Schedule list
| Version | Date | Summary of changes | Author |
|---|---|---|---|
| V1.0 | 23/09/2024 | Document creation | FPT |
- Schedule is a feature that allows developers to manage, create, and retrieve data related to scheduling through the run API.
- Create new schedules to form a schedule list.
1. Create schedule
Step 1: On the Schedule List screen, click the Add Schedule button…
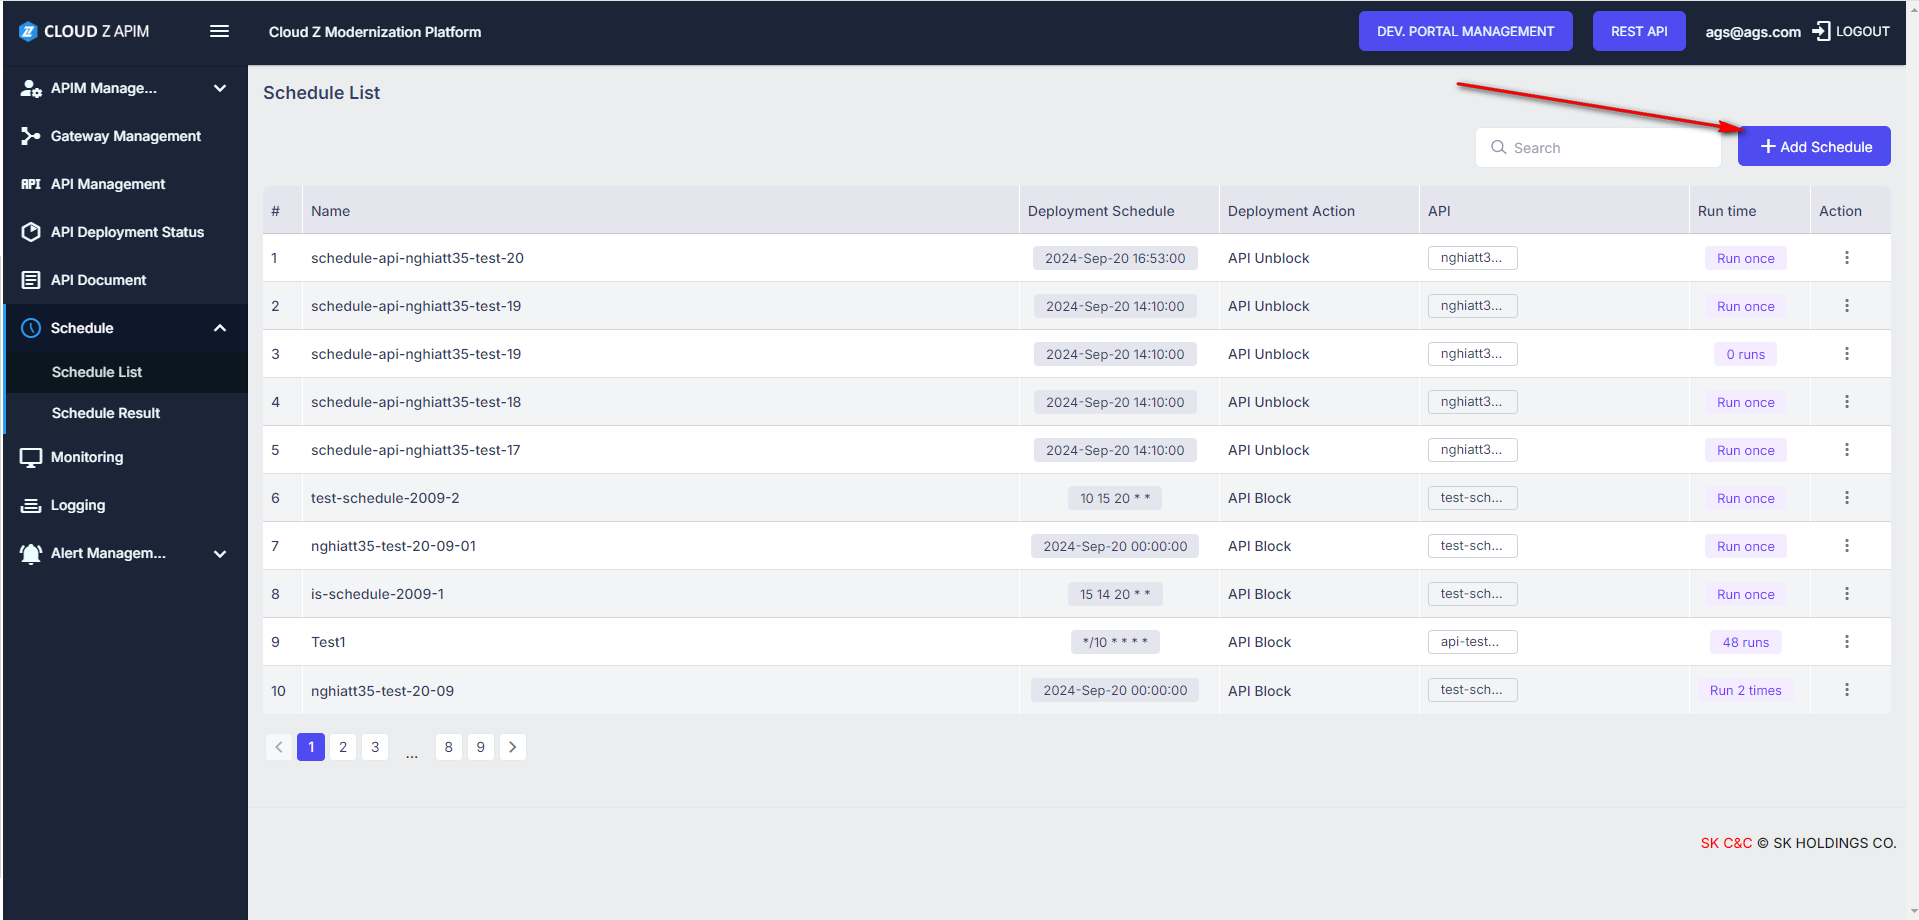
image.png
…to open the New API Deployment Schedule screen.
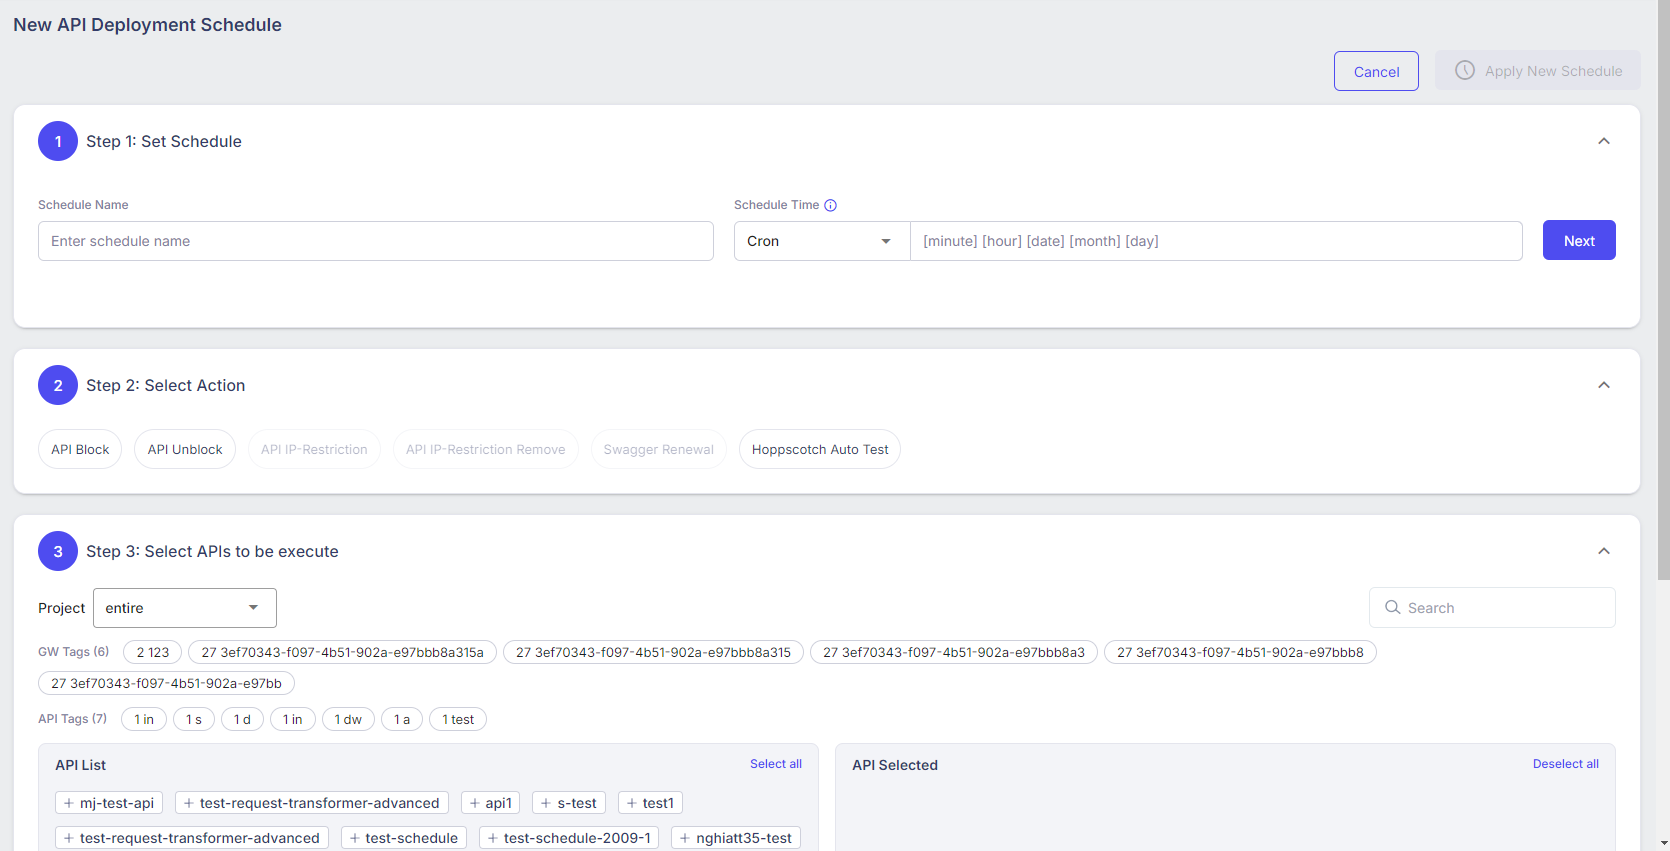
image.png
Step 2: Input the data in the “Step 1: Set Schedule” section:
- Enter the data for Schedule Name as a string.
- The Schedule Time has 2 options: “Cron” and “Fix Date Once”.

image.png
- If the option “Fix Date Once” is selected:
- Input the Schedule Time in the format dd/mm/yyyy HH:mm.
- When this option is executed, the API will run only once at the configured time.
- If the option “Cron” is selected:
- Input the Schedule Time in the format [minute] [hour] [date] [month] [day].
- Click on the info icon to see the guidelines.
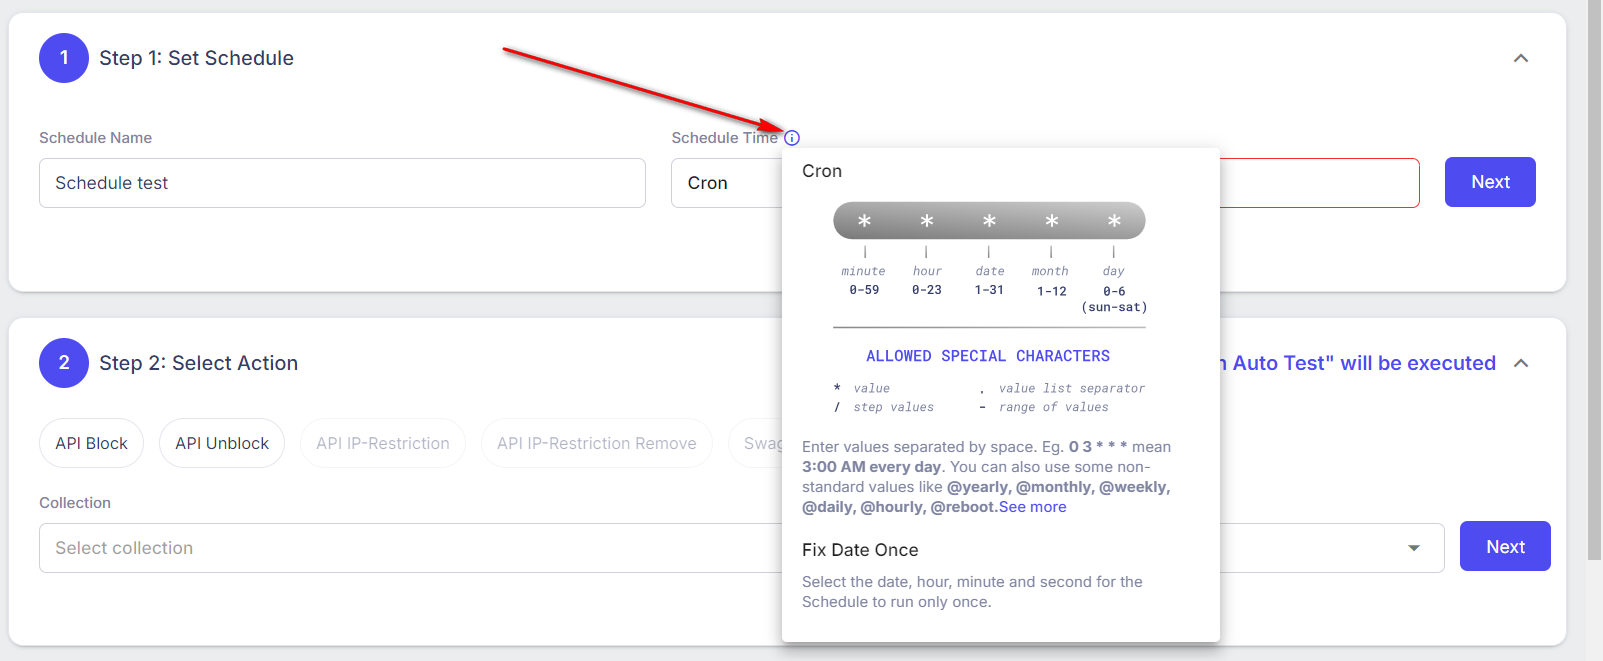
image.png
- When this option is executed, the API will run more time at the configured time.
Step 3: Input the data in the Step 2: Select Action section.
- Click on the action button to select.

image.png
- If you select the API Block option, 2 fields Status and Message will be displayed.
- Click on the Status field will to show the drop-down list, then select a status.
- Input the content of the message.
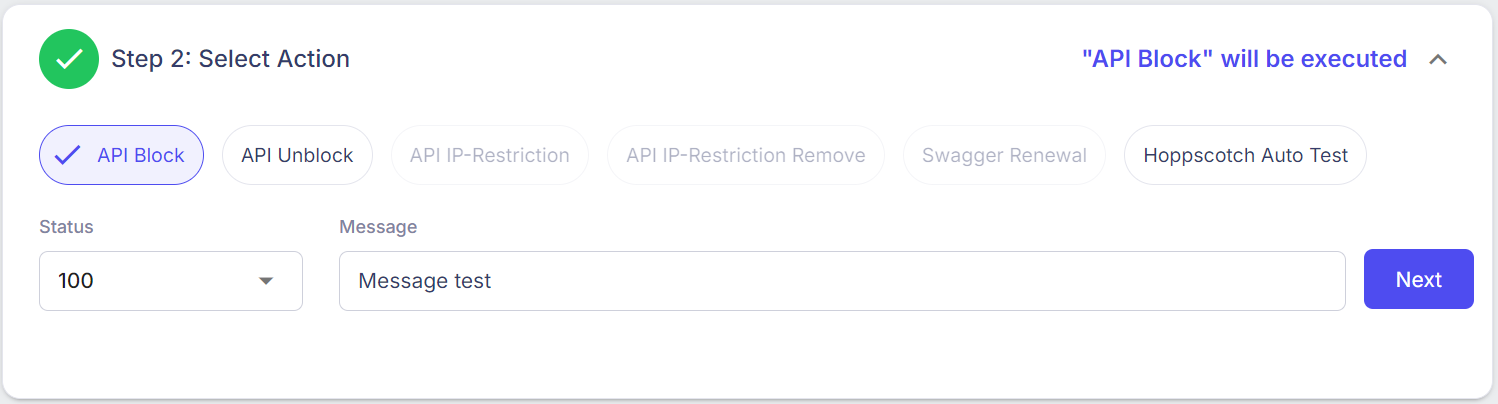
image.png
- Meaning of this configuration is: when the API is run with this configuration applied, the response will only return the status and message of the schedule; it will not return the response of the API.
- If you select the API Unblock option, no fields will be displayed.

image.png
- Meaning of this configuration is: The API functions normally, without any impact.
- If you select the Hoppscoth Auto Test option.
- Display the two fields Collection and Environment.
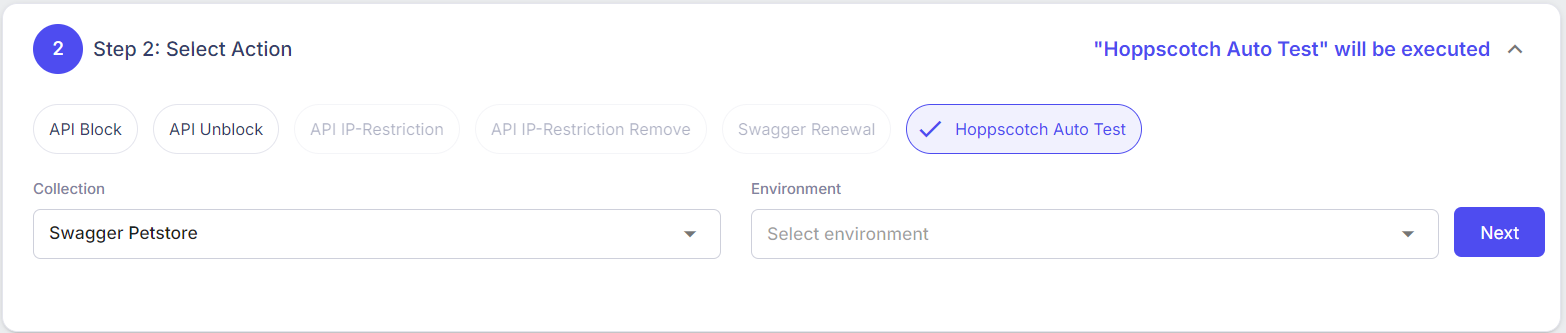
image.png
- Select the Collection and Environment; this data is configured at https://api-auto-test.apimags.skcloud.io.
- Meaning of this configuration is: The API collections are created at https://api-auto-test.apimags.skcloud.io/ will automatically-run when the scheduled time is configured.
Step 4: Input the data in the Step 3: Select APIs to be execute section.
- With the API Block or API Unblock option (selected in the “Step 2: Select Action” section).
- Click on the (+) icon displayed in the API list section. The selected APIs will be applied to the schedule.
- User can use a filter to search for the API quickly.
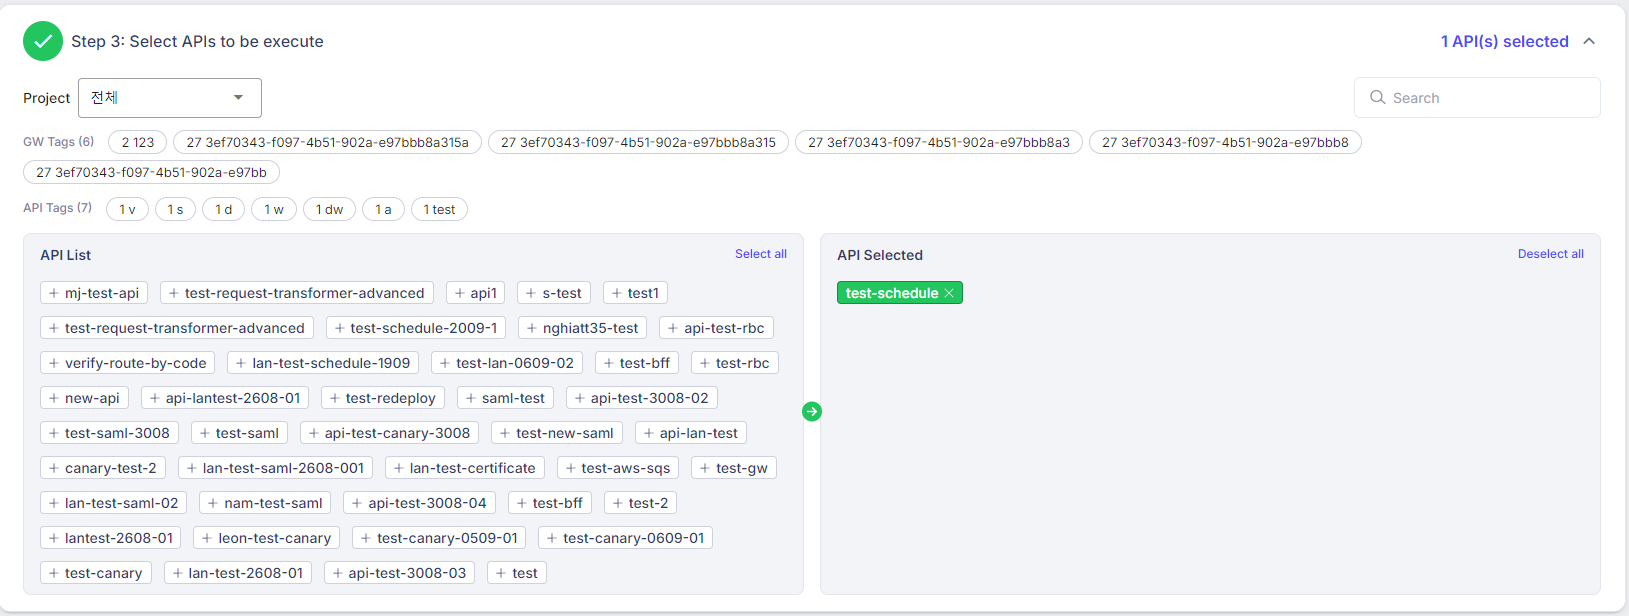
image.png
- With the Hoppscoth Auto Test option.
- Select the API in the API collection.
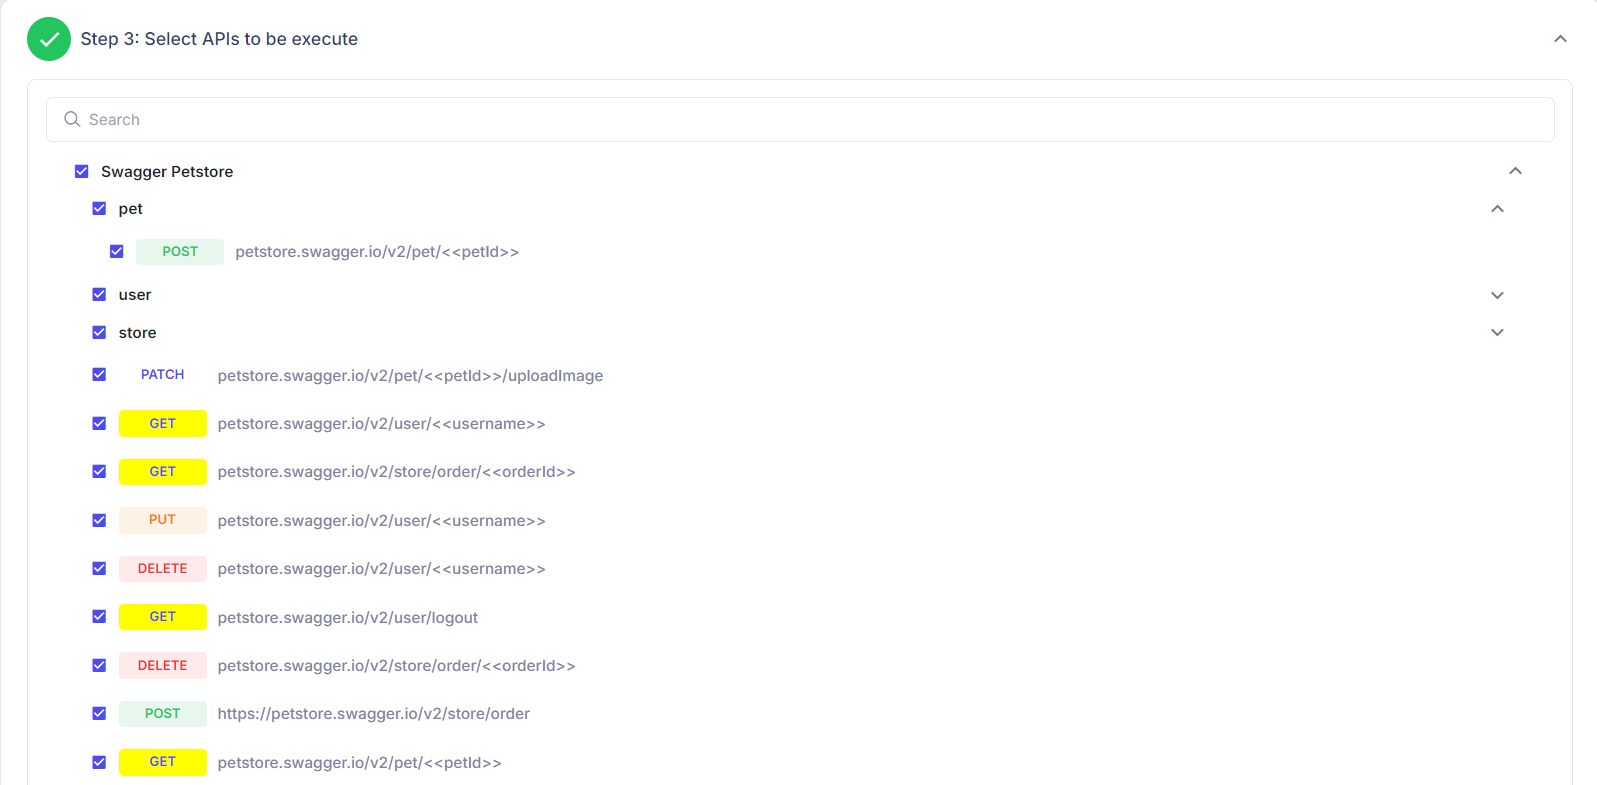
image.png
- Scroll down to view the API detail information.
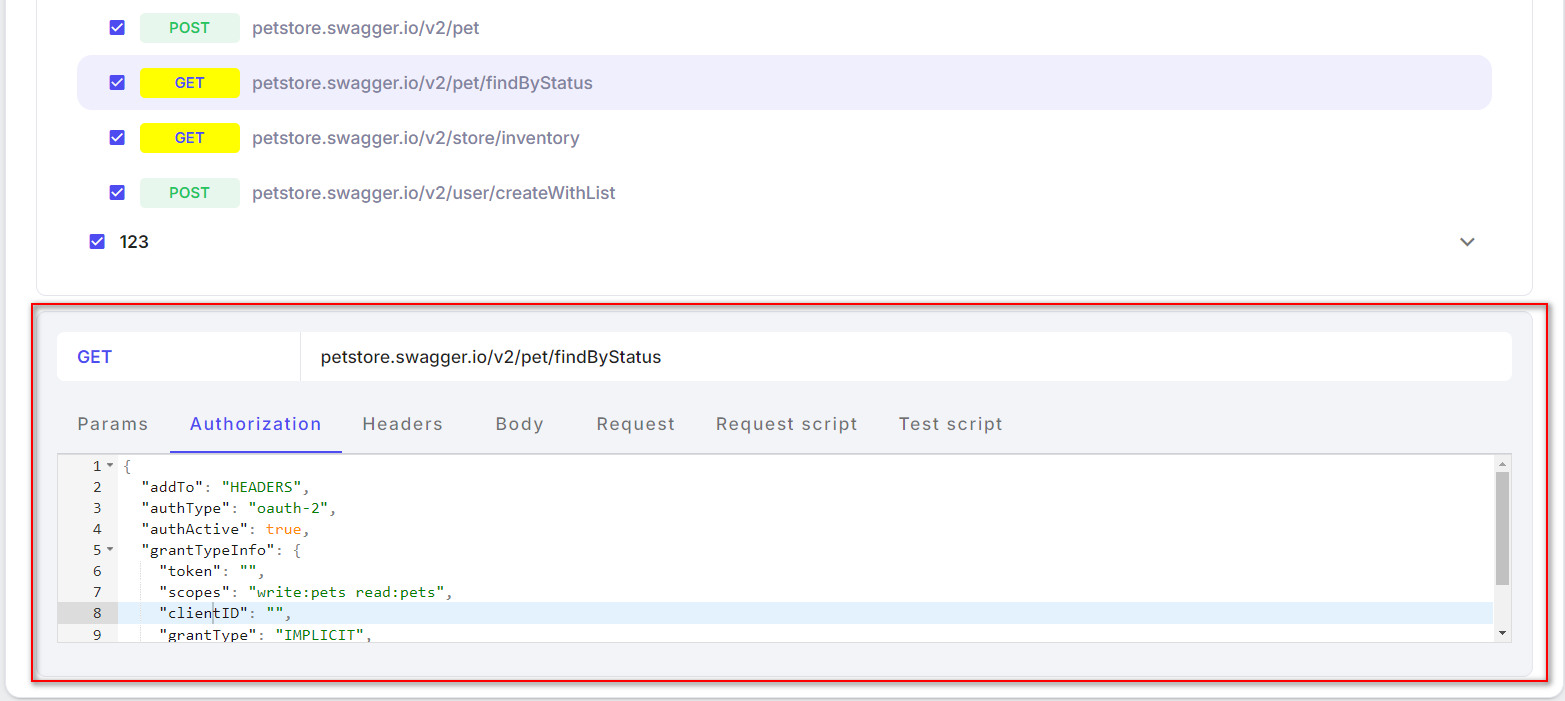
image.png
Step 5: Click on the Apply New Schedule button at the top right.
2. Schedule list
- The schedules are created successfully will display in the this Schedule list screen.
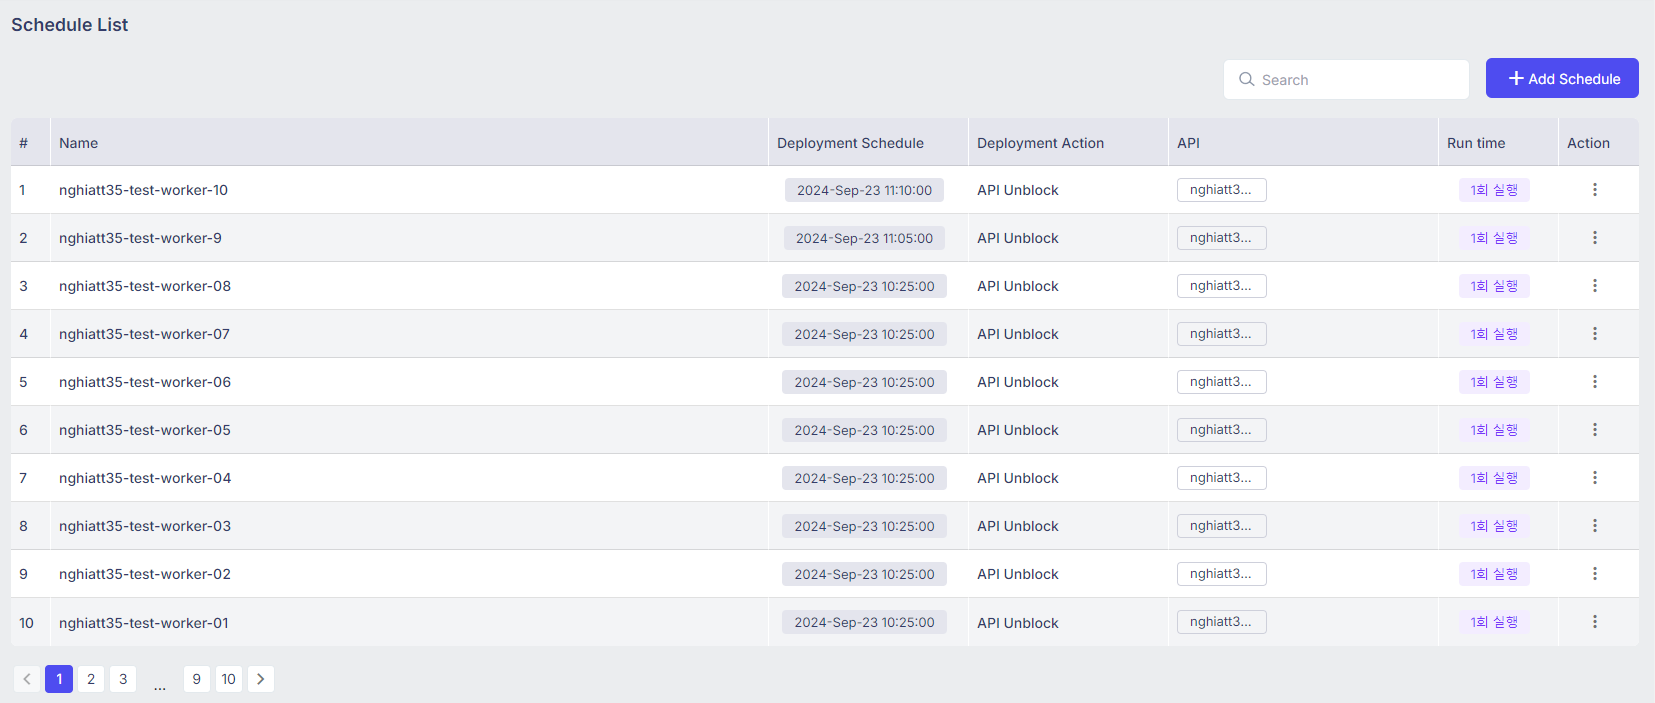
image.png
- The schedule list includes the following information: | Column | Description | | --- | --- | | Name | Name of the schedule | | Deployment Schedule | Schedule time configured in the Step 1: Set Schedule section | | Deployment Action | The action selected in the Step 2: Select Action section | | API | The name of API is applied to the schedule. | | Run time | The time to run the API is set by the schedule. | | Action | The actions: |
- Trigger: The schedule will run immediately, regardless of the set schedule time.
- Duplicate: Clone 1 record with the same information as the old schedule record.
- Edit: Open to the Update schedule screen.
- Delete: Delete the schedule. |
- Use can search the schedule by Name, Deployment Schedule, Deployment Action, API name, Run time.
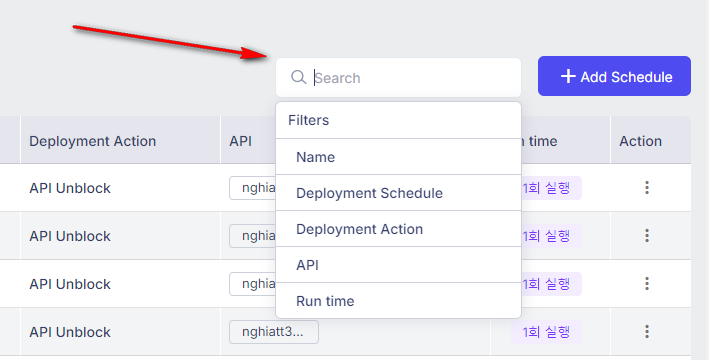
image.png
3. Action
- Click on the ellipsis icon in the Action column.
- The actions:
- Trigger: The schedule will run immediately, regardless of the set schedule time.
- Duplicate: Clone 1 record with the same information as the old schedule record.
- Edit: Open to the Update schedule screen.
- Delete: Delete the schedule.
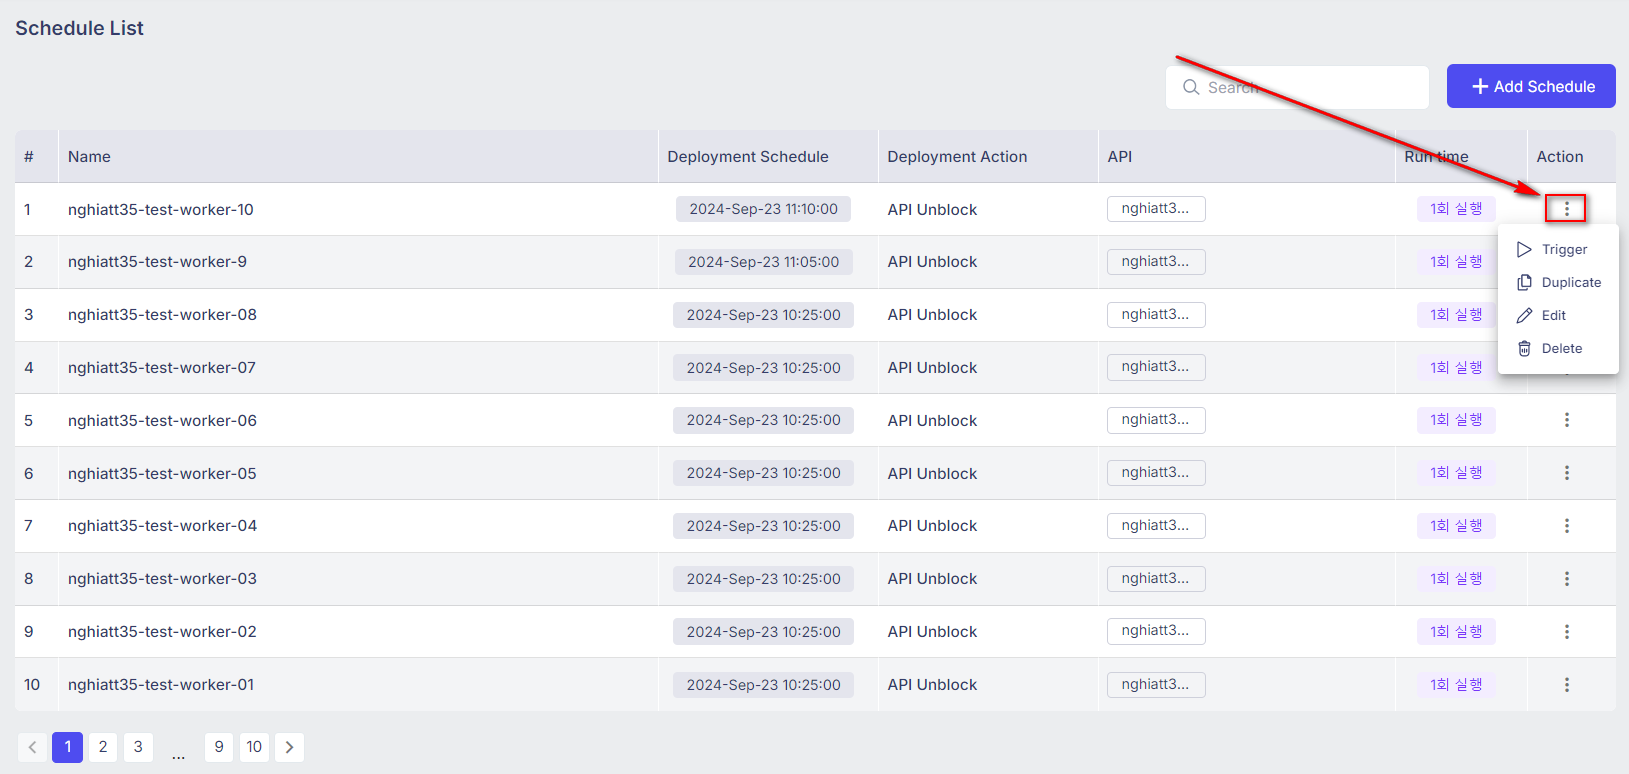
image.png
3.1. Trigger
Step 1: Click on the Trigger option to open the Trigger Schedule popup.
Step 2: Click on the OK, trigger it now button, this Schedule will run immediately.
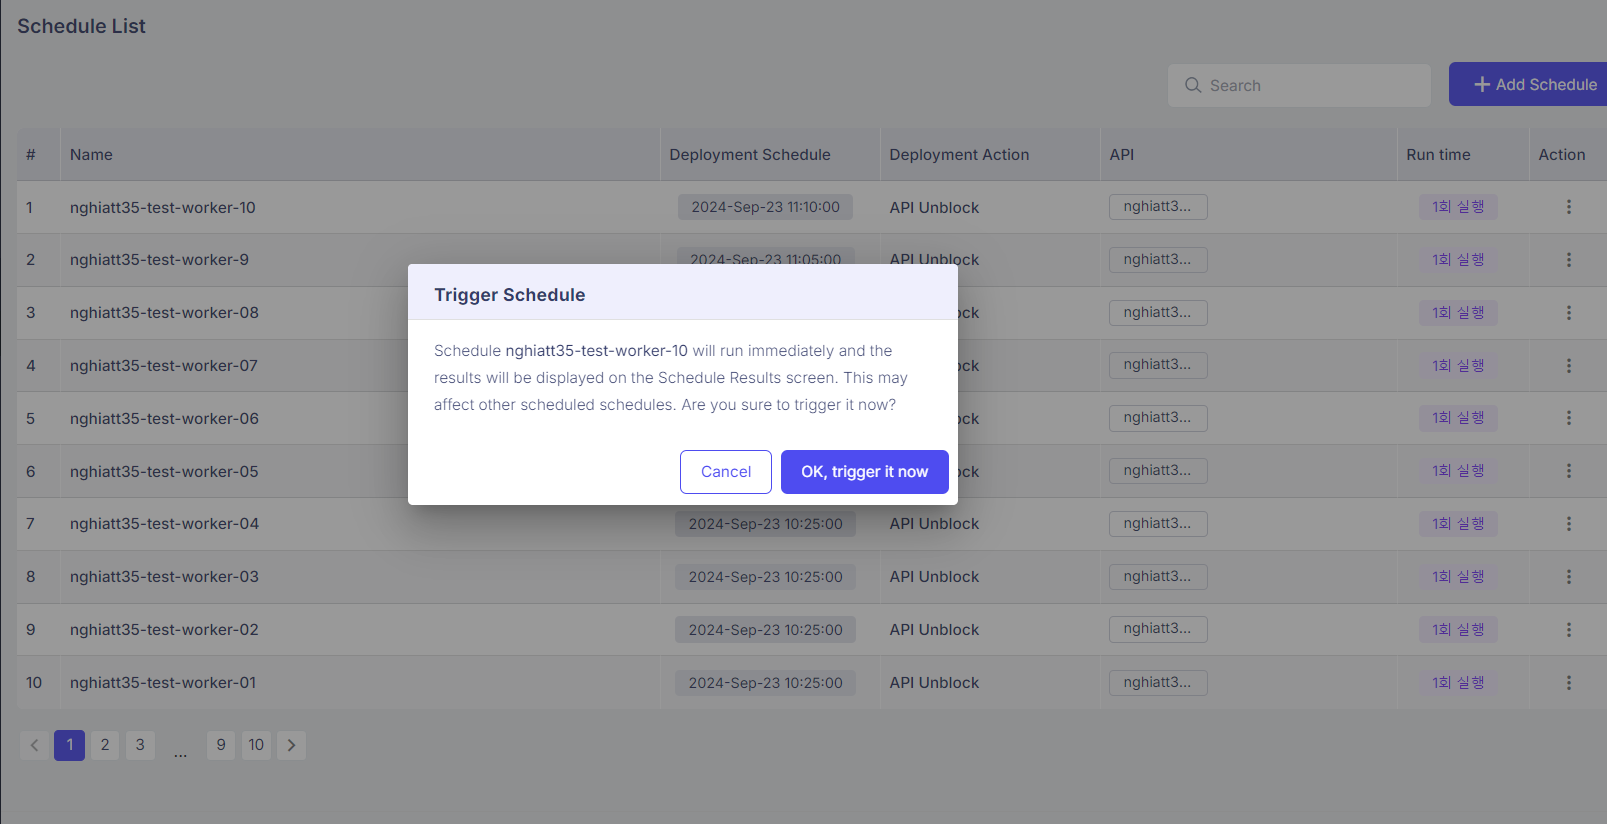
image.png
3.2. Duplicate
Step 1: Click on the Duplicate option to open the Duplicate API Deployment Schedule screen.
- The information on the this screen clones all of the old schedule, but it hasn’t been saved yet.
- The user can update data on this screen.
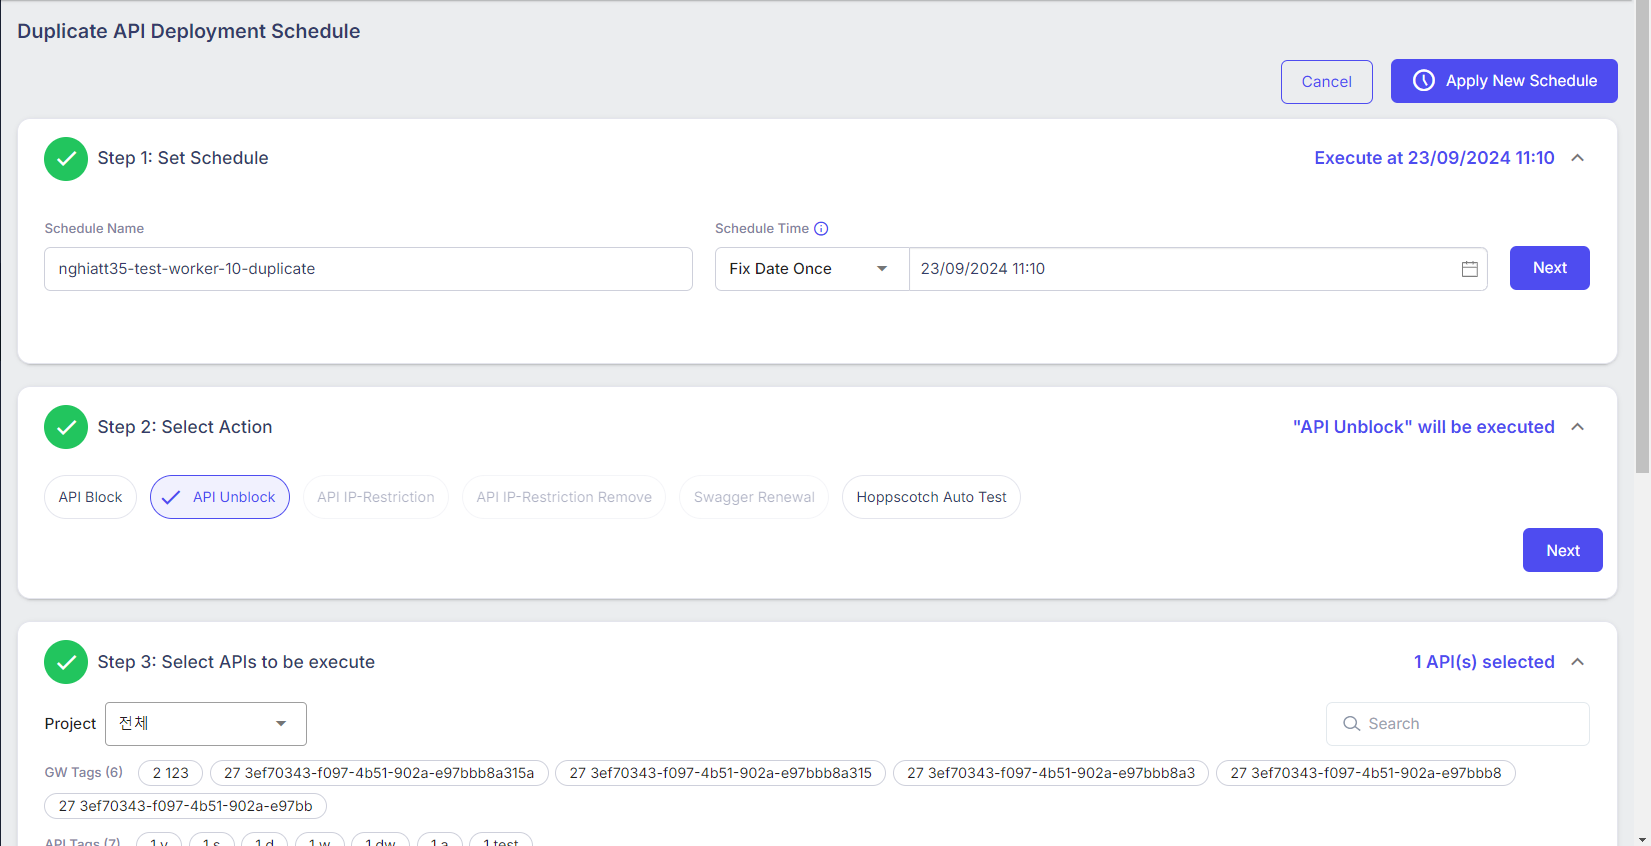
image.png
Step 2: Edit the data if needed.
Step 3: Click on the Apply New Schedule button at the top right to save.
3.3. Edit
Step 1: Click on the Duplicate option to open the Update API Deployment Schedule screen. The user can update data on this screen.
Step 2: Edit the data if needed.
Step 3: Click on the Apply New Schedule button at the top right to save.
3.4. Delete
Step 1: Click on the Delete option to open the Delete Schedule popup.
Step 2: Click on the OK, delete it now button.
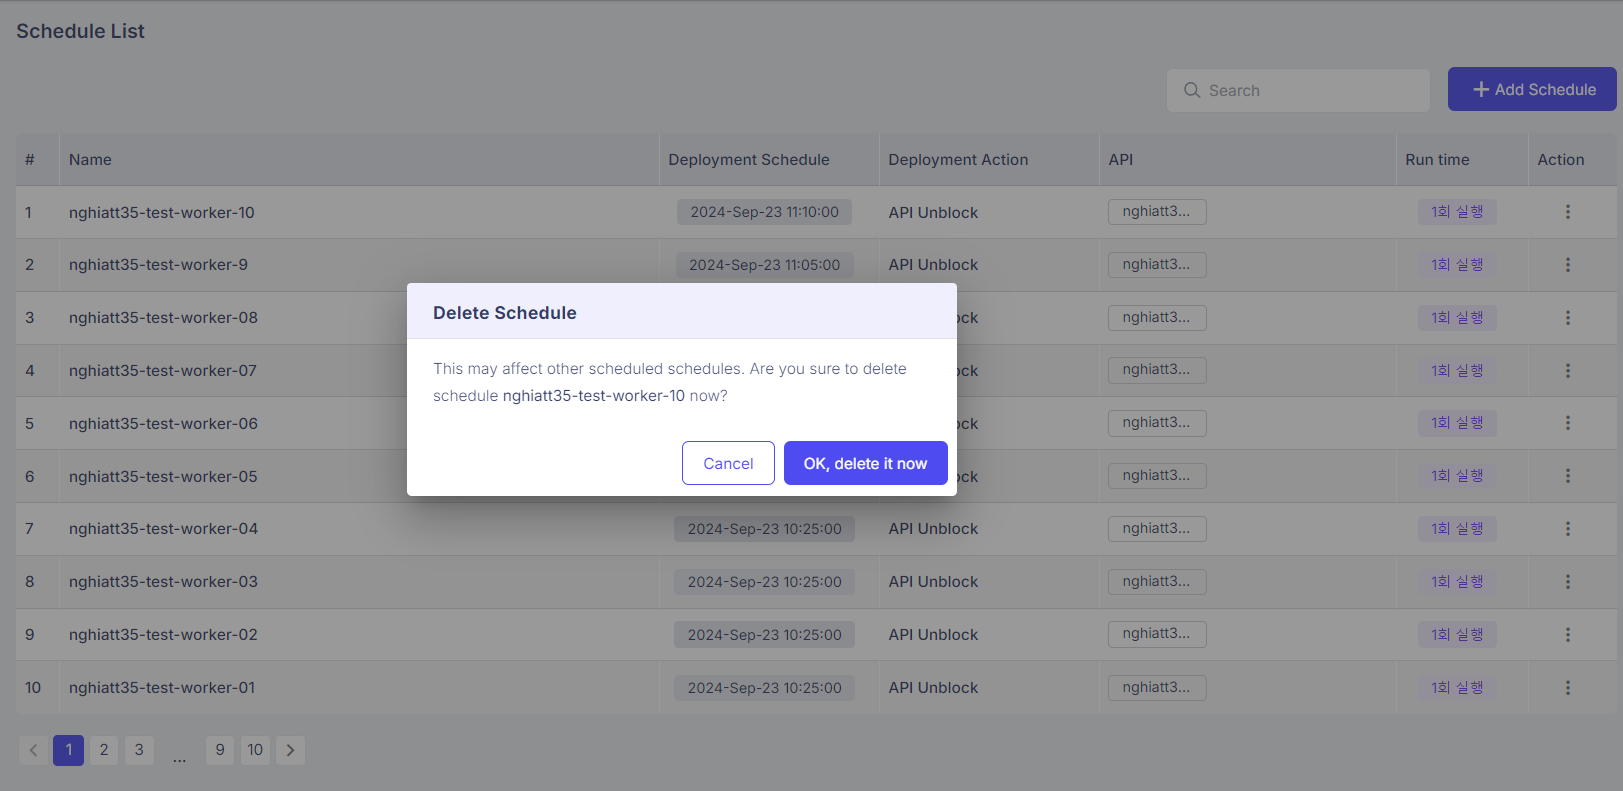
image.png
—end—