MCP Oauth2
1. Introduction
mcp-oauth2 is a Kong plugin/policy that secures MCP HTTP endpoints using OAuth2/OIDC (commonly with Keycloak).
It provides:
- Client discovery via /.well-known/oauth-protected-resource (RFC 9728), so MCP clients can learn the authorization server and supported scopes.
- JWT access-token validation: checks iss (issuer), aud (audience), and the signature using JWKS.
- (Optional) authorization by scope/role (e.g., from a claim like mcp_scopes) by mapping scopes to allowed MCP JSON-RPC methods.
2. APIM Console Setup
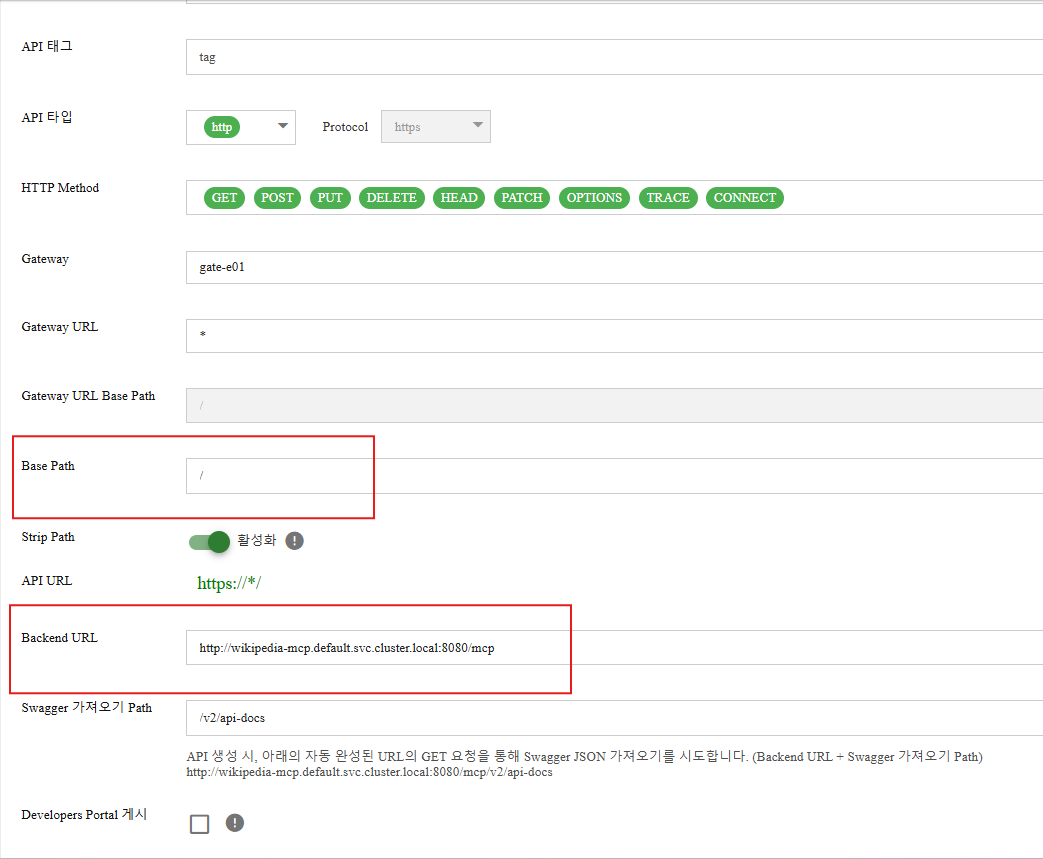
Step 1: Create a new API with the backend set to an MCP server.
MCP server : http://wikipedia-mcp.default.svc.cluster.local:8080/mcp
Because we need to access the MCP server through this API from VS Code, and VS Code doesn’t support URLs with an additional path segment, we set the Base Path = “/” (no path).
Step 2: Apply the mcp-oauth2 policy to the API.
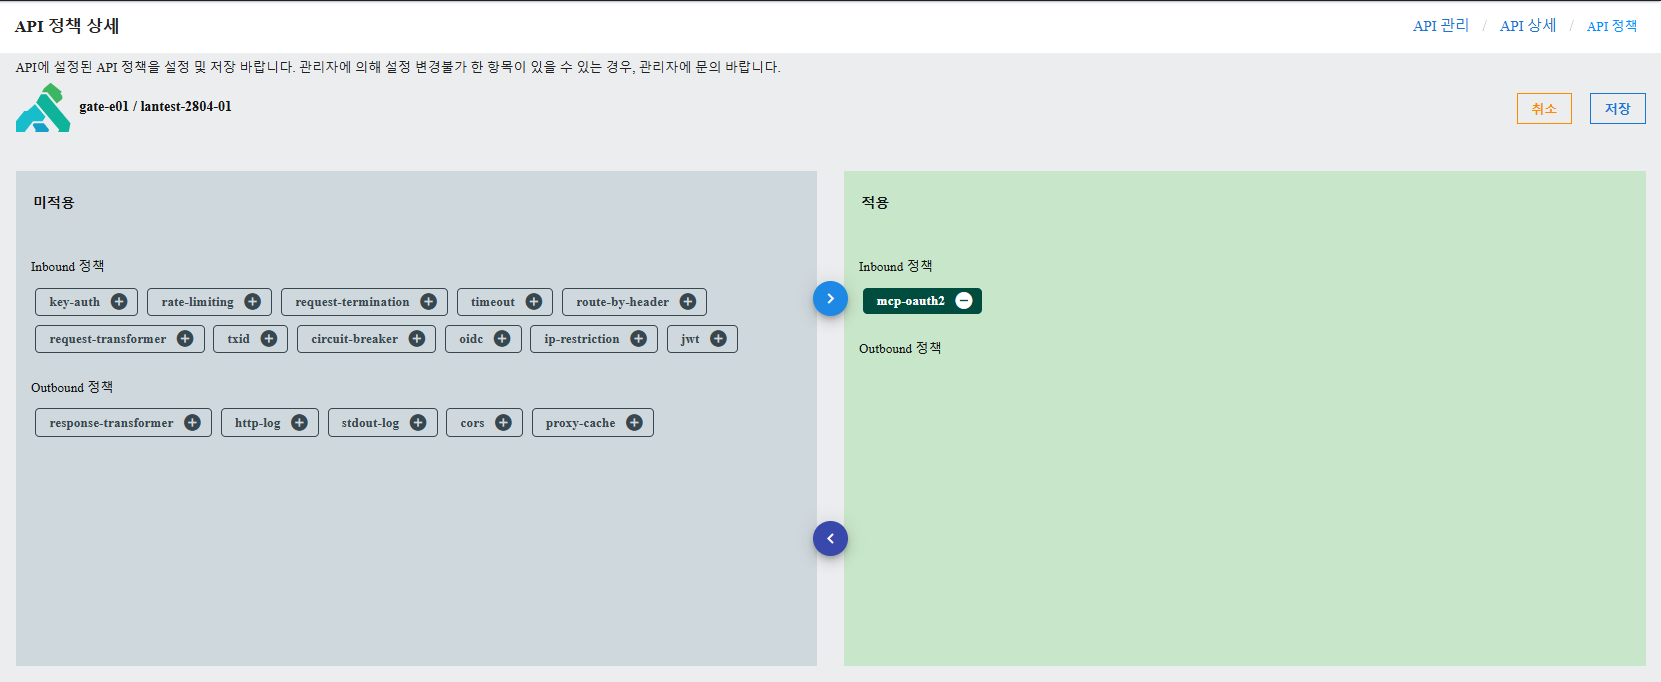
Step 3: Click the mcp-oauth2 policy button to display the configuration details below.
Section 1: PROTECTED RESOURCE METADATA (RFC 9728)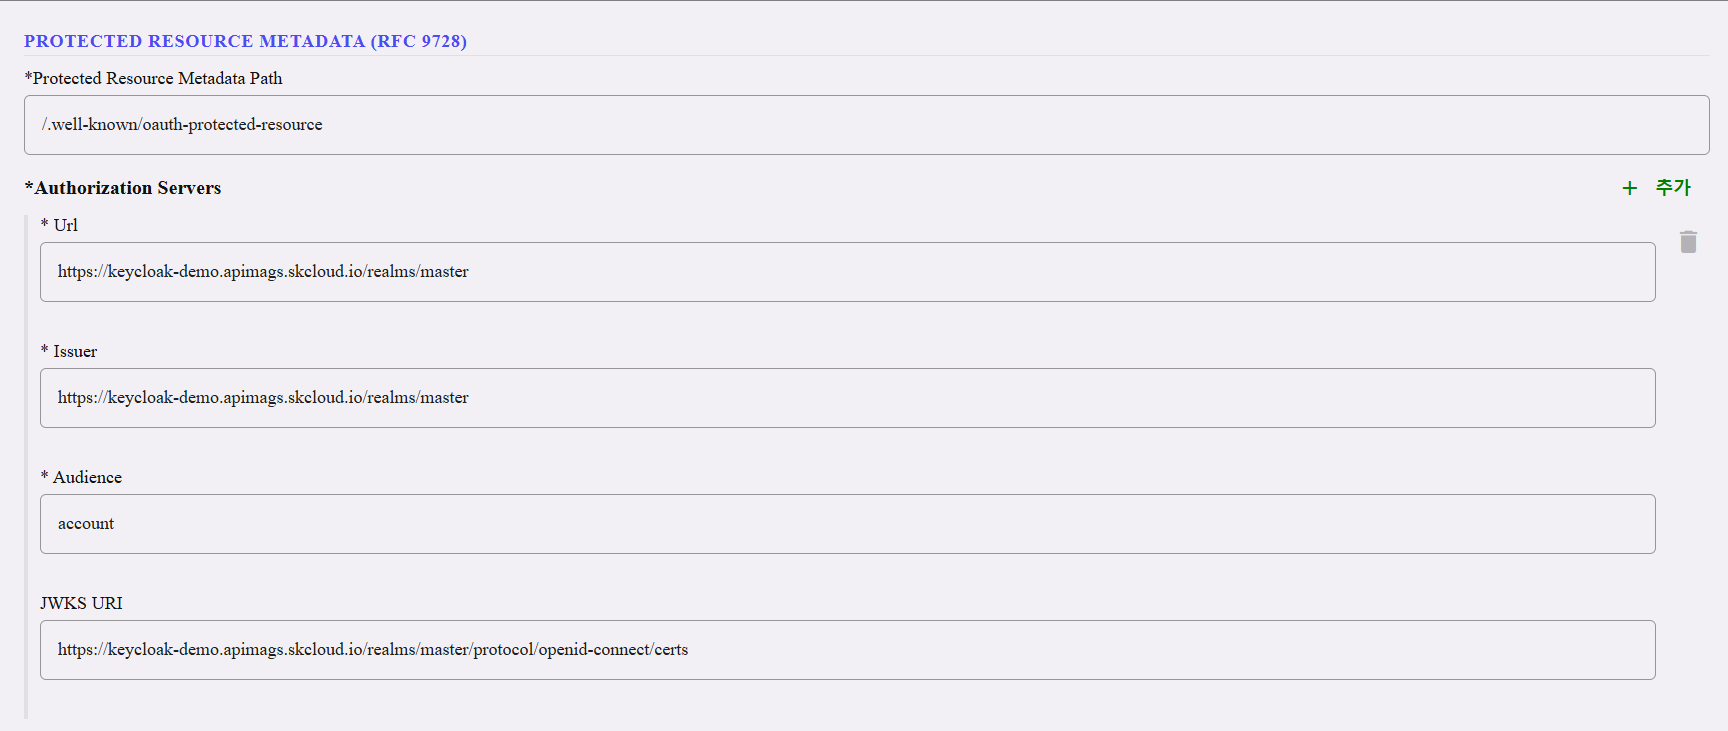
| Field | Type | Required | Default | Description |
|---|---|---|---|---|
| Protected Resource Metadata Path | string | Yes | /.well-known/oauth-protected-resource | • URL path where the plugin serves the RFC 9728 Protected Resource Metadata document. • MCP clients fetch this to discover authorization servers and supported scopes. • Almost never needs changing. |
- An array of trusted authorization servers. Add one entry per Keycloak realm (or other OAuth2 provider) that issues tokens for this MCP endpoint.
- Click + to add more entries.
| Field | Type | Required | Description |
| --- | --- | --- | --- |
| Url | string | Yes | • The public URL of the authorization server (where clients go to authenticate/get tokens).
• It’s also the base URL for building the JWKS URL when jwks_uri is a relative path.
Example: https://keycloak-demo.apimags.skcloud.io/realms/master | | Issuer | string | Yes | • Matched against the iss (issuer) claim in the JWT.
• If the token's issuer doesn't match, it is rejected.
• Must be an exact string match • including protocol, host, port, and path (no trailing slash).
• Find it at:{realm-url}/.well-known/openid-configuration→ issuer field. | | Audience | string | Yes | • Matched against the aud (audience) claim in the JWT.
• Prevents tokens meant for other services from being accepted.
• Must exactly match the value configured in the Keycloak Audience Mapper. | | JWKS URI | string | Yes | • Endpoint where the plugin fetches the authorization server's public signing keys (JWKS) to verify JWT signatures.
• Can be: Relative path (appended to Url): /.well-known/jwks.json Absolute URL (used as-is): https://keycloak-demo.apimags.skcloud.io /realms/master/protocol/openid-connect/certs Use an absolute URL when Kong can't reach the auth server via the same hostname as clients (e.g., Docker/k8s networking). Default: /.well-known/jwks.json |

| Field | Type | Required | Default | Description |
|---|---|---|---|---|
| Scopes Supported | array of strings | Yes | empty | Listed in the Protected Resource Metadata document to tell clients which scopes to request. This is informational only • it guides client discovery but does not enforce anything. Type each scope and press Enter to add it. Example: mcp:tools |

| Field | Type | Required | Default | Description |
|---|---|---|---|---|
| Authorization Header Name | string | Yes | Authorization | • Authorization Header Name = the HTTP header name your server/plugin will read to find the access token for token validation. • Usually keep it as Authorization. • Clients then send tokens like: Authorization: Bearer <access_token>• Change it only if your API expects the token in a different header • (e.g., X-Authorization). |

| Field | Type | Required | Default | Description |
|---|---|---|---|---|
| Forward Authorization Header | boolean | No | false | • false - Strips the Authorization header before forwarding to the MCP server (safer default). • true - Forwards the Bearer <token> header to the upstream MCP server. • Enable if your MCP server needs to read the token (e.g., to extract user identity or claims). |
| Field | Type | Required | Default | Description |
|---|---|---|---|---|
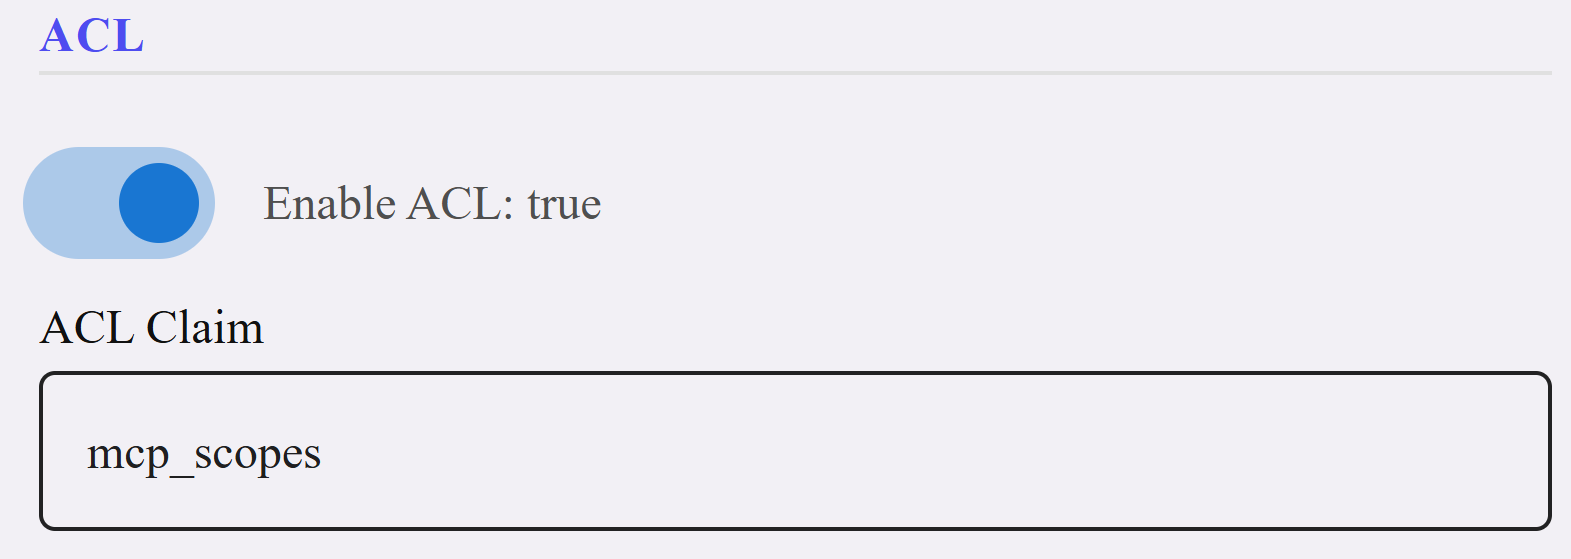
| Enable ACL | boolean | No | false | false - Any valid token grants access to all MCP methods (token validation still happens). true - After validating the token, the plugin also checks the token's scopes/roles against Scope Method Mapping to decide if the specific JSON-RPC method is allowed. |
| ACL Claim | string | No | scope | • Name of the JWT claim containing the user's permissions. The plugin reads this claim and uses its values for ACL checks. • Common values: → mcp_scopes - Custom claim from a Keycloak Protocol Mapper ⚠️ Must exactly match the Token Claim Name in the Keycloak Protocol Mapper. |
Maps each scope/role to a list of MCP JSON-RPC methods that scope is allowed to invoke. Only effective when Enable ACL is true

| Field | Type | Required | Description |
|---|---|---|---|
| Scope | string | Yes (per entry) | The scope/role name. Must match a value that appears in the JWT claim specified by ACL Claim. Example: mcp:tools |
| Methods | array of strings | Yes (per entry) | MCP JSON-RPC method names this scope is allowed to invoke. Type each method name and press Enter to add. Example: tools/list, tools/call |
⚠️ When ACL is enabled but Scope Method Mapping is empty: All requests are denied. You must configure at least one mapping.
💡 Permissions are additive: A user only needs ONE scope that permits the method. If any scope in the token allows the method, access is granted.
Section 7: TIMEOUTS & CACHING| Field | Type | Required | Default | Description |
|---|---|---|---|---|
| Token Cache TTL (s) | number | No | 300 | How long (in seconds) a validated token is cached in Kong's shared memory. During this period, repeated requests with the same token skip JWT decoding and signature verification. Even if cached, the plugin re-checks the JWT exp claim on every request and invalidates expired tokens. |
| HTTP Timeout (ms) | number | No | 10000 | Timeout (in milliseconds) for HTTP requests to fetch JWKS (public signing keys) from the authorization server. If the auth server doesn't respond within this time, token validation fails. • Increase if the auth server is on a slow network or cold-starting • Decrease for faster failure when the auth server is unreachable |
3. Keycloak Setup
3.1. Keycloak OAuth2 Foundation
These steps configure Keycloak so that MCP clients can discover the authorization server and obtain tokens with the correct audience.
3.1.1 Create the Client Scope
What this does: Creates a named scope that clients can request. When a client asks for the scope, Keycloak includes it in the token - and any mappers attached to this scope also fire.
Step 1: Navigate to Keycloak Admin → Client scopes → Create client scope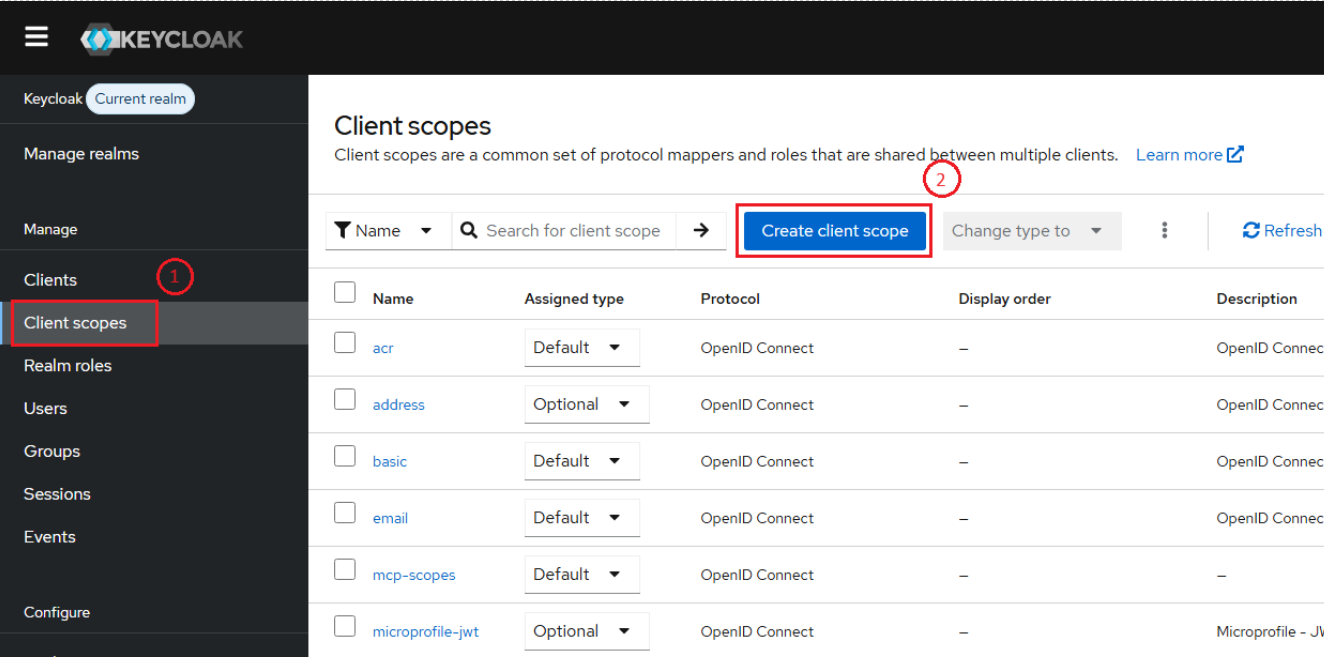
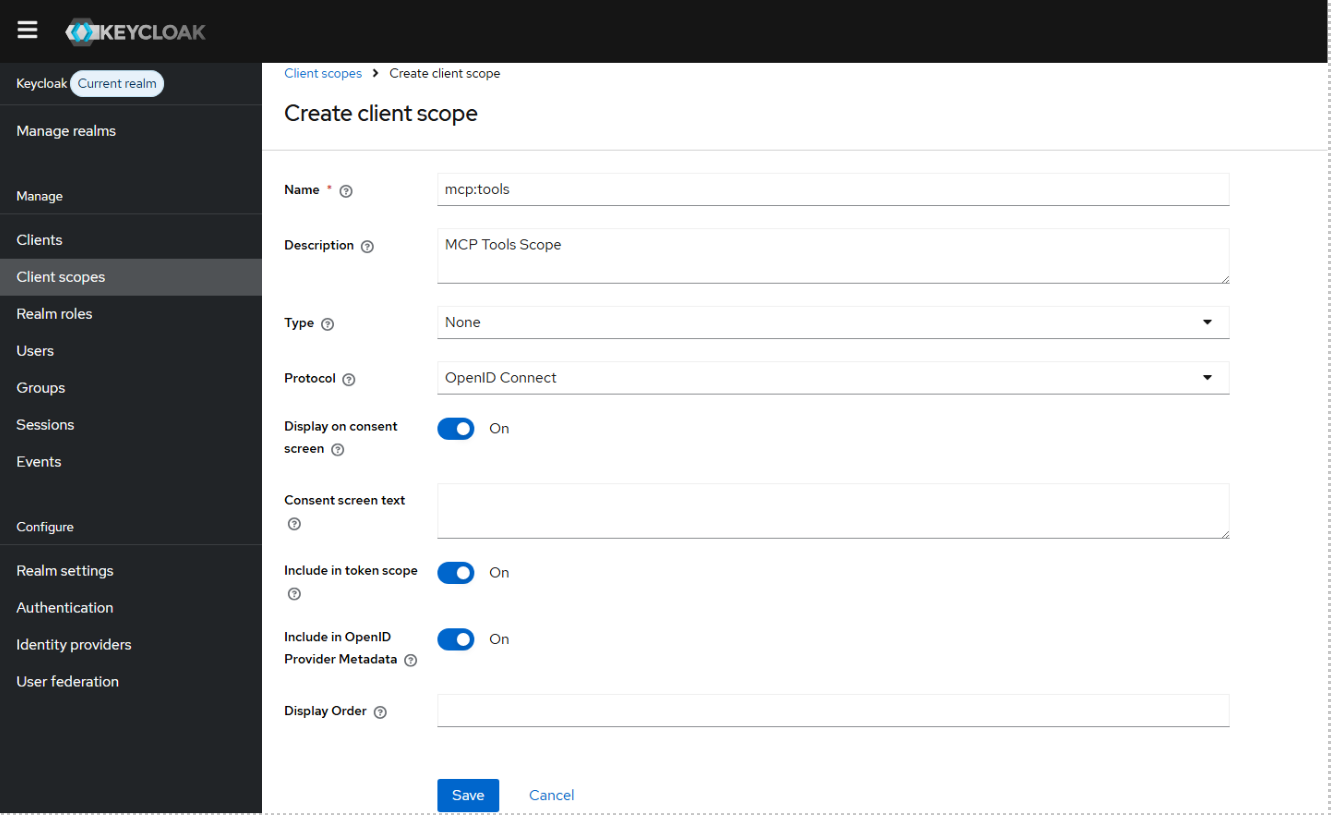
| Field | Value | Why |
|---|---|---|
| Name | mcp:tools | The scope name your MCP clients will request |
| Protocol | OpenID Connect | Standard OAuth2/OIDC protocol |
| Display on consent screen | ON | Shows what the client is requesting during login |
| Consent screen text | Access MCP tools | Human-readable description for users |
| Include in token scope | ON | Ensures the scope value appears in the JWT scope claim |
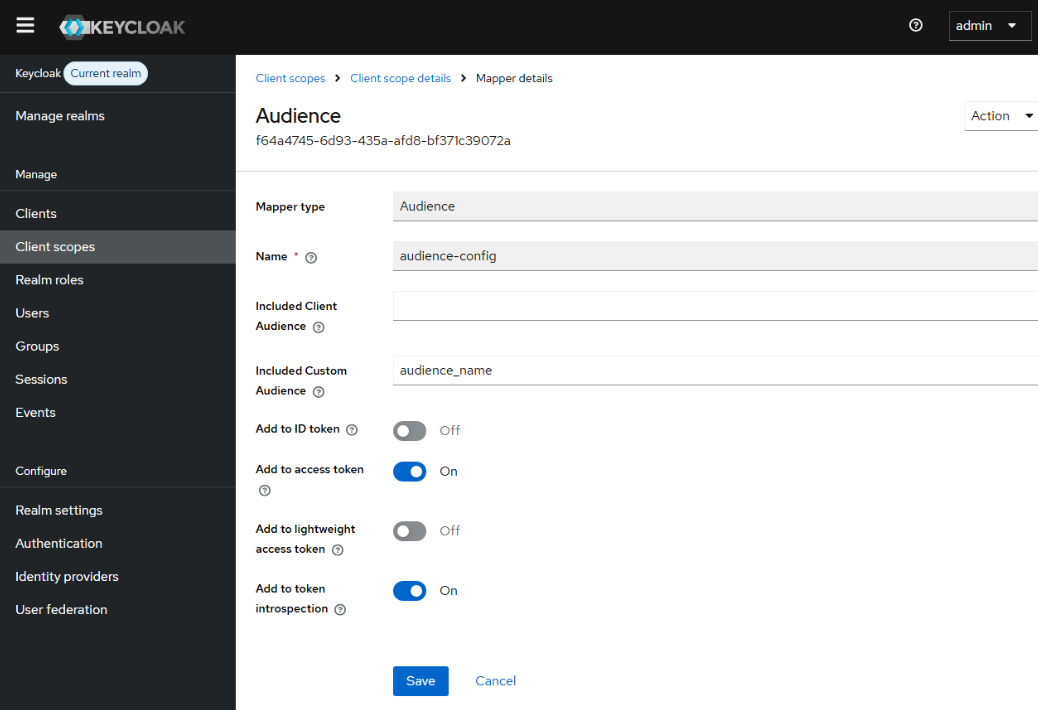
3.1.2 Add the Audience Mapper
What this does: Adds an aud (audience) claim to the access token. The plugin validates that the token's audience matches its configured value - this prevents tokens issued for other services from being accepted by your MCP endpoint.
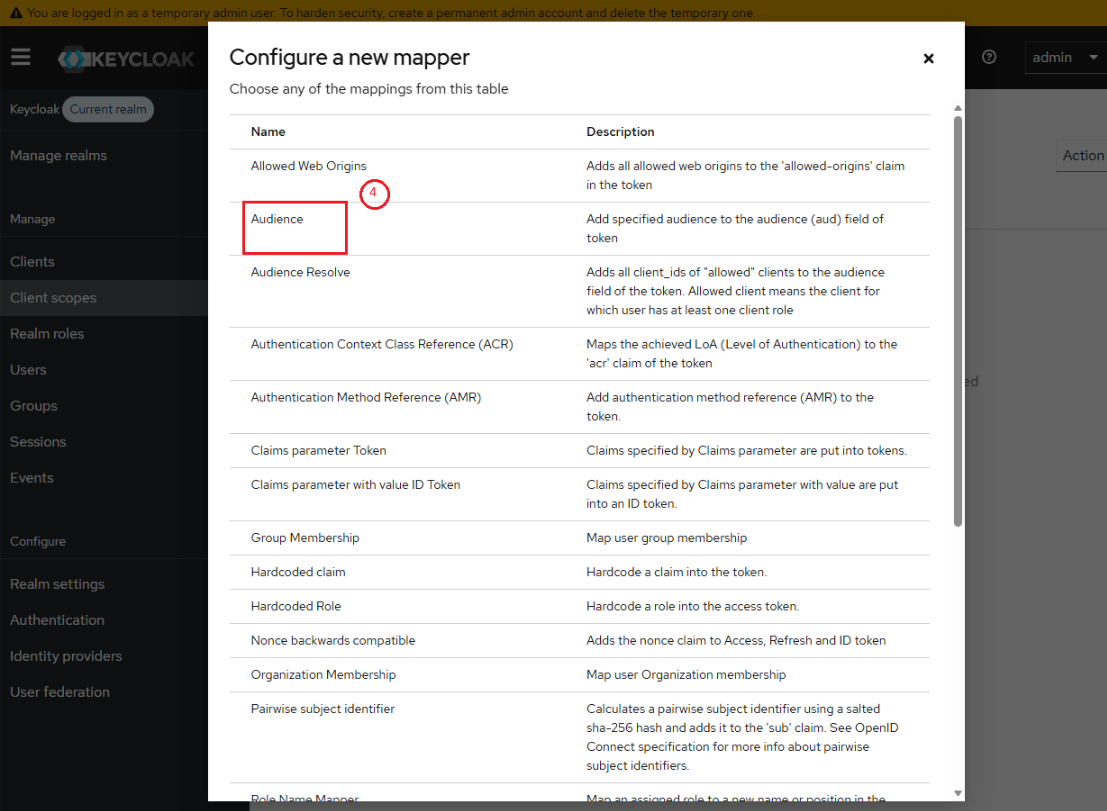
Step 1: Navigate to The mcp:tools scope you just created → Mappers tab → Configure a new mapper → Select Audience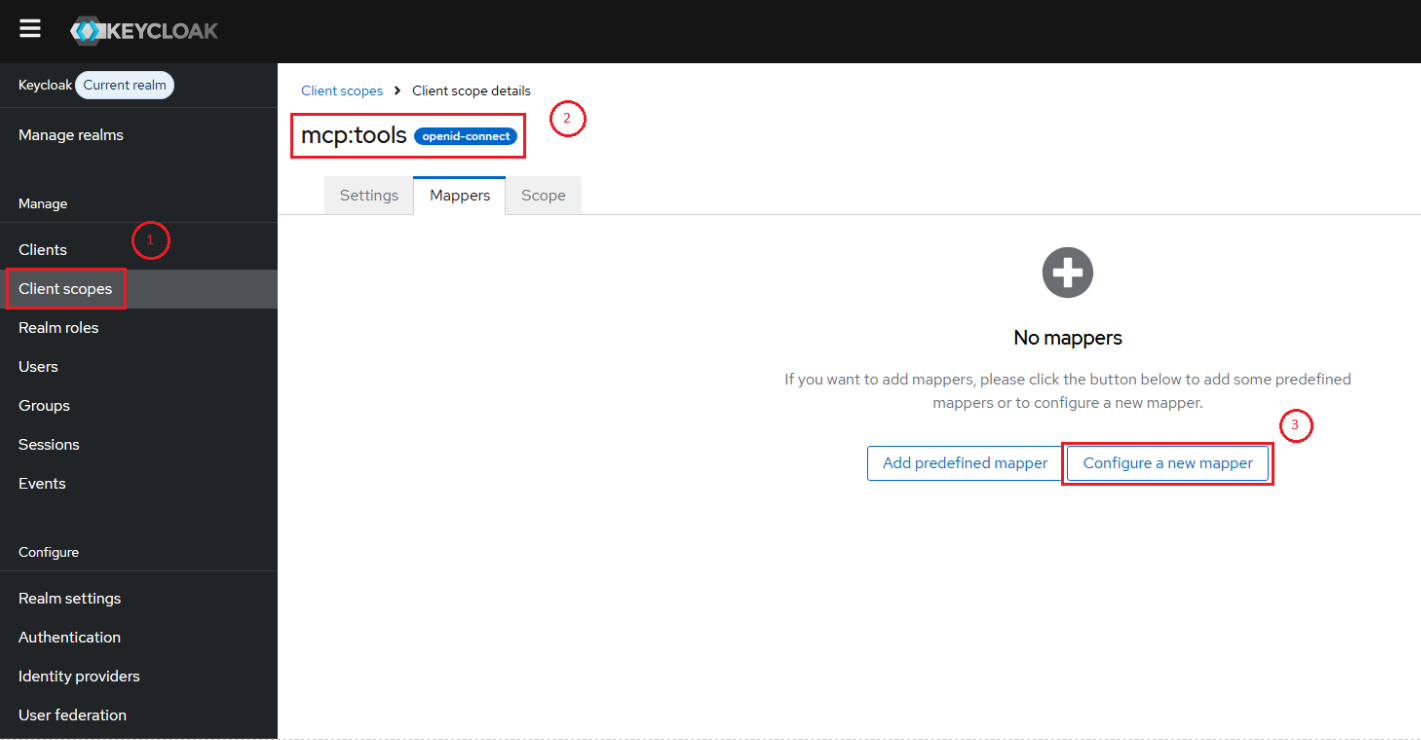
| Field | Value | Why |
|---|---|---|
| Name | audience-config | Descriptive name for this mapper |
| Included Custom Audience | audience-name | Must match the audience field in the Kong plugin config |
| Add to access token | ON | The plugin reads the access token, not the ID token |
| Add to ID token | OFF | ID tokens are for the client app, not the resource server |
 |
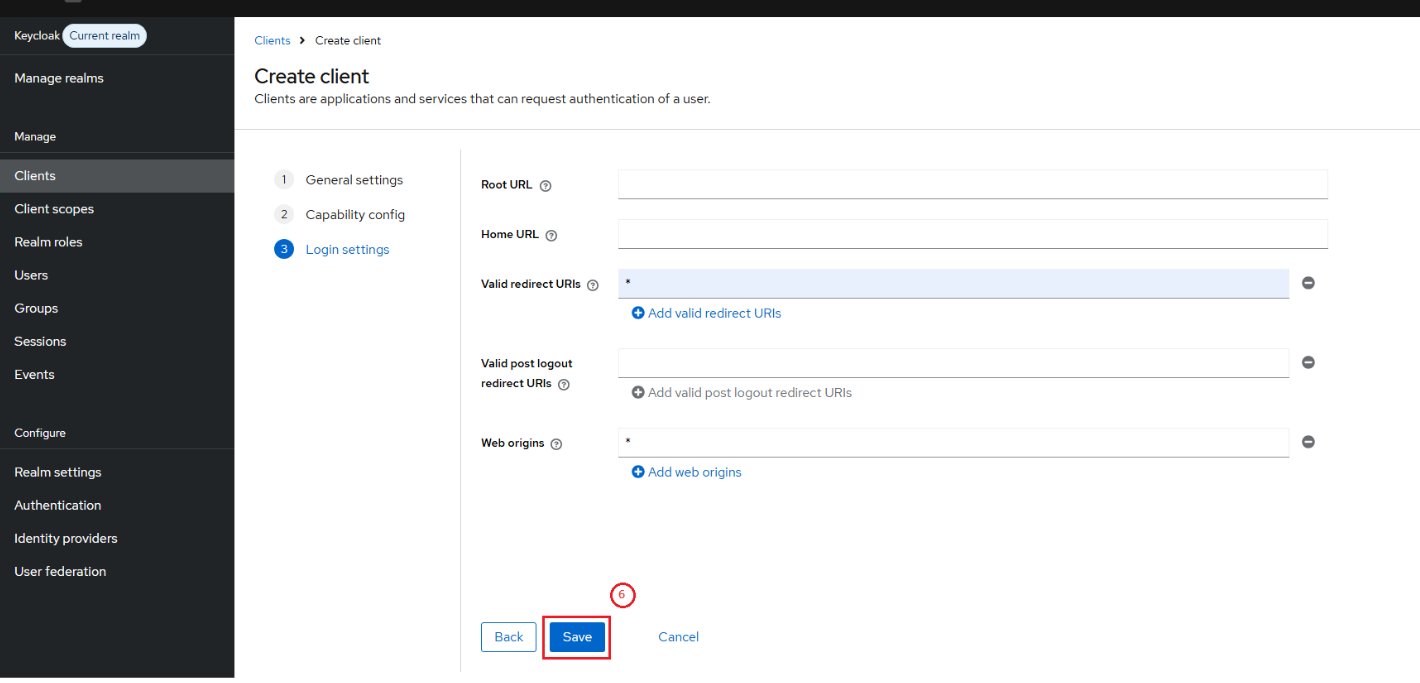
3.1.3. Create new Client
What this does: Create a client for MCP client to connect to Keycloak.
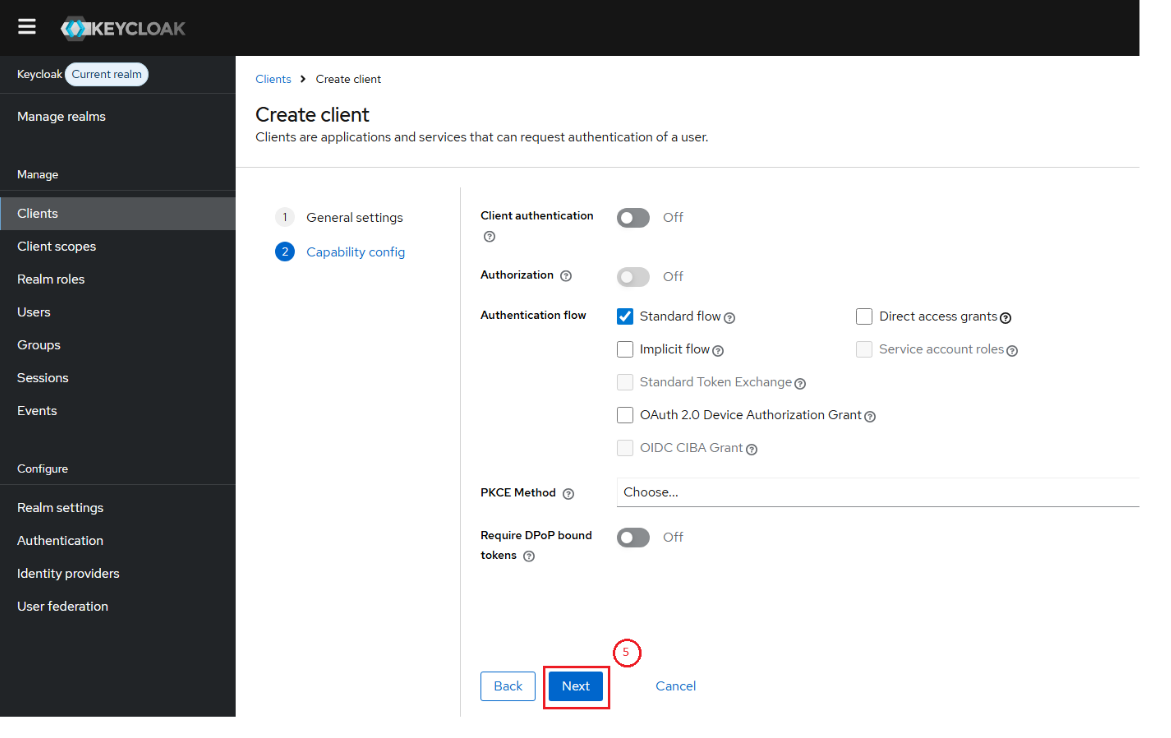
Step 1: Navigate to Clients → Create client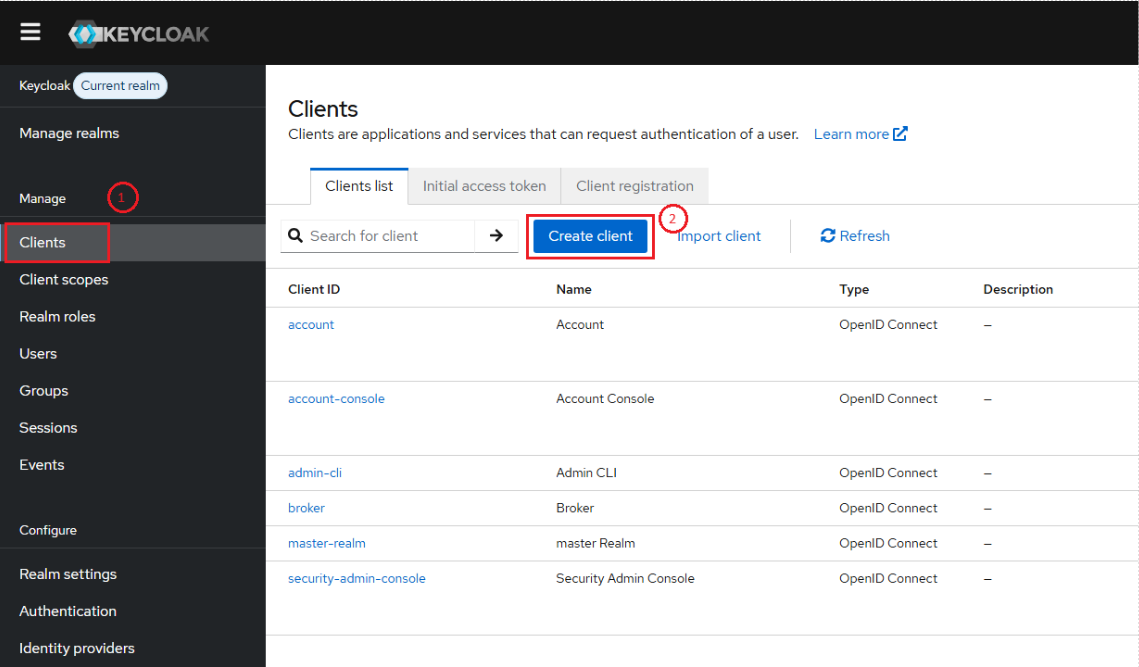
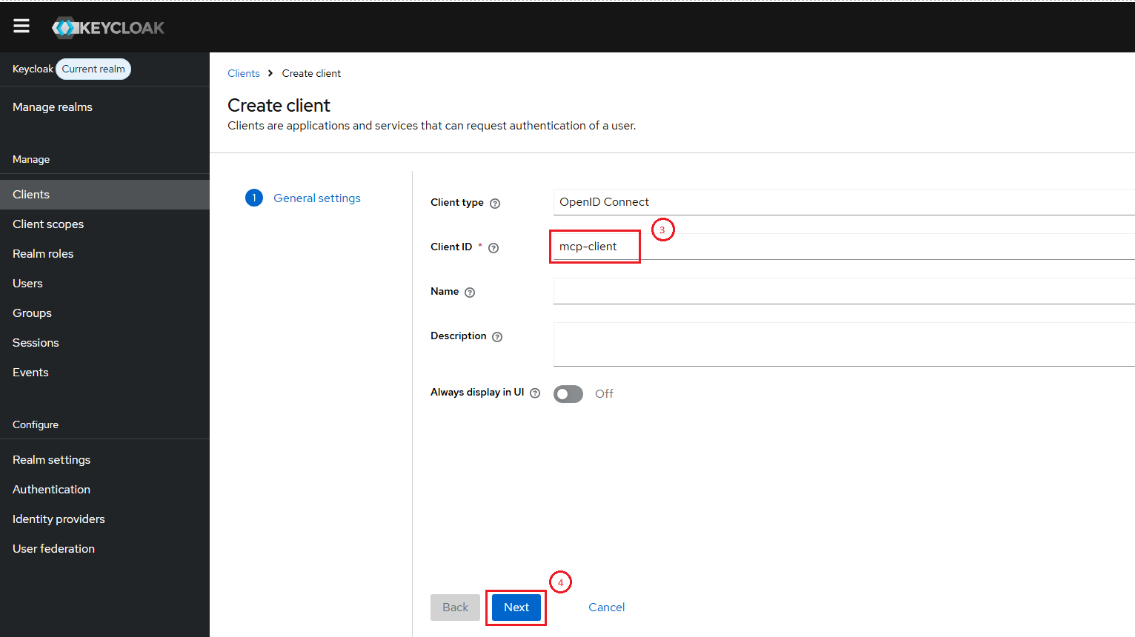
| Field | Value | Description |
|---|---|---|
| Client ID | Mcp-client | Client ID |
3.2. Keycloak: Group-Based ACL Setup
This section sets up fine-grained access control so different users get different MCP permissions. The architecture is:
Groups → Realm Roles → Protocol Mapper → "mcp_scopes" JWT claim → ACL
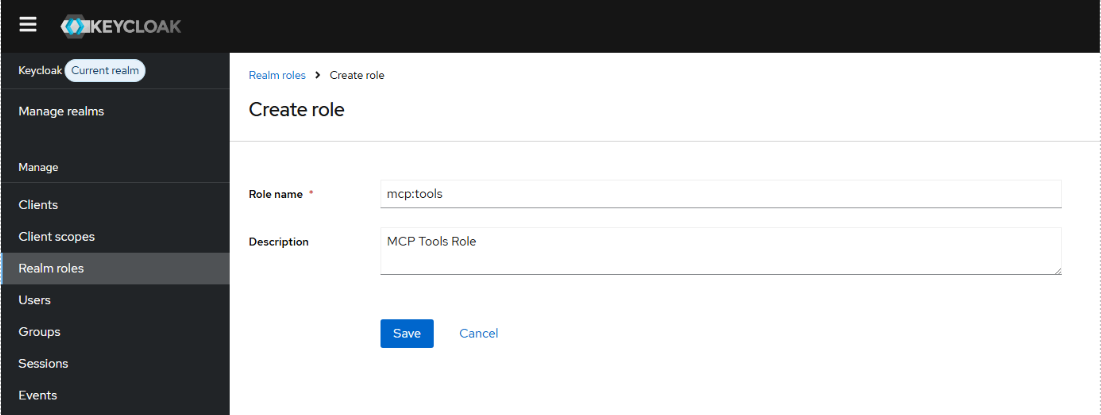
3.2.1. Create Realm Roles
What these are: Named permission tiers. Each role represents a set of MCP methods a user is allowed to call. The role names will appear in the JWT mcp_scopes claim.
Step 1: Navigate to: Realm roles → Create role (repeat for each)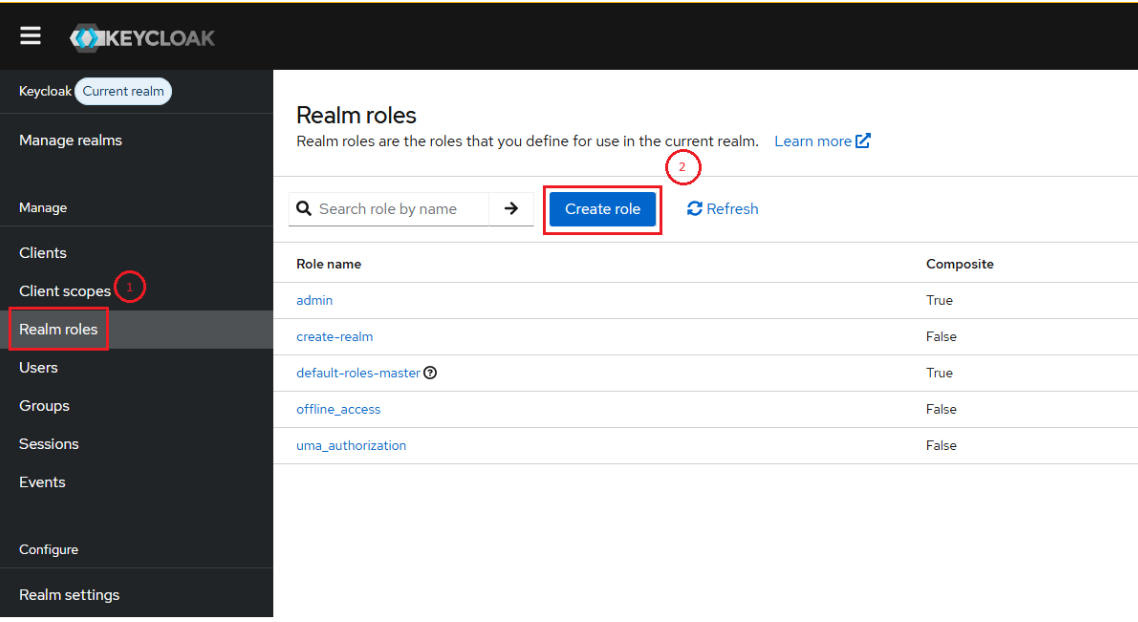
| Role Name | Purpose | Example MCP Methods |
|---|---|---|
| mcp:tools | For tools access | tools/list |
| mcp:resources | For resouces access | resources/read |
 |
3.2.2. Create Groups
What these are: Organizational containers for users. Instead of assigning roles user-by-user, you assign roles to a group and then add users to the group.
Step 1: Navigate to: Groups → Create group
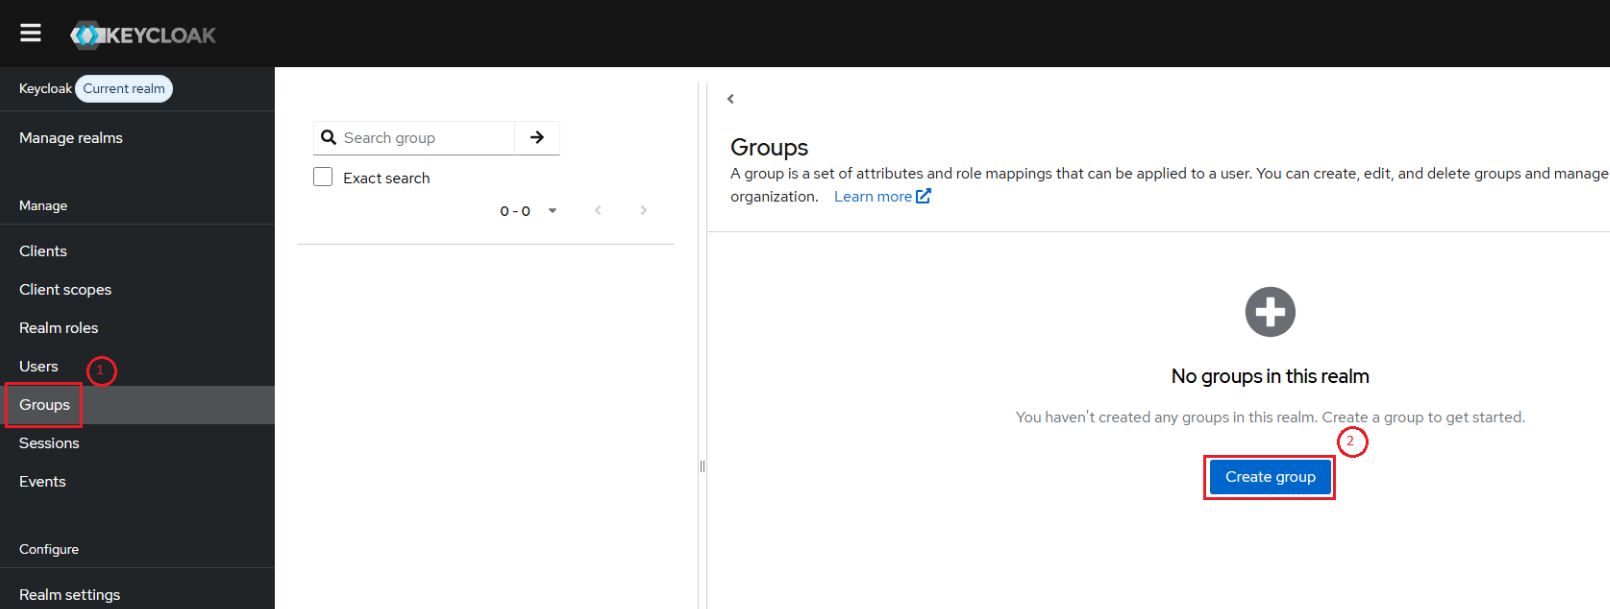
| Group Name | Description |
|---|---|
| mcp-member | Basic member access |
| mcp-admin | Full access to all MCP tools, resources |
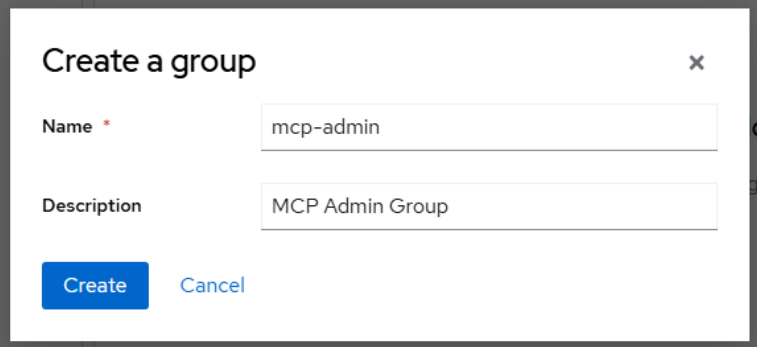 |
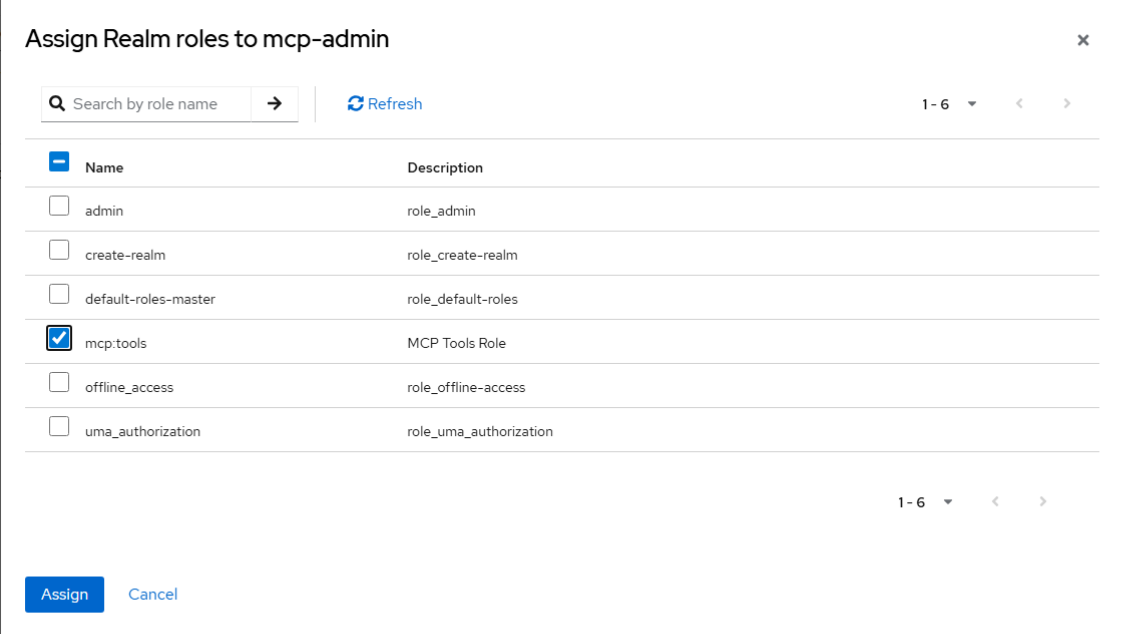
3.2.3. Assign Roles to Groups
Step 1: Navigate to Groups → Click a group → Role mapping tab → Assign role| Group | Roles to Assign |
|---|---|
| Mcp-admin | mcp:tools, mcp:resources |
| Mcp-member | mcp:tools |
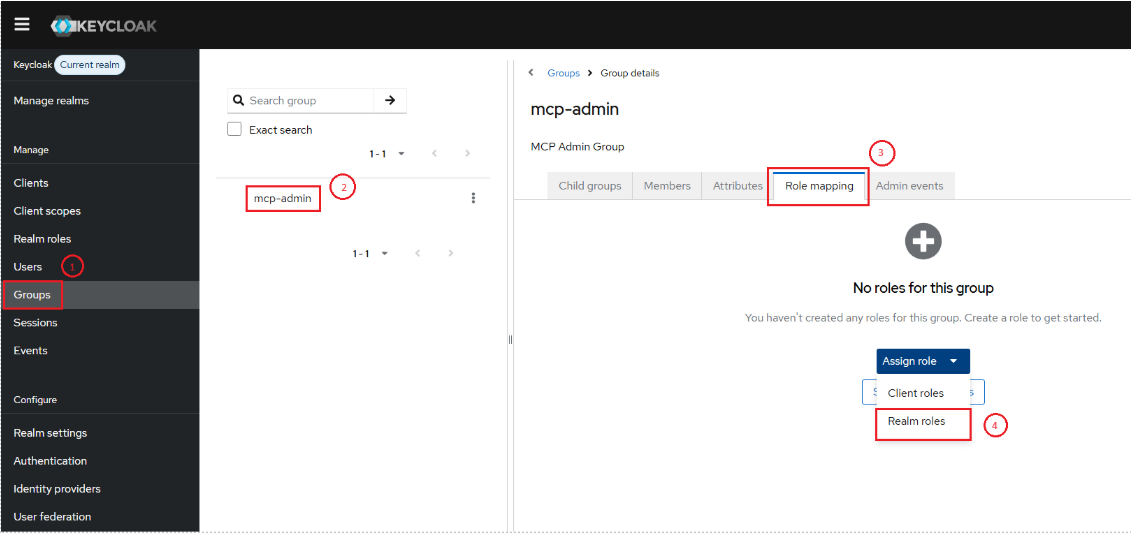 |
Click Assign
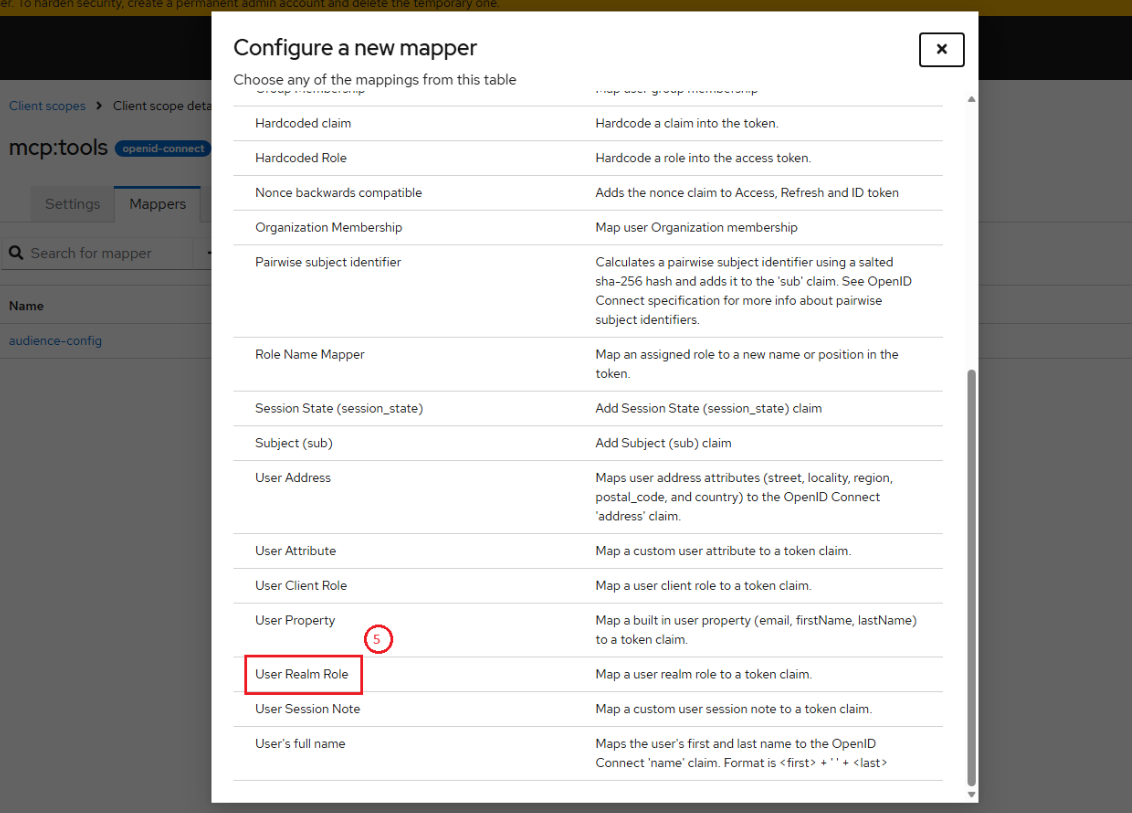
3.2.4. Create the Protocol Mapper (mcp_scopes Claim)
What this does: Tells Key cloak to include the user's realm roles (filtered by the mcp: prefix) as a custom claim called mcp_scopes in the access token. This is the claim the Kong plugin reads to make ACL decisions.
Step 4: Navigate to Client scopes → mcp:tools → Mappers tab → Add mapper → By configuration → Select User Realm Role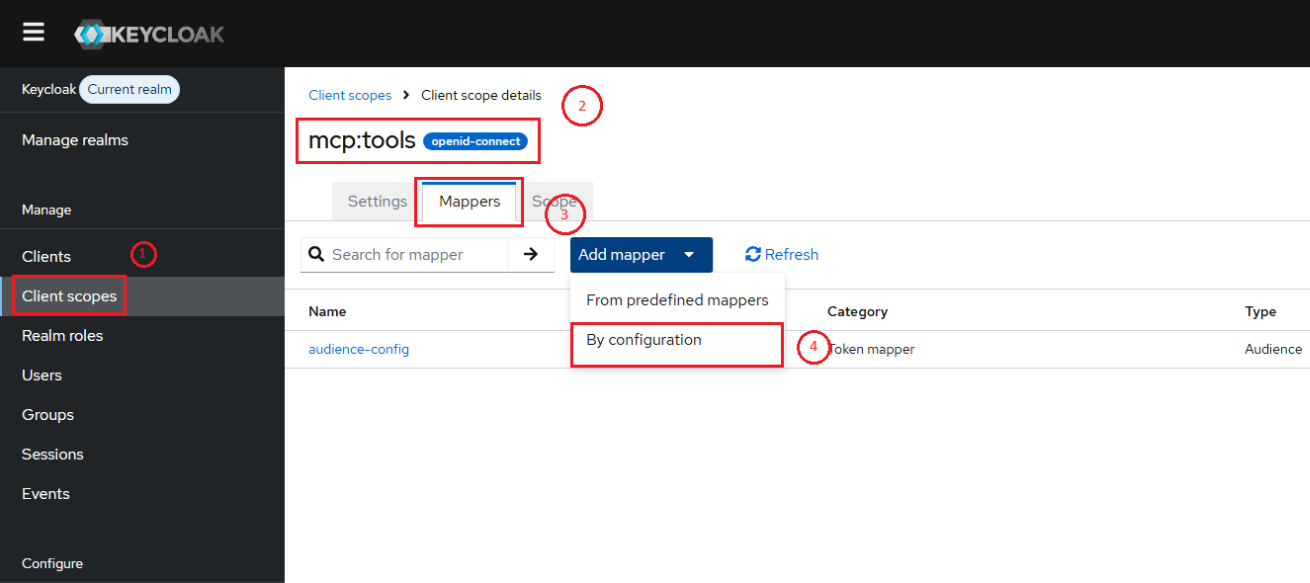
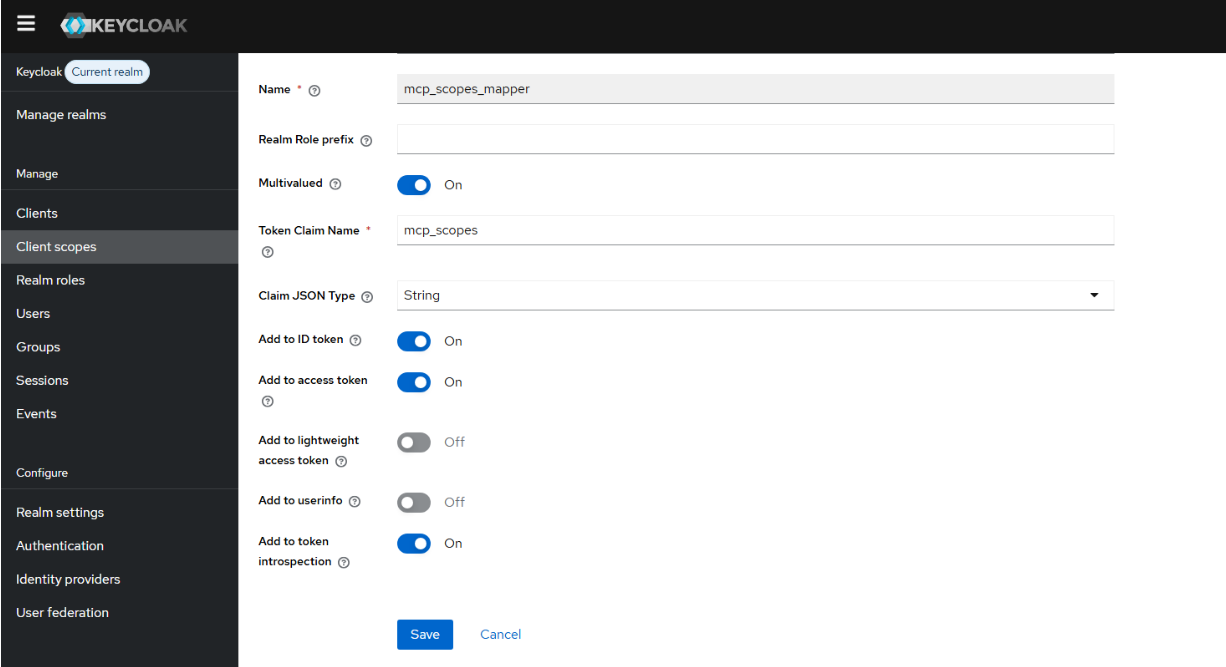
| Field | Value | Why |
|---|---|---|
| Name | mcp-scopes-mapper | Descriptive name |
| Mapper Type | User Realm Role | Maps the user's realm roles to a token claim |
| Token Claim Name | mcp_scopes | Must match acl_claim in Kong plugin config |
| Multivalued | ON | Users may have multiple roles |
| Add to access token | ON | The plugin reads the access token |
| Add to ID token | OFF | Not needed for resource server validation |
| Add to userinfo | OFF | Not needed |
Critical: The Token Claim Name (mcp_scopes) must exactly match the acl_claim field in the Kong plugin configuration. A mismatch means the plugin can't find the permissions in the token.
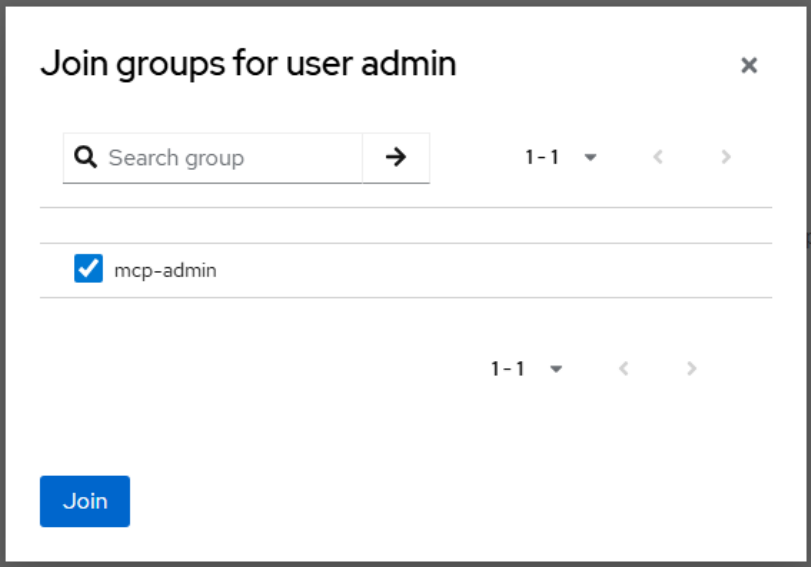
3.2.5. Add Users to Groups
Step 1: Navigate to Users → Click on a user → Groups tab → Join group → Select the appropriate group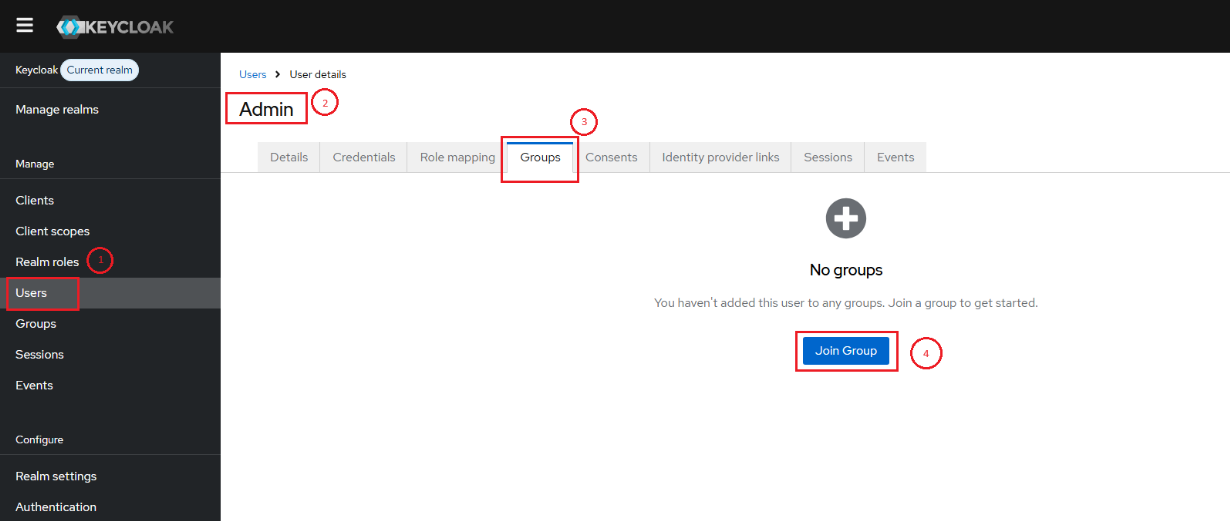
| User | Group | Resulting JWT mcp_scopes |
|---|---|---|
| canhng1 | Mcp-member | Mcp:tools, Mcp:resources |
| admin | mcp-admin | Mcp:resources |
 |
4. Testing using Visual Studio Code
4.1. Forward Kong proxy to local

4.2. Create new MCP server
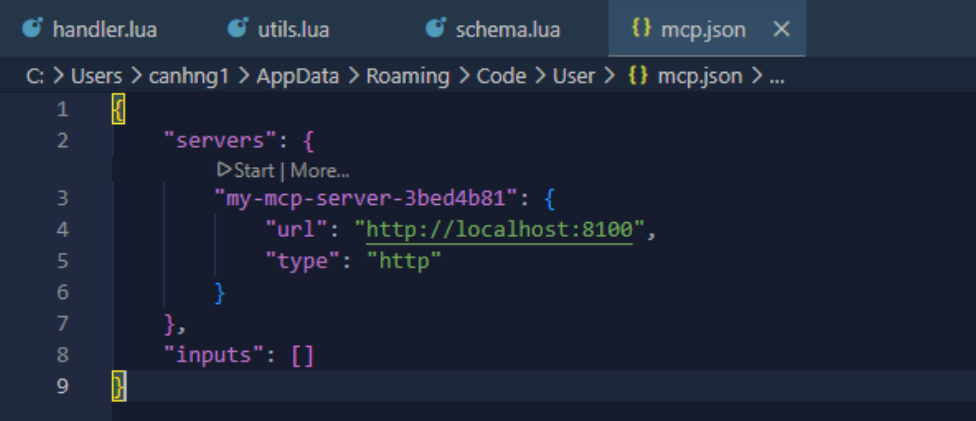
Open Vs Code, press Ctrl + Shift + P and select MCP: Add server…. Select HTTP and enter http://localhost:8100. Give the server a unique name to be used inside Visual Studio Code. In mcp.json you should now see an entry like this:

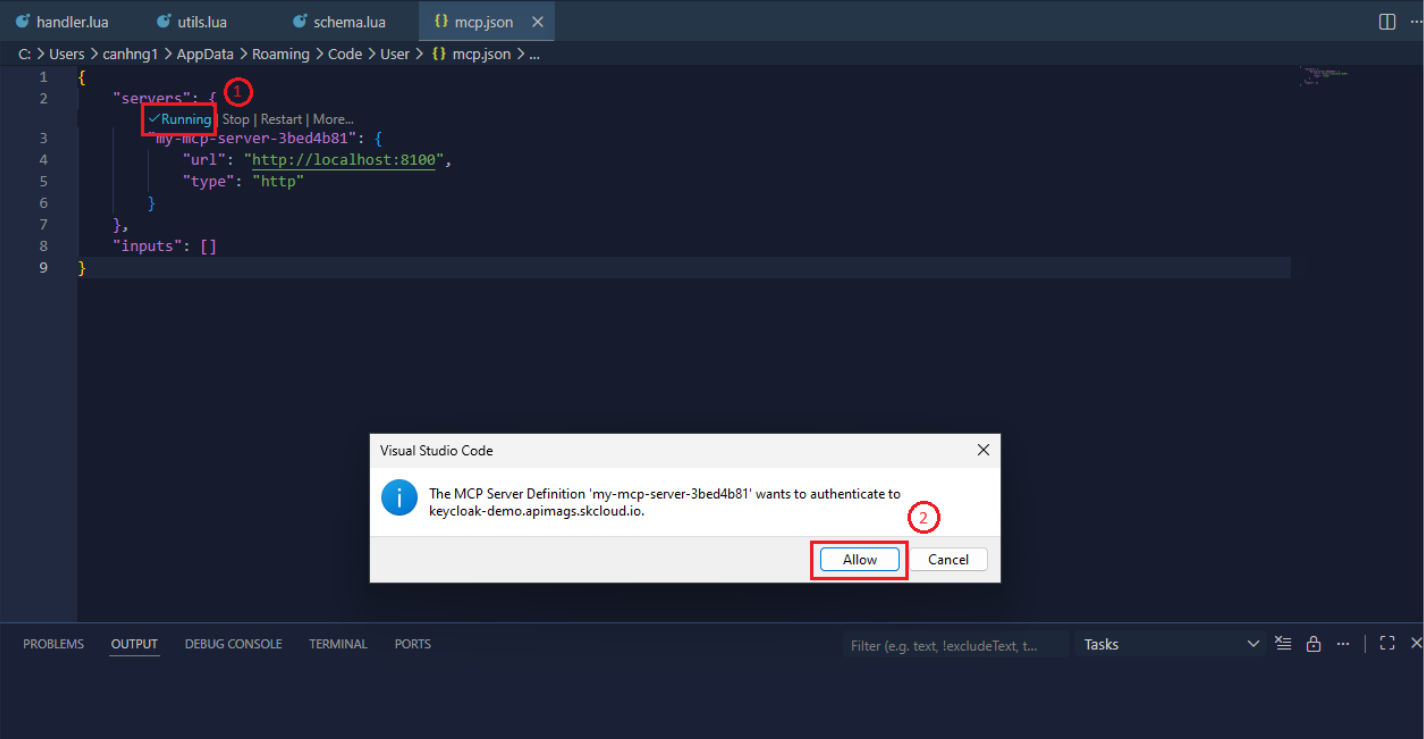
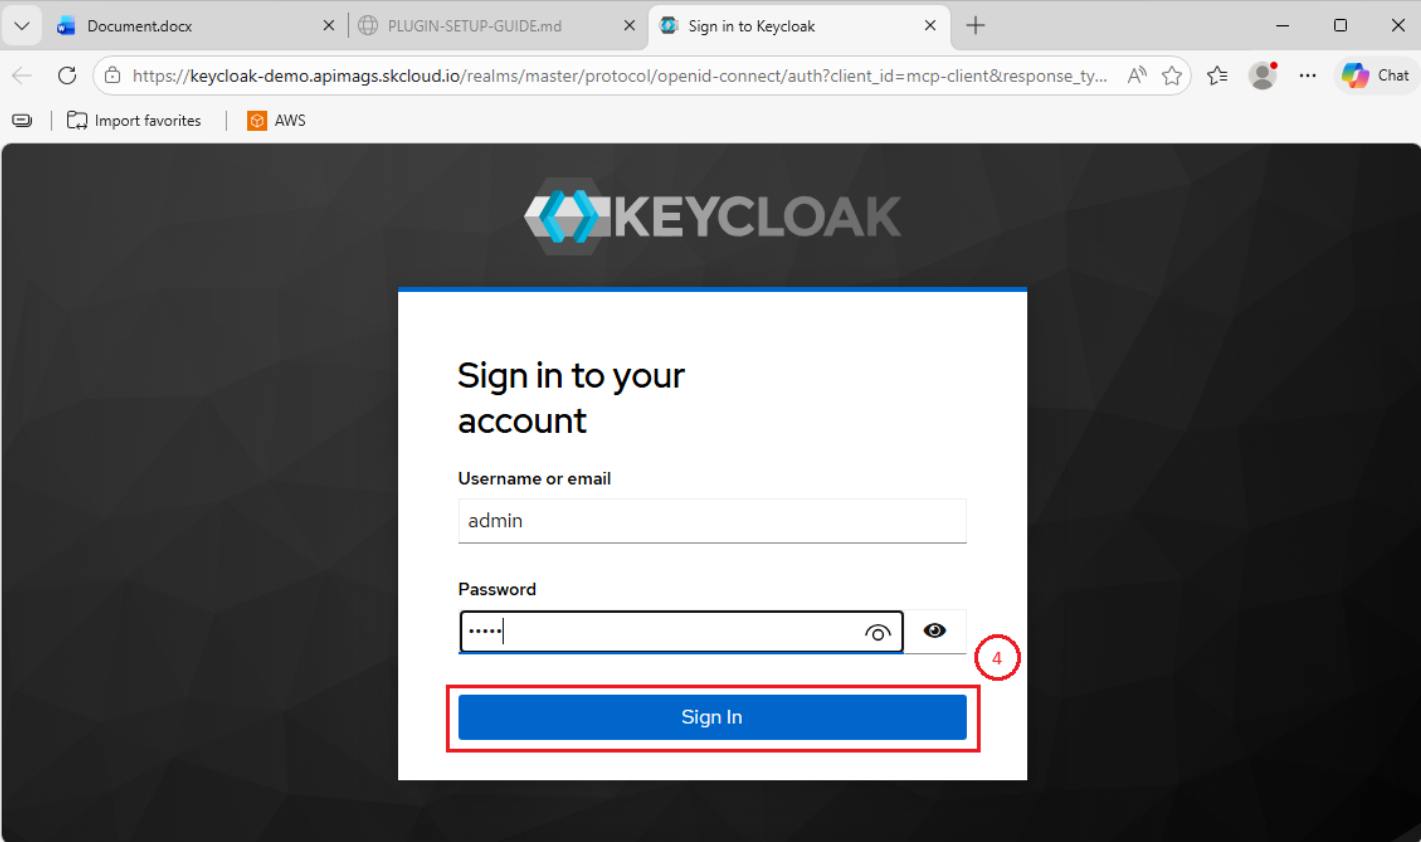
4.3. Start the server and connect to mock MCP server with Keyloak authentication

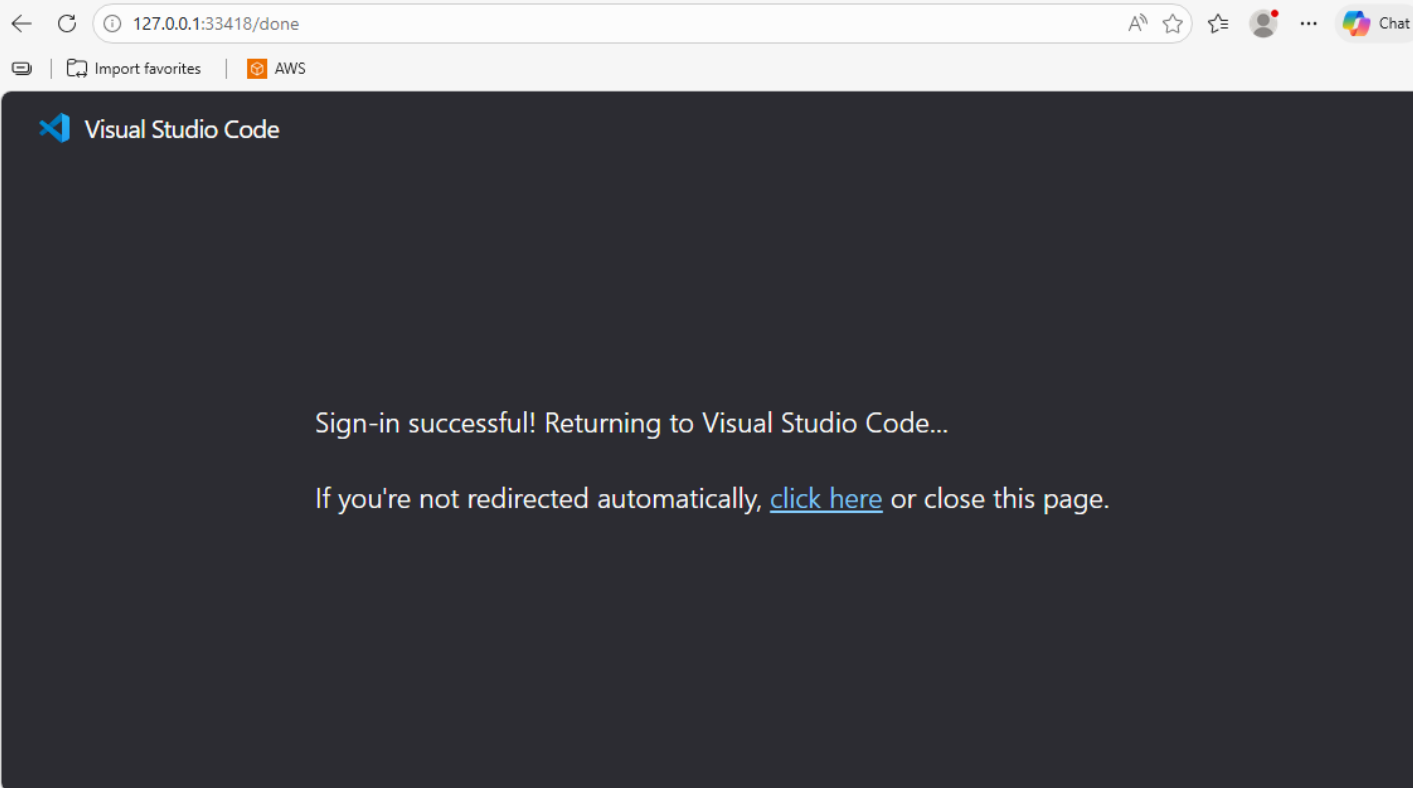
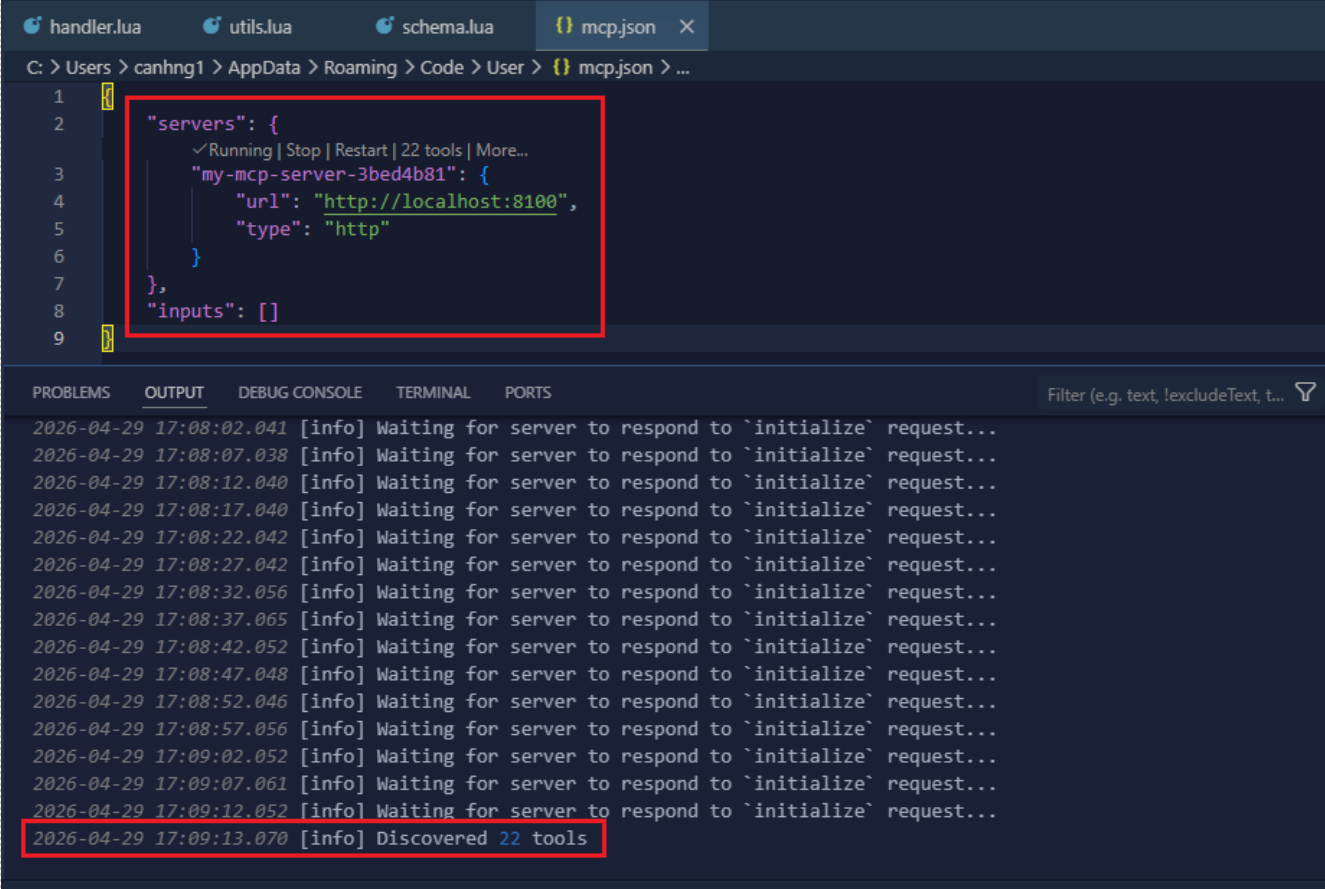
Login success and connected to mock MCP server with 22 tools.