API Management
Introduction to API Management
API Management provides functionalities to create, configure, test, deploy, and monitor APIs within the APIM system. It serves as a centralized interface where users can manage APIs efficiently.
Key Features
API Creation & Initial Configuration: Users can create new APIs with required configurations.
API Post-Creation Configuration:- API Policies Applying: Users can apply policies for authentication, security, and traffic control.
- Canary Config: allows controlled rollout of API versions.
- API Documentation: Swagger documentation can be fetched and edited.
- API Testing: Before deployment, APIs can be tested using request methods, headers, and parameters.
- API Deployment: Users can publish APIs, making them accessible externally.
- API Modification and Deletion: Provides insights into API usage and enables updates.
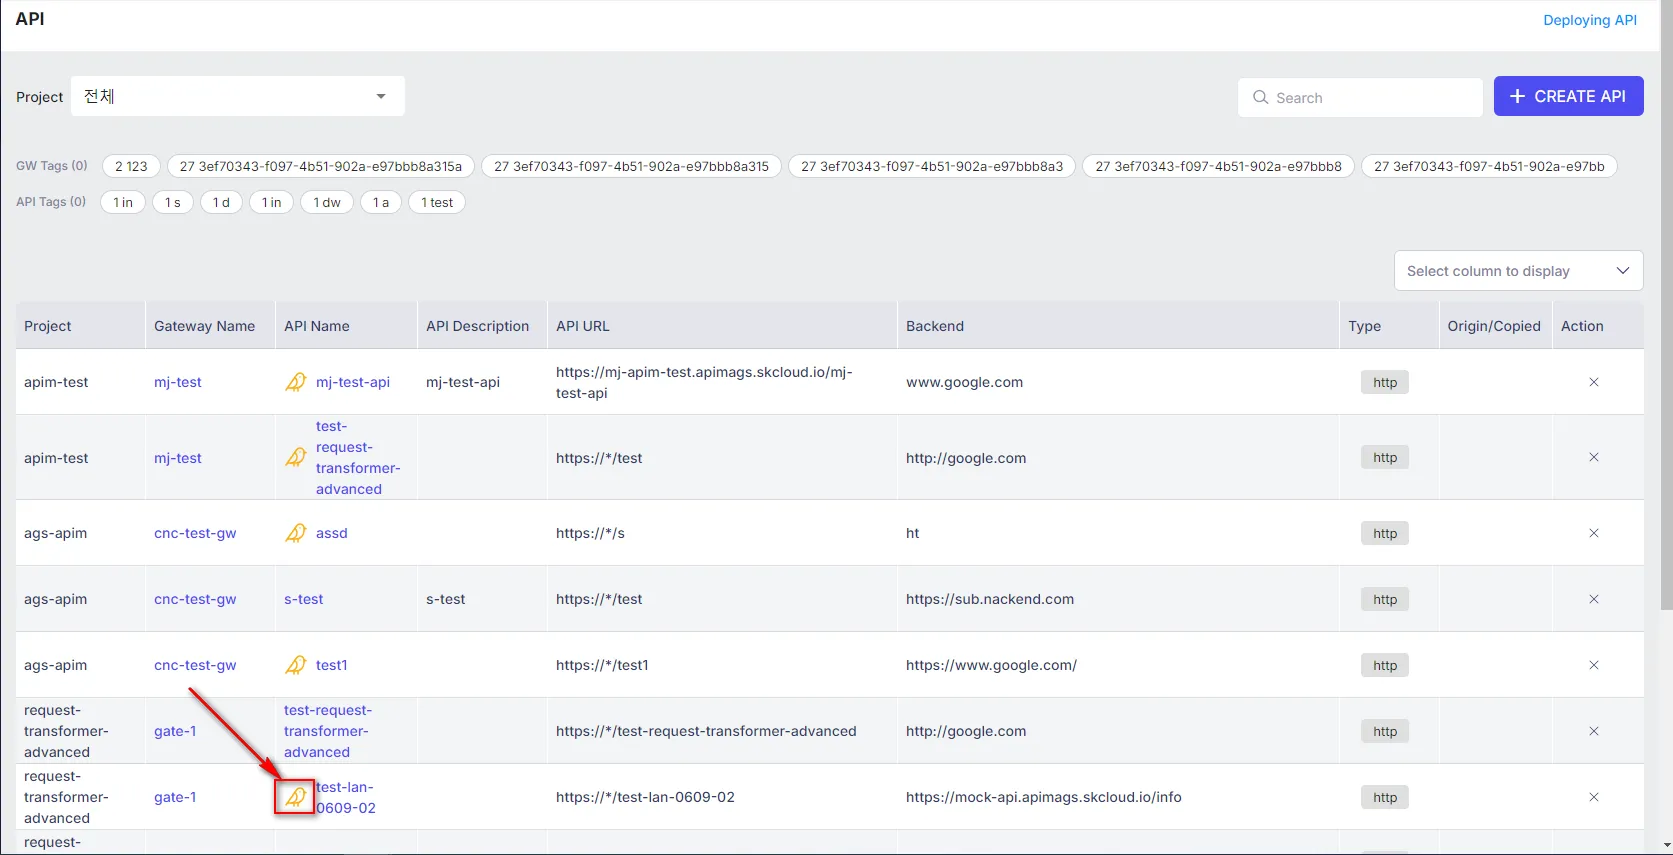
Accessing API Management
Users can navigate to API Management from the sidebar menu.

This screen provides an overview of all APIs, with options to filter, search, and manage APIs.
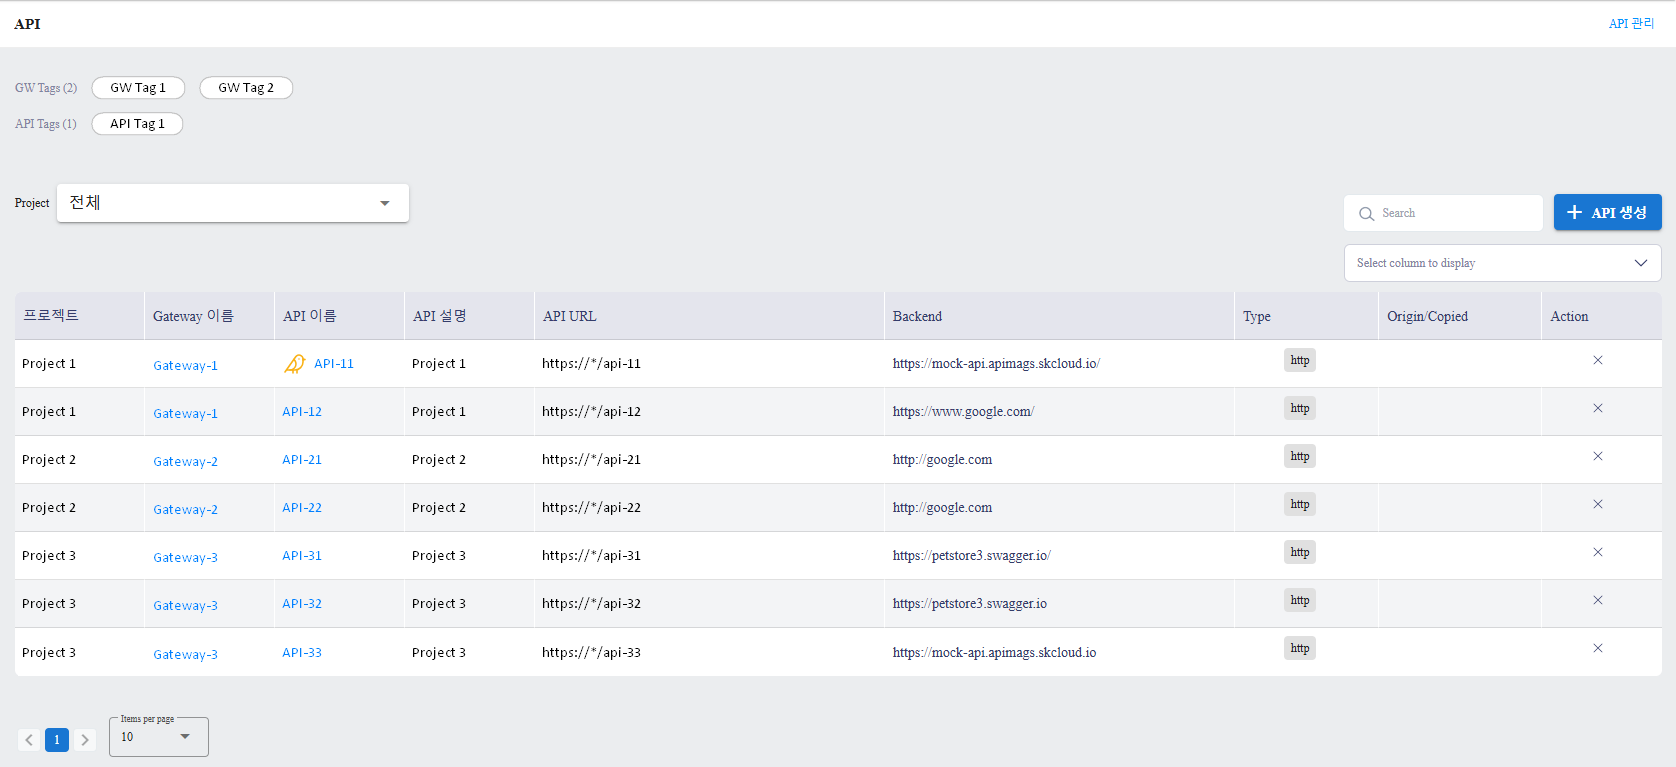
Features of API Management Screen
Project Selection: Select a project to view its APIs.

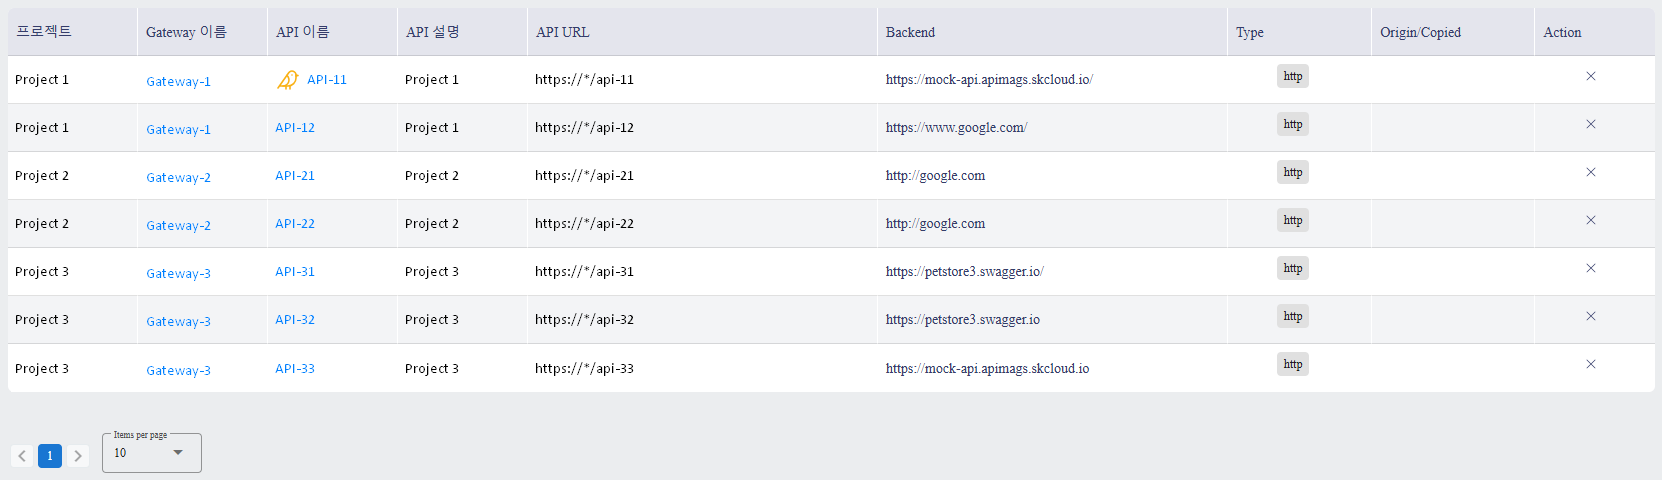
API Data Table: Displays a list of all APIs within the project. Pagination is supported.
Search Bar: Allows searching for APIs using keywords.

Create API Button: Access API creation interface.

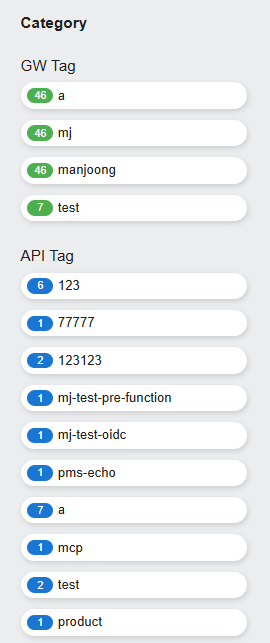
API and Gateway Tag Filter: Filter APIs based on either Gateway tags or API tags.
API Creation & Initial Configuration
Users can create a new API by clicking CREATE AN API on the API Management screen.
Steps:
- Select Project: Choose a project from the dropdown list.
- Configure API Details: Refer to API Initial Configuration Details below.
- Save API: Click API STORAGE to finalize creation or CANCELLATION to abort.
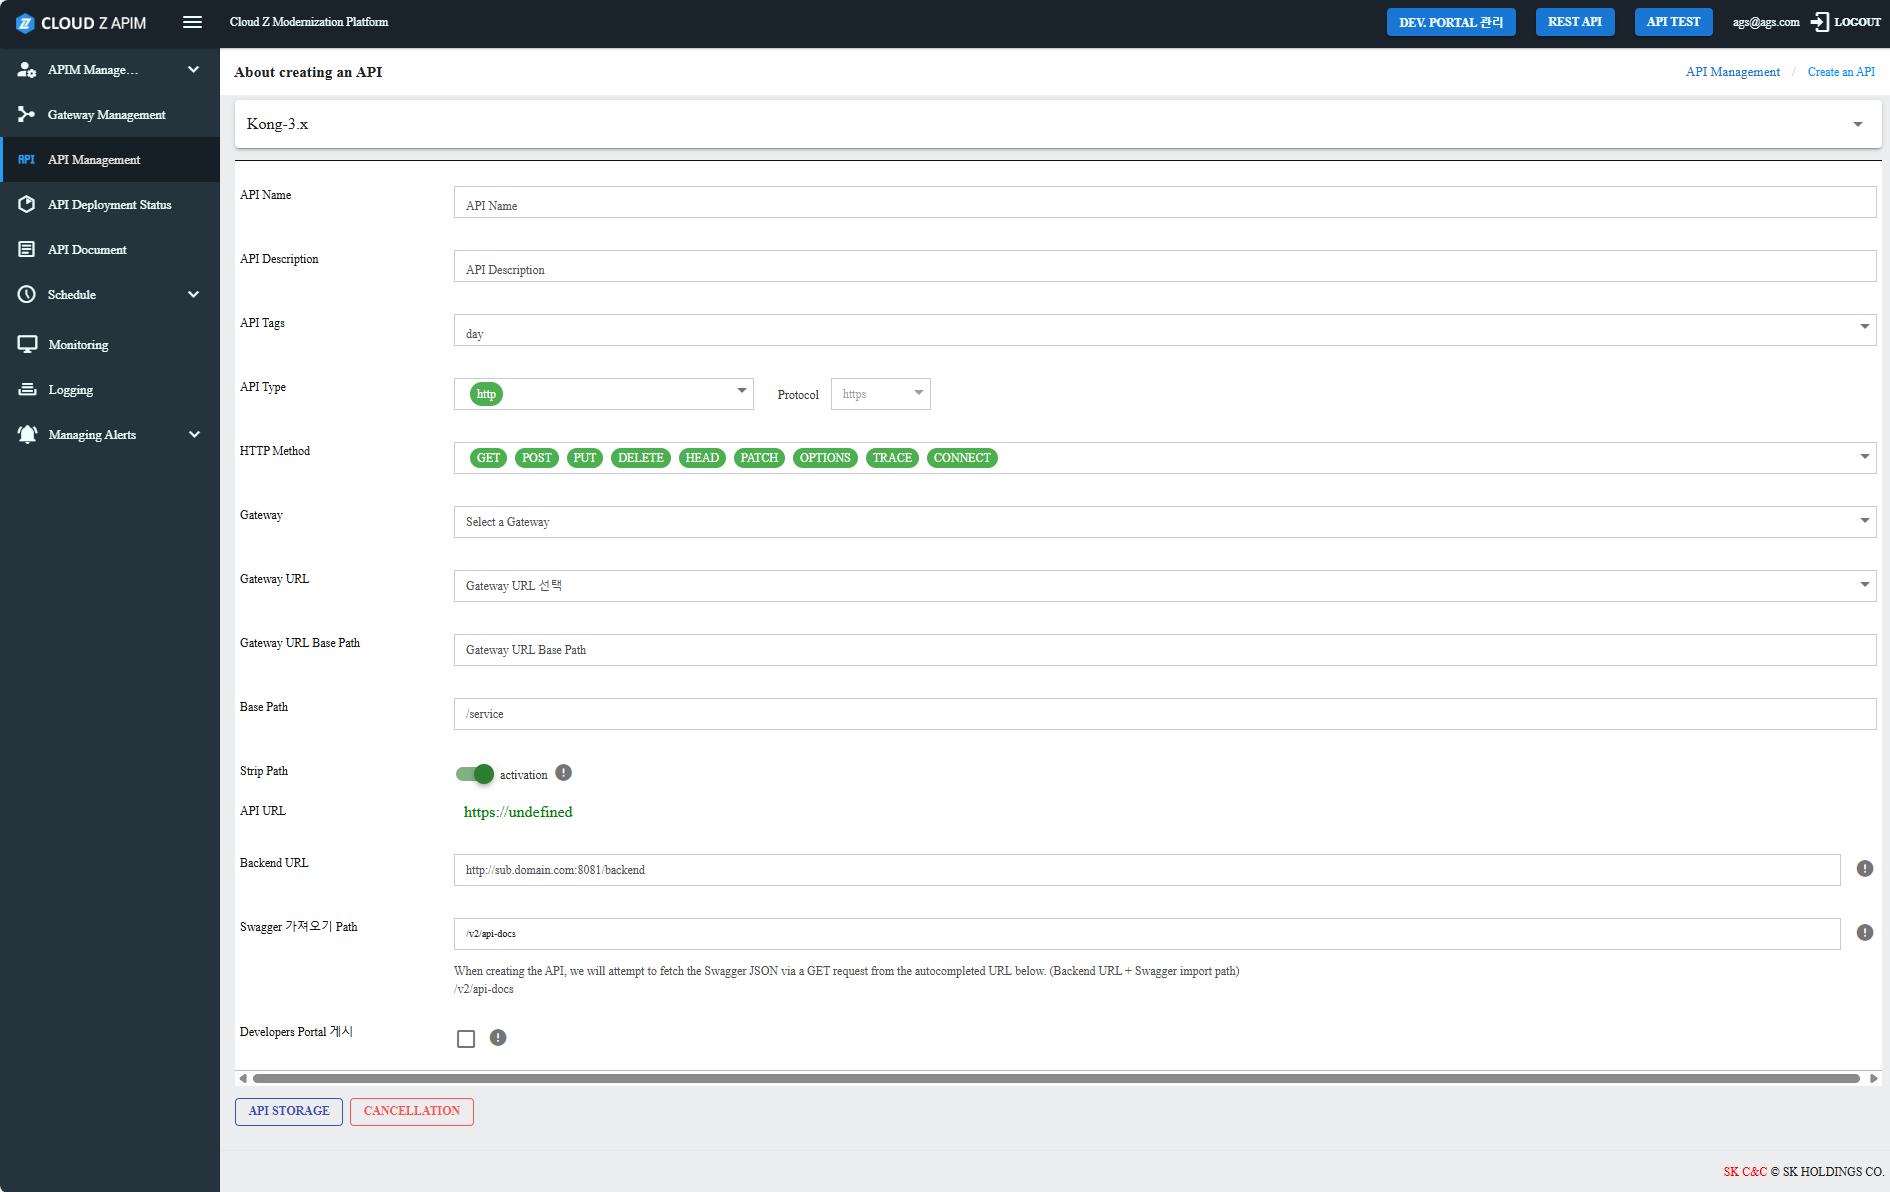
API Initial Configuration Details
| Field Name | Purpose | Input Notes | Mandatory |
|---|---|---|---|
| API Name | Unique API identifier. | English letters, numbers, spaces, underscores ‘_’, or double comma ‘:’. | Yes |
| API Description | Additional details about the API. | Short description. | No |
| API Tags | Used for filtering/searching API. | Separate tags with Enter | No |
| API Type | Defines the communication type of the API, how the API connects to backends. | Select from: HTTP, WebSocket, AWS Lambda. Refer to Settings for API Types for more detailed instructions. | Yes |
| Protocol | Specifies the security protocol for the API. | Choose between HTTP or HTTPS. If HTTPS is selected, an SSL certificate is required. | Yes |
| HTTP Method | Determines the allowed request methods. | Select from: GET, POST, PUT, DELETE, HEAD, PATCH, OPTIONS, TRACE, CONNECT. Multiple methods can be selected. | Yes |
| Gateway | Specifies the Gateway through which the API is accessed. | Select an existing Gateway. API must be attached to a Gateway. | Yes |
| Gateway URL | The public-facing URL for the API. | Automatically set based on the selected Gateway and cannot be manually edited, based on Gateway URL. For more details, please refer to User Guide/APIM Console/Gateway Management. | Yes |
| Gateway URL Base Path | Defines the API route for client requests. | Enter the path (e.g., /order). Combined with the Gateway URL to form the full API URL. | No |
| Base Path | Sets the path that will be stripped before forwarding the request to the backend. | Enter a value like /service. Works with Strip Path toggle. | Yes |
| Strip Path | Removes the Base Path before forwarding to the backend. | Toggle ON or OFF. If enabled, “Base Path” will be stripped from the request before reaching the backend. | Yes |
| API URL | The final client-facing API URL. | Automatically generated by combining Gateway URL and Base Path. | Yes |
| Backend URL | Address of the Backend Service to be proxied by the Gateway. | Enter a full URL. Required field for HTTP-based APIs. Refer to Settings for API Types for more detailed instructions. | Yes |
| Swagger Fetch Path | Fetches Swagger JSON documentation from the backend. | Enter a Swagger path (e.g., /v3/api-docs). Automatically appends to the Backend URL. | Yes |
| Developers Portal Posting | Determines if the API should be listed in the Developer Portal. | Checkbox. If checked on, the API will be visible in the Developer Portal and can be configured as a Product in the Developers Portal. For detailed information on configuring as a Product, please refer to Developer Portal Guides. | No |
Settings for API Types
When users select API Type as HTTP or WebSocket, they must follow specific URL formats for the Backend URL.
Allowed Backend URL Formats:- http://domain.com/
- http://domain.com
- https://domain.com
- http://sub3.sub2.sub1.domain.com
- http://domain.com/path1
- http://domain.com/path1/path2/path3
- http://domain.com:8081
- http://sub.domain.com:8081/path
If users select API Type as AWS Lambda Function Integration, they must configure AWS Credentials to link the API with AWS Lambda.
Additional Required Fields for AWS Lambda:- Lambda Name: Enter the AWS Lambda function name.
- AWS Region: Enter the AWS region where the Lambda function is deployed.
Example of API Creation:
If an API is set up as:
- API Type: HTTP (using https protocol)
- Gateway URL: https://your.domain.com
- Base Path: /myservice
- Backend URL: http://backend.com/backend
- Swagger Fetch Path: /v2/api-docs
The final API URL for client requests will be: https://your.domain.com/myservice
Swagger documentation will be fetched from: http://backend.com/backend/v2/api-docs
For example, if client calls https://your.domain.com/myservice/v1/apis/ it will ultimately be proxied to the path http://backend.com/backend/v1/apis/.
API Post-Creation Configurations
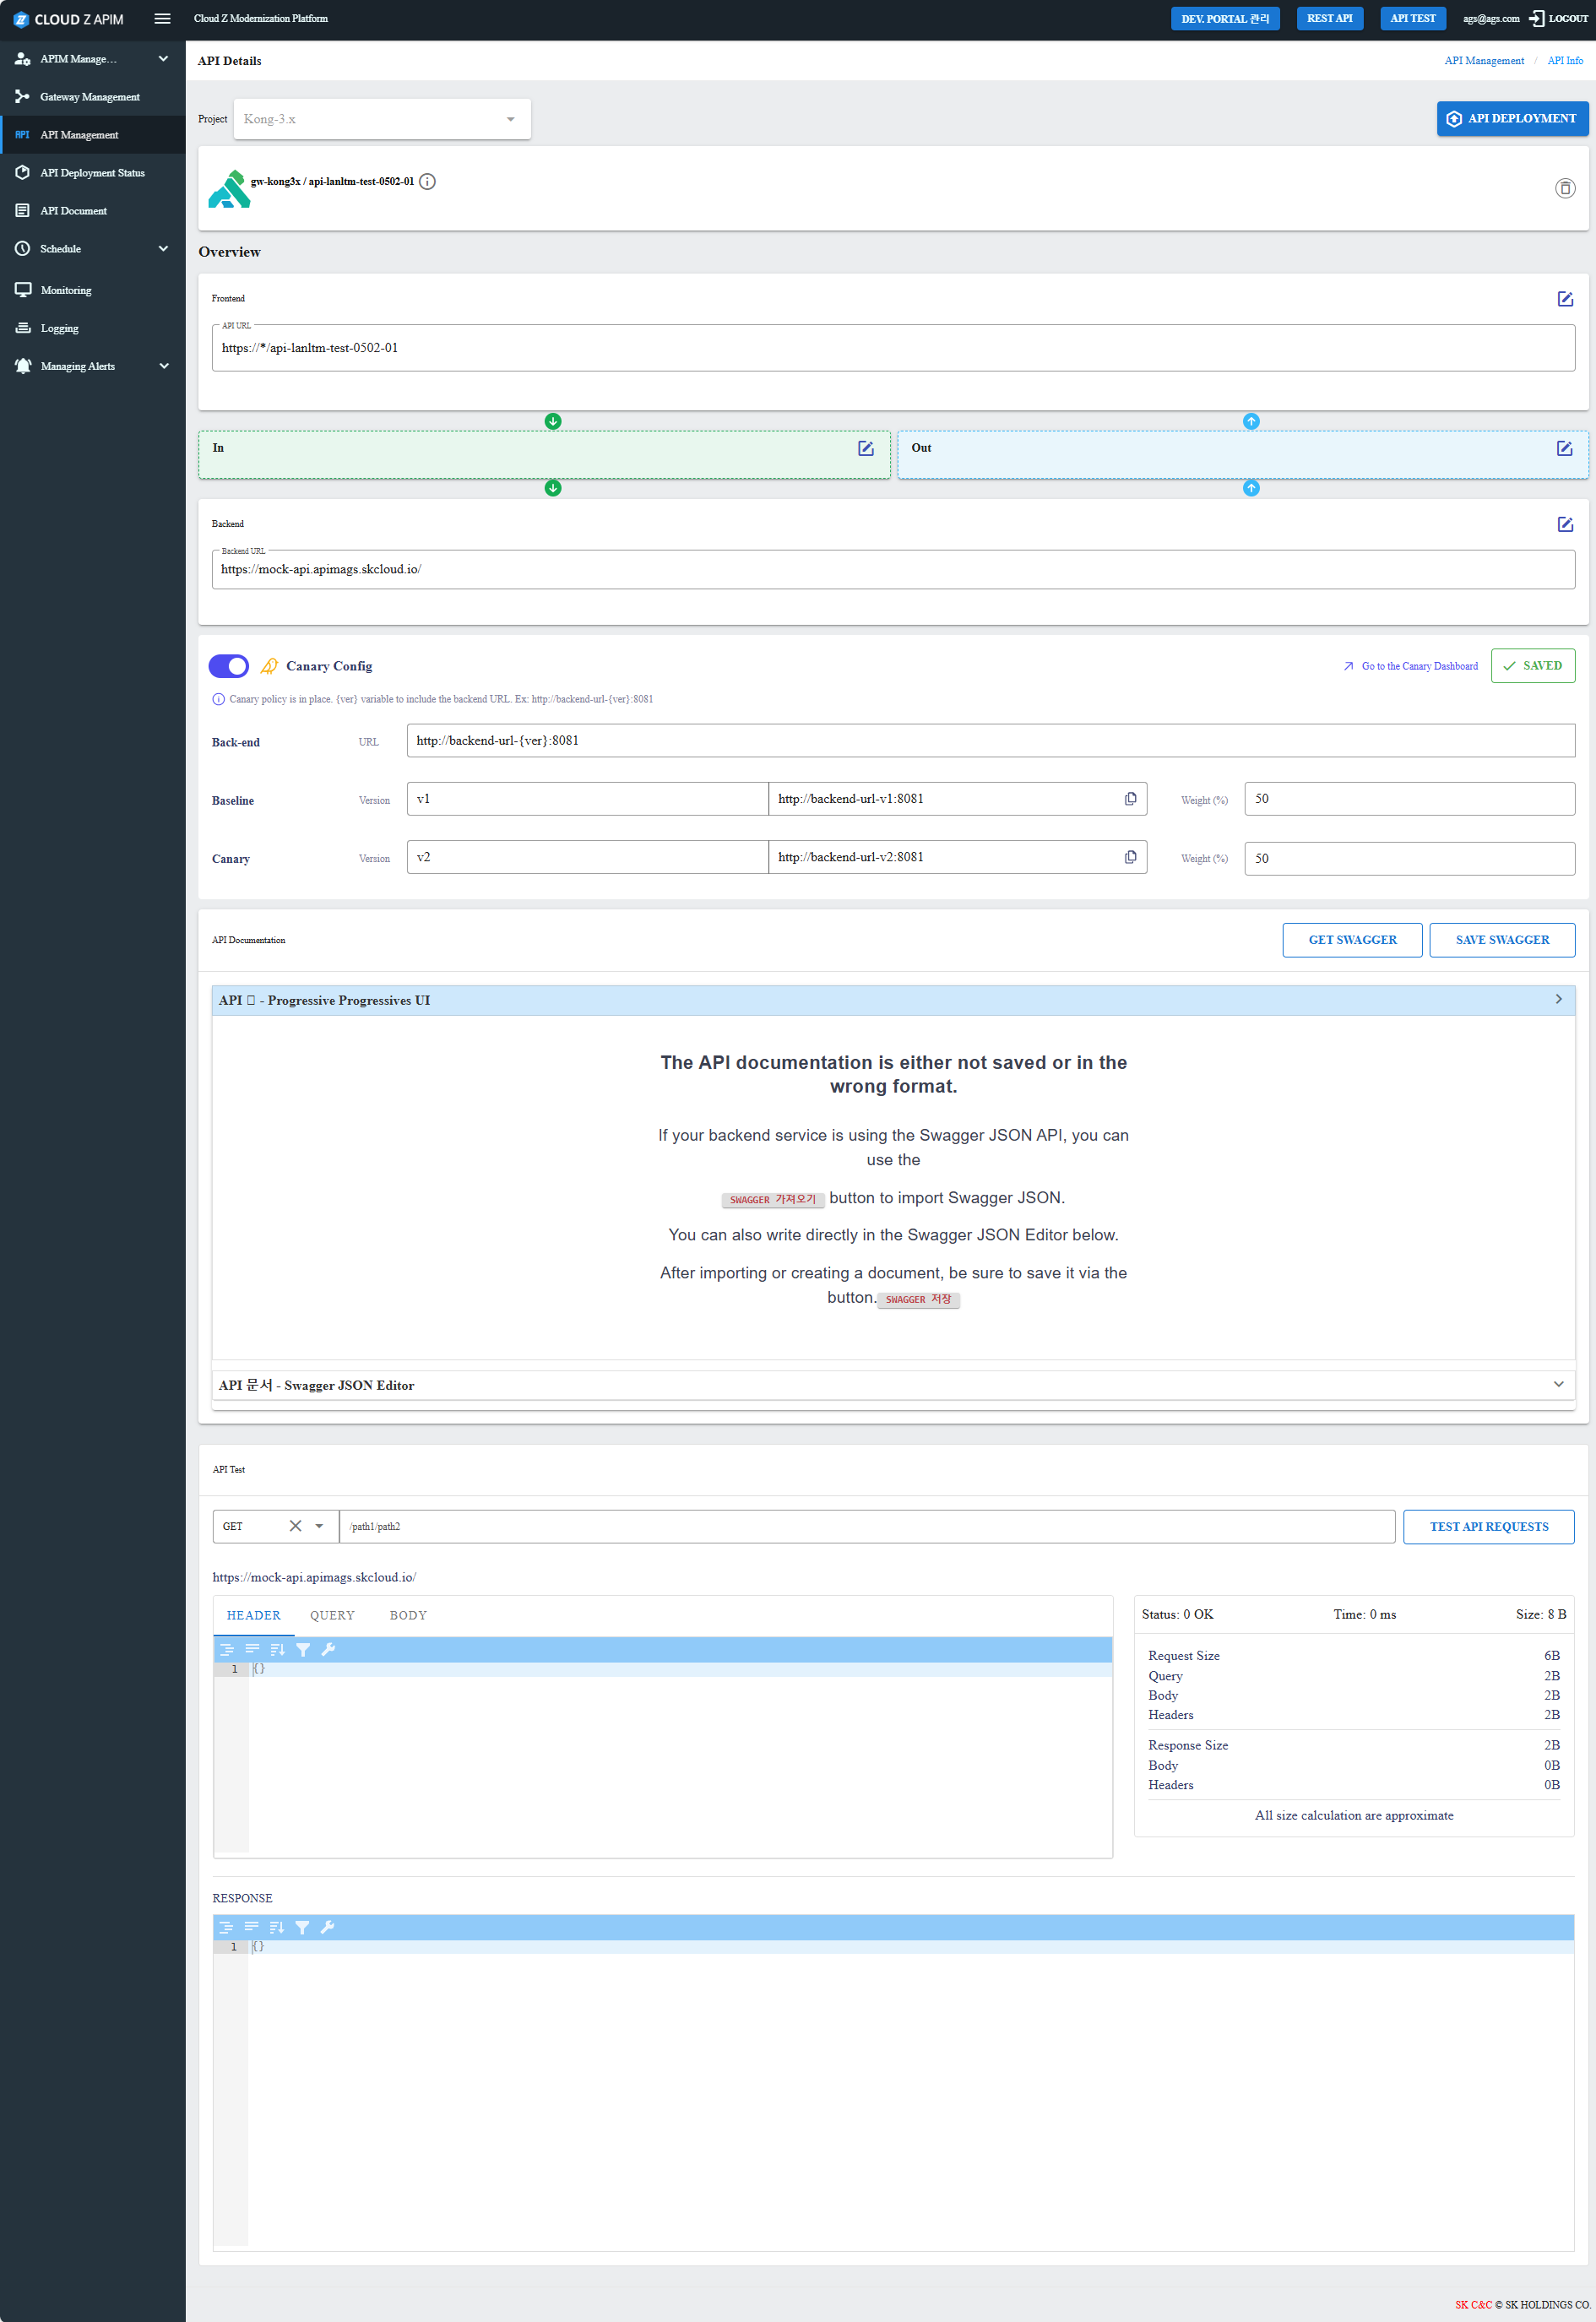
Once an API is created, users are directed to the API Details Screen, where they can manage post-creation configurations or delete the API.
Available Configurations:- API Policies Applying: Set inbound and outbound API policies.
- Canary Config: Configure version-based deployments.
- API Documentation: Fetch, edit, or update Swagger documentation.
- API Testing: Run API tests before deployment.
- API Deployment: Deploy API for external access.
- Edit API Frontend & Backend: Modify API URL, Base Path, and Backend URL.
- API Deletion: Delete the API.
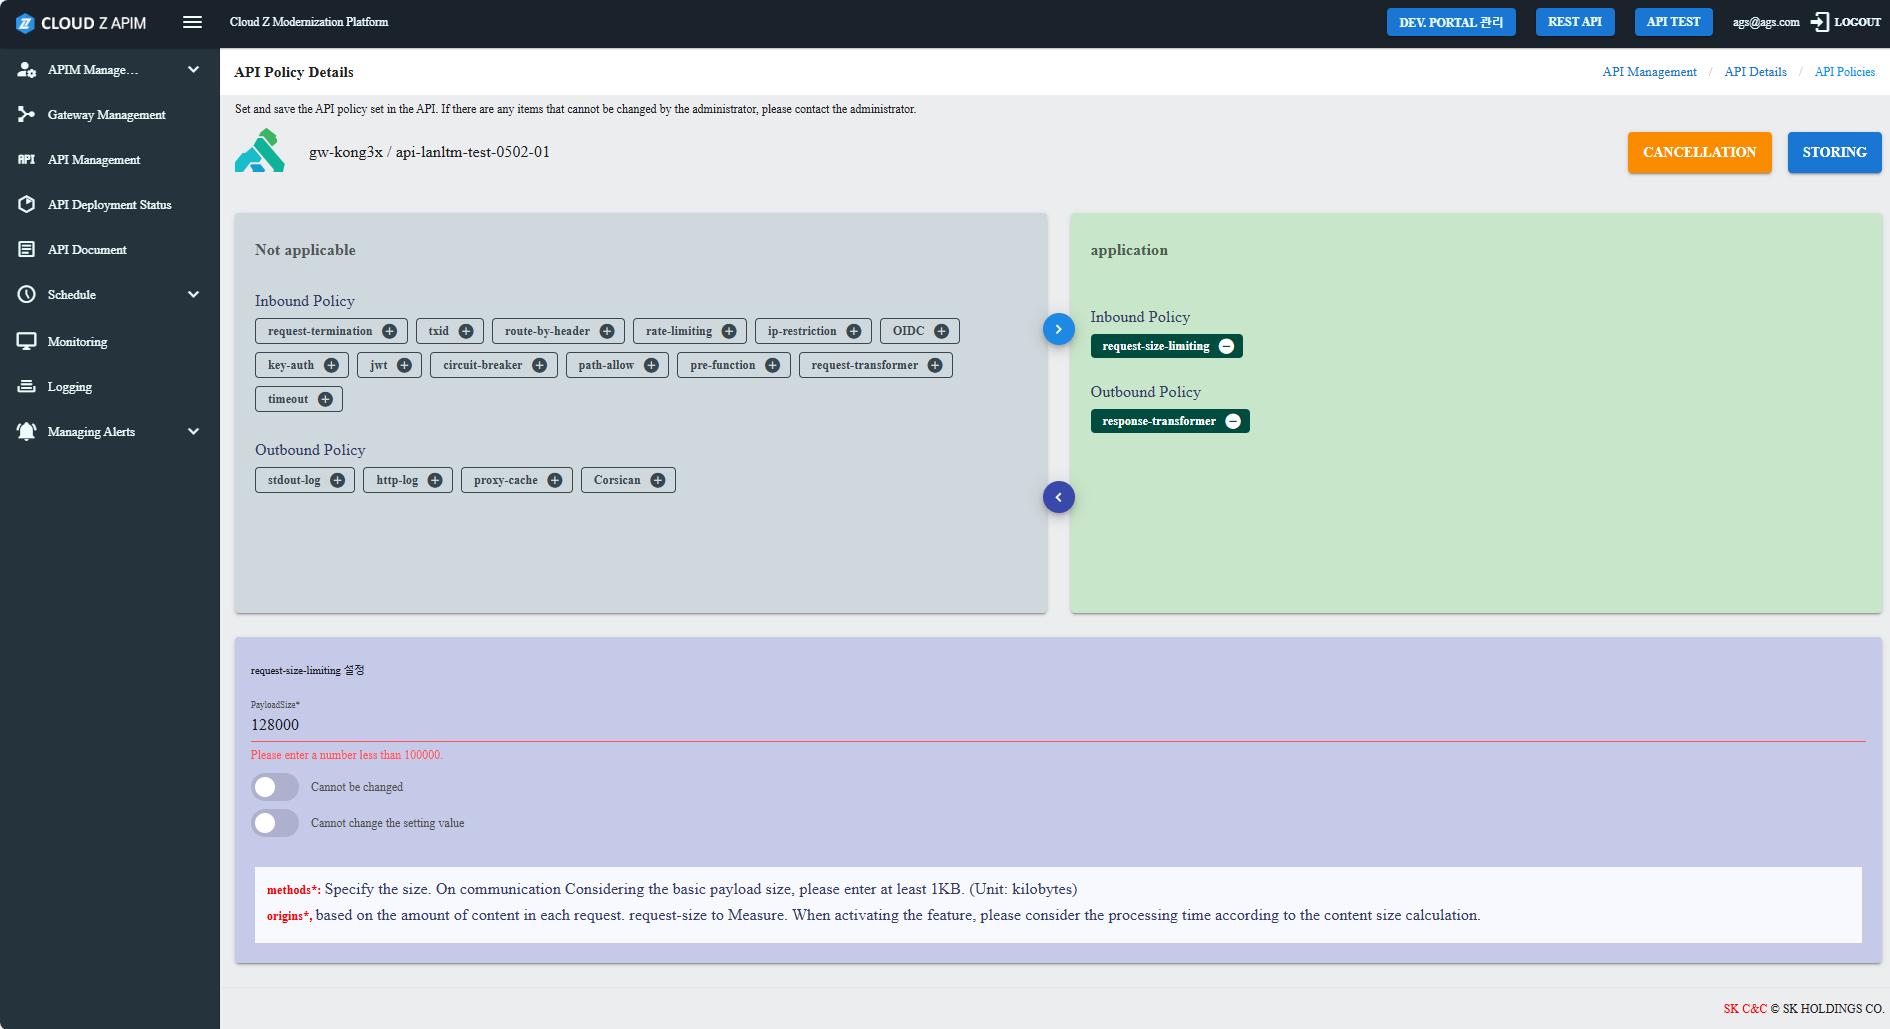
API Policies Applying
Users can set policies to control API behavior. Policies are divided into:
- Inbound: Modifies requests before reaching the backend (e.g., header transformations, IP restrictions).
- Outbound: Modifies responses before reaching the client (e.g., logging, adding headers).
Users can add or remove policies and configure settings before deployment.
Steps:- Click on Edit icon in the policy section to access the API Policy Details configuration screen.
- Add policies from the Not Applicable section or remove applied policies.
- Configure policy settings by clicking on policy names. For more details on how to configure for each policy, please refer to User Guide/APIM Console/API Policy.
- Click STORING to save changes.
Policies must be saved individually and will only take effect after API deployment.
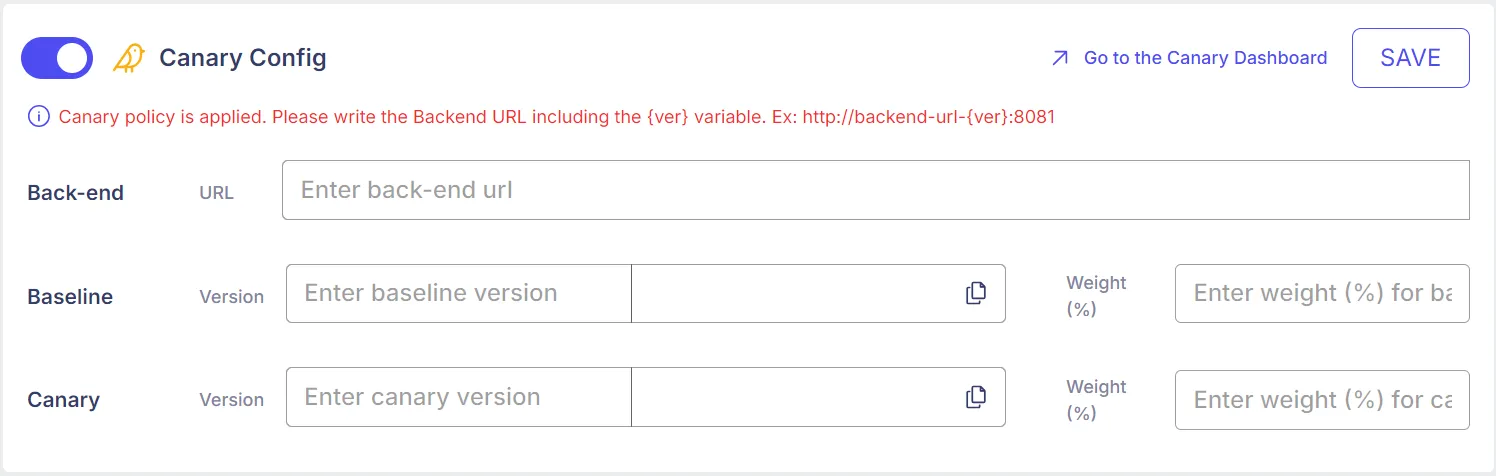
Canary Config
Canary Config allows controlled API version rollouts. Users can enable via Canary Config toggle.
Steps:- Toggle Canary Config ON.
- Canary Config Setting:
| Field Name | Input Instructions |
|---|---|
| Back-end: URL | The Backend URL including the (ver) variable. Example: http://backend-url-(ver):8081 |
| Baseline: Version | Version of Baseline. |
| Baseline: Link | Auto update version to the link when user input in the ‘Baseline: Version’ field. |
| Baseline: Weight (%) | Input number. The total of the “Baseline: Weight (%)” field and “Canary: Weight (%)” is 100. |
| Canary: Version | Version of Canary |
| Canary: Link | Auto update version to the link when user input in the “Canary: Version” field. |
| Canary: Weight (%) | Input number. The total of the “Baseline: Weight (%)” field and “Baseline: Weight (%)” is 100. |
- Click SAVE to apply changes.
Users can edit Canary Config later via API Management or API Details Screen.
API Documentation (Swagger)
Users can fetch or manually edit Swagger Documentation.
Steps:- Set Swagger Retrieval Path (e.g., /v3/api-docs).
- Click GET SWAGGER to fetch documentation.
- Edit Swagger JSON in Swagger Editor if needed.
- Click SAVE SWAGGER to store changes.
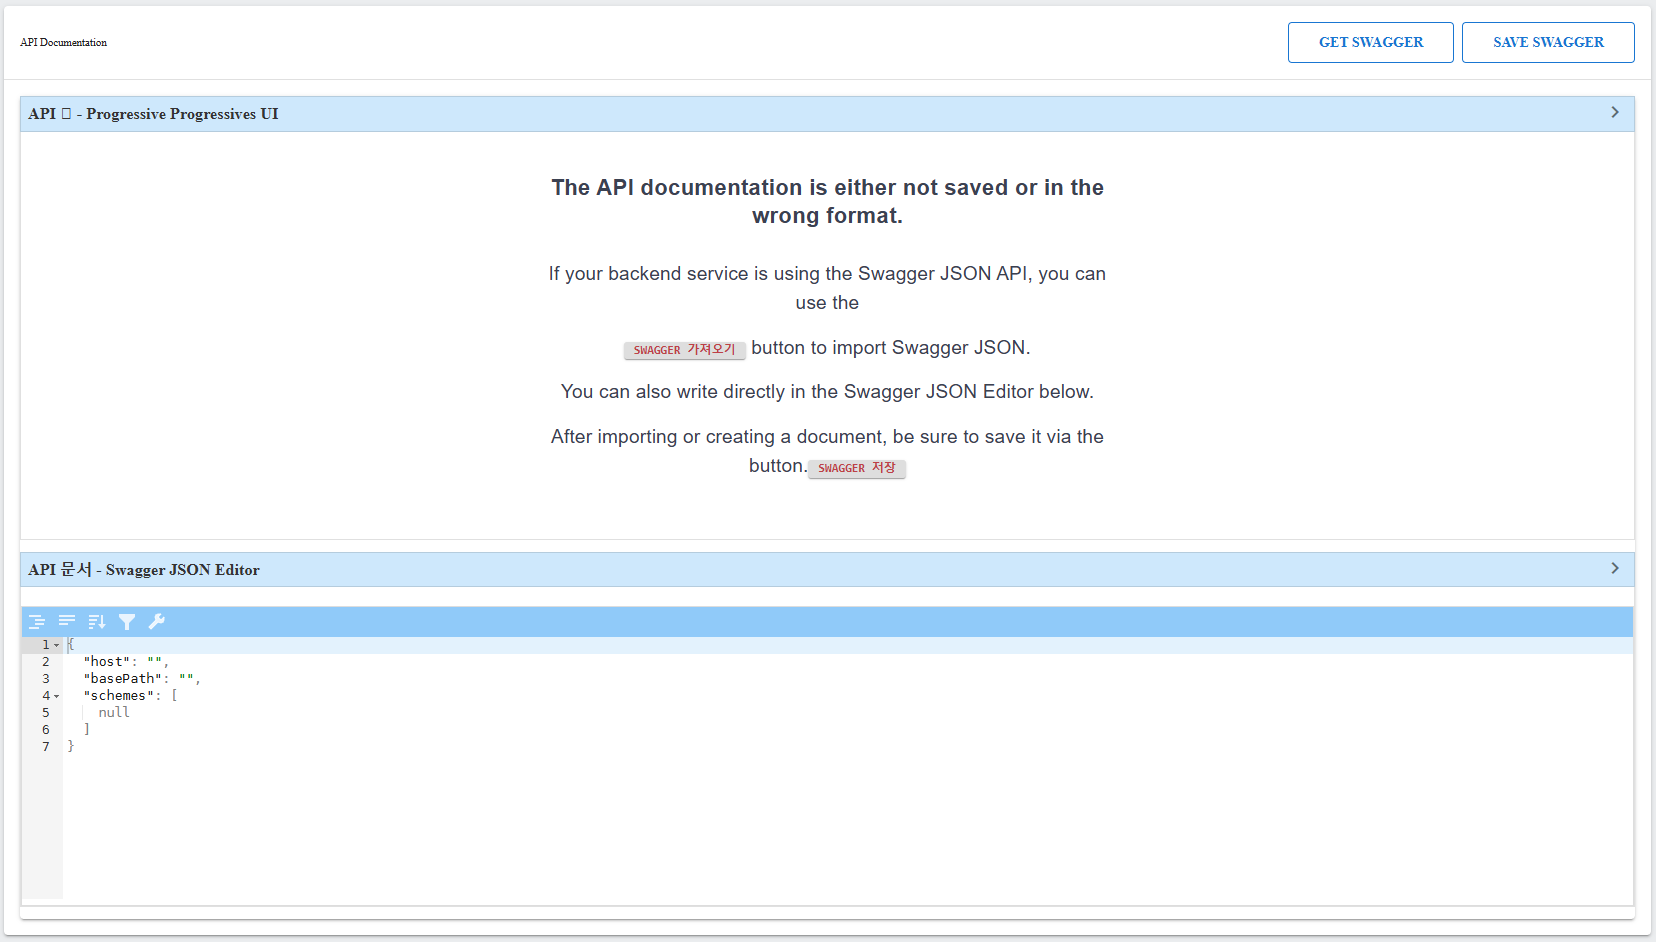
Swagger documentation is deployed with the API and can be accessed under API Document in the sidebar.
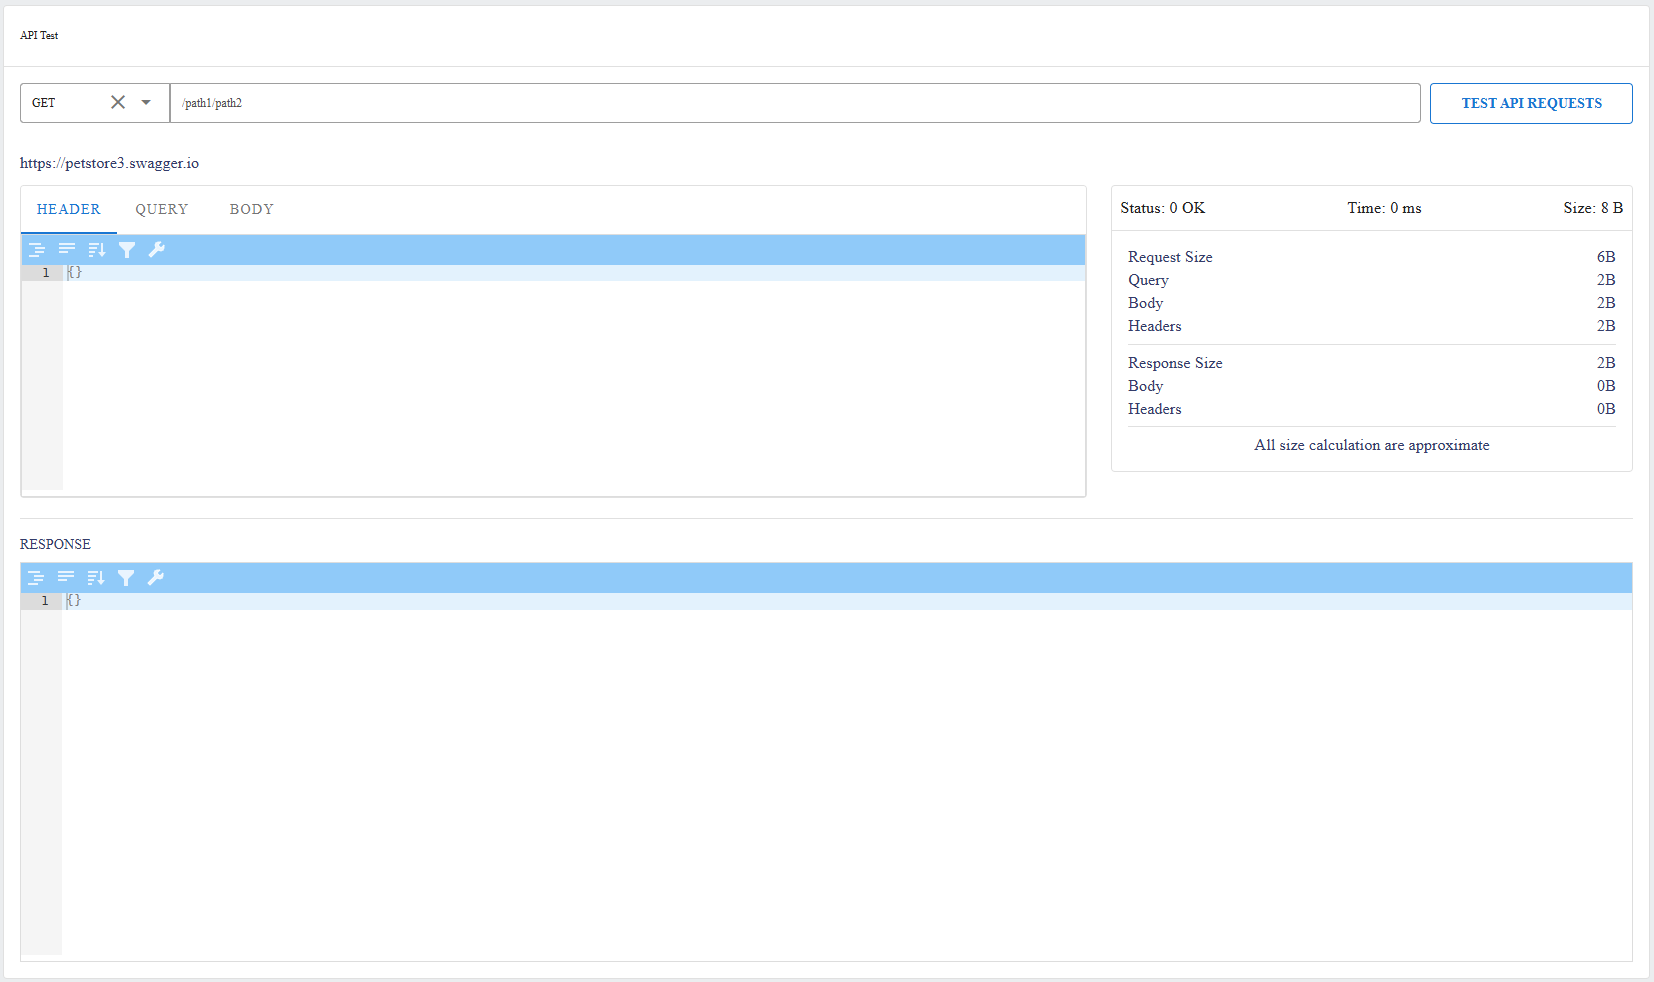
API Testing
Users can test APIs before deployment.
Features:- Supported Methods: GET, POST, PUT, DELETE, HEAD, OPTIONS, PATCH.
- Request Parameters: Path (/path/(key1)), Headers, Query parameters, Body.
- Response Analysis: View status, headers, and response body.
To start testing, click TEST API REQUESTS.
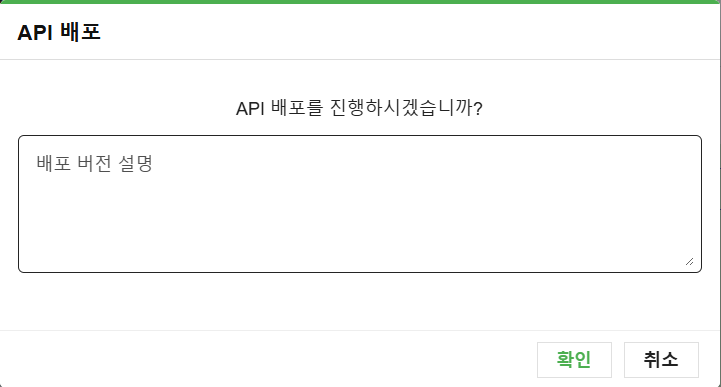
API Deployment
APIs must be deployed for external access.
Steps:- Click API DEPLOYMENT.

- Enter deployment version description.
- Click CONFIRMATION to deploy.
Only the latest deployed version is accessible externally.
Edit API Frontend & Backend
Users can edit API settings on frontend/backend configuration.
API Deletion
Users can delete APIs via:
- Trash icon in API Details Screen.
- Cross icon under Action in API Management Screen.
Deleted APIs cannot be restored.

