User management
This guide explains methods for managing user settings (login, logout, password change, user deactivation…).
Users in AMDP can be assigned either SYSTEM ADMINISTRATOR or DEVELOPER roles. Available menus and functions differ based on the assigned role. SYSTEM ADMINISTRATORS can use and manage all menus but only have view access to individual projects.
For detailed information on user roles, refer to User Authority Management. Additionally, management authority for individual projects can be found in Project Configuration Management.
User settings
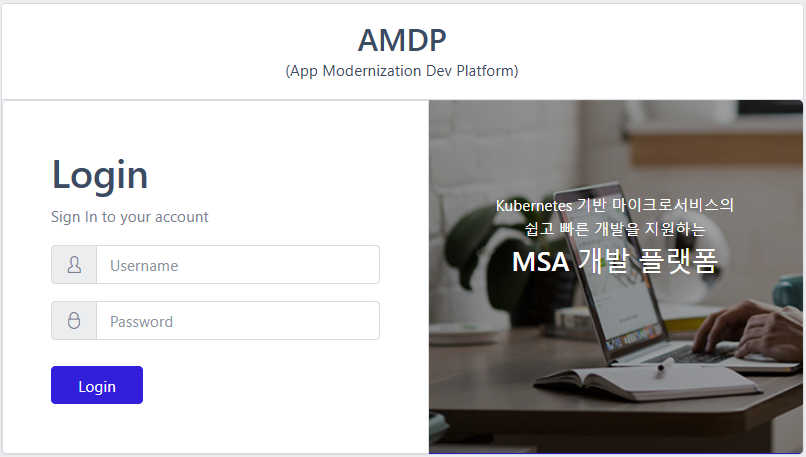
Login
The AMDP web console login page. The domain may vary for each installed project.
https://console-dev.skamdp.org
Logout
- Select the User Settings button in the top-right corner.

- Select the Logout button in the pop-up window to log out and be redirected to the login screen.
Password Reset
- Select the User Settings button in the top-right corner.

- On the password change page, enter the current password and new password, then click Save to change it.
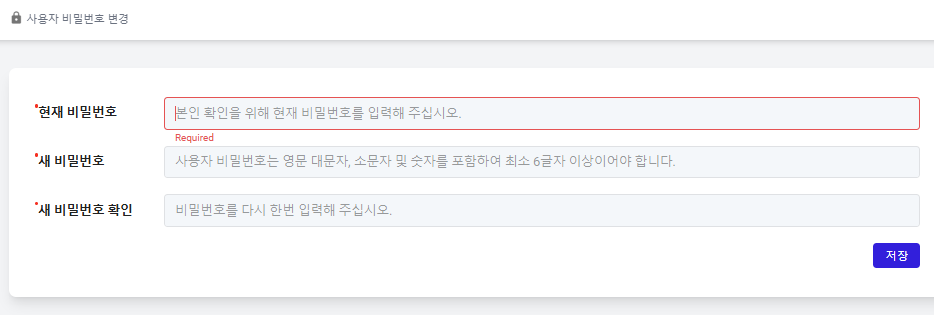
When setting a new password, it must meet the following requirements:
- Minimum length: At least 6 characters
- Character composition: Must include uppercase letters (A–Z), lowercase letters (a–z), and numbers (0–9)
User Profile
This screen is the explanation of user profiles. You can check basic user information, associated groups, and assigned authorities based on group and project.
Select the User Profile button in the top-right corner to view the User profile detail:

View user information and assigned authorities. Displayed information varies between SYSTEM ADMINISTRATOR and DEVELOPER roles.
-
ADMINISTRATORrole: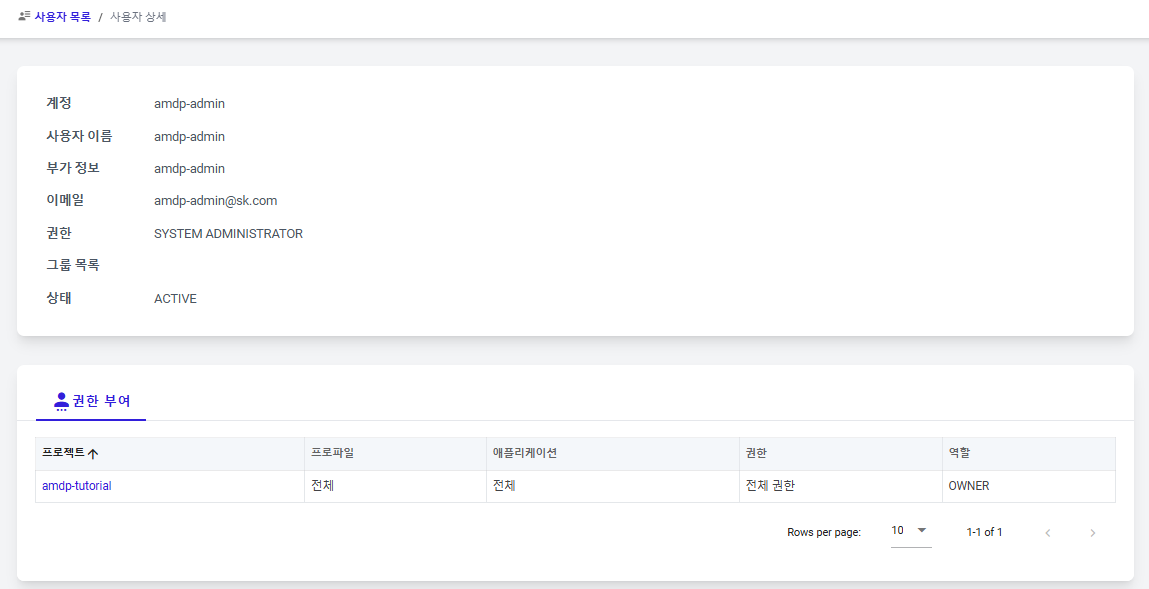
-
DEVELOPERrole:
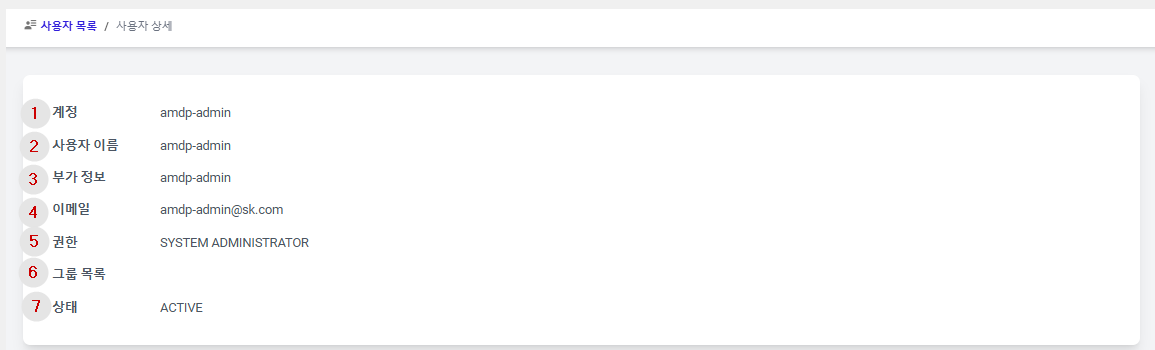
① Account: The name used for logging into AMDP.
② Username: The name displayed for the user.
③ Additional Information: Team or other additional information about the user.
④ Email: The user's email information.
⑤ Authority: The authority assigned to the user.
⑥ Group List: The groups the user is registered in. SYSTEM ADMINISTRATOR doesn't display specific groups but can navigate to Group Management via the provided link.
⑦ Status: The current status of the user (ACTIVE/ INACTIVE).
SYSTEM ADMINISTRATORS have basic read permissions for all projects, so they don't have a separate authority assignment list.
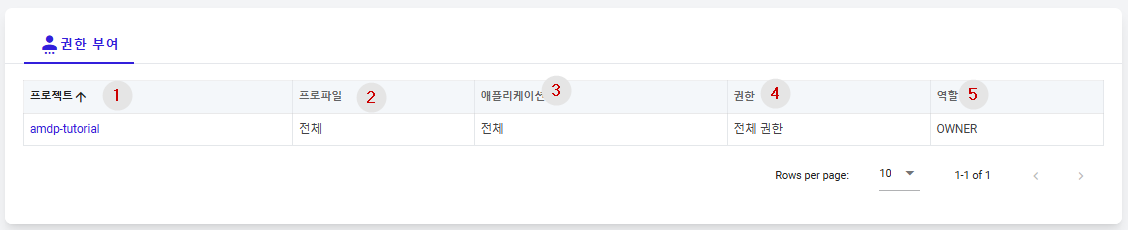
① Project: The name of the project where the user is assigned authority. Selecting the project name navigates to the project management menu of that project.
② Profile: The name of the profile in the project where the user is assigned authority. Either All or individual profile names.
③ Application: The name of the application assigned for authority. Either All or individual application names.
④ Authority: Displays the authority assigned for the application. Depending on the assigned authority, it is displayed as Full Authority, Read and Execute Authority, or Read Authority.
⑤ Role: The user's role in the project, either as a project manager or a regular user (authority grantor). Project managers are OWNER, regular users are MEMBER.
User Registration and Deactivation
User registration and deactivation can only be performed by SYSTEM ADMINISTRATOR accounts. There is currently no option to delete users; they can only be deactivated. However, there is currently no way to reactivate deactivated users.
User Registration
Explains how a SYSTEM ADMINISTRATOR account can add new users.
- Select the User Management menu to navigate to the user list page. Click the ADD button on the user list page.

- Enter the details for the user to be registered:
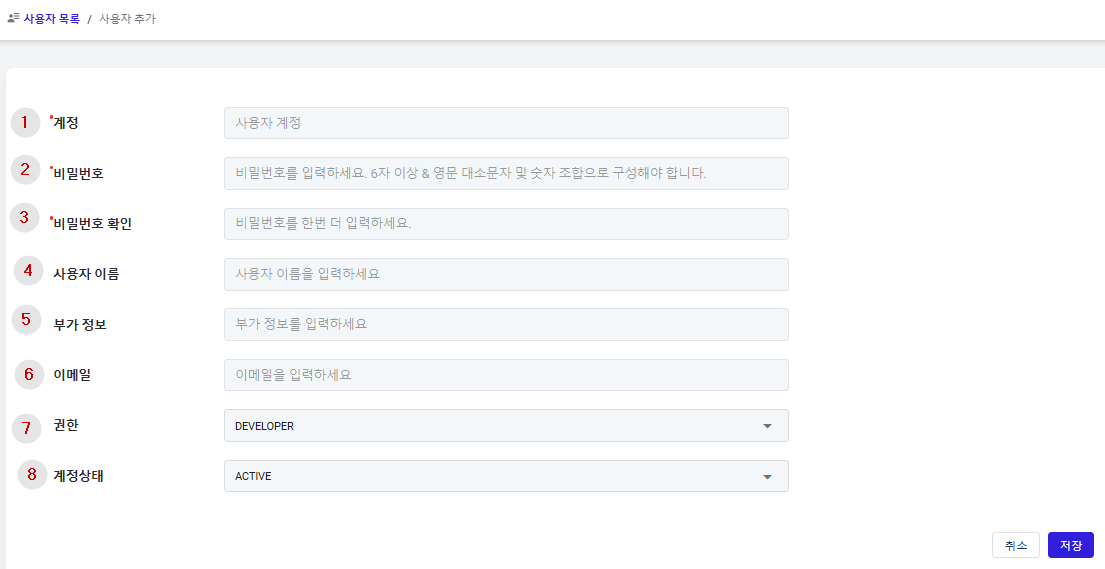
① Account: (Mandatory) The name used for logging into AMDP.
② Password: (Mandatory) The password used for logging into AMDP.
③ Password Confirmation: (Mandatory) For typo prevention in password entry.
④ Username: The name displayed for the user.
⑤ Additional Information: Team or other additional information about the user.
⑥ Email: The user's email information.
⑦ Authority: The authority assigned to the user. Choose between SYSTEM ADMINISTRATOR and DEVELOPER.
SYSTEM ADMINISTRATORhas access and management permissions for all management menus but only has access permissions for all projects.DEVELOPERhas permissions for specific projects and no access to management menu but can access project management menus and manage specific projects if they are project administrators.
⑧ Account Status: Determines the initial user status (ACTIVE / INACTIVE) upon registration.
User Deactivation
Describes the method for a SYSTEM ADMINISTRATOR to change a specific user's account
status to inactive. Inactive users cannot log in.
- Select the User Management menu and proceed to the user list page.
Navigate to the user modification page by clicking the Action button for the account of the user to be deactivated.

- In the user modification pop-up window, change the Account Status to
INACTIVEand then select the save button.
- The inactive user will no longer be able to log in.
User Information Modification
Explains how a SYSTEM ADMINISTRATOR can modify (change) a specific user's information.
As user registration is only possible through a SYSTEM ADMINISTRATOR account, all information except Password can be modified (changed) only by a SYSTEM ADMINISTRATOR.
- Select the User Management menu to navigate to the user list page. Click the Action button for the user account to be modified to navigate to the user modification page.
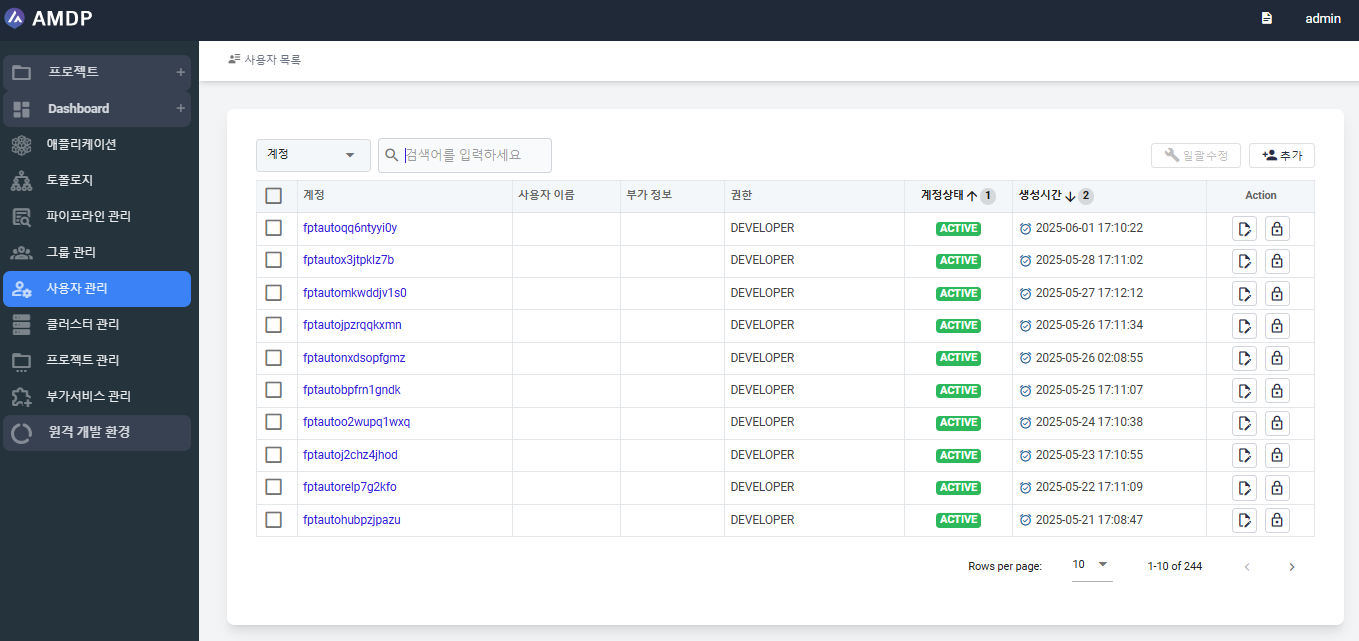
- Make necessary modifications (changes) in the user modification pop-up window and save. Note that Email cannot be changed.
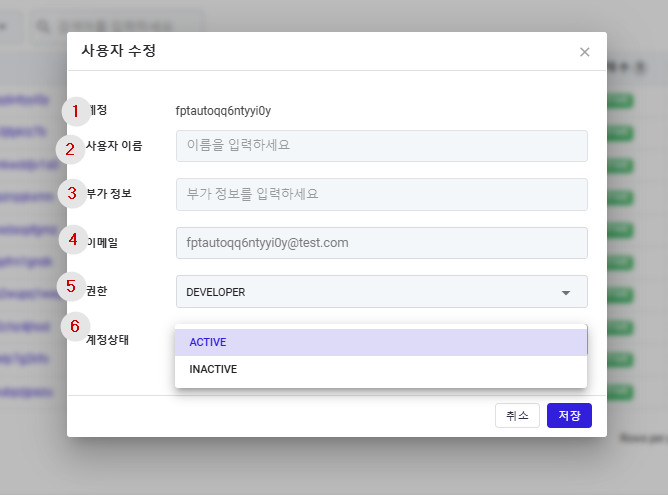
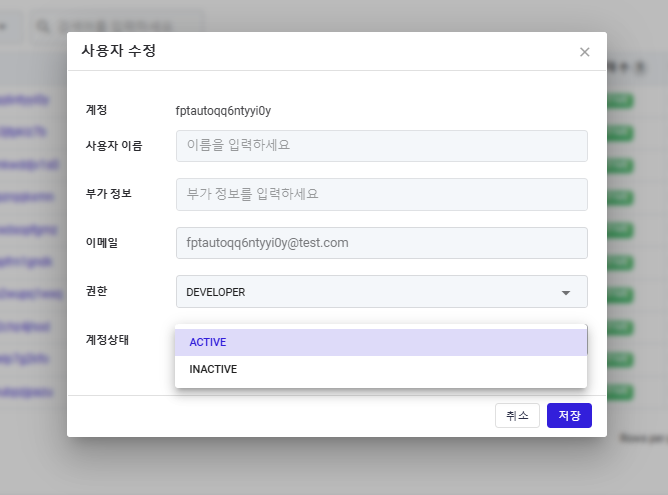
① Account: The registered user account (ID) cannot be changed.
② UserName: The user's name, as displayed in certain functionalities, can be altered.
③ Additional Information: Similar to the username.
④ Email: Used in specific functionalities and is a unique address that cannot be changed.
⑤ Permissions: The user's permissions can be adjusted.
⑥ Account Status: The user's account status can be changed to either ACTIVE or INACTIVE.
- Admin can update multiple users at once from the user list, instead of editing each user individually through Bulk Edit function.
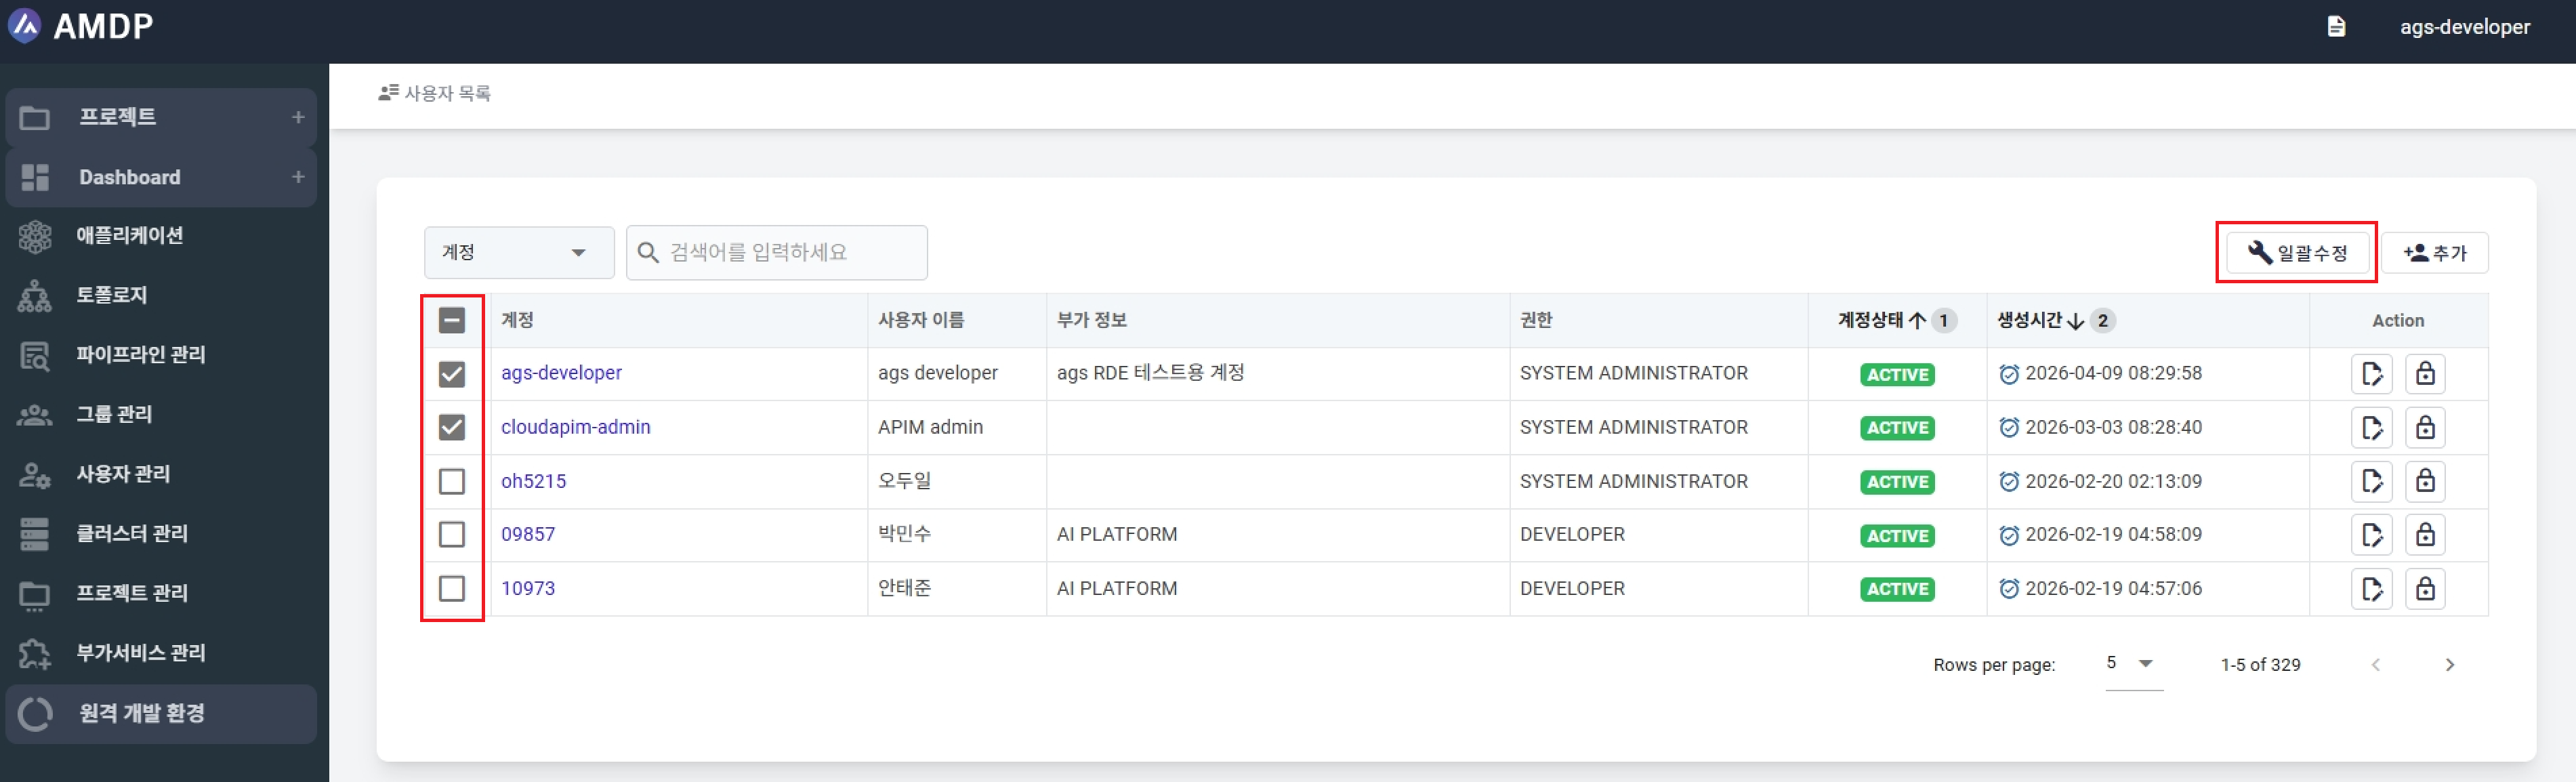
After selecting users and clicking Edit, the system opens the Edit popup:
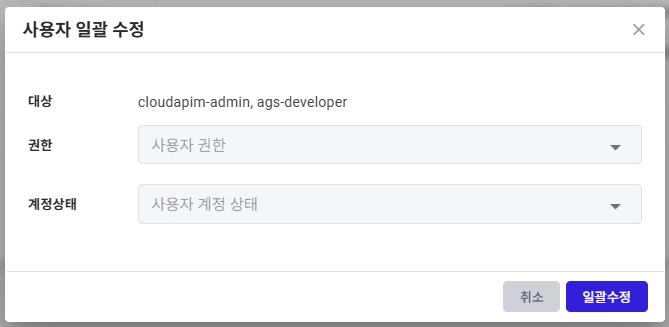
- Role: Set a role for all selected users.
- Account Status: Set an account status for all selected users.