Create users and set user permissions
User or Group Creation
Only users with ADMINISTRATOR privileges can manage User/Group settings.
User Creation
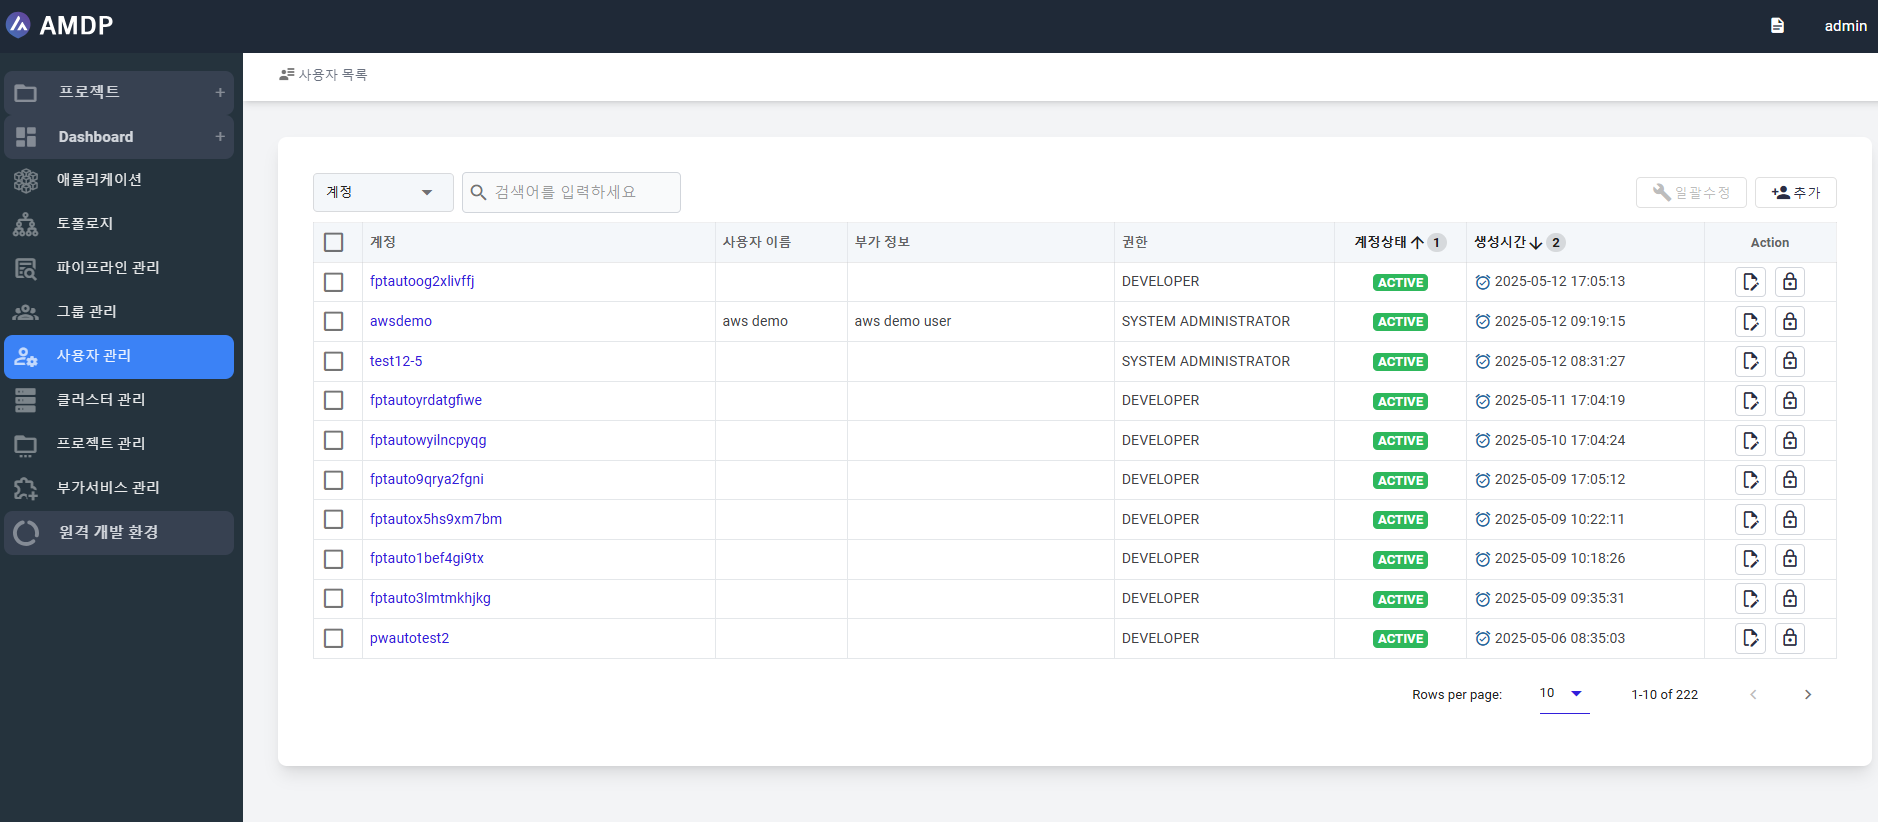
Select the User Management on the menu. Click the ADD button on the user list page to go to the user addition page.
On the user addition page, enter the details of the user who will be the administrator of the project. Set the user's role as SYSTEM ADMINISTRATOR and fill in the rest as desired.
Click SAVE button to register the user.
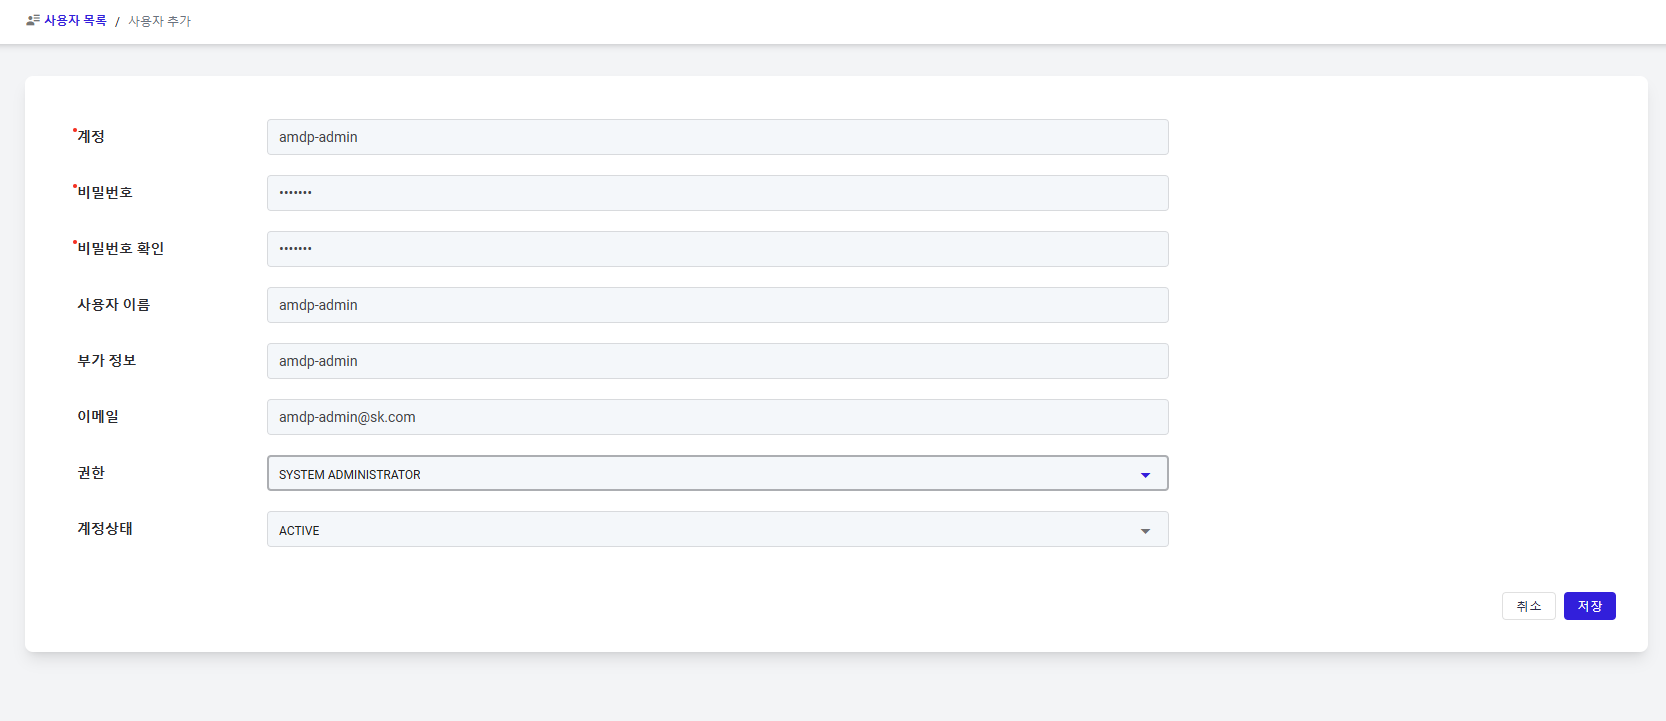
The password must be at least 6 characters in length and is combination of uppercase, lowercase and numbers.
Additionally, enter details for a general user of the project, also with DEVELOPER privileges.

Group Creation
Select the Group Management menu. Click the ADD button on the group list page to go to the group addition page.

On the group creation page, enter as the group name and add an optional description. Click the ADD button in the user list to select users to add.
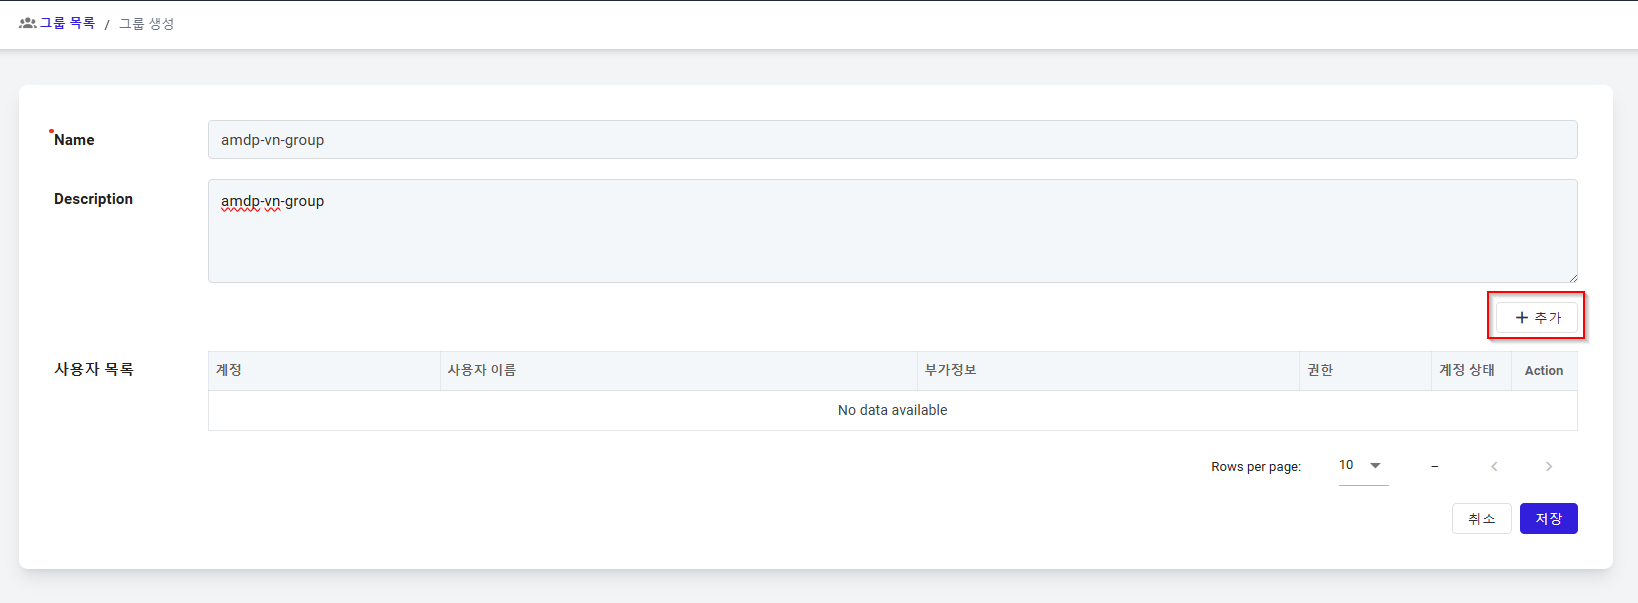
Search and select the user to add.
Click SAVE button to create the group.

Project Permission Settings
Granting Project Administrator or User Permissions
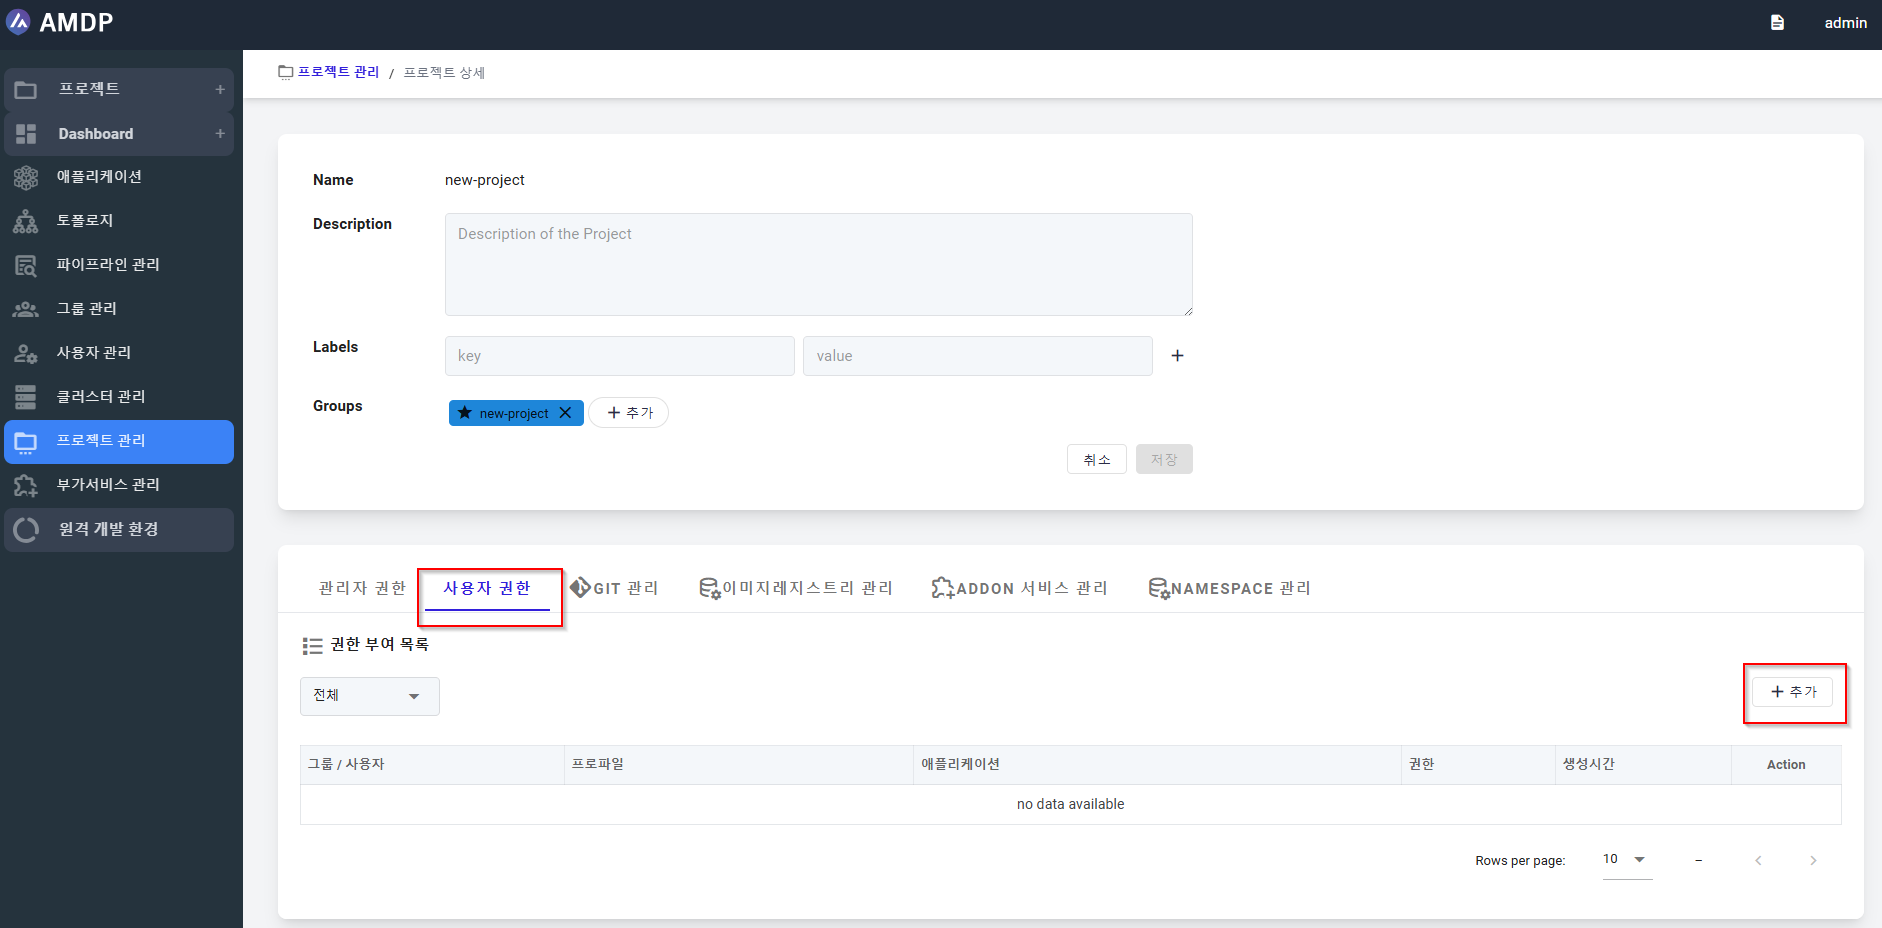
Select the Project Management on the menu, then choose the registered project name
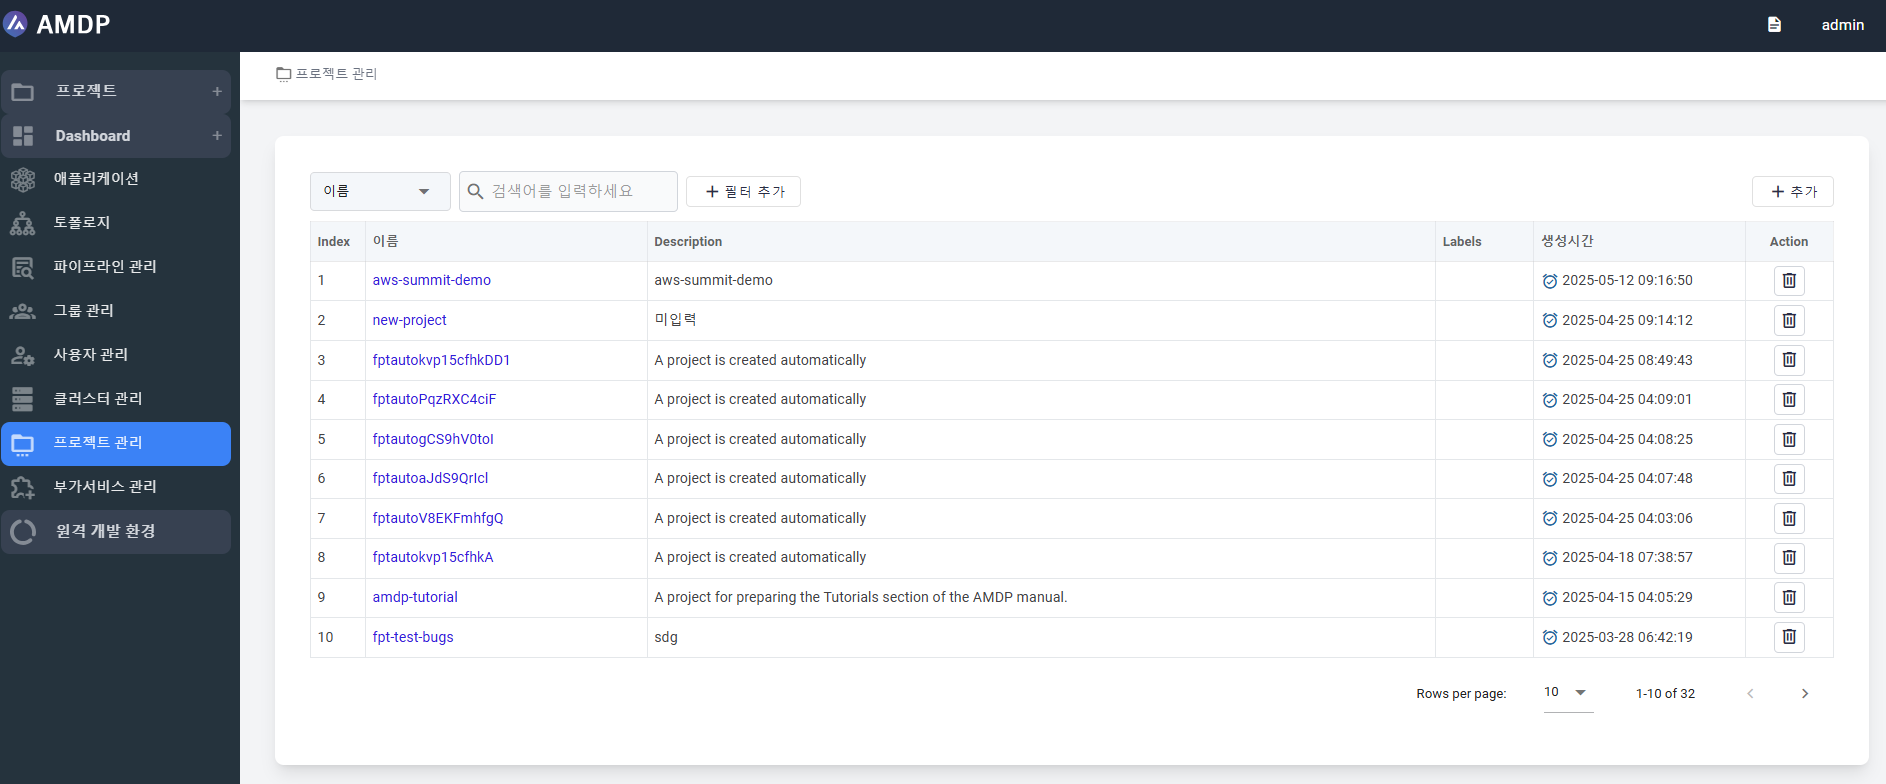
When the registered project is chosen, the Project details page is displayed:
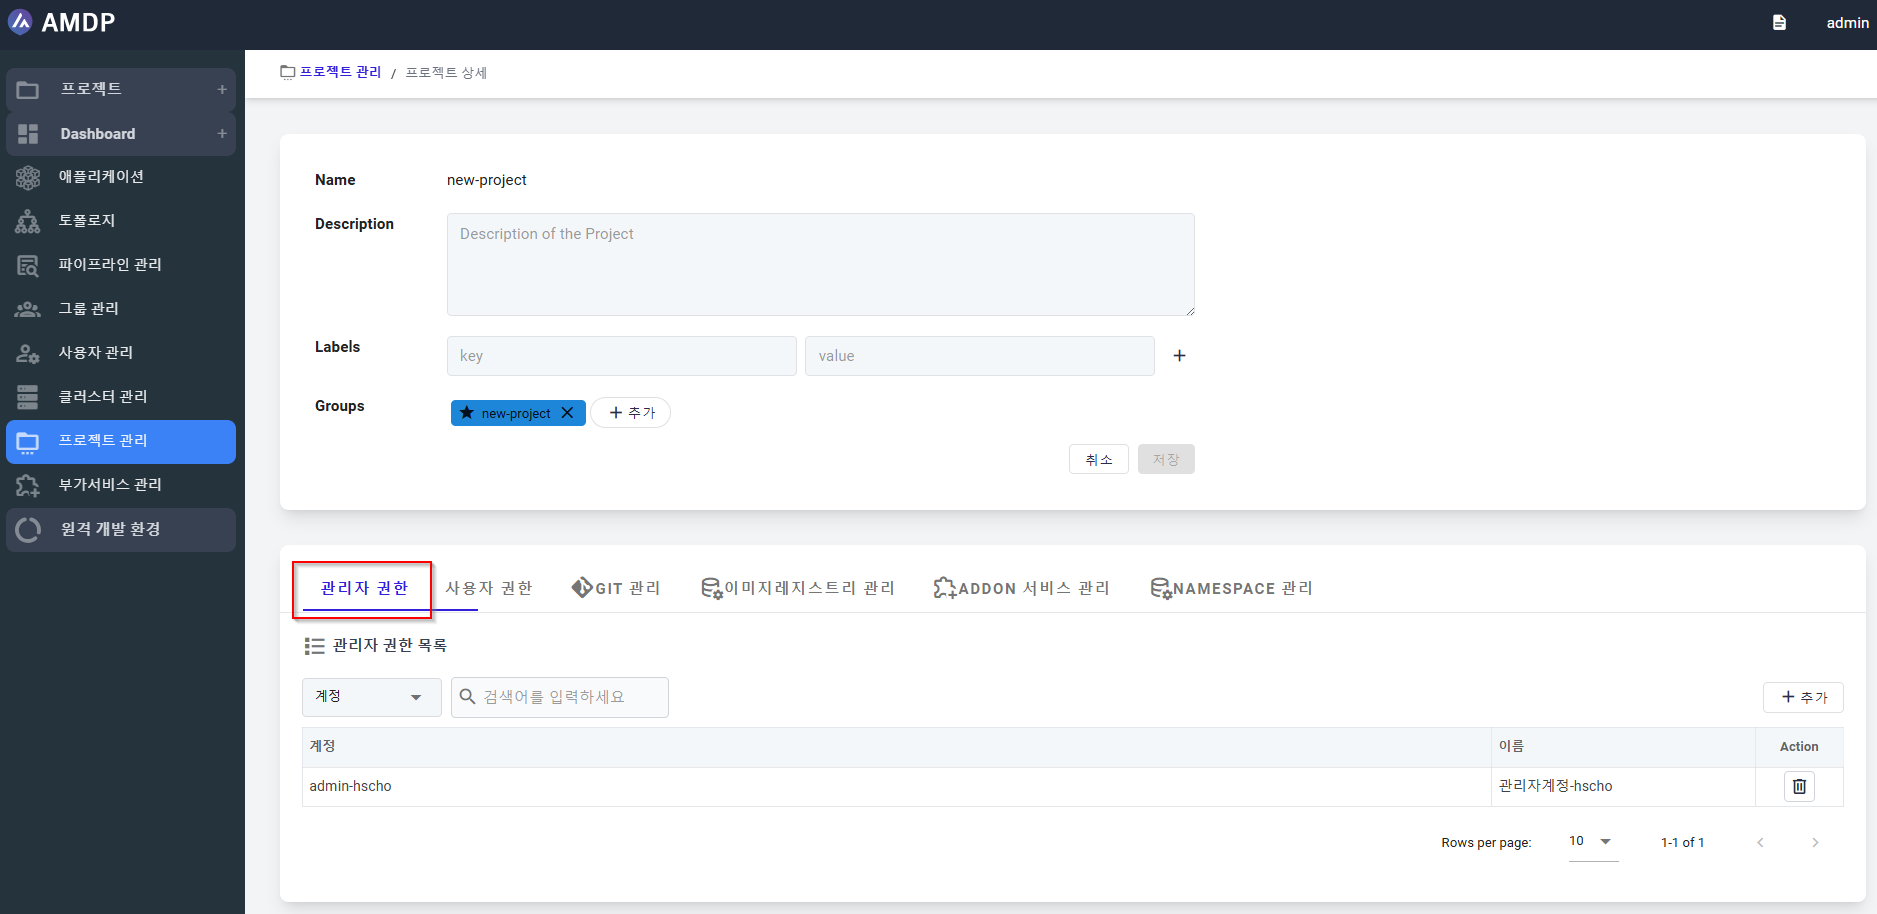
Administrator Permissions
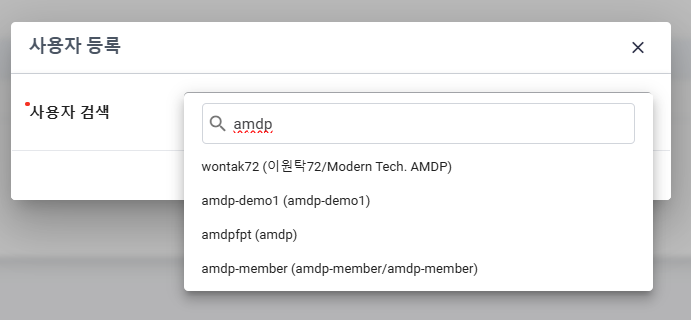
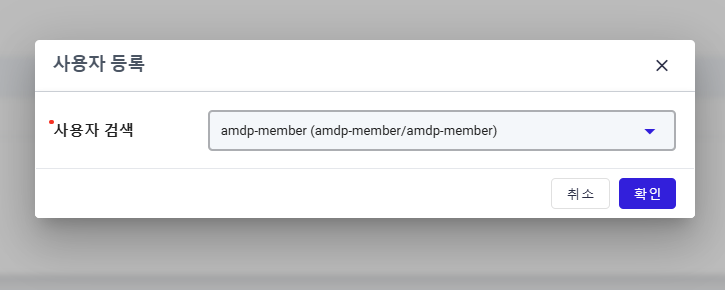
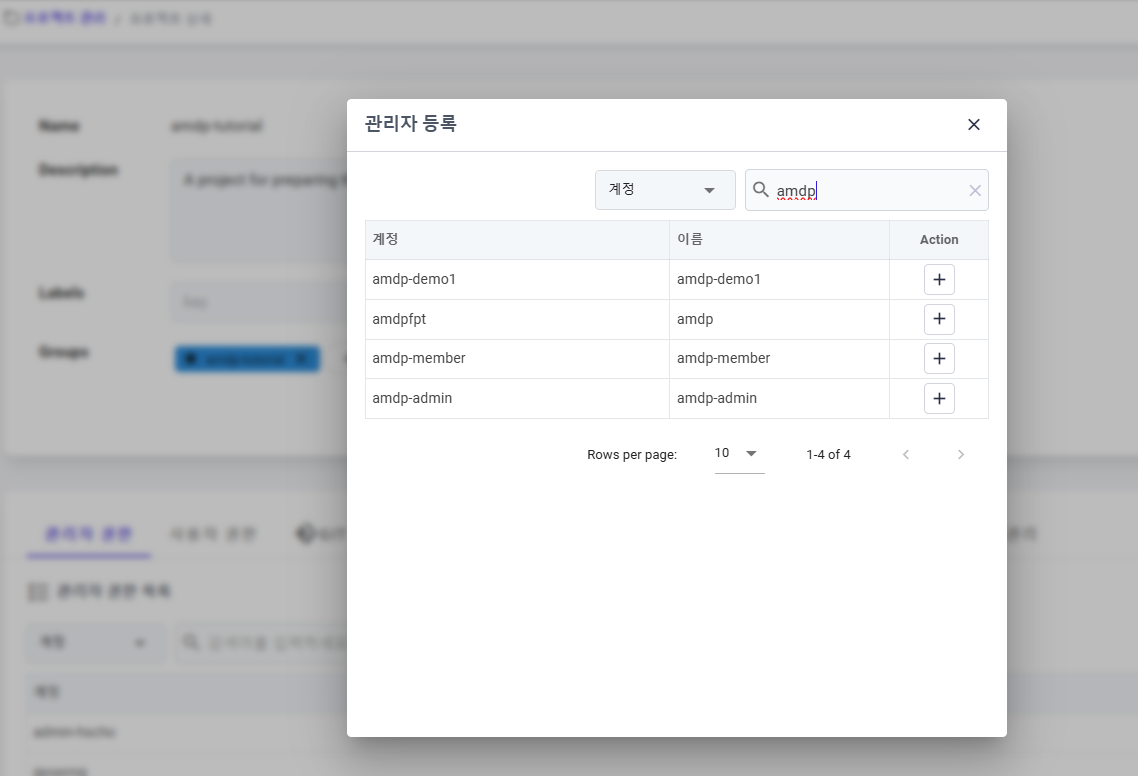
In the Administrator Permissions tab, click the ADD button to search for the user “amdp-member”, then press the button under Action to register.
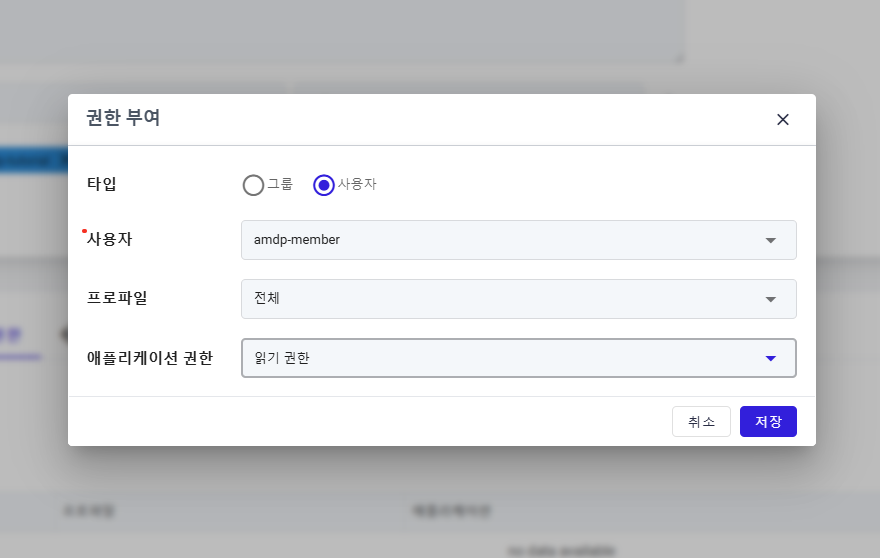
User Permissions
Click the ADD button in the User Permissions tab.
Choose ‘User' as the target option, then select an item from the user list.
Since the profile is not created yet, select All in the Profile section and set Read Permission for Microservice Permissions.
Selecting All for the profile will grant batch permissions for all microservices.