Create Application
Application Registration
Only accounts registered as Project Administrators can register applications. System Administrators can only view and need to be registered as a project administrator to have permissions.
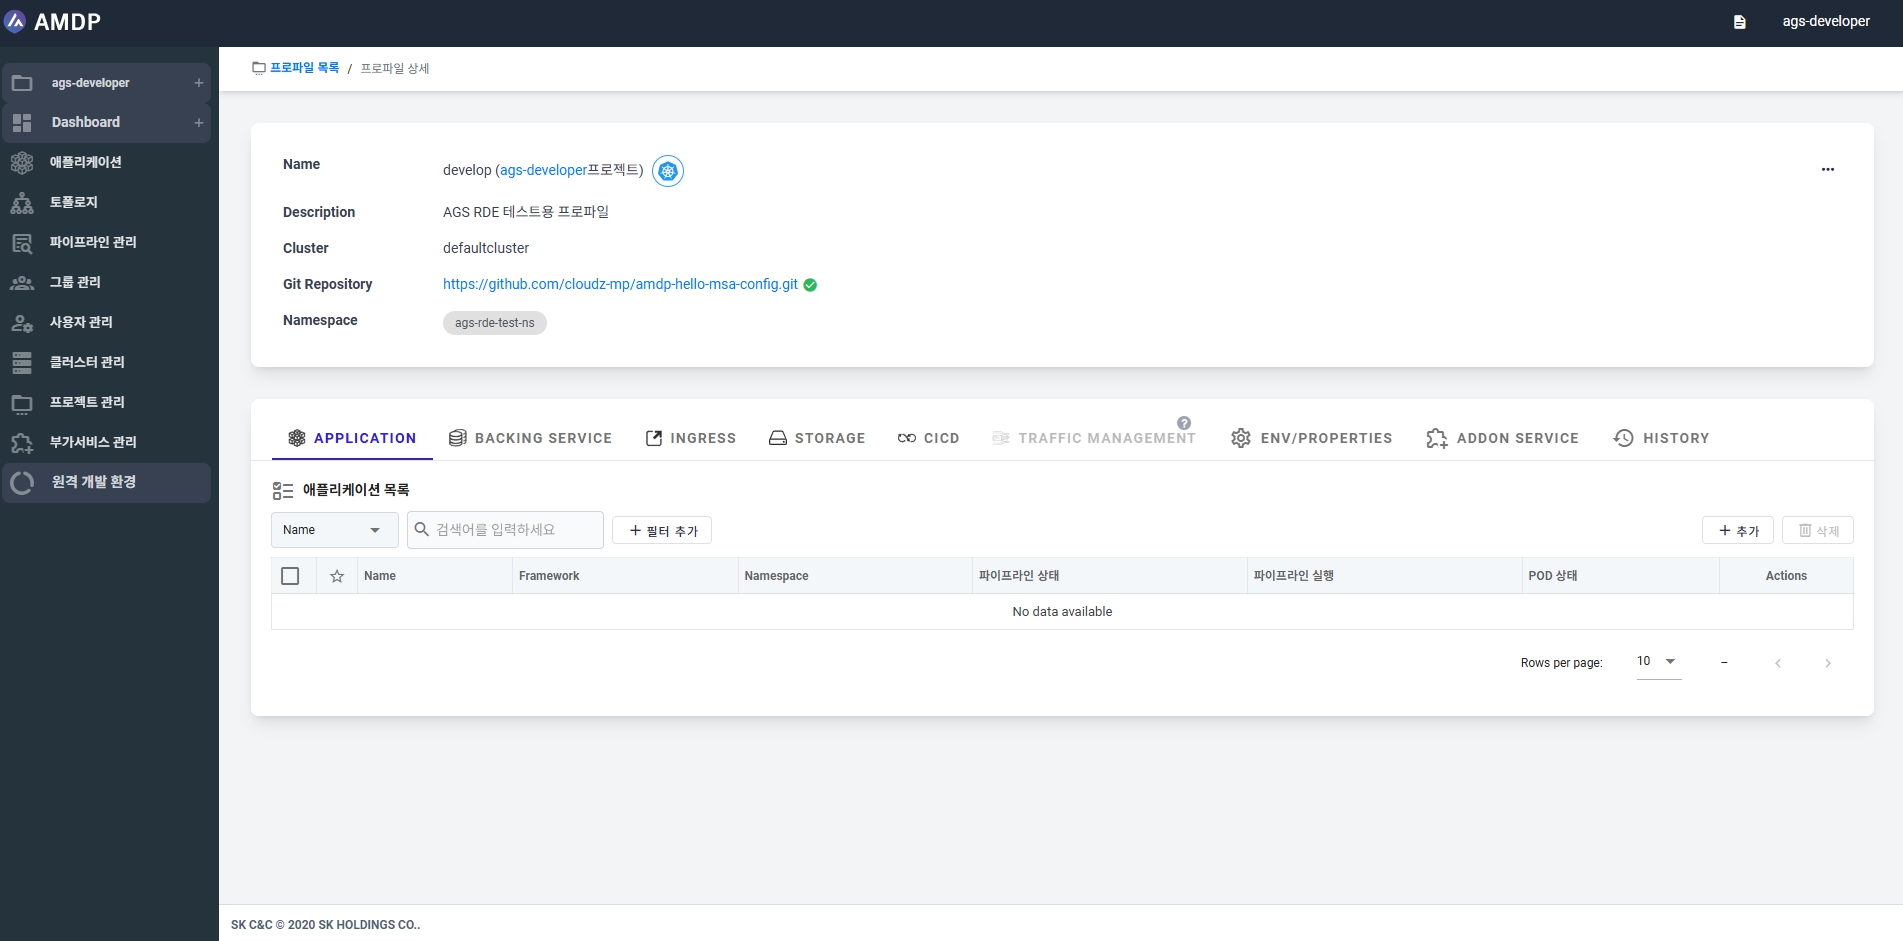
- Select the APPLICATION tab on the profile page. Click ADD button in the application list.
-
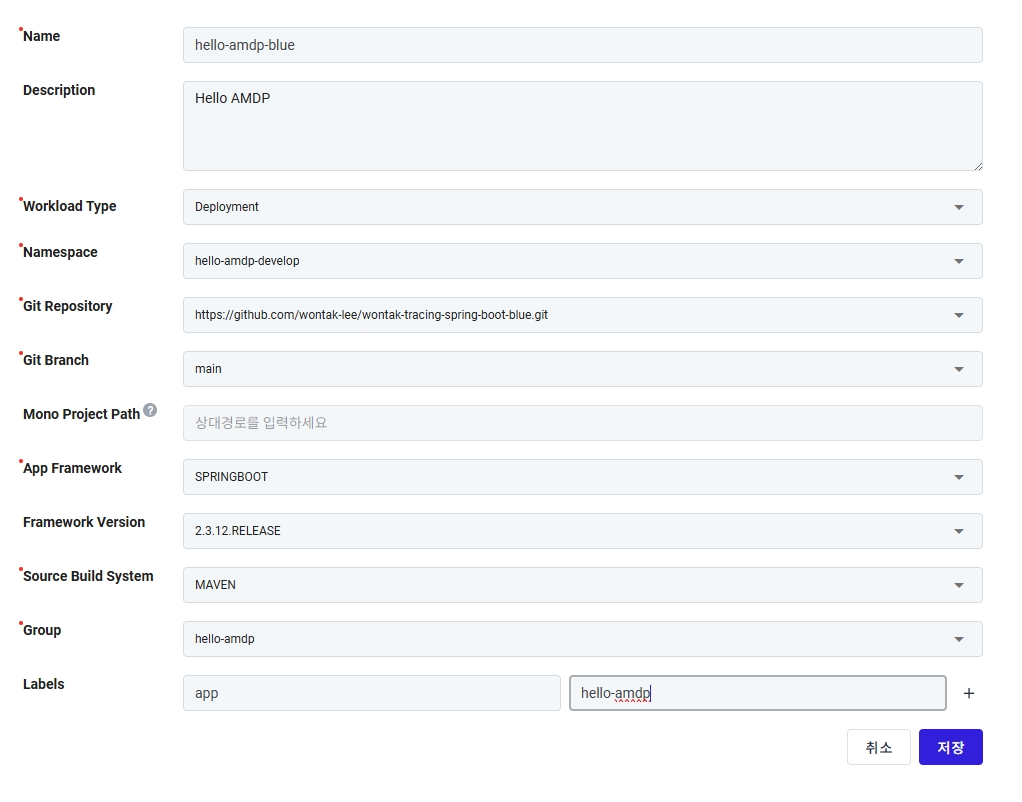
Enter the basic information for the application on the Add Application page as shown in the image below
-
Choose Deployment as the Workload Type.
-
Select SPRINGBOOT as the App Framework and choose the framework version used in the application.
-
Choose MAVEN as the build system.
-
Select hello-amdp group.
-
Additionally, enter
app=hello-amdpin the Labels.
. Finally, click the Save button at the bottom right to register the new application.
Application Database Registration
Only accounts registered as Project Managers can register BACKING SERVICES. The System Administrator account can only view and must be registered as the project manager to have permissions.
-
Select the BACKING SERVICE tab on the profile page. Click the ADD button in the application list.
-
Enter the database to be used by the application as shown in the image below.
-
Enter a name for distinguishing the database and select the database type. In this example, MariaDB is used.
-
Enter the JDBC address for connecting to MariaDB.
-
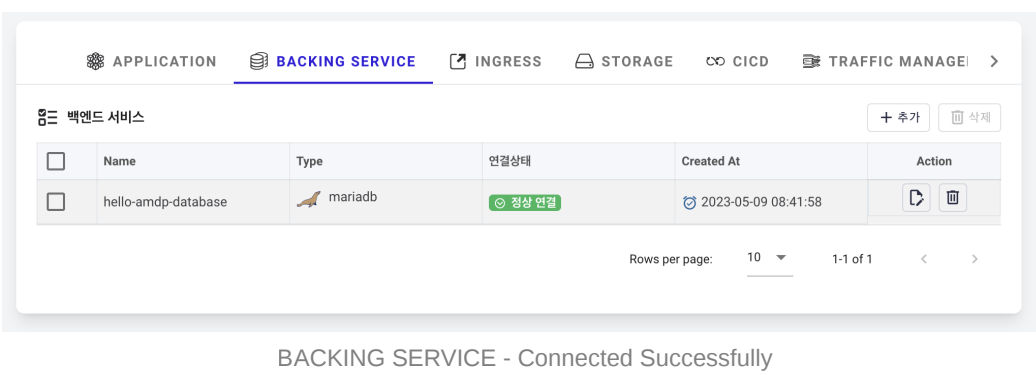
Enter user authentication information and click add to complete the registration.

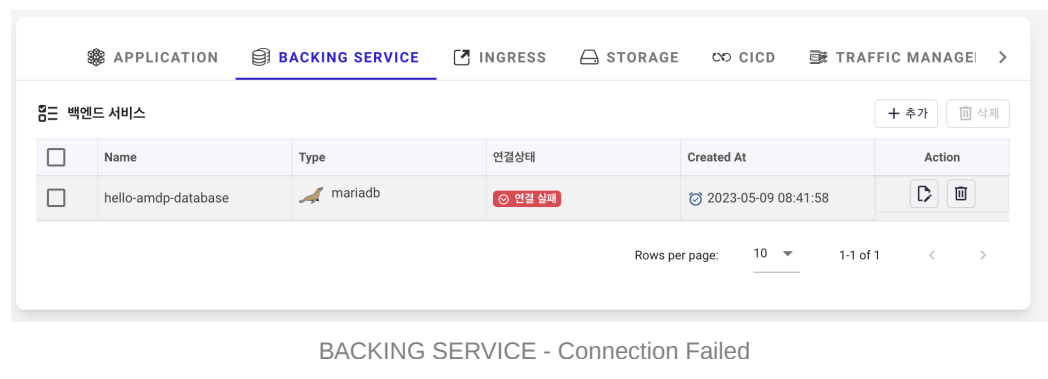
- If registration is successful and the information entered is correct, the connection status will be Connected Successfully
-
If the registration or authentication information is incorrect, the connection status will be Connection Failed
Connecting the Application and Database
Only accounts registered as Project Managers can modify applications. The System Administrator account can only view and must be registered as the project manager to have permissions. Also, users with full permissions for the respective application (it's about pipeline permissions) cannot modify it.
Configure settings to connect the hello-amdp-database registered for use in the hello-amdp-blue application.
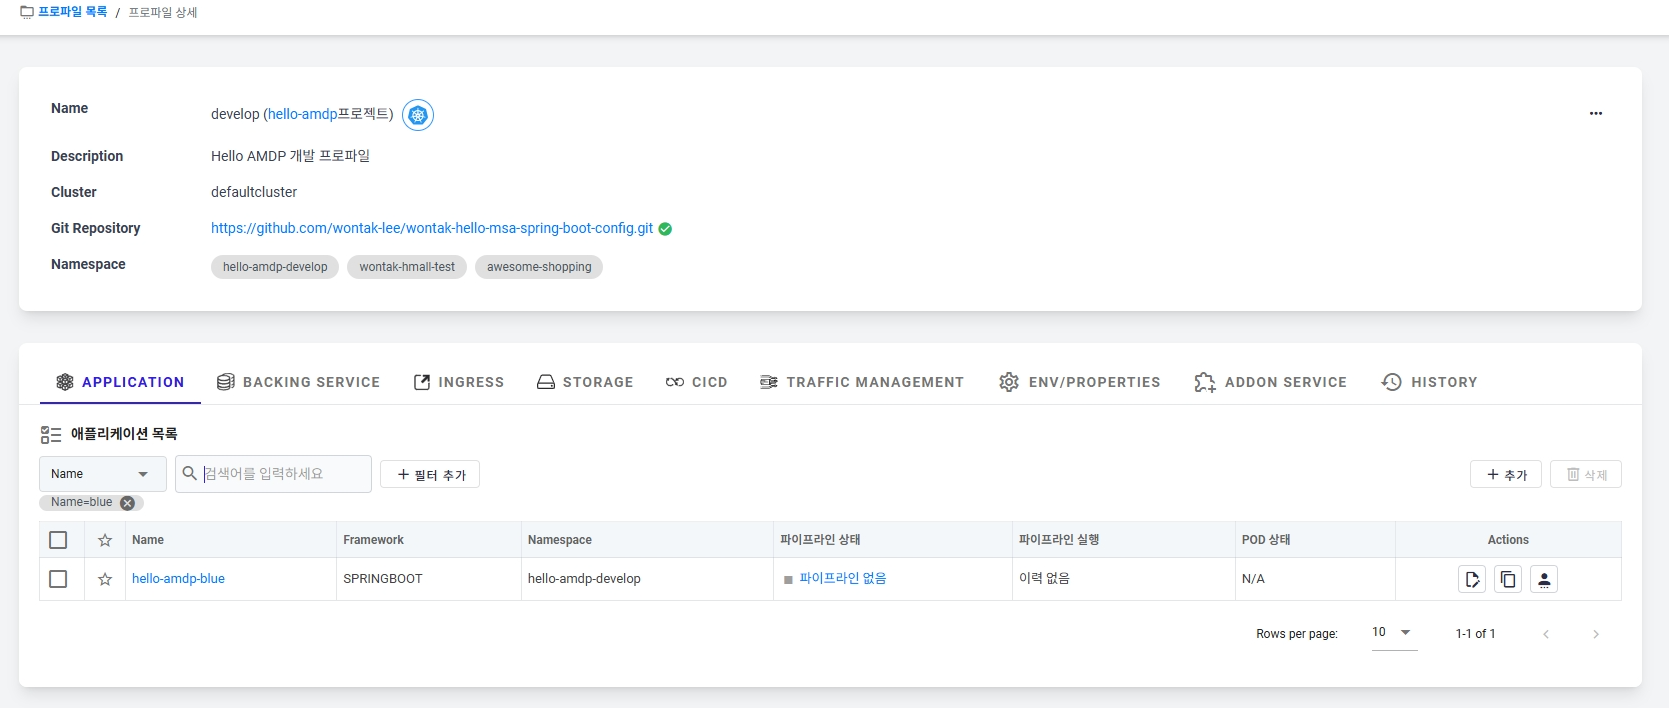
- In the APPLICATION tab, click the modify button among the Action buttons of the hello-amdp-blue application to go to the editing page.

-
On the application editing page, select the Basic Settings tab.
-
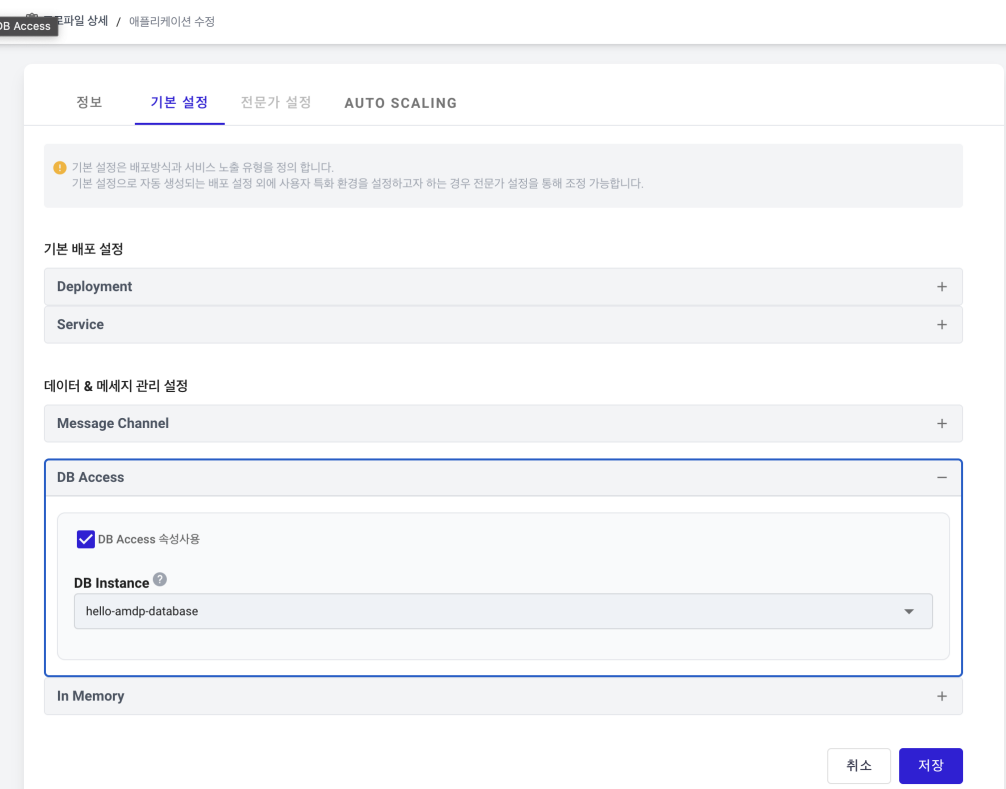
Expand the “+” button on the right of the DB Access in the Data & Message Management Settings section.
-
Check the DB Access properties checkbox and select the hello-amdp-database to connect to the DB Instance. Click the Save button to complete.
Application Storage Registration
Only accounts registered as Project Managers can register STORAGE. The System Administrator account can only view and must be registered as the project manager to have permissions.
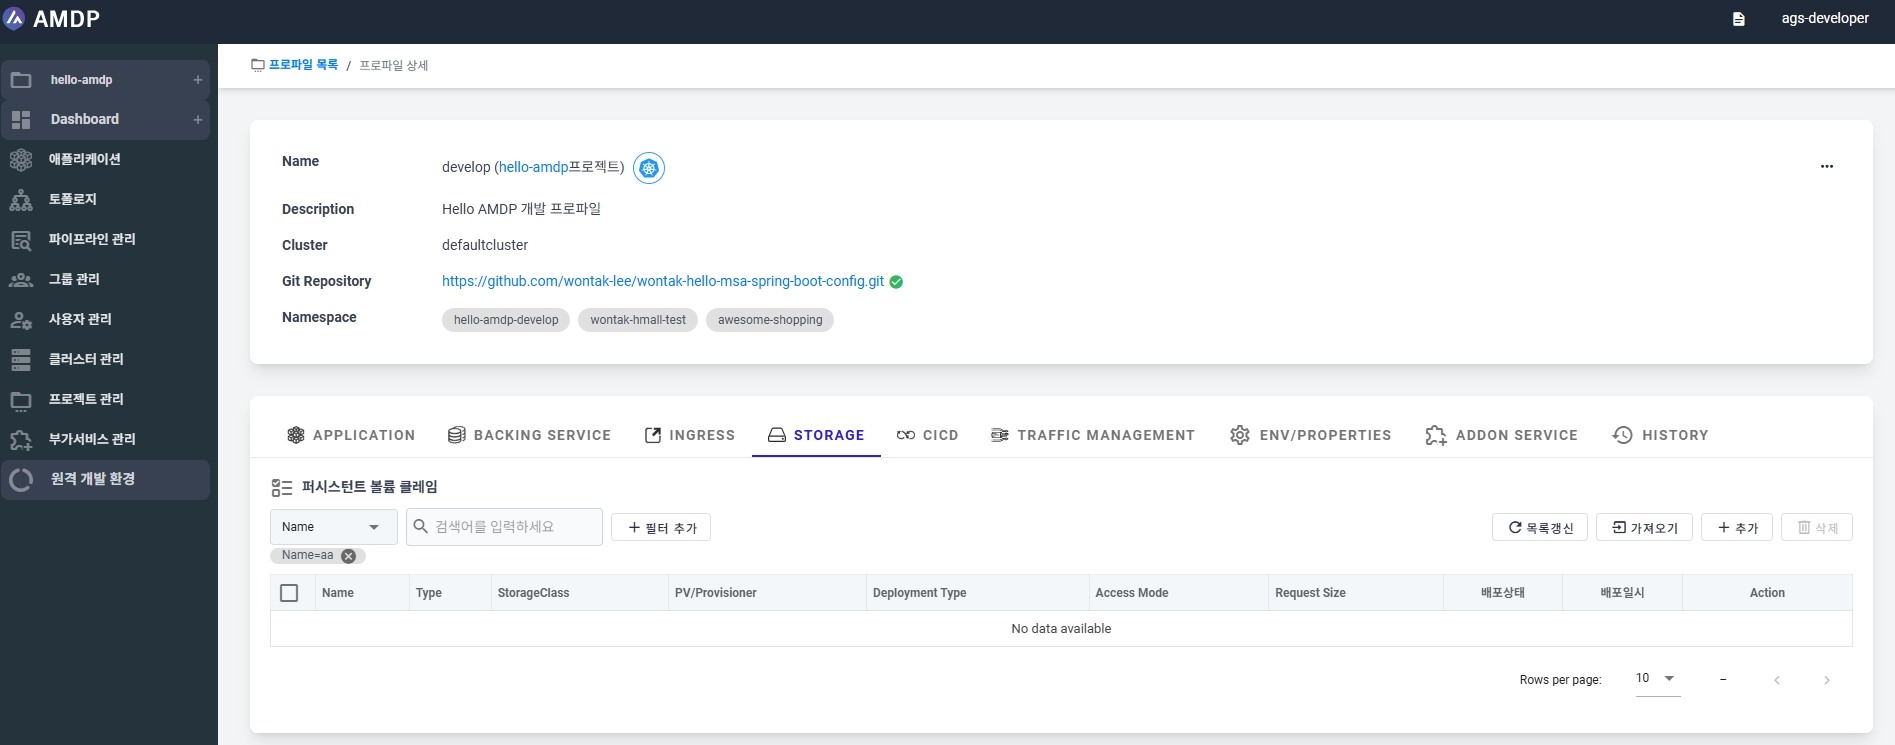
Create a Kubernetes Persistent Volume Claim (PVC) resource to connect to the registered storage (Persistent Volumes - PV).
-
In the STORAGE tab, click the ADD button to create a new PVC.
-
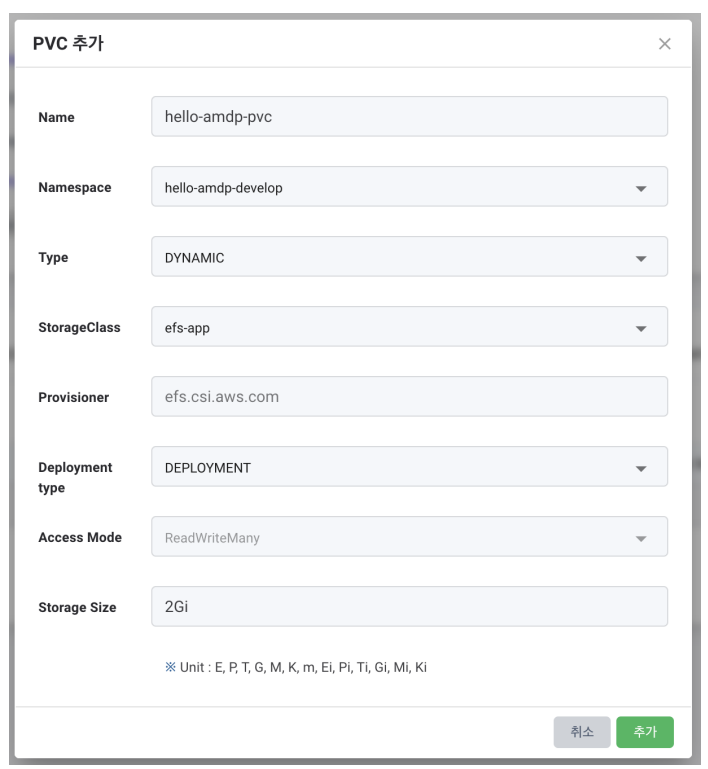
Enter hello-amdp-pvc in the Name.
-
Select the hello-amdp-develop where the application is deployed in the Namespace.
-
Select DYNAMIC as the Type.
In this guide, only provisioned storage registered in the storage class resources is used, hence the Dynamic type is used.
-
Select the StorageClass to use
Provisioned storage must be pre-registered in the Kubernetes storage class.
-
Select DEPLOYMENT for the Deployment Type as it's storage created for application use.
Deployment Type provides STATEFULSET DEPLOYMENT.
-
Access Mode is set to ReadWriteMany by default for access by multiple Pods.
-
Enter the Storage Size. Here, 2Gi is used.
Click the Add button to save the PVC
Deploying Storage (Resource Creation)
When new storage is registered, it exists only as data in AMDP and must be deployed using the Deploy button to create Kubernetes PVC resources. If the Dynamic type is chosen, PV and PVC are created using the specified storage class.
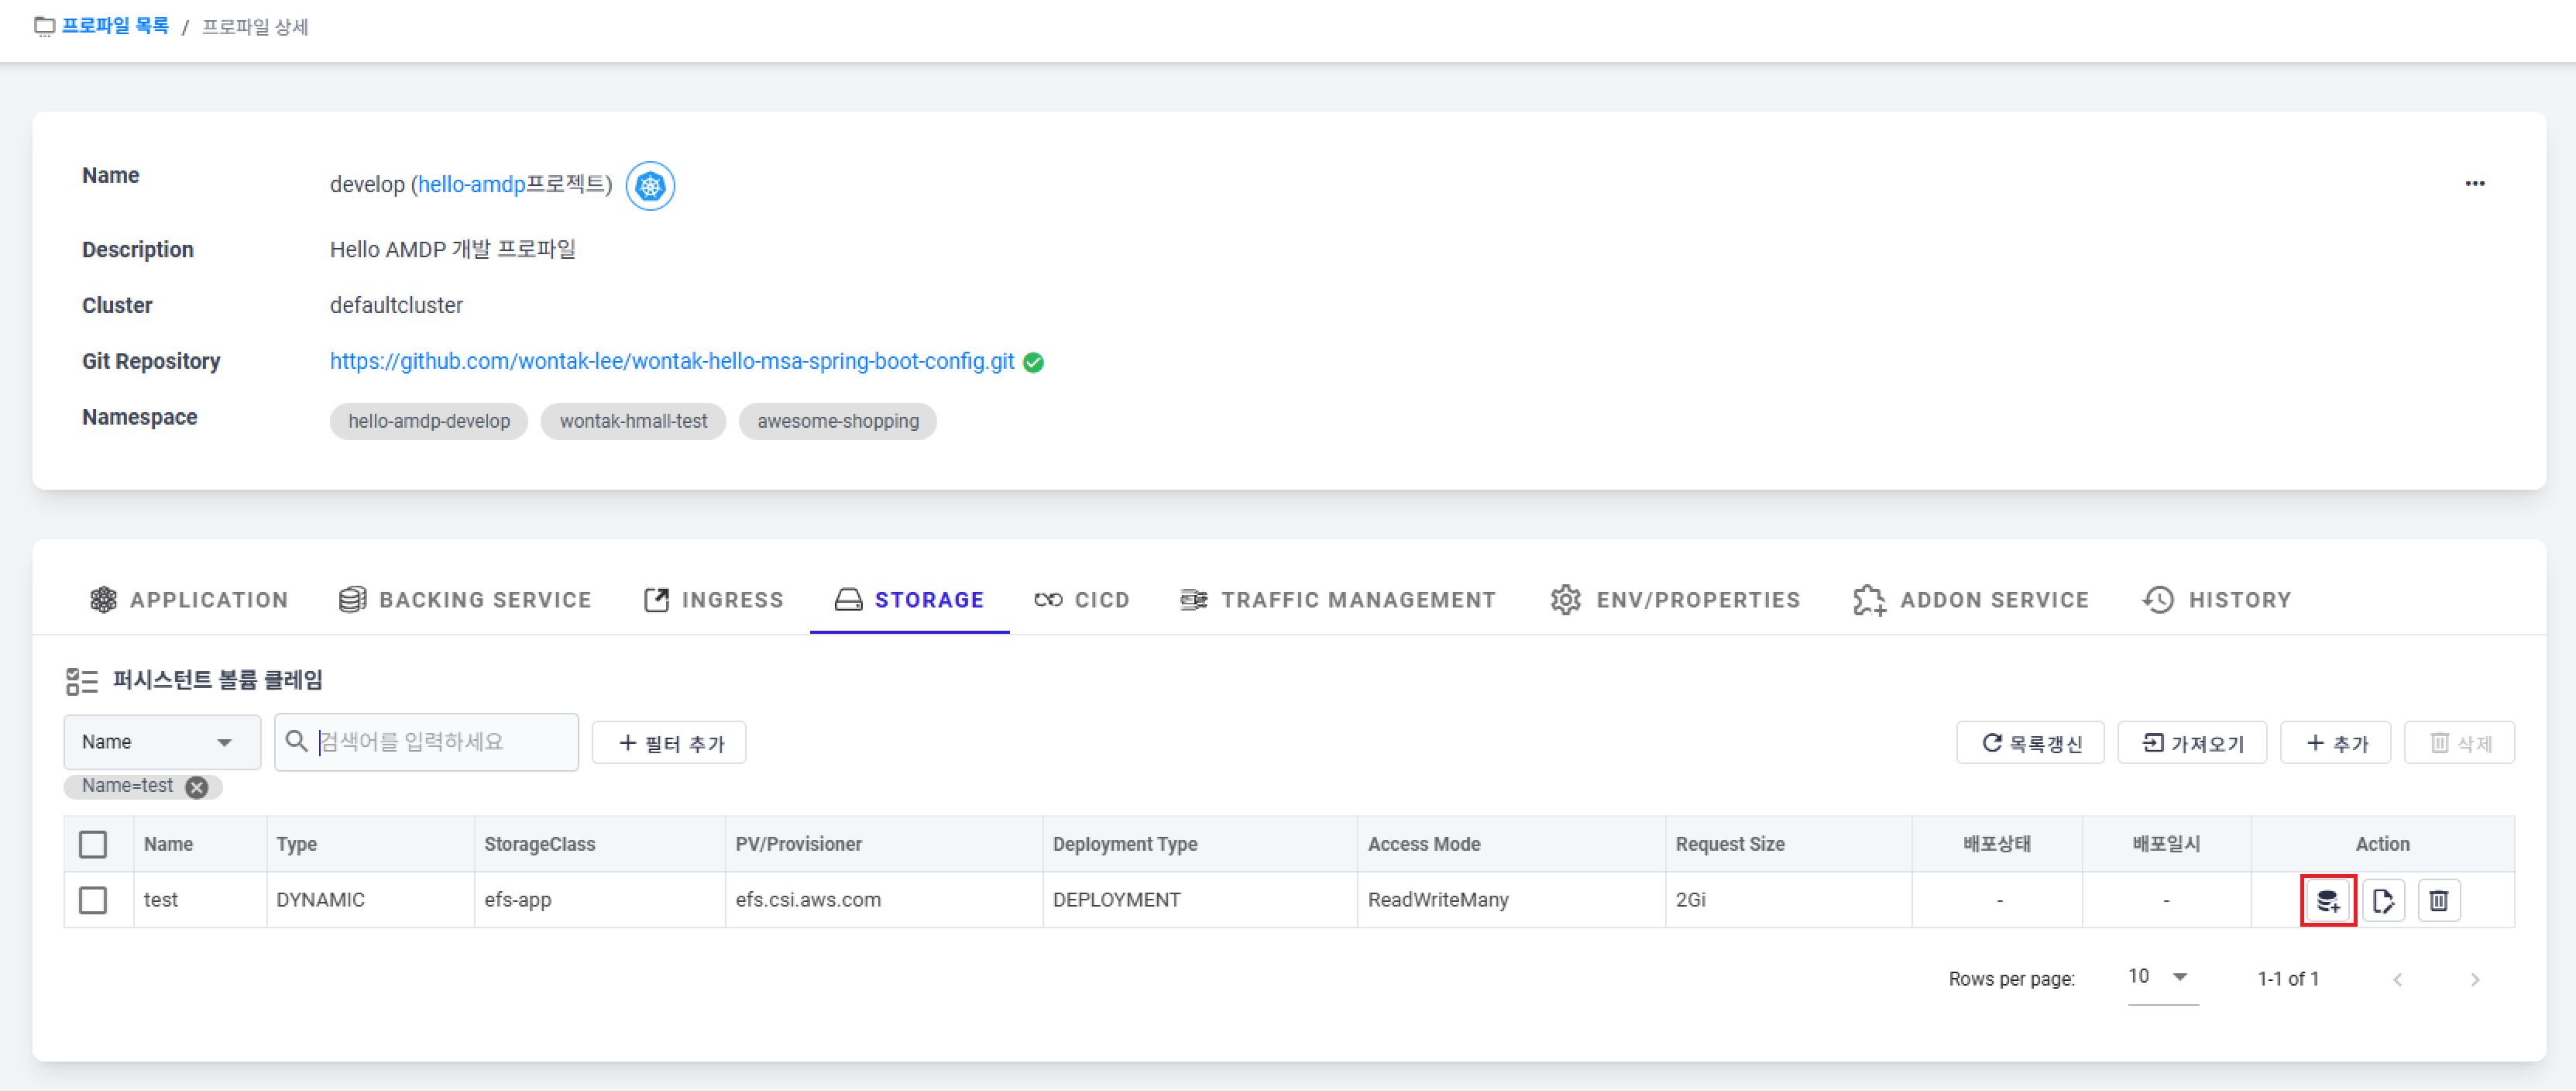
-
Click the Deploy button in the above image to create the PVC.
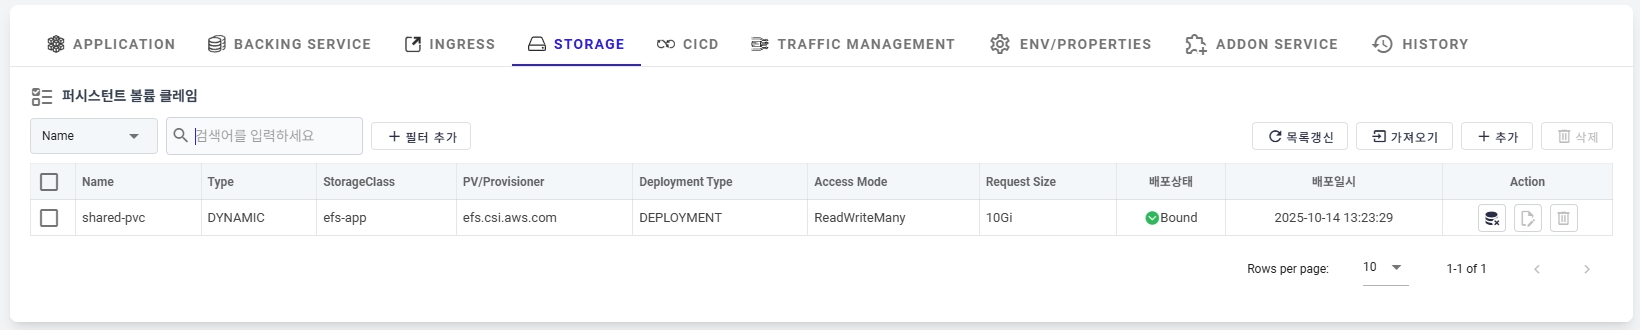
-
If the deployment status shows as Pending, it is being created. Refresh the page to see if the deployment status changes to Bound and the creation is completed.
Connecting Application and Storage (PVC)
Only accounts registered as Project Managers can modify applications. The System Administrator account can only view and must be registered as the project manager to have permissions. Also, users with full permissions for the respective application (it's about pipeline permissions) cannot modify it.
Configure settings to connect the hello-amdp-pvc registered for use in the hello-amdpblue application.
- In the APPLICATION tab, click the modify button among the Action buttons of the hello-amdp-blue application to go to the editing page.
-
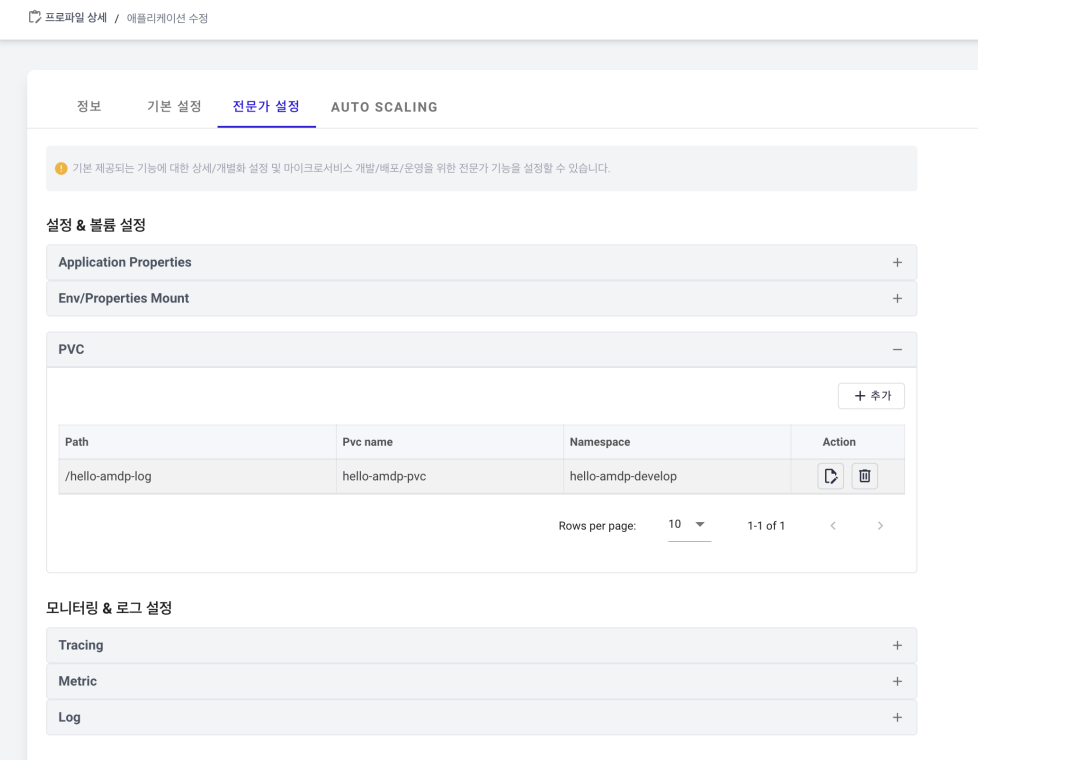
On the application editing page, select the checkbox for Expert Mode at the bottom of the Information tab.
-
Once the Expert Mode checkbox is selected, the Expert Settings tab is activated. Select the Expert Settings tab.
-
In the Settings & Volume Settings area, expand the PVC by clicking the “+” button on the right.
-
Click the ADD button on the right to select the mount path (hello-amdp-log) and PVC (hello-amdp-pvc).
-
Click the SAVE button at the bottom right to complete the settings.