Create Project and Profile
Project Creation and Settings
Only users with ADMINISTRATOR privileges can manage project settings
This guide explains the registration, configuration, and management of permissions for projects in AMDP. Projects can only be registered by SYSTEM ADMINISTRATORS . After a system administrator creates a project, users with administrative rights can be assigned. Individual users (DEVELOPERS) can be granted user permissions (read/write/execute) for specific profiles/applications. ADDitionally, it covers GIT management for profile settings and application repositories, and Image Registry Management for container-built images. Regular users registered as project administrators can manage and view the project, including its permissions and environment. For detailed information on the range of granted permissions, refer to the User Permission Management section.
Project Creation
- Select the Project Management menu. Click the ADD button in the project management list to go to the new project creation page.
-
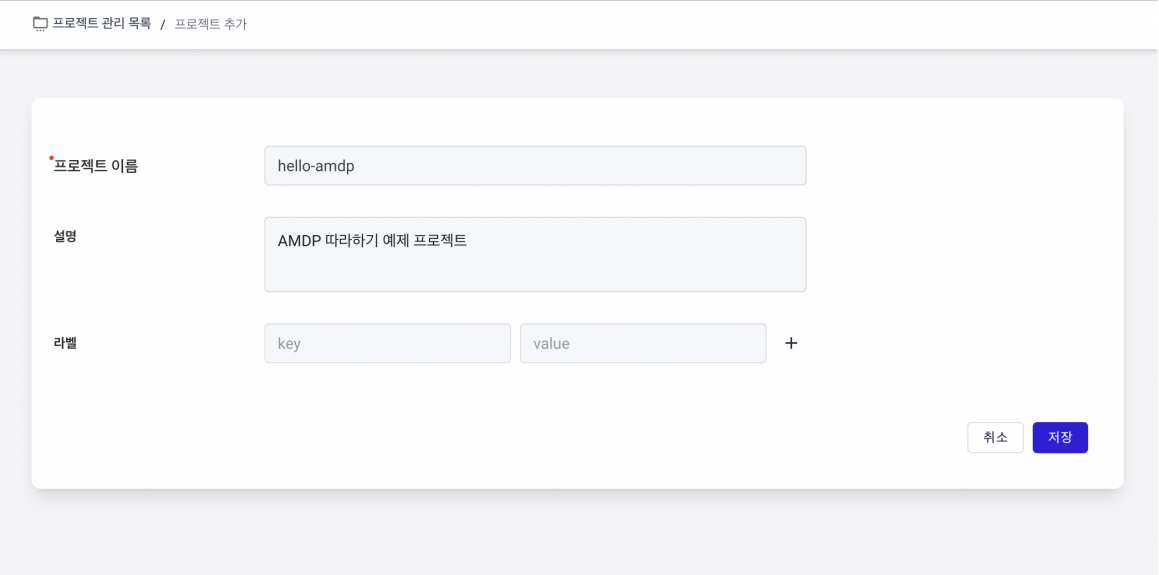
On the project Addition page, enter the project name and an optional description. Click SAVE to create a new project.
-
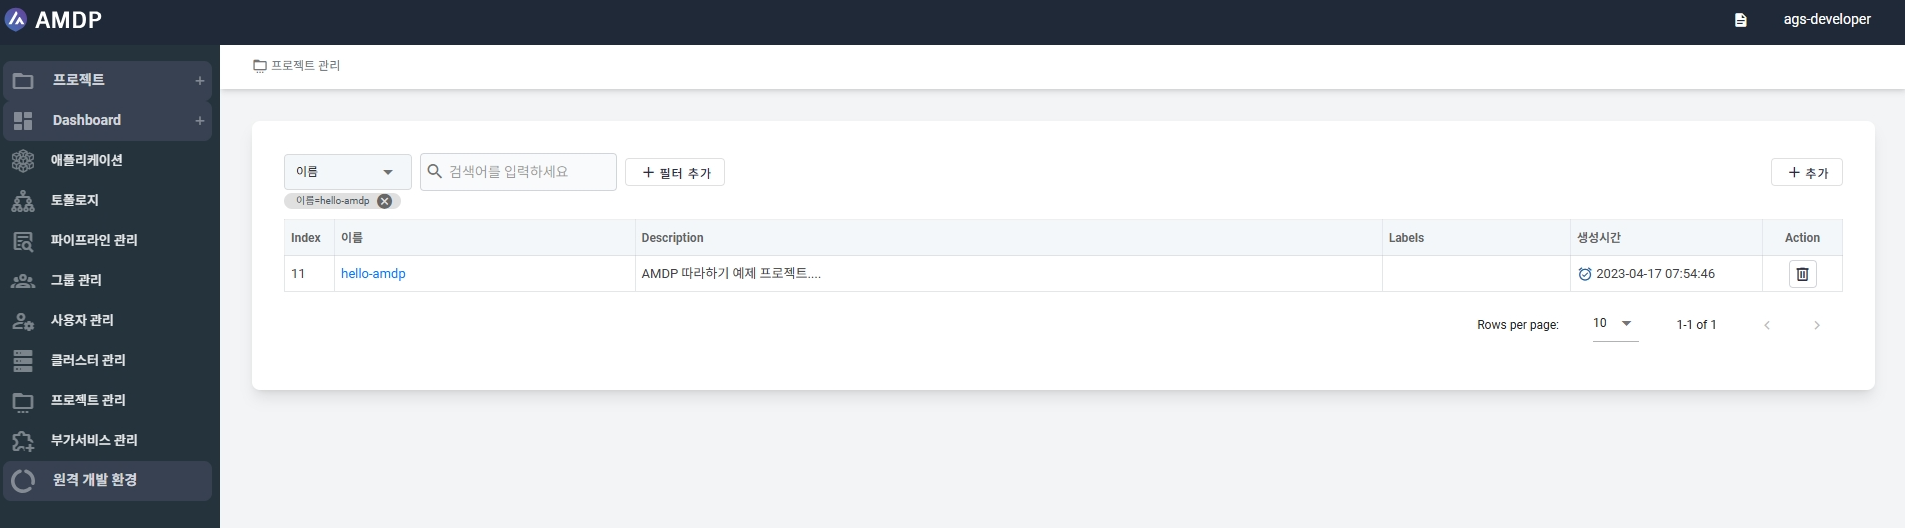
The created project appears as below. Admin rights and User rights are set after registering users.
Project Settings
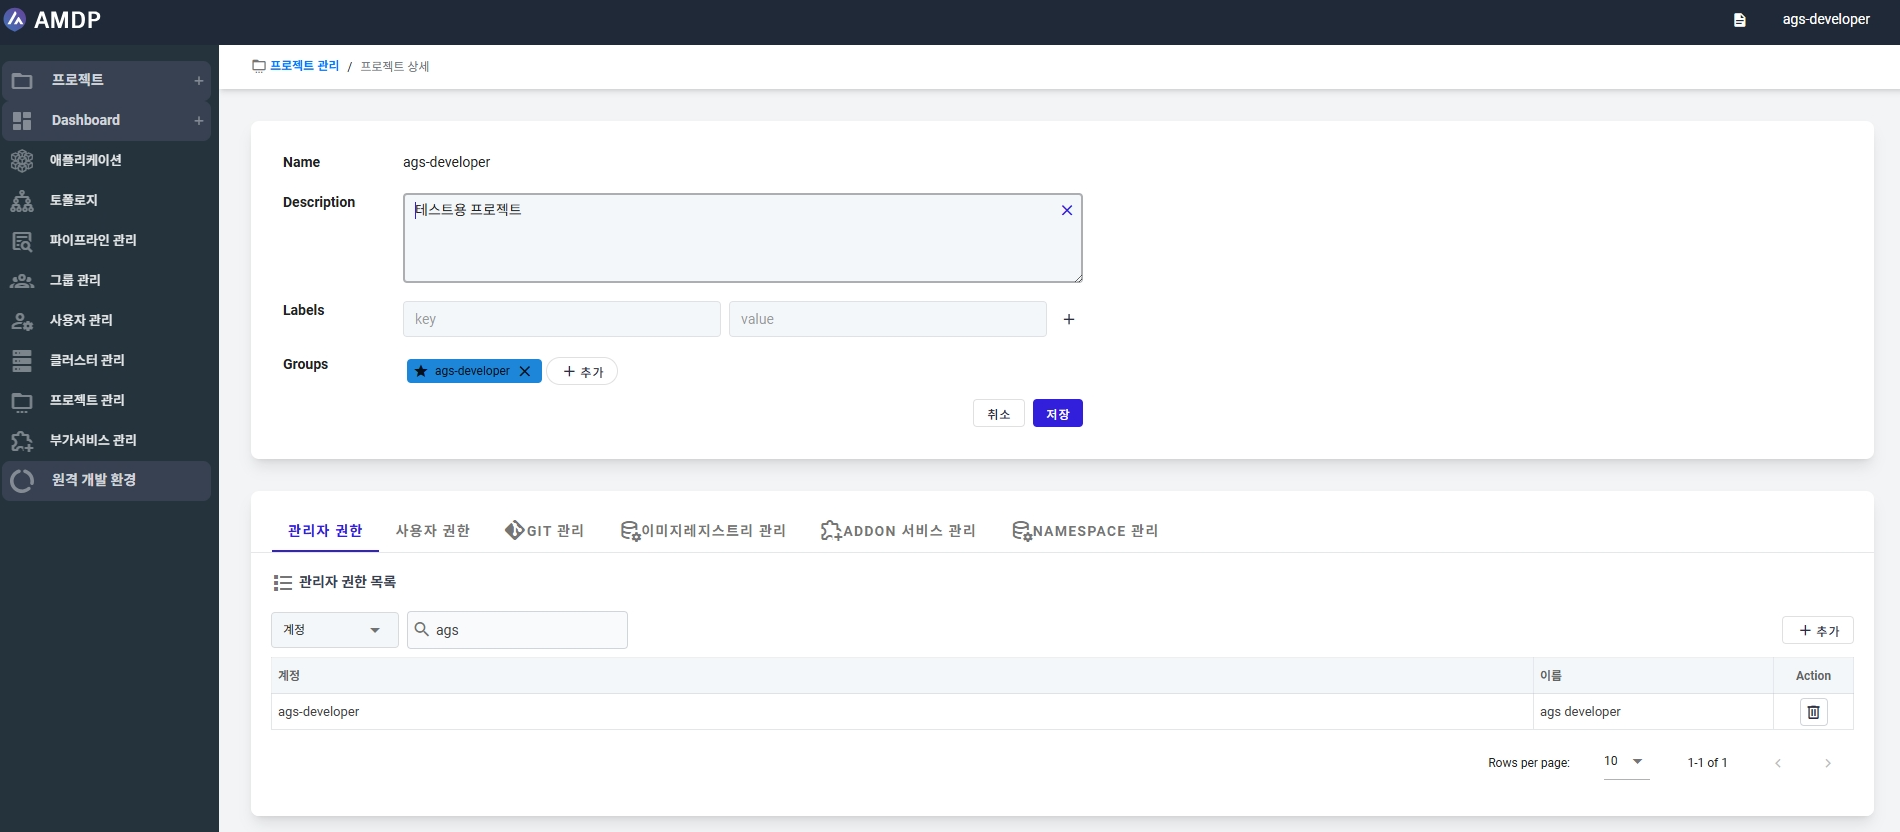
Administrator rights and user rights settings are done during user or group creation setting.
The Git information in this example is not real. All Git information must use actual user details.
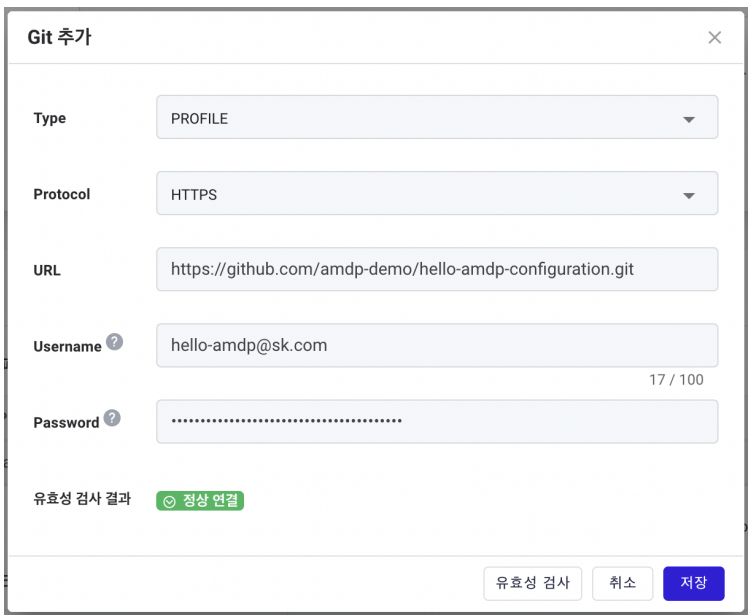
- You need to ADD repositories for profile configuration and application storage for the new project created. Click the ADD button in the profile config Git list.
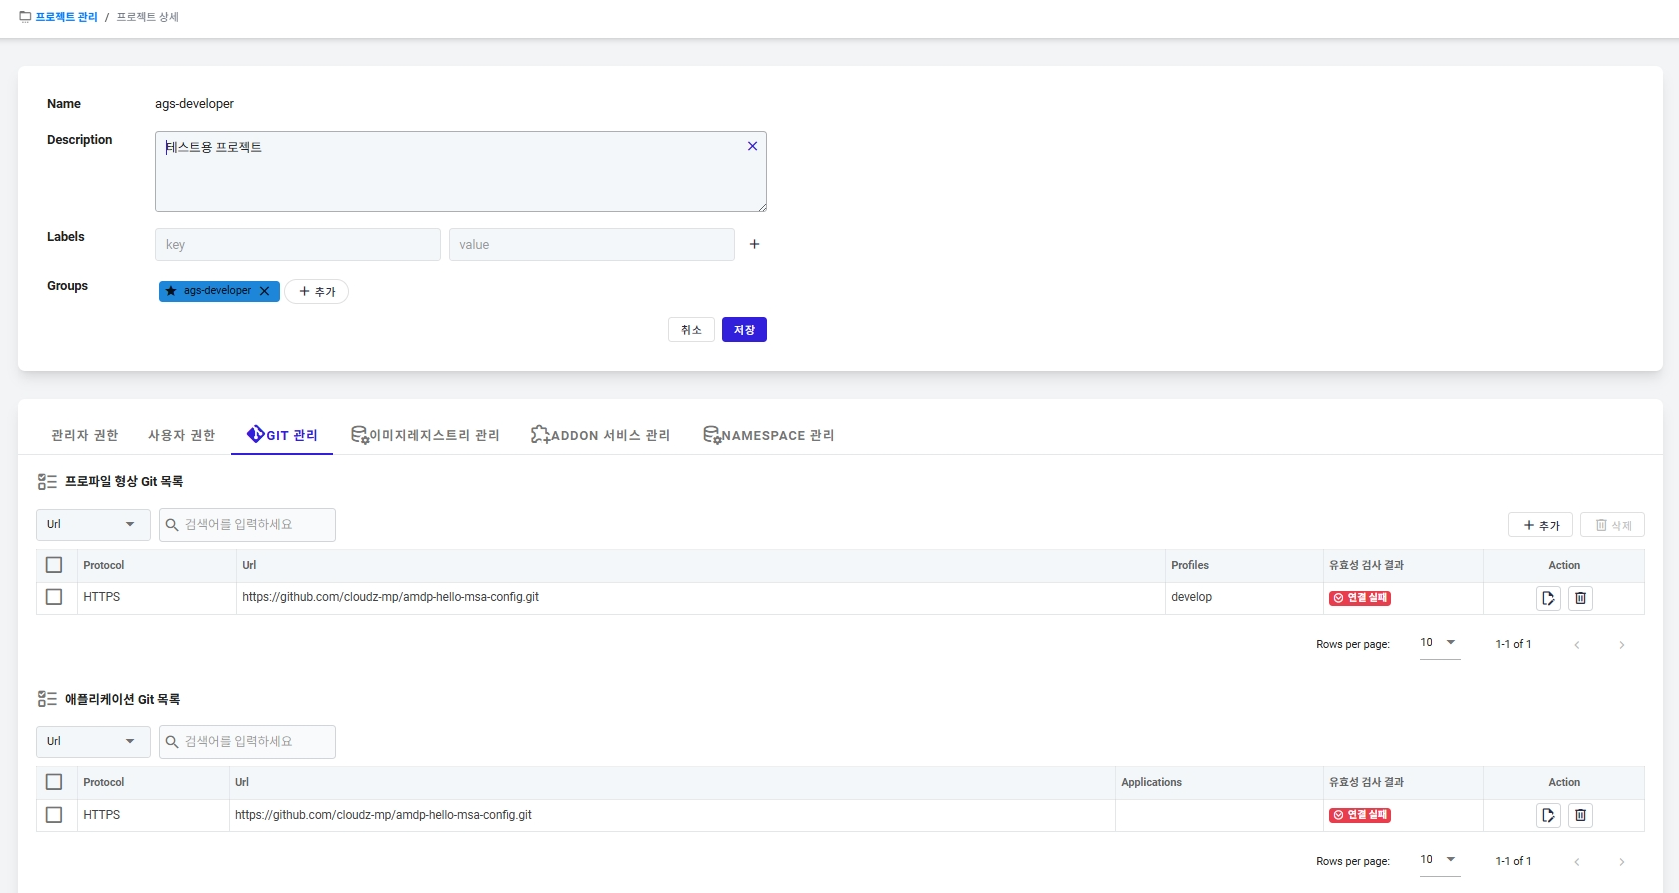
- Add repository info for profile settings. Use the Validate button to check the settings. If the connection is normal, successfully connected will appear in the validation result.
For GitHub, a (developer) token is required instead of a regular user password due to policy.
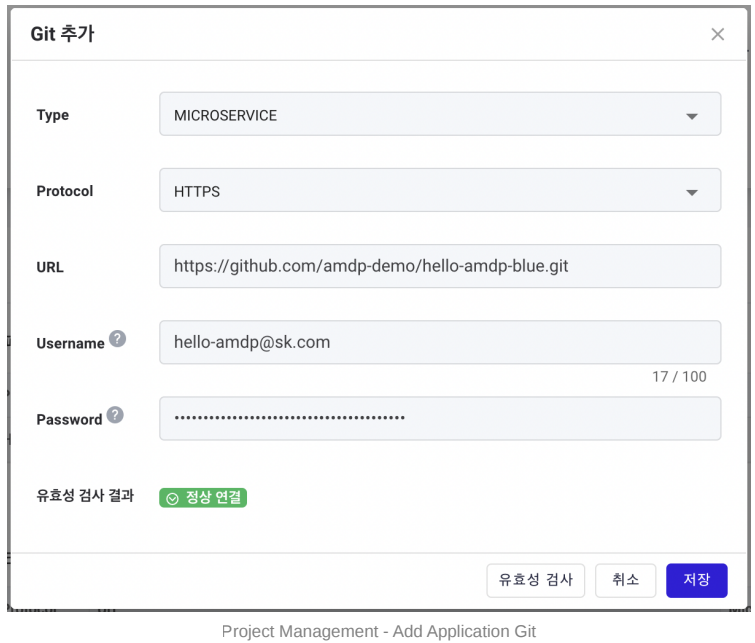
- Add repository info for the application storage. Again, use the Validate button for checking.
For Github, a (developer) token is required instead of a regular use password due to policy.
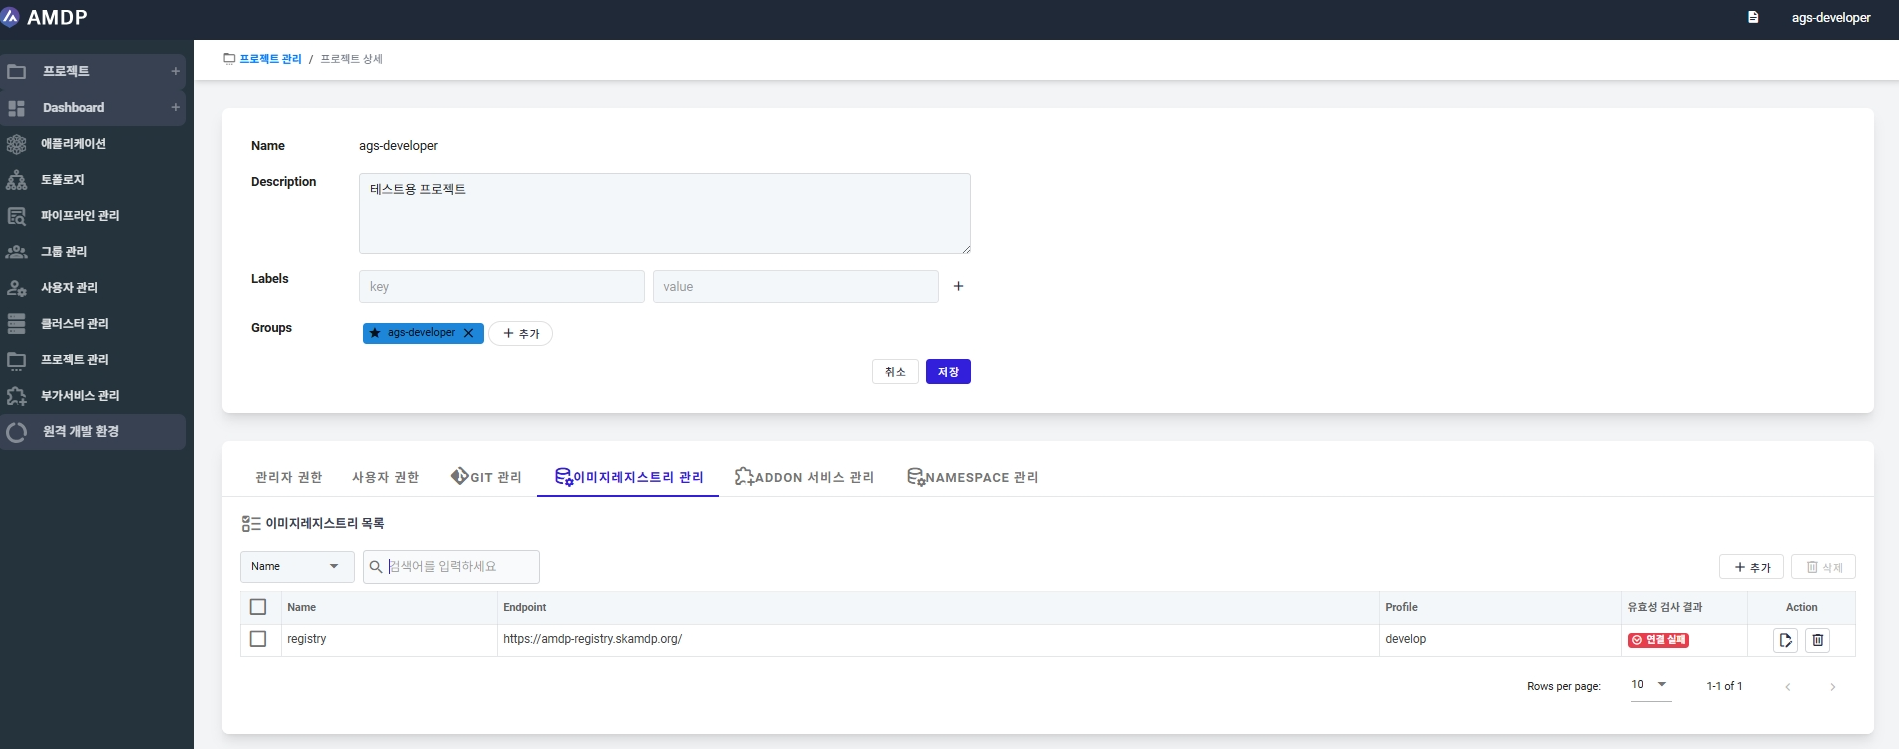
- You need to add an image registry for storing container images of applications registered in the new project. Click the ADD button in the image registry list.
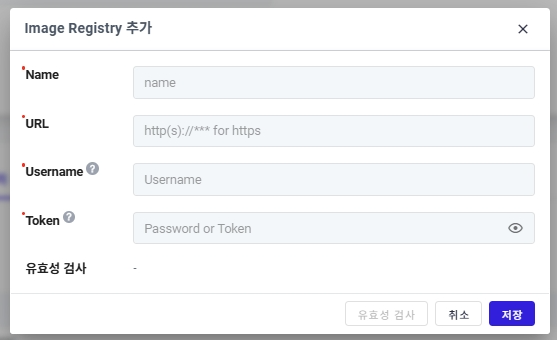
- Add image registry information. Use the “Validate” button to check the settings.
Profile Creation and Configuration
Only accounts registered as Project Administrators can create profiles. System Administrators can only view and need to be registered as a project administrator to have permissions .
Creating a new Profile
-
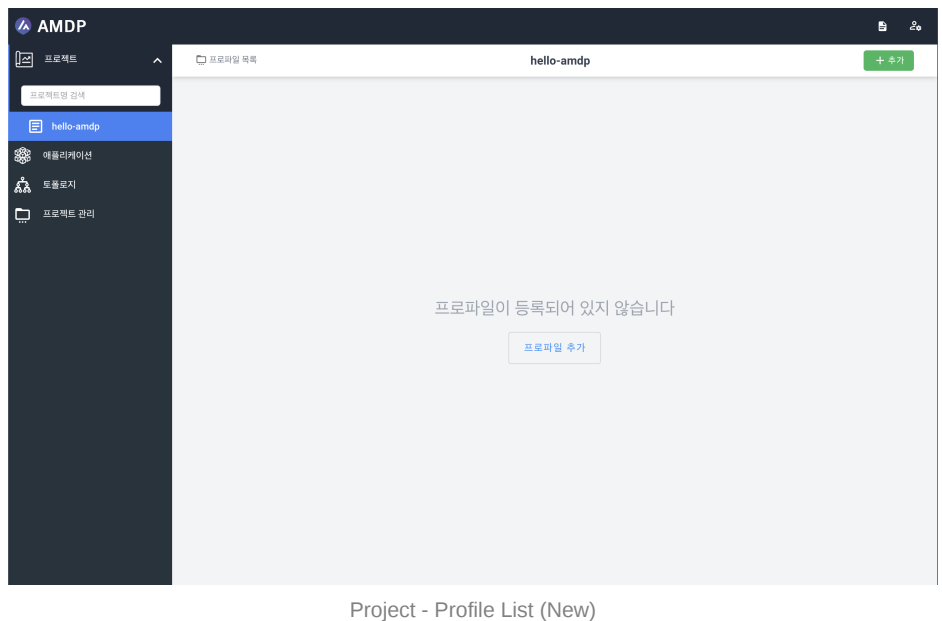
Select new project created from the projects menu. Click the ADD button or the ADD Profile button in the top right corner.
-
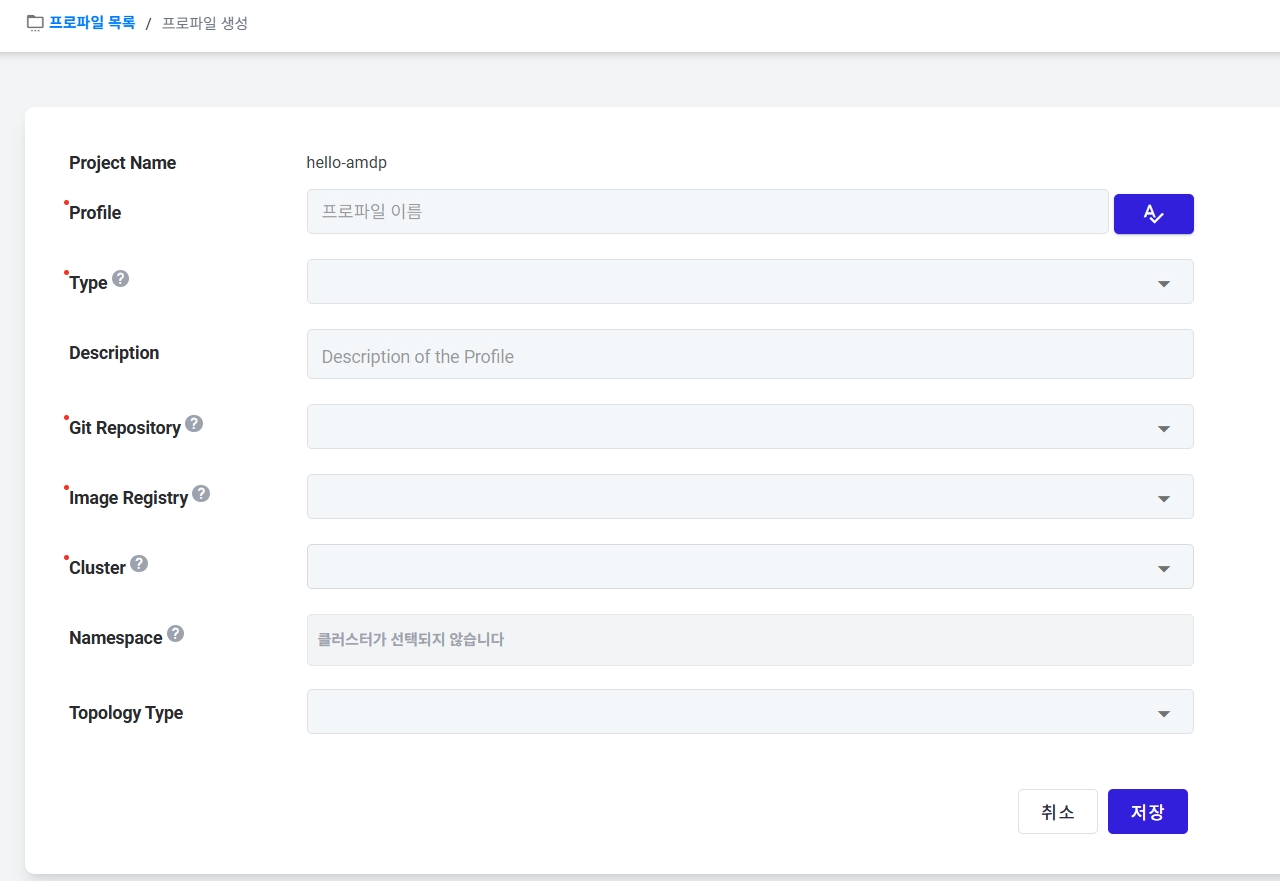
On the Create Profile page, enter Develop in the Profile field and check for name duplication using the button on the right.
-
Select Profile Type and write the desired content in the Description.
-
Register the profile setting repository listed in Project Management in the Git Repository field.
-
Register the registry listed in Project Management in the Image Registry field.
The project must be previously registered in the Image Registry.
-
Select the cluster to be used by the profile. A cluster is a mandatory item after installing AMDP.
-
Do not use Topology Type for this guide. Select NONE.
-
After filling in all details as shown below, click the Save button.
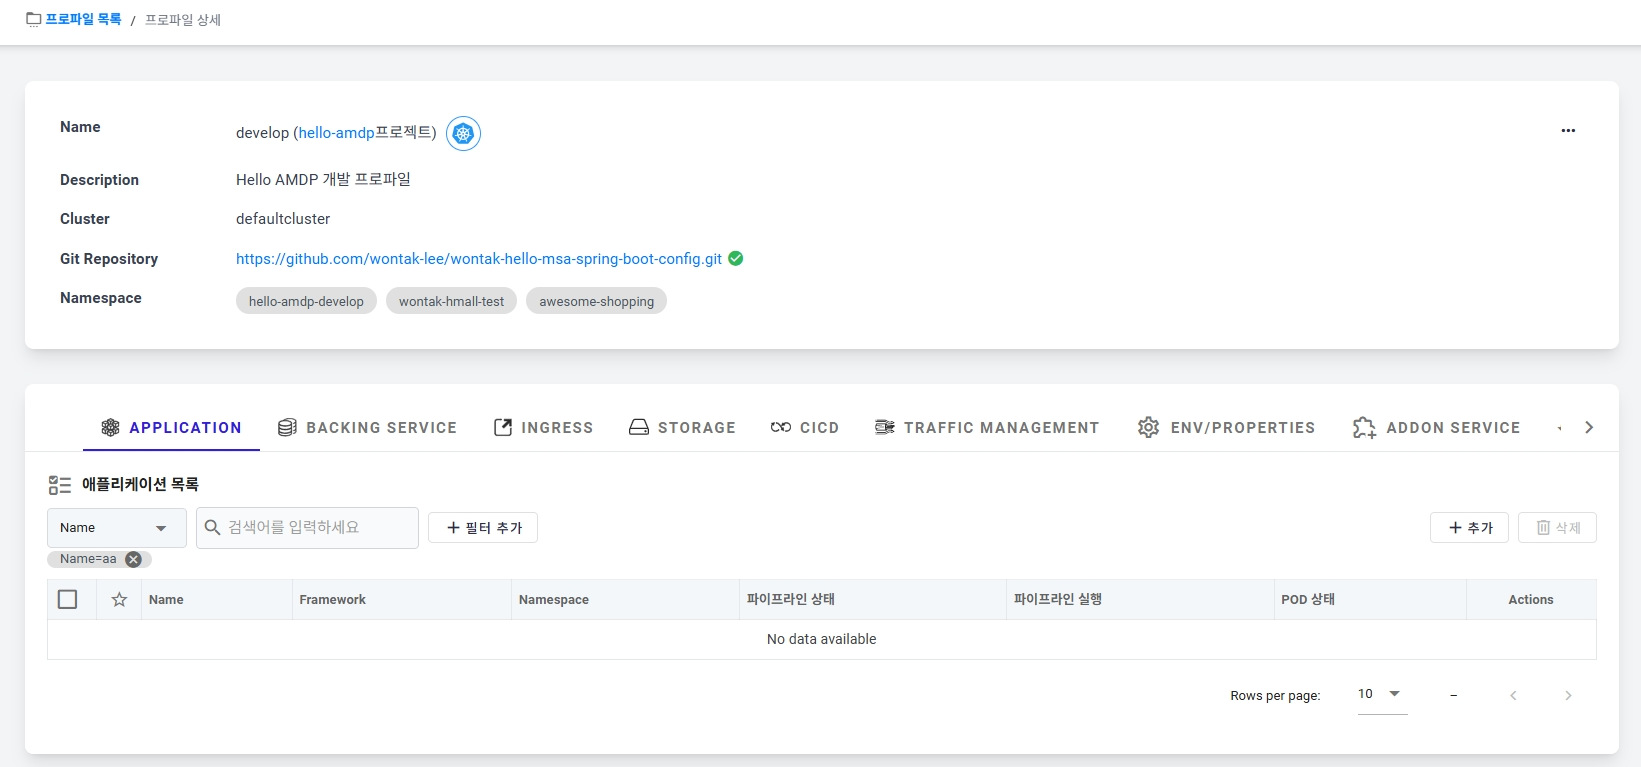
- Successful profile creation will redirect to the profile detail page.
Basic Profile Configuration
Only accounts registered as Project Administrators can Add SERVICES. System Administrators can only view and need to be registered as a project administrator to have permissions.
ADDON SERVICES must be pre-registered through the Addon Service Management menu after installing AMDP. Refer to the installation guide for more details.
- Select the ADDON SERVICE tab on the profile detail page. Click the ADD button in the Addon Service list to register a new Addon.

-
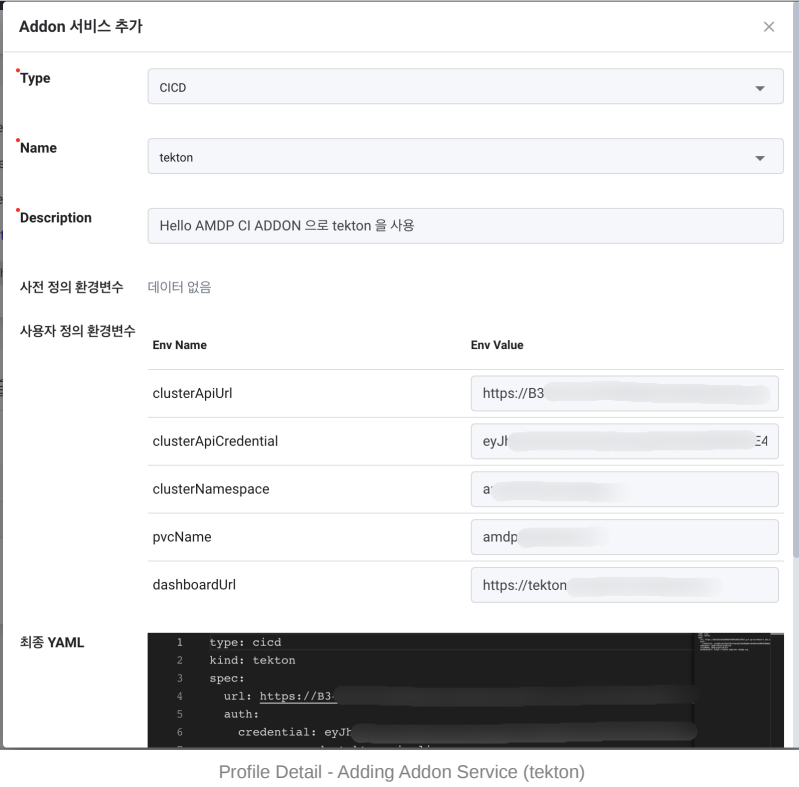
Register Tekton for CI. Select CICD in Type.
-
Choose Tekton in Name.
-
Enter desired content in Description.
-
Click the Save button at the bottom right.
-
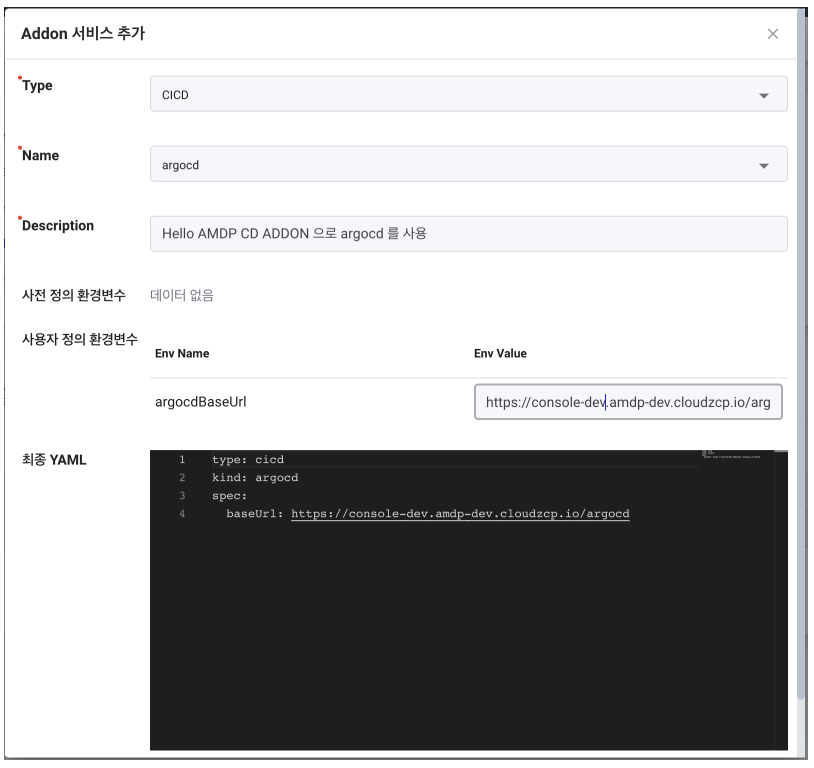
Register argocd for CD. Select CICD in Type.
-
Choose argocd in Name.
-
Enter desired content in Description.
-
Click the Save button at the bottom right.
Only accounts registered as Project Administrators can set up CICD. System Administrators can only view and need to be registered as a project administrator to have permissions .
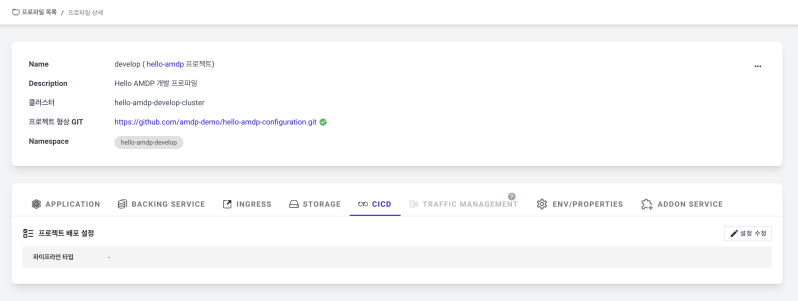
- Select the CICD tab on the profile page. Click the Edit Settings button in the project deployment settings.
-
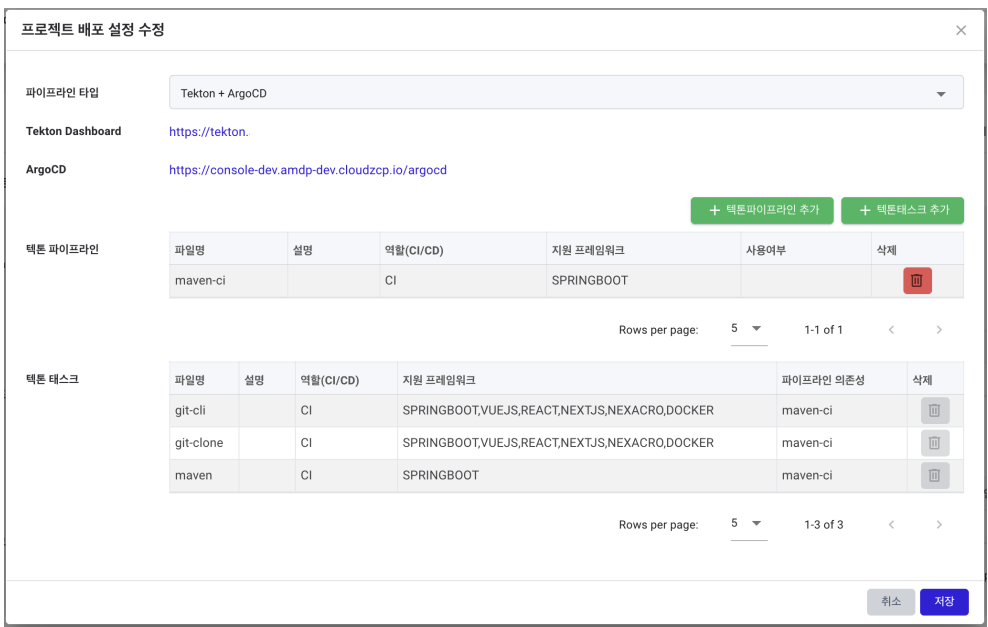
Choose” Tekton + ArgoCD” for the Pipeline Type.
-
Click the ADD Tekton Pipeline button and select tekton-base-202301/maven-ci (Role: CI, Supported Framework: SPRINGBOOT) .
-
Click the ADD Tekton Test button and select all tasks below: a. tekton-base-202301/git-cli (Role: CI, Supported Framework: SPRINGBOOT, VUEJS, REACT, NEXTJS, NEXACRO,DOCKER) b. tekton-base-202301/git-clone (Role: CI, Supported Framework: SPRINGBOOT, VUEJS, REACT, NEXTJS, NEXACRO, DOCKER) c. tekton-base-202301/maven (Role: CI, Supported Framework: SPRINGBOOT)
-
Click the Save button at the bottom right to save the settings.
Refer to section “Create Application”
INGRESS SettingsYou configure ingress to access the application from outside after deployment. Before setting up ingress, a domain that can be accessed must already be registered.
-
Select the INGRESS tab from the profile list.
-
In the ingress list, press the ADD button to create a new ingress.
-
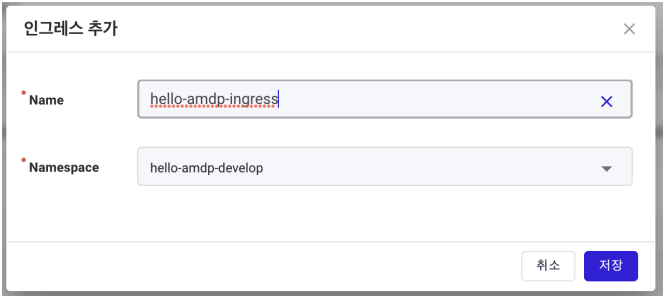
Enter hello-amdp-ingress in the Name.
-
Select hello-amdp-develop in Namespace and press save.
-
After saving, you are automatically redirected to the ingress detail page. Initially, there is nothing under Hosts. Press the ADD button with the red circle to ADD items as shown in the Ingress Detail Page image below.
-
Enter the domain to register in Host.
-
If TLS setup is necessary, press the 🖊 button next to TLS Secret (optional) to select a registered TLS Secret. TLS setup is not used in this guide.
For TLS setup, it must be previously registered in the Kubernetes resource Secret.
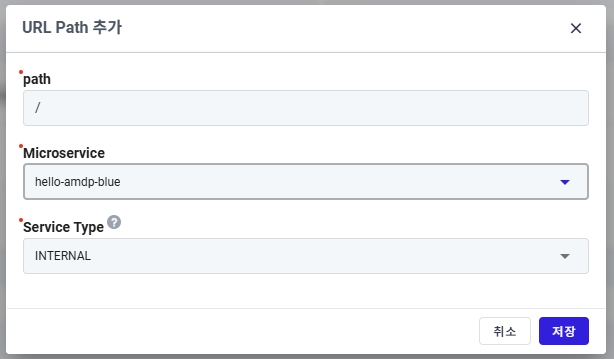
- Press the ADD PATH button under Target Microservice to register a path.
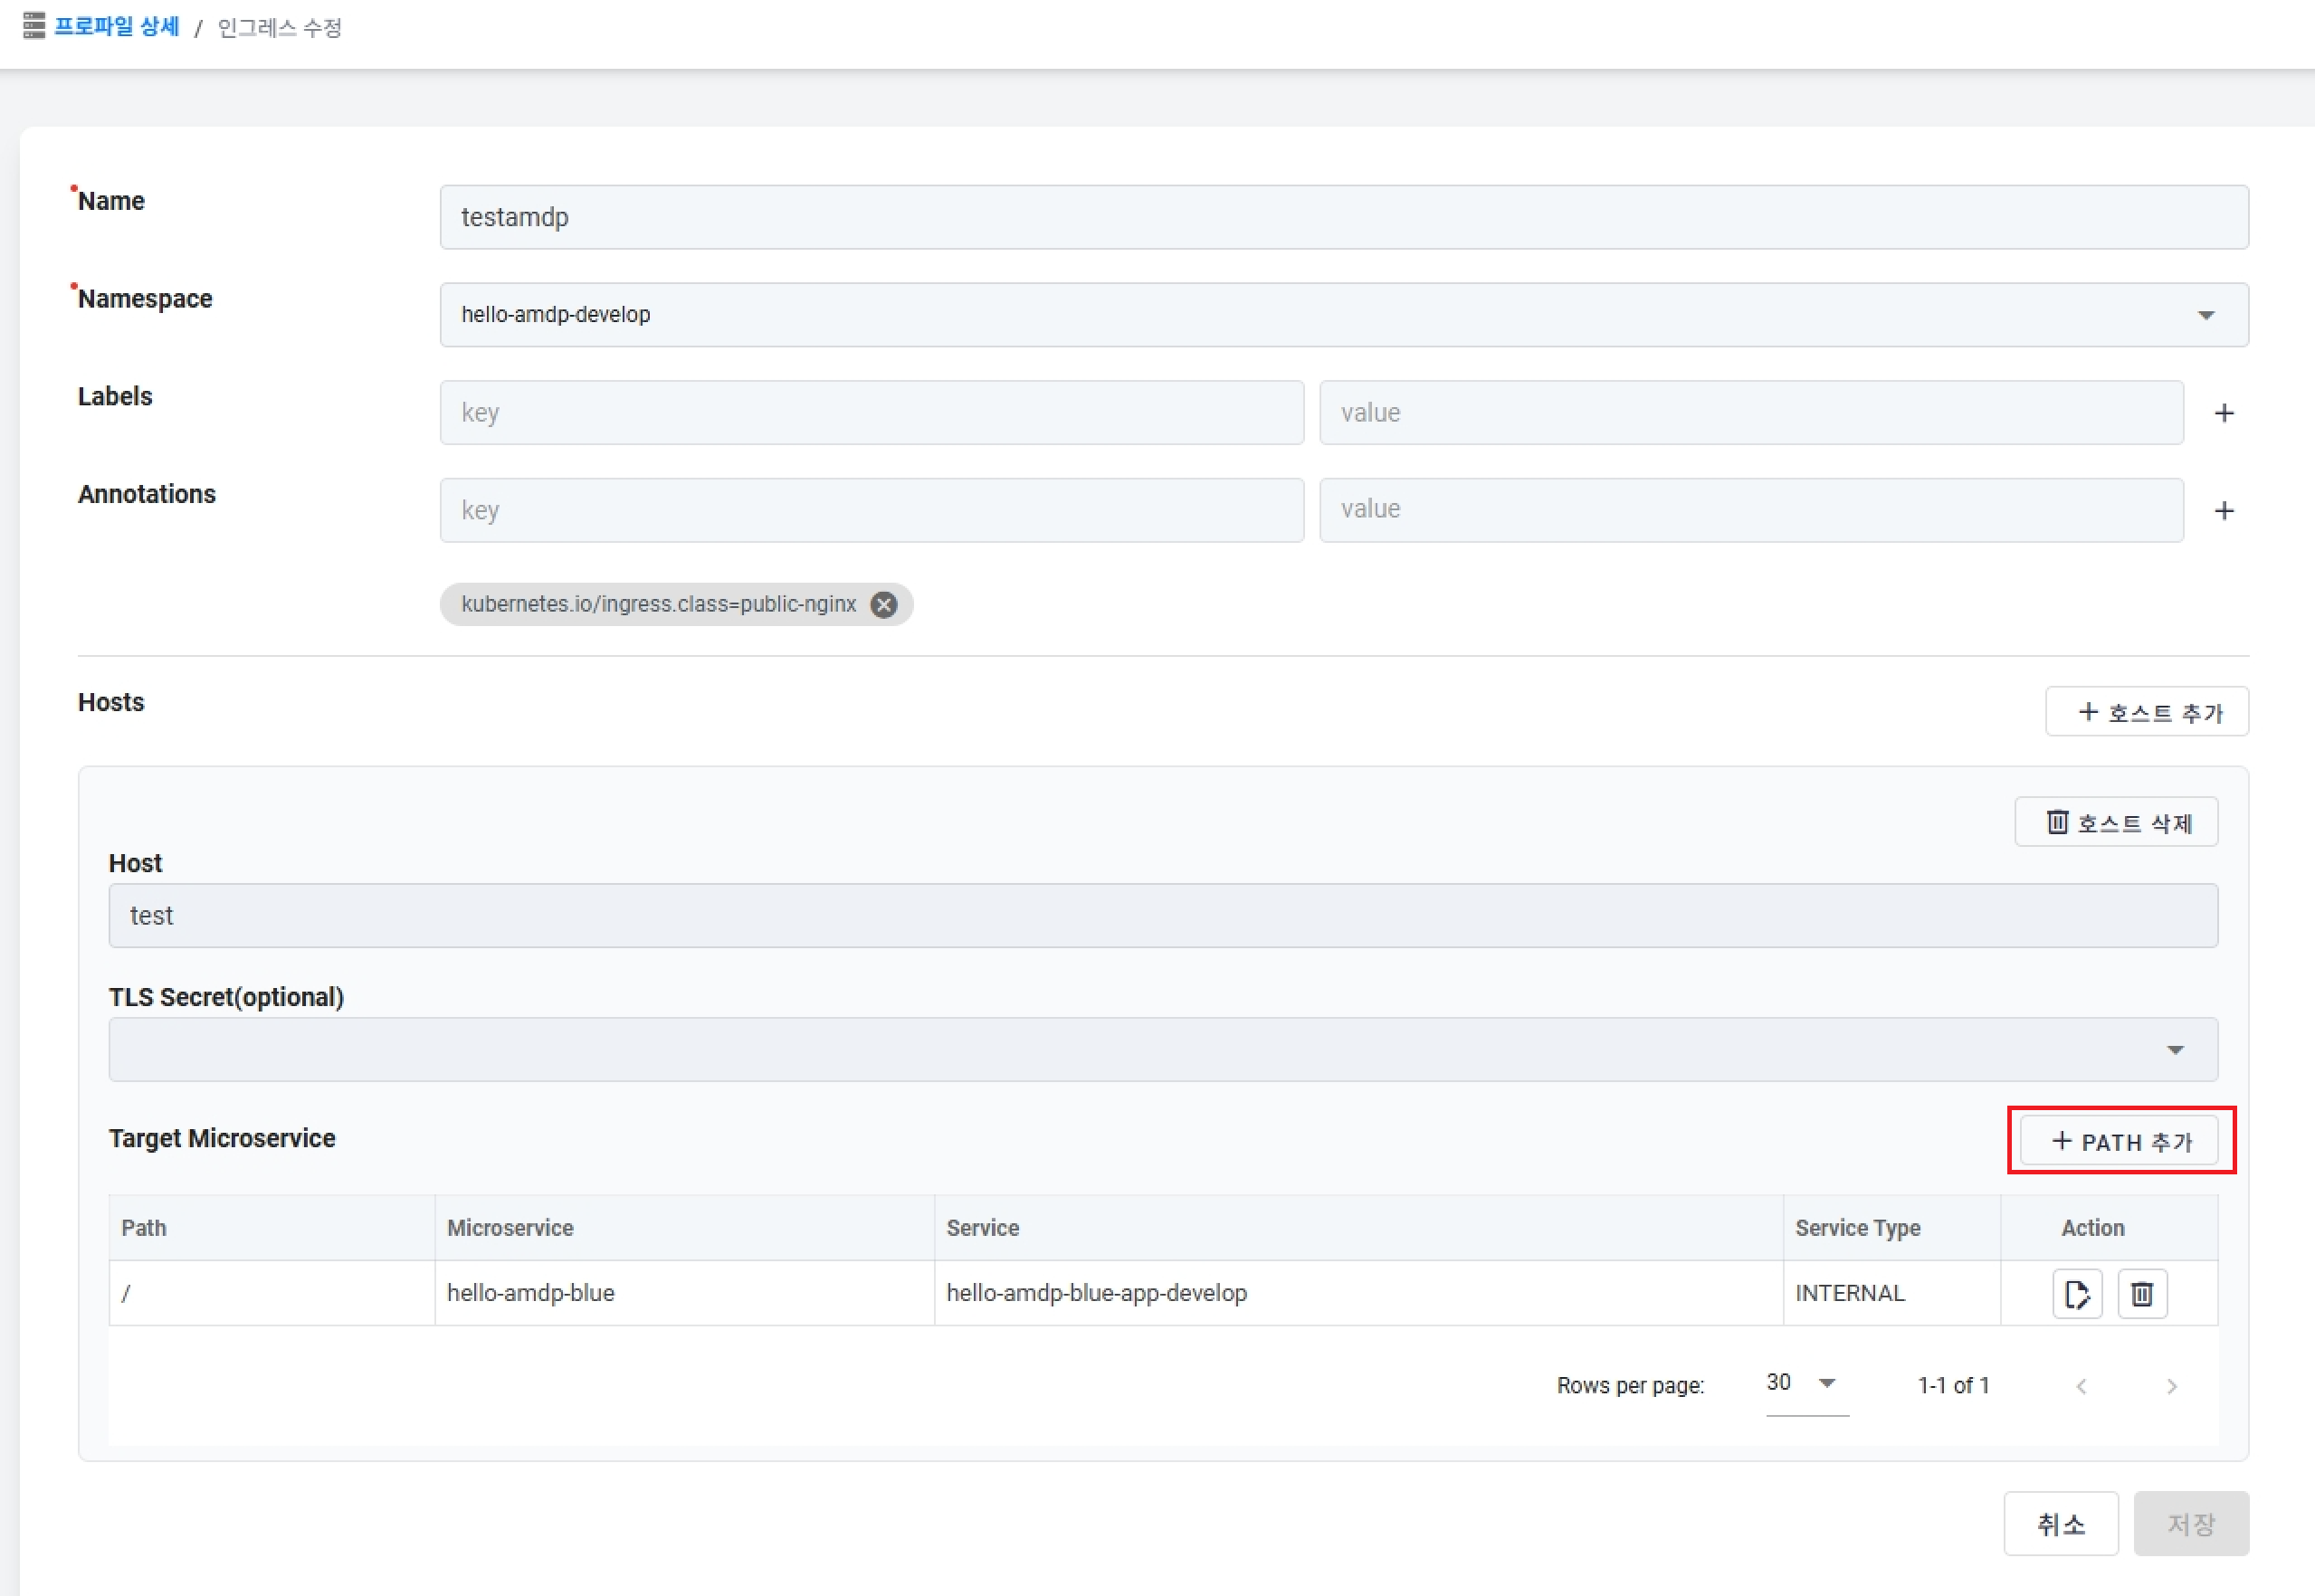
- Select the application (hello-amdp-blue) to assign to the ingress and enter the toplevel path (“/”). Press the save button, and as shown in the image above, the settings are complete. Finally, press the Save button at the bottom right to complete the ingress registration:
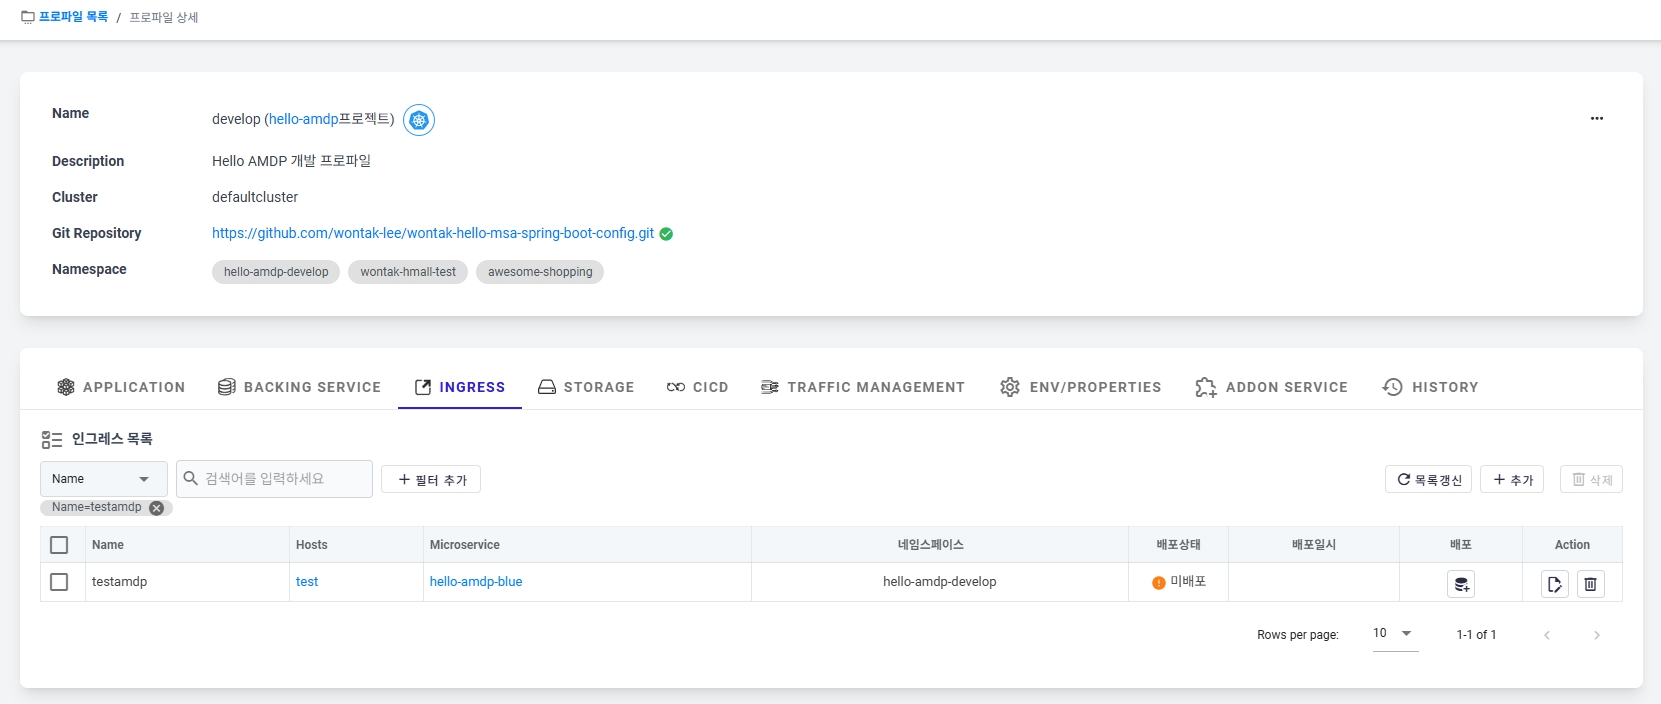
- After saving, click on hello-amdp (develop profile) at the top. If you go back to the INGRESS tab, you can see the registered ingress as shown in the image below.
-
Currently, you have only registered, so you need to deploy to the actual Kubernetes ingress resource. Press the Deploy button to deploy.
-
Check for normal deployment in the deployment status, and the ingress setup is completed.
-
Test Result.