Topology
The AMDP Topology feature allows for the easy visual identification and configuration of topology components (applications, ingress, Backing Service) registered in a specific project/profile. This guide includes descriptions of the features for topology configuration and components, as well as user examples on how to add topology components.
Topology creation and modification are only possible by the project administrator.
Topology Configuration
Access to Topology from Sidebar Menu:
This is a detailed explanation of topology configuration and the functions of each object within it.
Topology Main Page
This is a detailed description of the items on the Topology Main Page.
Topology Main Page - Basic Configuration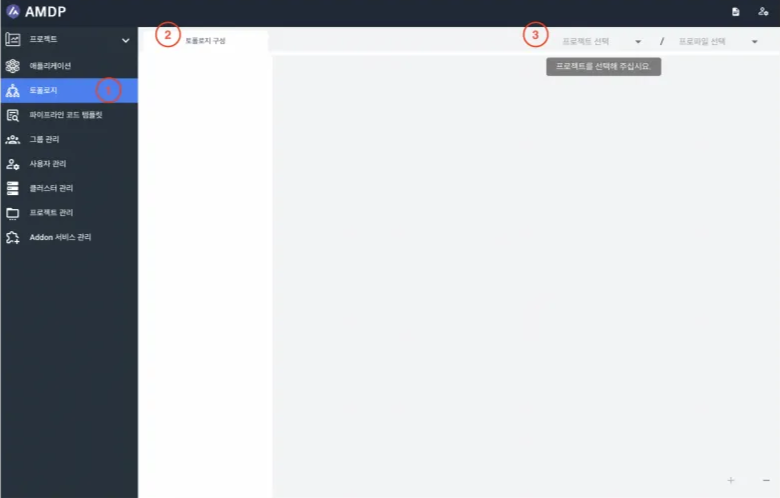
① Topology: This is the completed menu visible to the System Administrator. The Topology menu can also be selected by General Users. When selecting the Topology, the system navigates to the Topology Main Page.
② This is the Topology Components menu. After selecting a project and profile, you can view the topology components.
③ You can select the project/profile to use for topology. Selecting up to the profile will activate the topology.
Topology Main Page - Specified ConfigurationA project/profile that has never been used for topology cannot be created by anyone other than the project administrator , resulting in an error.
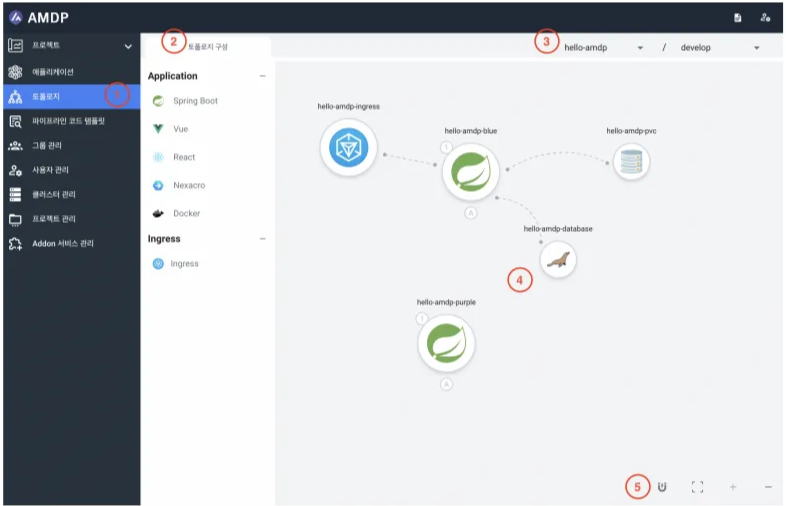
① Identical to the basic configuration.
② The Topology Components menu provides Application and Ingress , which can be added to the Topology Main Page via drag and drop . Detailed explanations are provided in the section Topology Components Menu below.
③ The same as the basic configuration, but with a project/profile selected as an example.
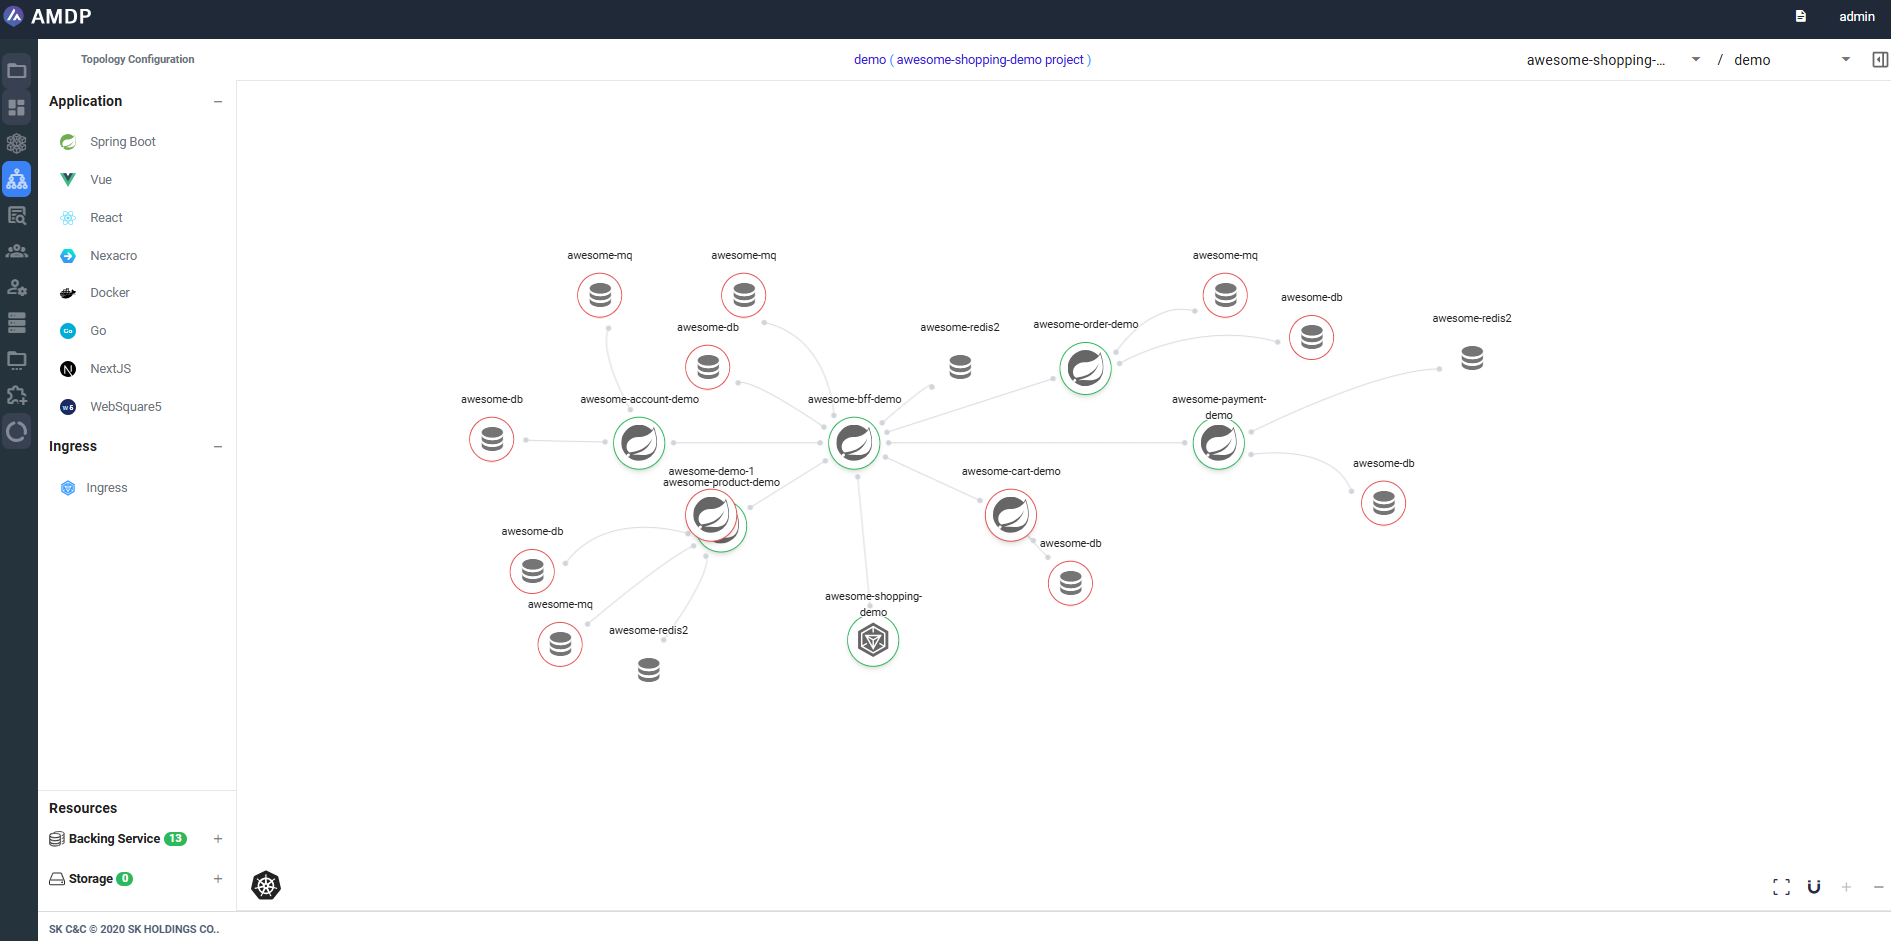
④ This is the Topology Main Page screen. It visually displays the applications, ingress, and Backing Service registered in the selected project/profile as topology components, including their connections.
⑤ Features available for manipulating the Topology Main Page. For detailed explanations, please refer to Tools at the end of the guide.
Topology components
You can add desired components to the Topology Main Page by drag and drop via the Components Menu. In AMDP Topology, components such as Spring Boot, Vue, React, Nexacro, Docker, and Ingress are referred to as node based on Graph Theory.
Currently, only applications and ingress can be added.
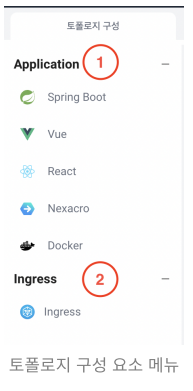
① This is the list of application framework nodes that can be registered.
② Kubernetes ingress node.
ApplicationYou can intuitively identify the framework used in an application through its representative icon in the application framework. If you want to check the settings of an application node, you can do so by double-clicking on the application node present in the Topology Main Page.
The settings of the application node are the same as the application settings of the profile. However, the default items are different when creating (adding) a node. For detailed configuration methods, please refer to Cloud Native Service Management .
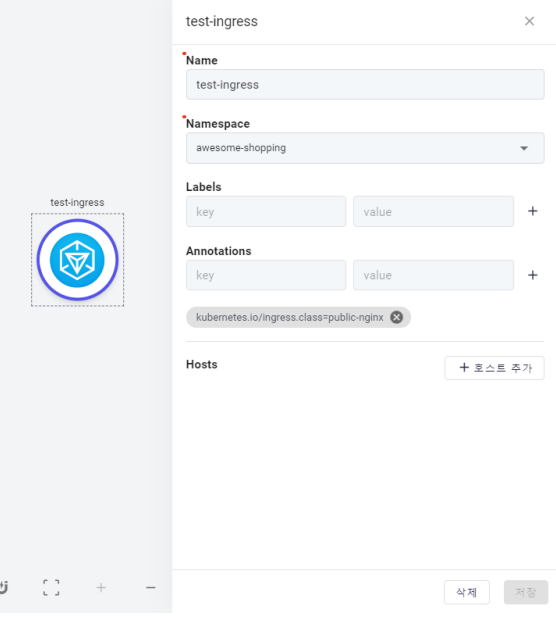
In AMDP, the supported Ingress utilizes Kubernetes ingress resources. Like the application node, the settings of the ingress node can be viewed with a double click on the icon of Ingress on the board.
The settings of the ingress node are the same as the ingress settings of the profile. For detailed configuration methods, please refer to Cloud Native Service Management .
You can adjust the view of all nodes on the topology main page.
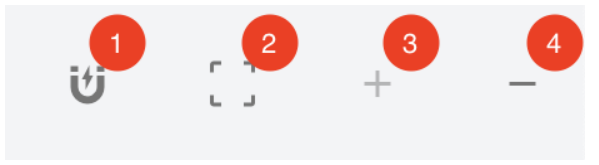
① When activated, the node's position will be adjusted to the specified pixels during movement.
② If the scale changes, the coordinates of the topology map change, or if the nodes are scattered, using this will reset the position information.
③ This is a feature that allows you to zoom in on the page.
④ This is a feature that allows you to zoom out of the page.
ShortcutMultiple Selection: Select nodes while holding down the Ctrl key. Select a node with a double click and then move it while holding down the Shift key to move all of the sub-nodes of the selected node:
Node Group Movement applies only to sub-nodes. Other applications and ingress do not move.
This section provides a detailed explanation of the basic information about the topology nodes and node connections, which are key components of the topology.
Basic Node Information
This explains the graph items used in topology, including application nodes, ingress nodes, and edges.
Application NodeFor detailed information on the replication (replica) and auto-scaling settings of the application, please refer to Cloud Native Service Management.

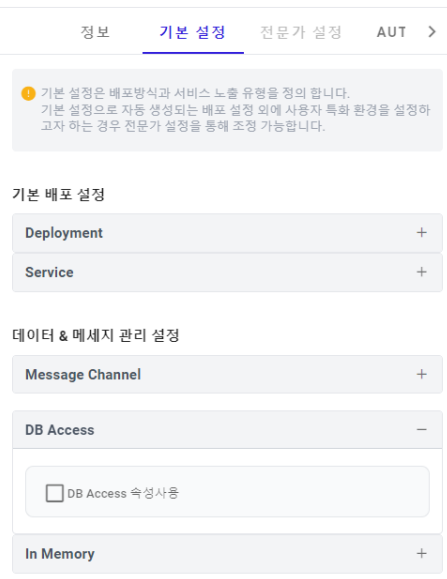
① The number of application replicas can be changed in the Default Settings under Basic Deployment Settings.
② Indicates the use of Application Auto Scaling. Clicking on the icon allows you to view the settings. It is indicated by color: Active (blue) , Inactive (gray) .
Ingress NodeFor detailed configuration methods of the Ingress Node, please refer to Cloud Native Service Management.
It is a dotted line connecting nodes. The information of the Edge varies depending on the connected nodes.
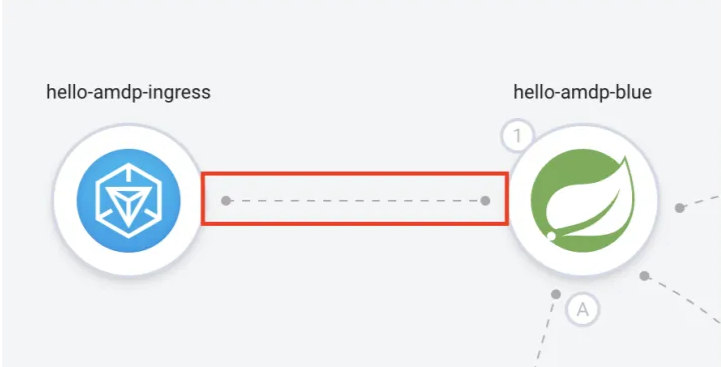
- Edge Information between Application Nodes
Since it only represents a logical relationship, it can only be deleted without any additional information.

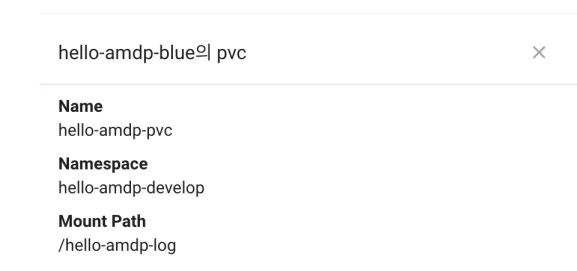
- PVC edge Information
You can find out information about the connected PVC (Persistent Volume Claim).
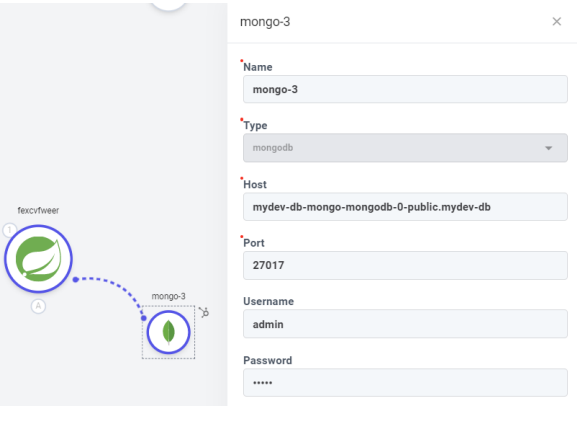
-
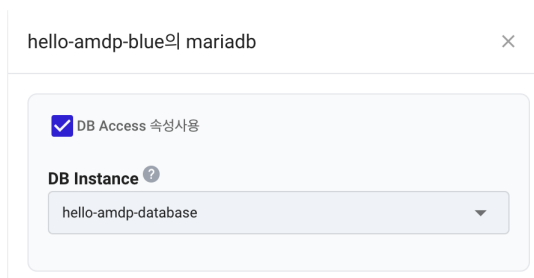
Database Edge Information. You can check the connected database instances. You can change the DB Access attributes, and the database instances can also be modified. The changes are applied when you press the Save button at the bottom right.
-
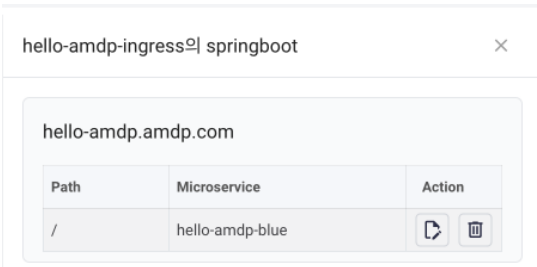
Ingress edge Information
- You can view the connected ingress configuring information.
- You can change the path and microservices by clicking the Edit button, and you can delete the ingress information with the Delete button.
Node Connection
When using multiple applications and Backing Services, some applications may be dependent on or operate through relationships with other applications. In cases where the relationship between applications and Backing Services needs to be expressed, physical or logical connections can be shown through node connections. The dotted line representing the connection between nodes is referred to as an edge .
Connecting Application Nodes to Application NodesConnections between application nodes can be made based on logical relation, rather than actual physical relationships . Through logical connections, users can view the entire topology structure and check the interrelationships between nodes.
-
Double-click on the application node you want to connect to select it.
-
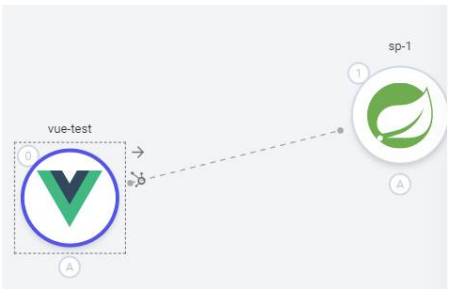
If you press the → icon and move the mouse, a connectable edge (dotted line) will appear.
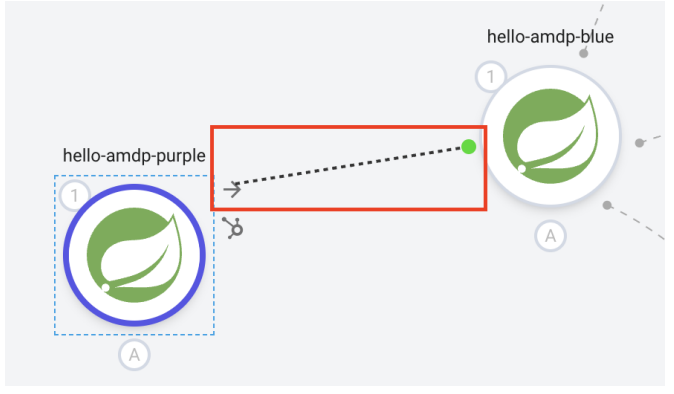
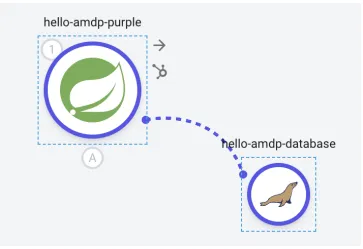
- When you move the edge to the application node you want to connect, you can see the connected appearance as shown in the image below.

The connection between application nodes and other nodes is an actual physical relationship. In addition to application nodes, you can connect databases, message channels, in-memory databases, and PVCs registered in the Backing Service and view these as sub-nodes.
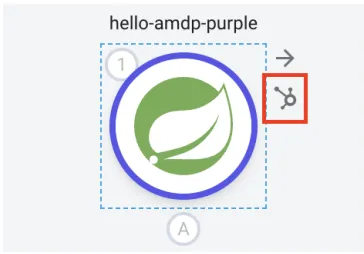
- To connect a sub-node, you need to activate the sub-node panel. Double-click the application node to select it and then choose the panel activation icon at the top right to activate the sub-node panel.
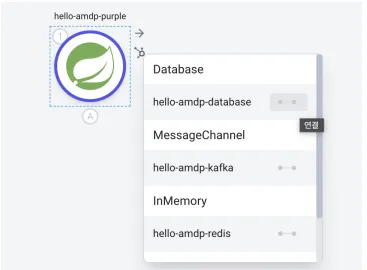
- In the sub-node panel, you can see Backing Services and PVCs registered in that profile. You can immediately connect by selecting the sub-node you wish to connect.
- Sub-nodes connected through the sub-node panel can be directly viewed on the main page.
Topology Example
Adding an Application- Select Project and Profile to activate the topology:

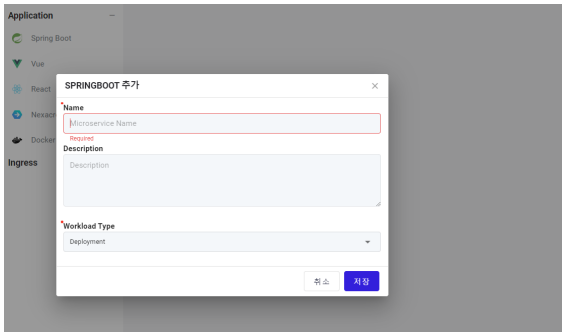
- Expand Application in the sidebar and drag and drop the service you want to use onto the main page of the topology

- When the registration window activates, enter the required information and click the Save button to register the service
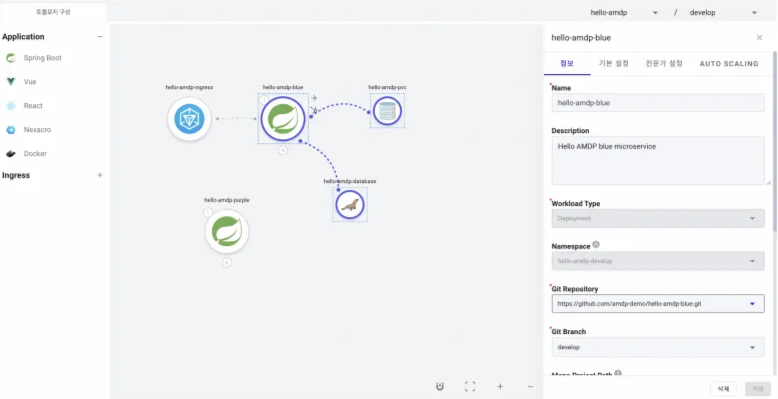
- After registering the Application, double-click the node to see detailed information on the right. Enter the necessary information and save.
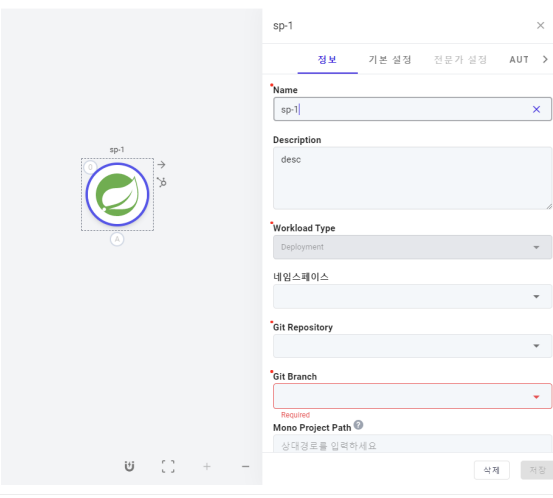
By double-clicking the application node, you can check and modify the information of the application. For detailed items, refer to Cloud Native Service Management.
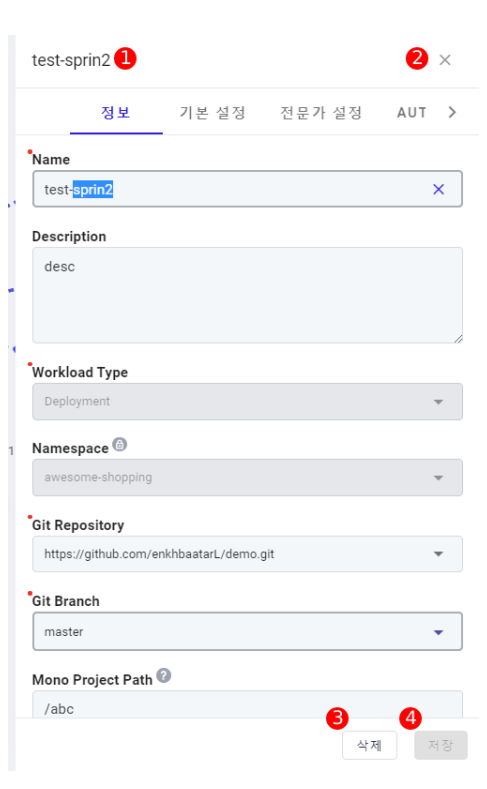
① Name: The name of the application
② Description: Click to close the detail panel.
③ Delete: Click to delete the application.
④ Save: Modification is possible if you are the project owner and values have changed.
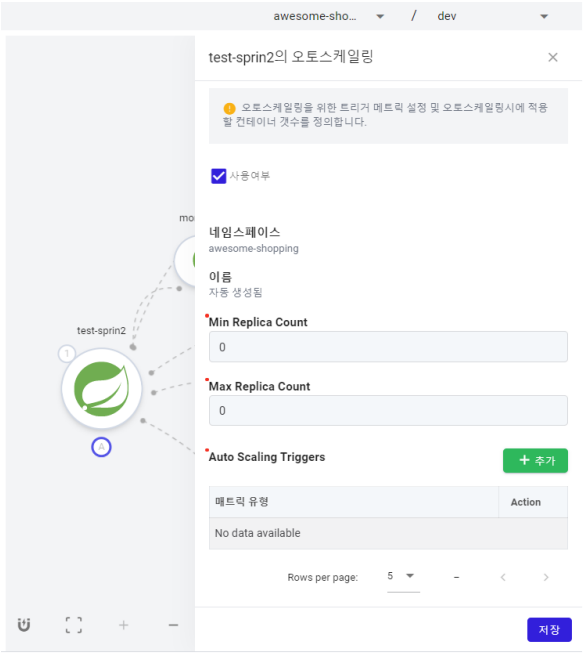
Application Auto ScalingClick the auto-scaling button to activate and modify auto-scaling information.
- Double-click to select a node and then drag from ① to visually represent the conceptual connection
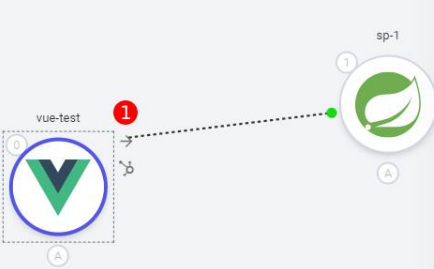
- Move the mouse to the node you want to connect to, and you can see the connected appearance as shown in the image below
Application's Sub-Nodes
You can connect applications with database, message Channel, in Memory, PVC and view them as sub-nodes.
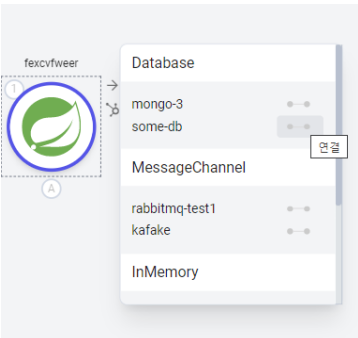
Connecting Sub-Nodes- Double-click and then click the sub-node panel icon to activate the sub-node panel.
- The activated sub-node panel shows the Backing Services registered in the profile by type. Select the Backing Service you want to connect with the application.
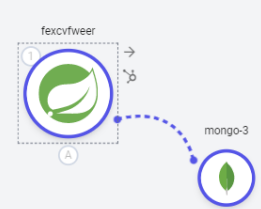
- After selection, the Backing Service becomes a sub-node of that node and is displayed as shown below:
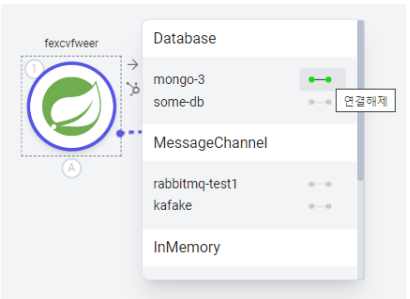
Connected sub-nodes can be disconnected through the sub-node panel, sub-node settings, Edge settings, and node settings page.
- Double-click the node and then disconnect in the node panel.
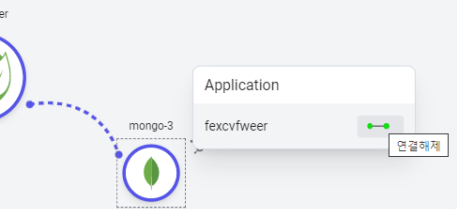
- Double-click the sub-node to select it, and the sub-node connection panel appears. Click the connected image of the application you want to disconnect.
- Disconnection is also possible from the settings page that appears when you double-click the edge connecting the main node and sub-node.

- Disconnection can be done by modifying the detailed information in the node settings page.
By double-clicking a sub-node, you can check and modify the information of that sub-node.
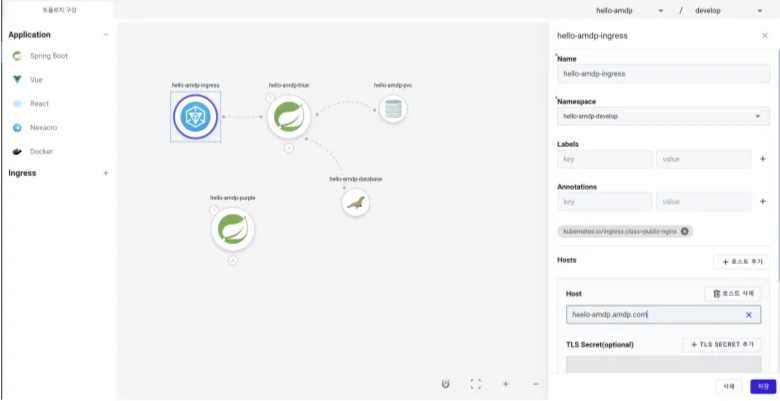
- Drag and drop Ingress from the left onto the main page of the topology.
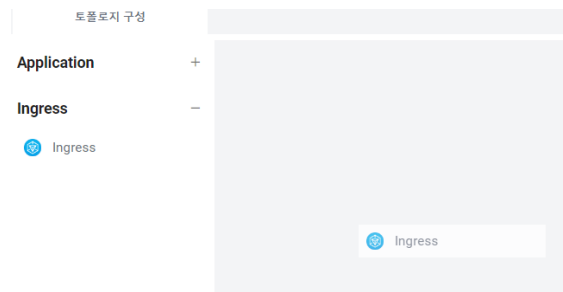
- In the activated input window, enter the Name and Namespace

- You can modify the detailed information in the settings that appear when you double-click the Ingress node: