User management
このガイドでは、ユーザー設定(ログイン、ログアウト、パスワード変更、ユーザー非アクティブ化など)を管理する方法について説明します。
AMDPのユーザーは、SYSTEM ADMINISTRATORまたはDEVELOPERのいずれかの役割を割り当てられます。利用可能なメニューや機能は、割り当てられた役割に基づいて異なります。SYSTEM ADMINISTRATORSはすべてのメニューを使用および管理できますが、個々のプロジェクトには表示アクセスのみがあります。
ユーザー役割に関する詳細情報は、ユーザー権限管理を参照してください。また、個々のプロジェクトの管理権限は、プロジェクト構成管理に記載されています。
ユーザー設定
ログイン
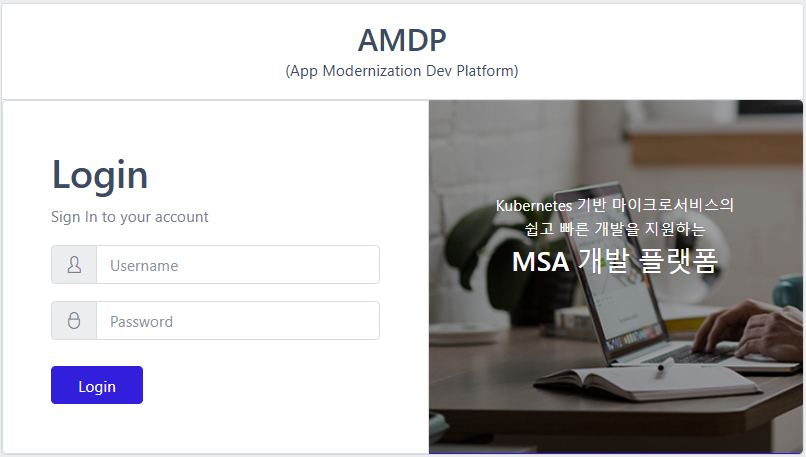
AMDPウェブコンソールのログインページです。ドメインは、インストールされた各プロジェクトによって異なる場合があります。
https://console-dev.skamdp.org
ログアウト
- 右上隅のユーザー設定ボタンを選択します。

- ポップアップウィンドウでログアウトボタンを選択してログアウトし、ログイン画面にリダイレクトされます。
パスワードリセット
- 右上隅のユーザー設定ボタンを選択します。

- パスワード変更ページで、現在のパスワードと新しいパスワードを入力し、保存をクリックして変更します。
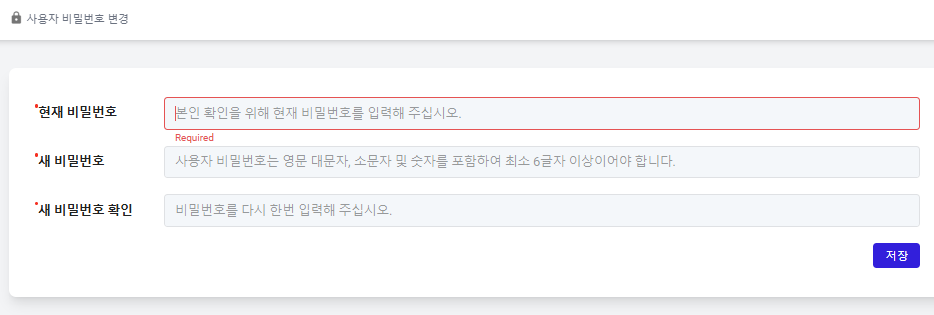
新しいパスワードを設定する際は、以下の要件を満たす必要があります:
- 最小長:少なくとも6文字
- 文字構成:大文字(A–Z)、小文字(a–z)、および数字(0–9)を含む必要があります
ユーザープロファイル
この画面はユーザープロファイルの説明です。基本的なユーザー情報、関連グループ、およびグループとプロジェクトに基づいて割り当てられた権限を確認できます。 ユーザープロファイルの詳細を表示するには、右上隅のユーザープロファイルボタンを選択してください:

ユーザー情報と割り当てられた権限を表示します。表示される情報は、SYSTEM ADMINISTRATOR と DEVELOPER の役割によって異なります。
-
ADMINISTRATOR役割: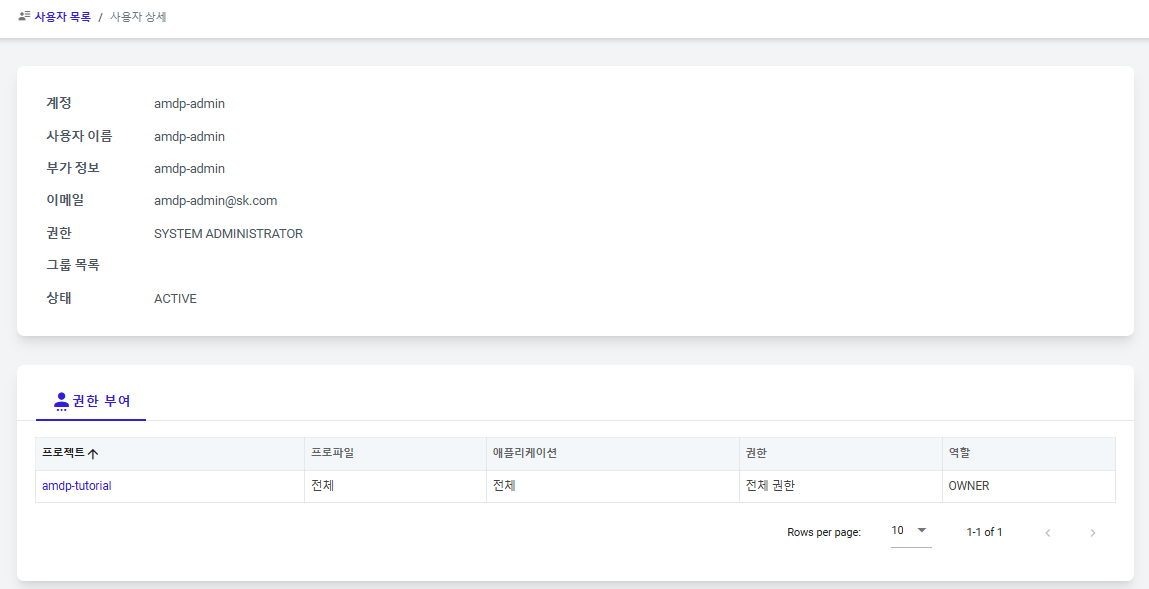
-
DEVELOPER役割: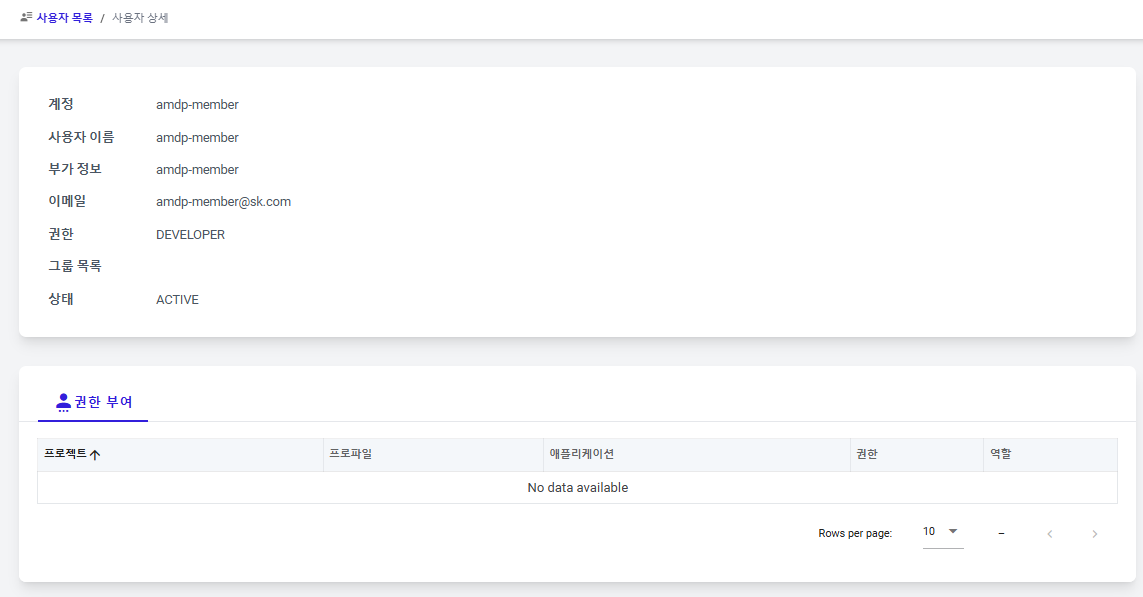
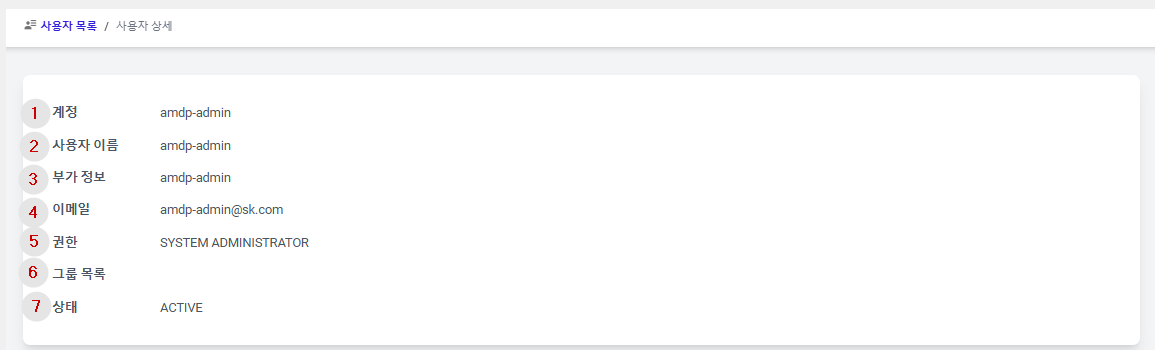
① アカウント:AMDPにログインするために使用される名前。
② ユーザー名:ユーザーに表示される名前。
③ 追加情報:ユーザーに関するチームまたはその他の追加情報。
④ メール:ユーザーのメール情報。
⑤ 権限:ユーザーに割り当てられた権限。
⑥ グループリスト:ユーザーが登録されているグループ。 SYSTEM ADMINISTRATOR は特定のグループを表示しませんが、提供されたリンクを介してグループ管理に移動できます。
⑦ ステータス:ユーザーの現在のステータス(ACTIVE/ INACTIVE)。
SYSTEM ADMINISTRATORS はすべてのプロジェクトに対して基本的な読み取り権限を持っているため、別の権限割り当てリストはありません。
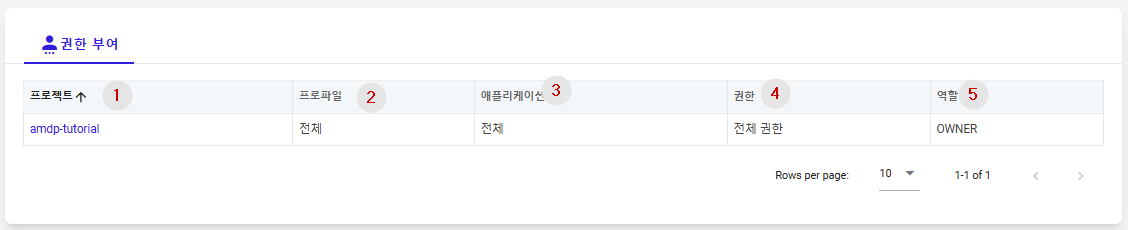
① プロジェクト:ユーザーに権限が割り当てられているプロジェクトの名前。プロジェクト名を選択すると、そのプロジェクトのプロジェクト管理メニューに移動します。
② プロファイル:ユーザーに権限が割り当てられているプロジェクト内のプロファイルの名前。すべてまたは個別のプロファイル名のいずれか。
③ アプリケーション:権限が割り当てられているアプリケーションの名前。すべてまたは個別のアプリケーション名のいずれか。 ④ 権限: アプリケーションに割り当てられた権限を表示します。割り当てられた権限に応じて、フル権限、読み取りおよび実行権限、または読み取り権限として表示されます。
⑤ 役割: プロジェクトにおけるユーザーの役割であり、プロジェクトマネージャーまたは通常のユーザー(権限付与者)としてのいずれかです。プロジェクトマネージャーは OWNER、通常のユーザーは MEMBER です。
ユーザー登録と非アクティブ化
ユーザーの登録と非アクティブ化は SYSTEM ADMINISTRATOR アカウントのみが実行できます。現在、ユーザーを削除するオプションはなく、非アクティブ化のみが可能です。ただし、非アクティブ化されたユーザーを再アクティブ化する方法は現在ありません。
ユーザー登録
SYSTEM ADMINISTRATOR アカウントが新しいユーザーを追加する方法を説明します。
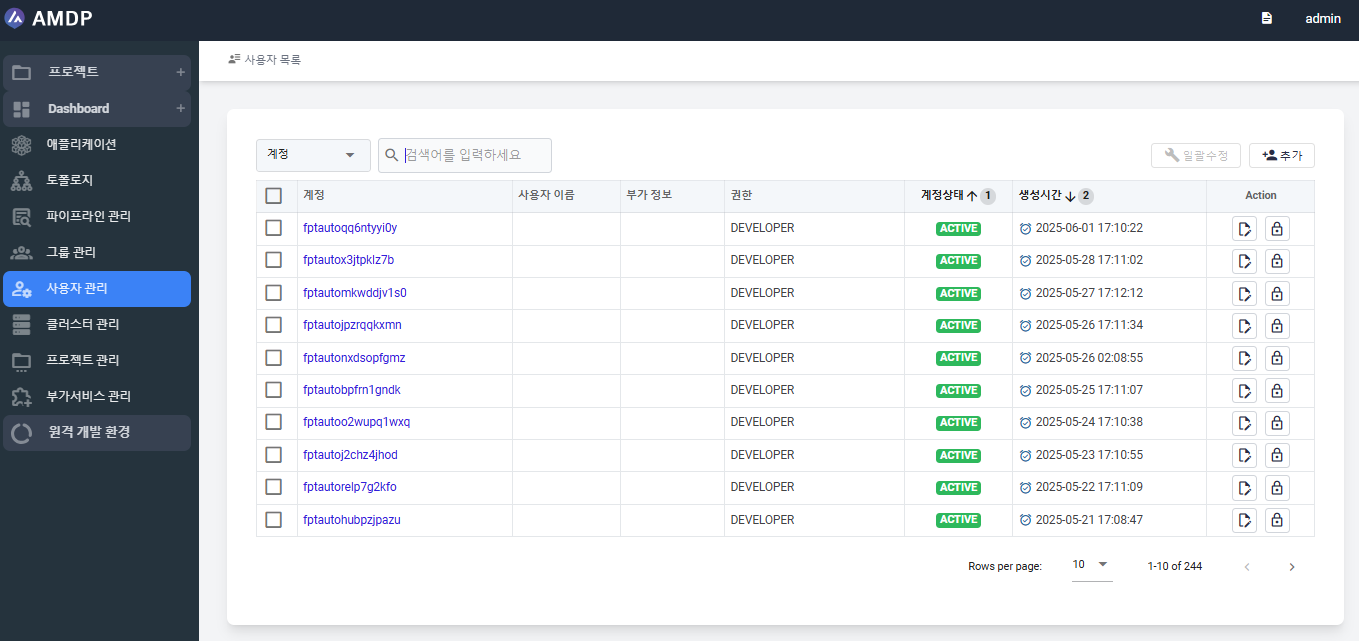
- ユーザー管理メニューを選択してユーザーリストページに移動します。ユーザーリストページの ADD ボタンをクリックします。

- 登録するユーザーの詳細を入力します:
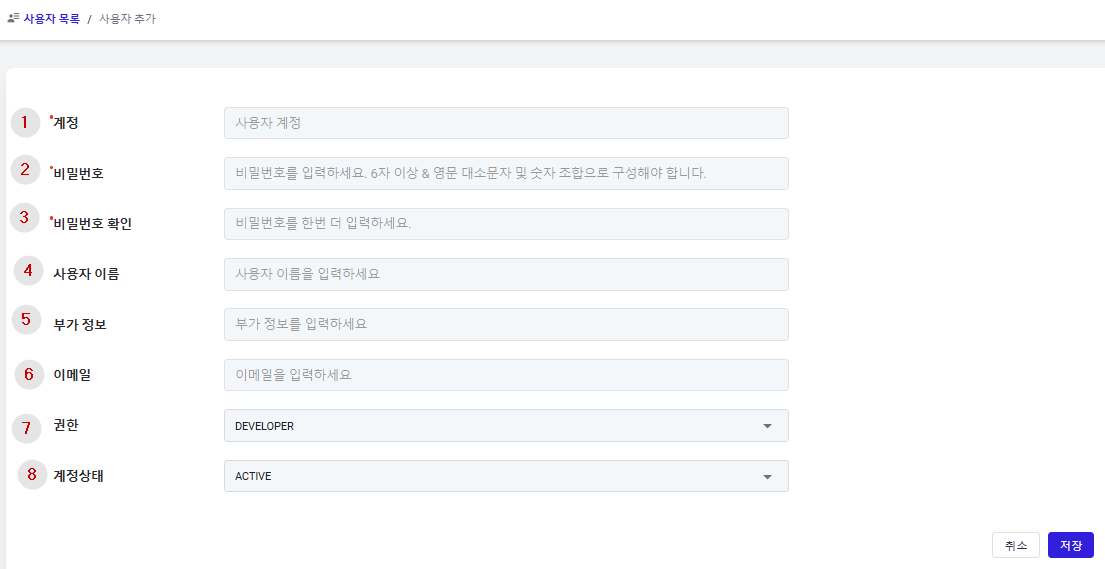
① アカウント: (必須) AMDP にログインするために使用される名前。
② パスワード: (必須) AMDP にログインするために使用されるパスワード。
③ パスワード確認: (必須) パスワード入力時のタイプミス防止のため。
④ ユーザー名: ユーザーに表示される名前。
⑤ 追加情報: ユーザーに関するチームまたはその他の追加情報。
⑥ メール: ユーザーのメール情報。
⑦ 権限: ユーザーに割り当てられた権限。 SYSTEM ADMINISTRATOR と DEVELOPER のいずれかを選択します。
SYSTEM ADMINISTRATORはすべての管理メニューへのアクセスおよび管理権限を持っていますが、すべてのプロジェクトへのアクセス権限のみを持っています。DEVELOPERは特定のプロジェクトに対する権限を持ち、管理メニューへのアクセスはありませんが、プロジェクト管理メニューにアクセスし、プロジェクト管理者であれば特定のプロジェクトを管理できます。 ⑧ アカウントステータス: 登録時の初期ユーザーステータス(ACTIVE/INACTIVE)を決定します。
ユーザー非アクティブ化
SYSTEM ADMINISTRATOR が特定のユーザーのアカウントステータスを非アクティブに変更する方法について説明します。非アクティブなユーザーはログインできません。
- ユーザー管理メニューを選択し、ユーザーリストページに進みます。
非アクティブにするユーザーのアカウントのアクションボタンをクリックして、ユーザー修正ページに移動します。

- ユーザー修正ポップアップウィンドウで、アカウントステータスを
INACTIVEに変更し、保存ボタンを選択します。
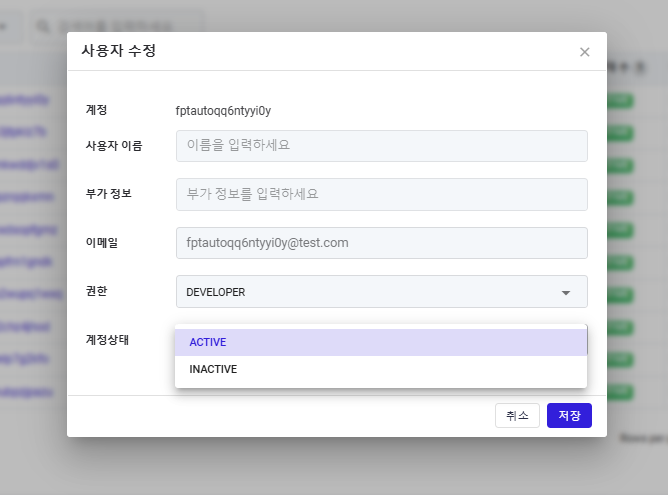
- 非アクティブなユーザーはログインできなくなります。
ユーザー情報の修正
SYSTEM ADMINISTRATOR が特定のユーザーの情報を修正(変更)する方法について説明します。
ユーザー登録は SYSTEM ADMINISTRATOR アカウントを通じてのみ可能なため、パスワードを除くすべての情報は SYSTEM ADMINISTRATOR のみが修正(変更)できます。
- ユーザー管理メニューを選択してユーザーリストページに移動します。修正するユーザーアカウントのアクションボタンをクリックして、ユーザー修正ページに移動します。
- ユーザー修正ポップアップウィンドウで必要な修正(変更)を行い、保存します。メールアドレスは変更できないことに注意してください。
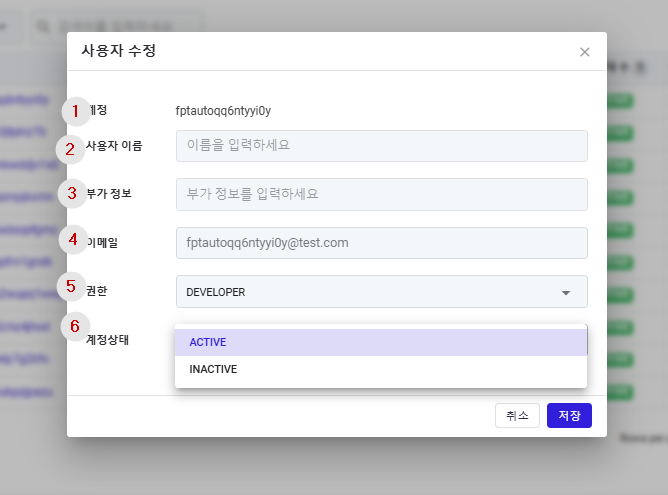
① アカウント: 登録されたユーザーアカウント(ID)は変更できません。
② ユーザー名: 特定の機能で表示されるユーザーの名前は変更可能です。
③ 追加情報: ユーザー名と同様です。
④ メール: 特定の機能で使用される一意のアドレスで、変更できません。 ⑤ 権限: ユーザーの権限は調整可能です。
⑥ アカウントステータス: ユーザーのアカウントステータスは ACTIVE または INACTIVE に変更できます。
- 管理者は、ユーザーリストから複数のユーザーを一度に更新でき、各ユーザーを個別に編集する必要はありません(バルク編集機能を通じて)。
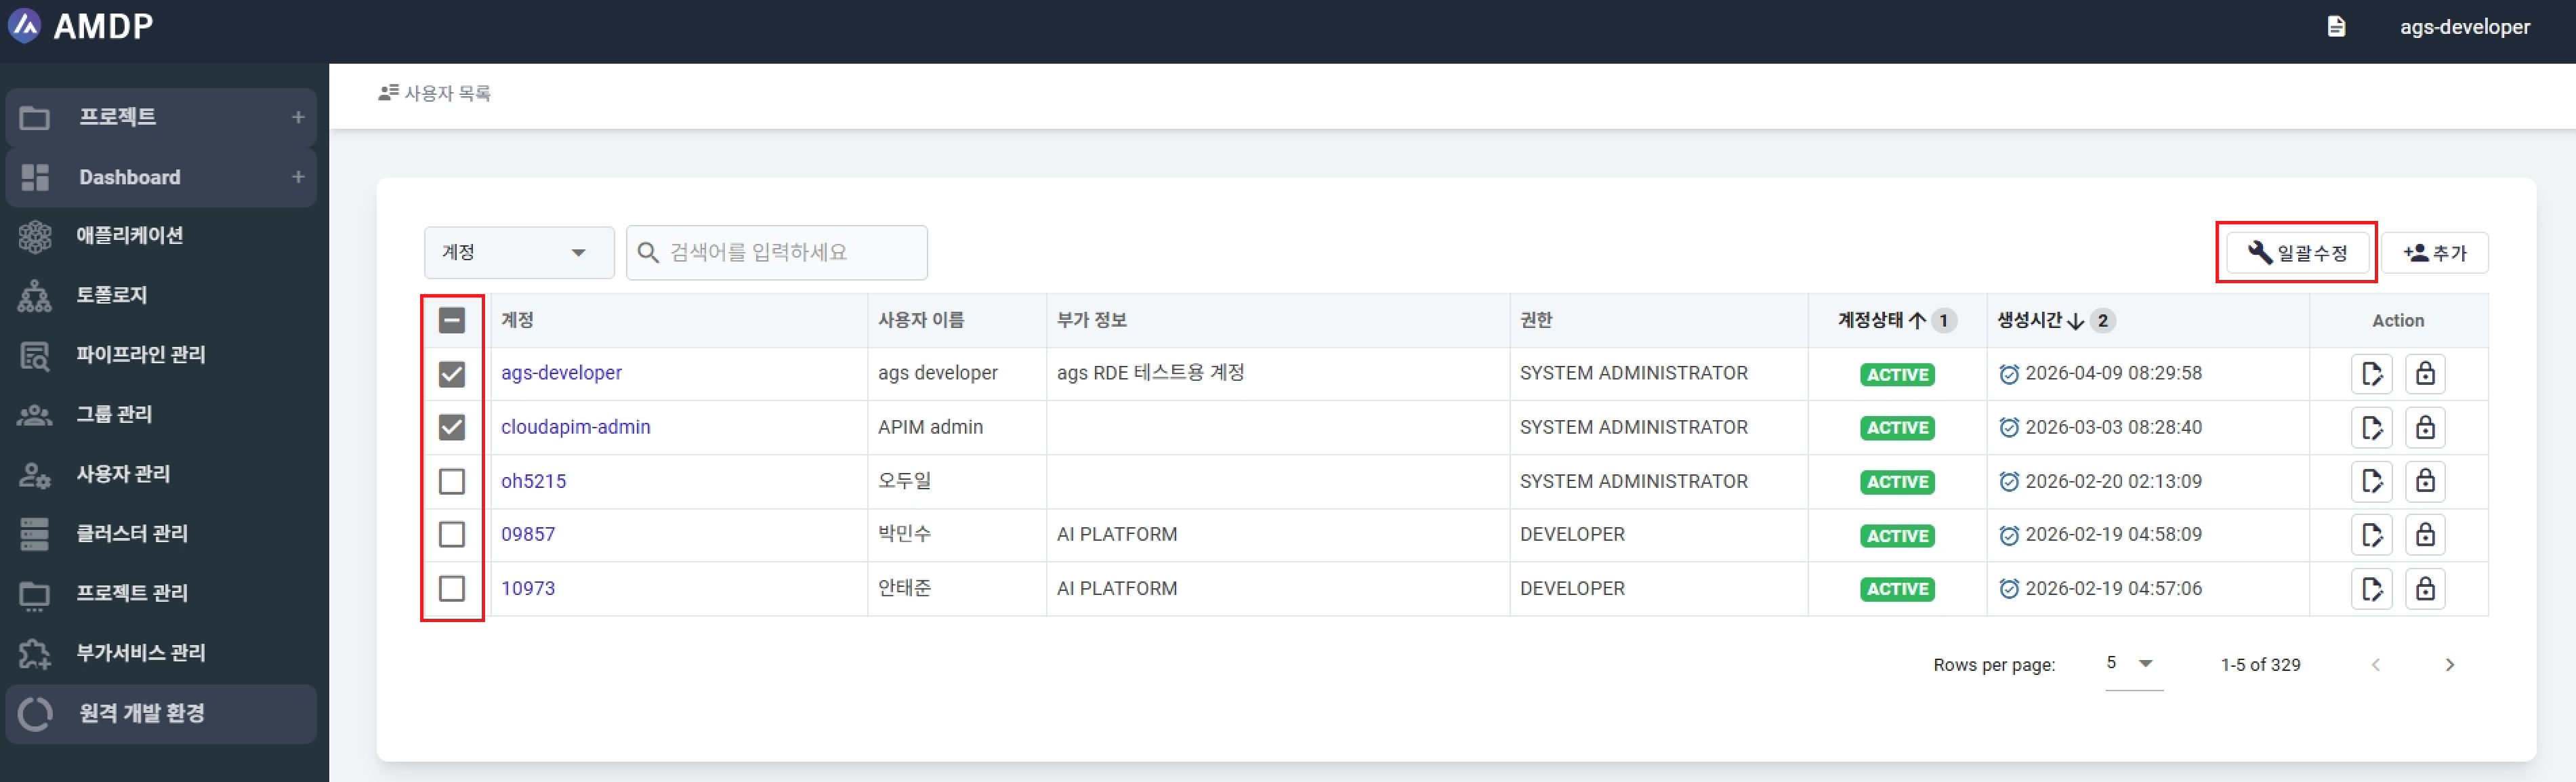
ユーザーを選択して「編集」をクリックすると、システムは編集ポップアップを開きます:
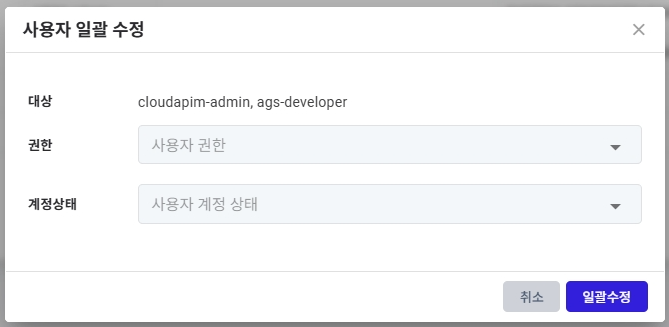
- 役割: 選択したすべてのユーザーに役割を設定します。
- アカウントステータス: 選択したすべてのユーザーにアカウントステータスを設定します。