Share Agent Instance
The Share feature in Agent Instance lets you securely and flexibly share the agent instance you create with other users or groups so they can view what others created in Agent Instance screen. You can control who has access and what level of permission each user or group receives. The Agent Instance sharing feature makes it easy to collaborate securely. You can adjust access at any time by revisiting the sharing dialog, updating users, groups, or permissions as needed.
How to Share an Agent Instance
-
Go to AI Agent > Agent Instances
-
Click the (⋮) button then click Share
Select Sharing Mode
In the sharing dialog, you will see three sharing modes:
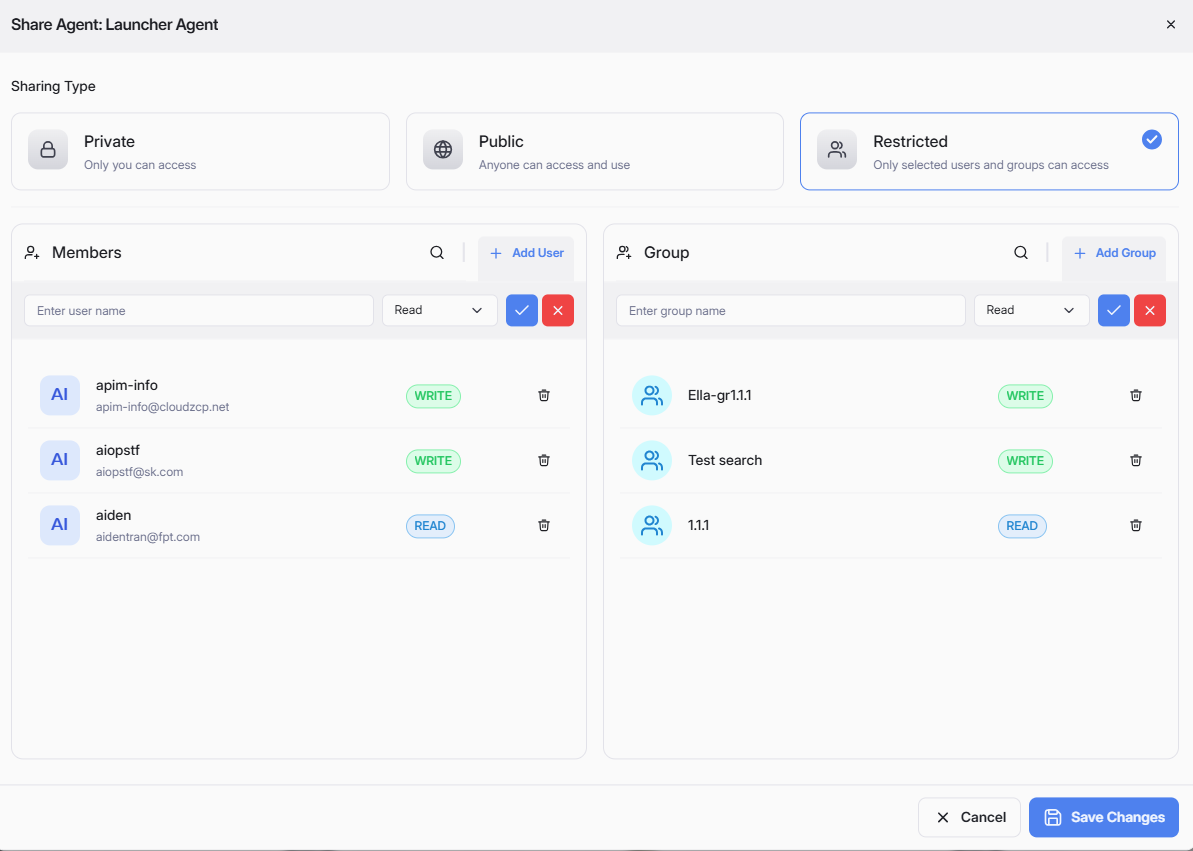
- Private:
- Only you can access and use this agent.
- Useful for agents under development or personal use.
- Public:
- Anyone can access and use this agent.
- Choose this for agents intended for broad visibility or open collaboration.
- Restricted:
- Only selected users or user groups can access and use this agent.
- Offers granular control over who can view or edit the agent.
Please select the appropriate sharing mode and click Save to apply your changes.
Share with a User
When you select Restricted mode, you can share the agent with specific users:
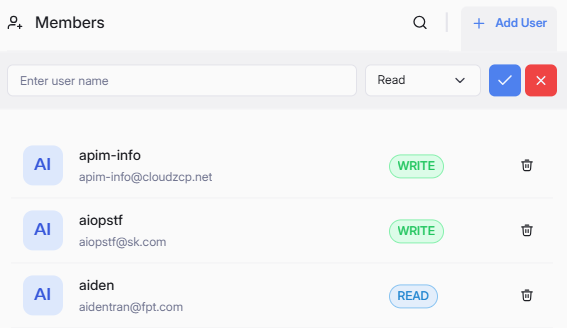
Follow the steps below to share the agent Instance with other users:
- Click + Add User at the top right of the Members section.
- In the search bar, begin typing the username or email. Matching users will appear in the dropdown.
- Select the desired user.
- Choose the permission level: Read (user can view and use the agent, but not modify it), Write (user can edit the agent).
- Click the checkmark to confirm, or the red X to cancel.
- The user will appear in the list below with their permission badge (
READorWRITE). - Click Save at the bottom right to apply your changes.
You can edit a user permission using the pencil icon or remove them with the trash icon.
Share with a User Group
When you select Restricted sharing mode, you can also share your agent Instance with groups:
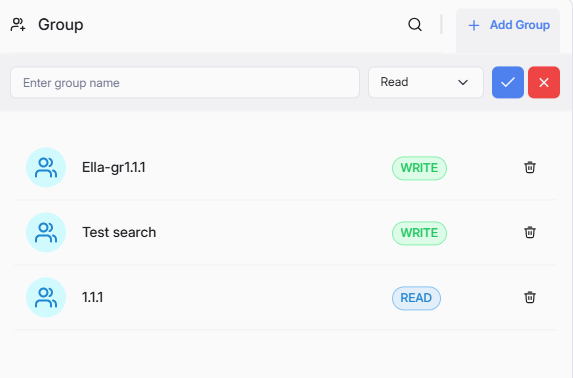
Follow the steps below to share the agent Instance with user groups:
- Click + Add Group at the top right of the Group section.
- Type the group name in the search bar. Matching groups will appear in the dropdown.
- Select the appropriate group from the results.
- Choose the permission for the group: Read (All group members can only view and use the agent), Write (user can edit the agent).
- Click the checkmark to confirm, or the X to cancel.
- The group will appear in the list below with their permission badge.
- Click Save to apply changes.