Getting Started
This guide walks you through the complete end-to-end flow from setting up backend connections to publishing a live agent that users can interact with in AI Workspace.
Overview
Building and deploying an agent in Agent Studio follows this sequence:
Backend Server → MCP Profile → MCP Instance → Skill Registry → Agent Profile → Publish → AI Workspace
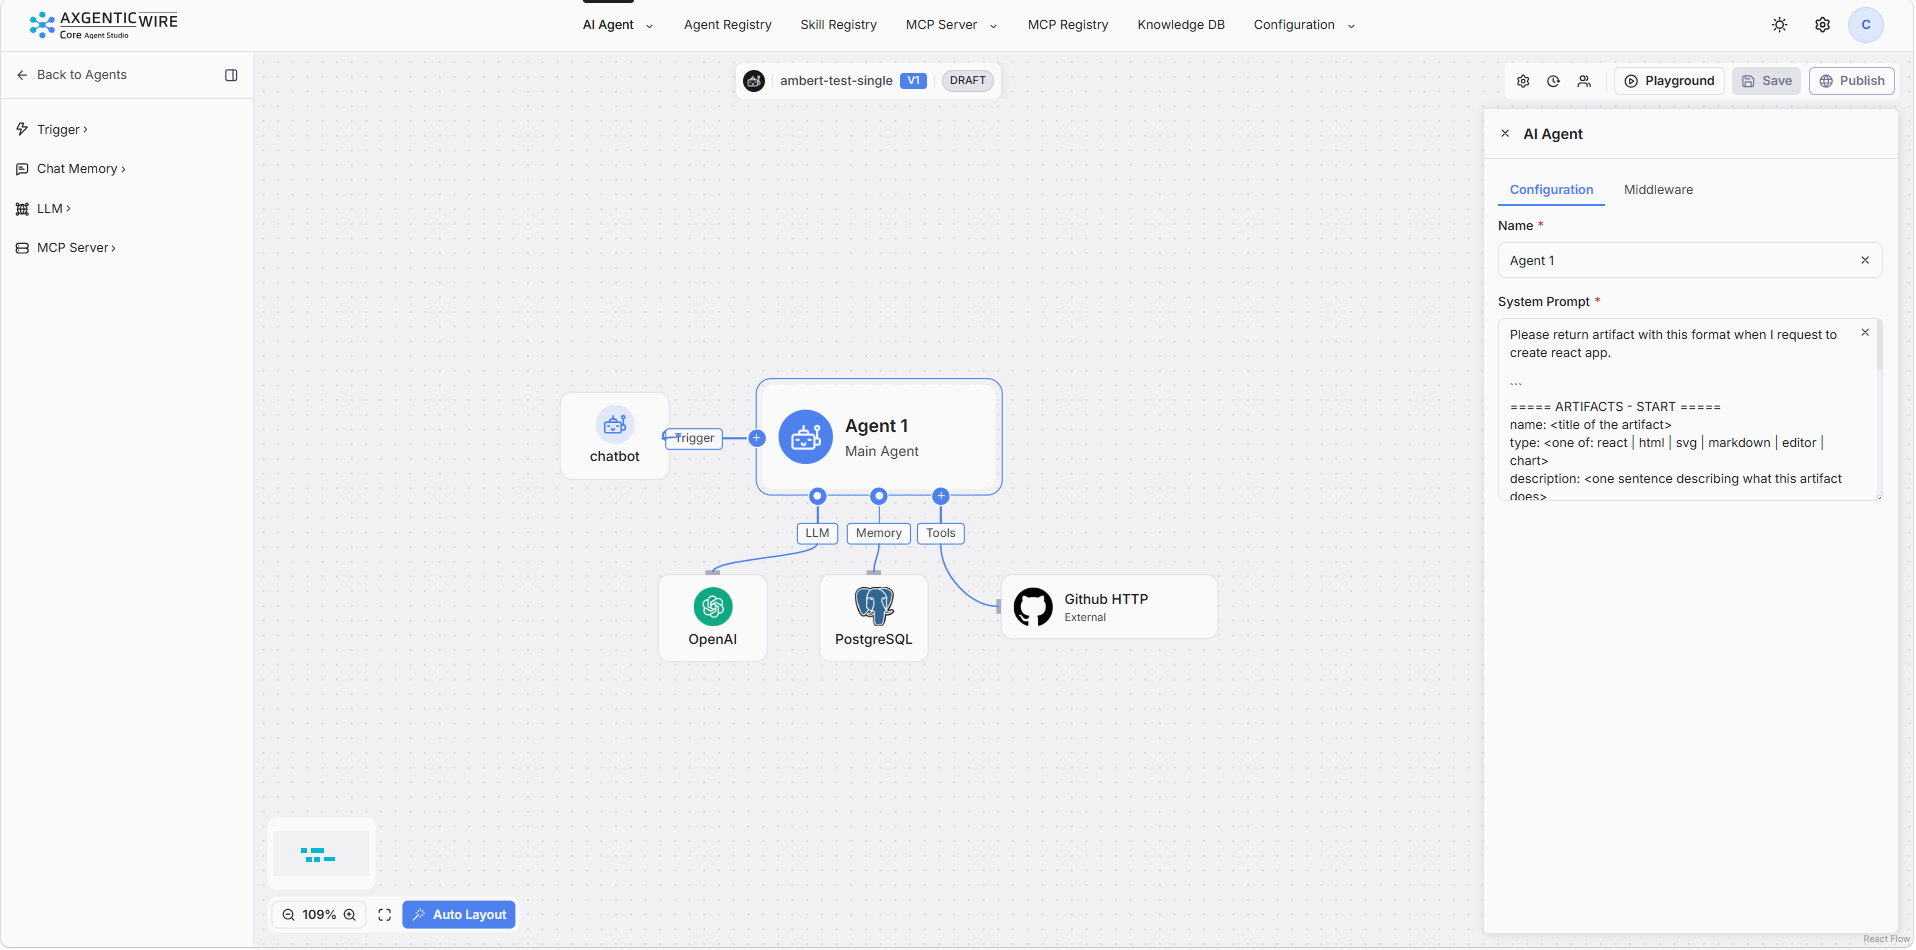
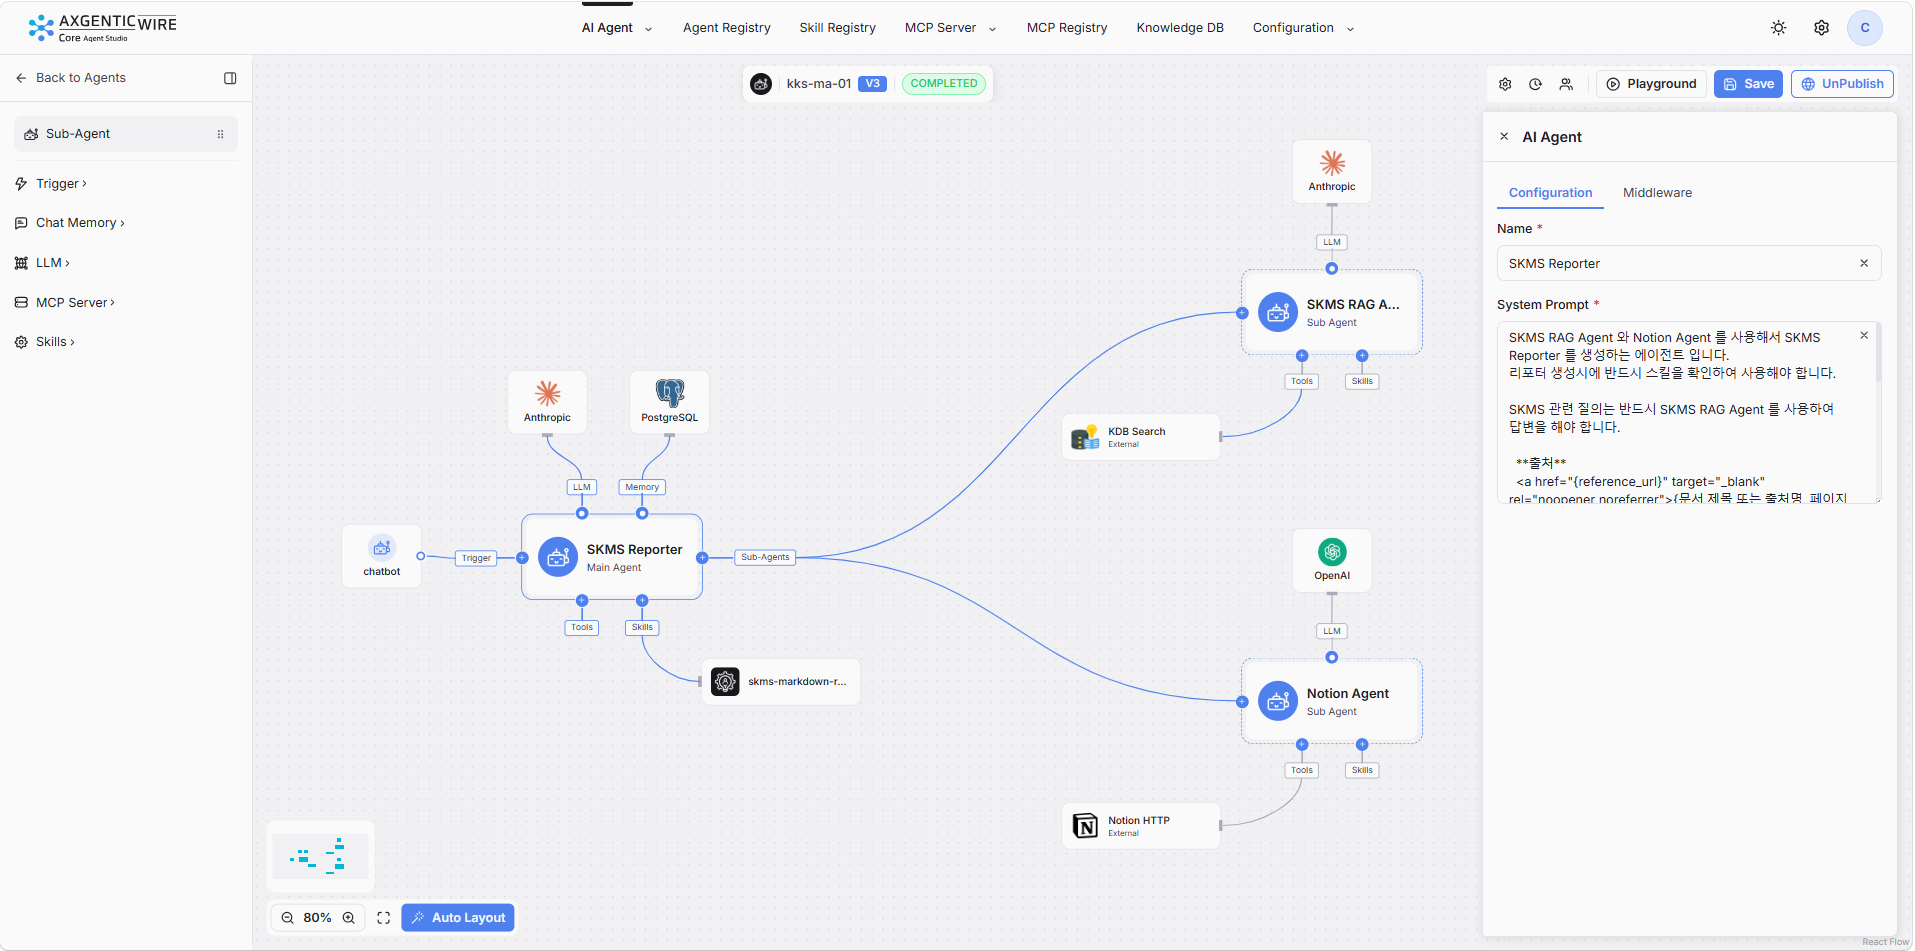
Agent Studio supports two agent types:
- Single Agent: A standalone agent combining a trigger, Memory and Cache, an LLM, tools (via MCP servers), and skills.
- Multi Agent: A main agent connected to one or more sub-agents, each with their own components.
Step 1: Connect Your Backend (MCP Server Setup)
MCP servers expose your backend APIs as tools that agents can call. Choose the path that fits your use case.
Path A - Internal MCP (your own backend API)
- Go to MCP Server > Backend Servers and select Register Backend.
- Enter your backend server URL, authentication settings, and API details.
- For full details, see Backend Server > Register a New Backend
- Go to MCP Profiles and select Create MCP Profile.
- Map the backend APIs you want to expose as MCP tools.
- Run Playground to verify the API calls return expected results.
- Select Save to finalize the profile.
- Select Provision on the MCP Profile.
- The provisioned server now appears in MCP Instances as a running instance.
- Go to MCP Instances, click (⋮) on your instance, and select Playground to validate the live instance.
- After validation, click (⋮) again and select Publish.
- The MCP instance is now available to be attached to agents.
Path B - External MCP (third-party MCP server)
- Go to MCP Registry and select Publish External MCP.
- Provide the external server endpoint and authentication details.
- The external MCP is registered and available for agents to use.
Step 2: Create Skills
Skills are reusable logic blocks (code, prompts, or API calls) that extend what an agent can do.
- Go to Skill Registry and select New Skill.
- Define the skill type, input/output schema, and implementation.
- Select Save. The skill is now available to attach to agents.
Tip: Browse the Skill Registry to reuse skills shared by other users or published publicly - you do not need to build everything from scratch.
Step 3: Create the Agent
With your MCP servers and skills ready, you can now build the agent.
- Go to AI Agent Studio > Agent Profiles and select Create Agent.
- Choose your agent type:
- Create Single Agent - for a standalone, single-purpose agent.
- Create Multi Agent - for a multi-agent workflow with a main agent and sub-agents.
- On the design canvas, configure the following:
| Component | What to do |
|---|---|
| Trigger | Select how the agent is invoked (e.g., chat message, scheduler, webhook) |
| LLM | Choose the language model that powers the agent's reasoning |
| Memory and Cache | Select a memory/cache profile for conversation context |
| MCP Servers | Attach the MCP instances you provisioned in Step 1 |
| Skills | Attach the skills you created in Step 2 |
- Select Save to store the agent configuration.
For detailed configuration steps, refer to AI Agent Studio > Agent Profiles > Create and Update Single Agent Profile or Create and Update Multi Agent Profile.
Step 4: Test in Playground
Before going live, validate that your agent behaves as expected.
- Go to AI Agent Studio > Agent Profiles. On the agent profile card, click (⋮) and select Playground.
- Send test messages and verify:
- MCP tool calls return correct results.
- Skills execute as intended.
- The LLM responds accurately within the agent's scope.
- Adjust the configuration and re-test until the agent performs correctly.
Step 5: Provision and Publish
- Select Provision on the agent profile as a deployment step.
- Once provisioning completes, select Publish to make the agent live. The agent is now available in AI Workspace for users to interact with.
Step 6: Use the Agent in AI Workspace
Once published, users can access and interact with the agent from AI Workspace.
- Open AI Workspace and go to Home.
- In the right sidebar, select the published agent from the Agent selector.
- Optionally add Photos & Files, Connectors, or Skills as needed before sending chat.
- Type a message in the workspace area and interact with the agent.
What's next: Your agent is live and ready for use. You can refine it at any time - update skills, add MCP tools, or adjust configurations - without needing to republish unless structural changes require it. Refer to the AI Workspace section for details on managing agent conversations and settings.