Project Settings
Project permissions in AMDP are categorized into Administrator Permissions and User Permissions. Administrator Permissions allow project admins to view and manage all aspects of the project, including read/write/execute actions and changing project settings. User Permissions, accessible via the User Permissions tab, enable control over profiles and applications for users or groups.
This section explains how to set up project administrators, user permissions, GIT management, and image registry management.
Administrator Permission
- The Administrator Permissions tab:
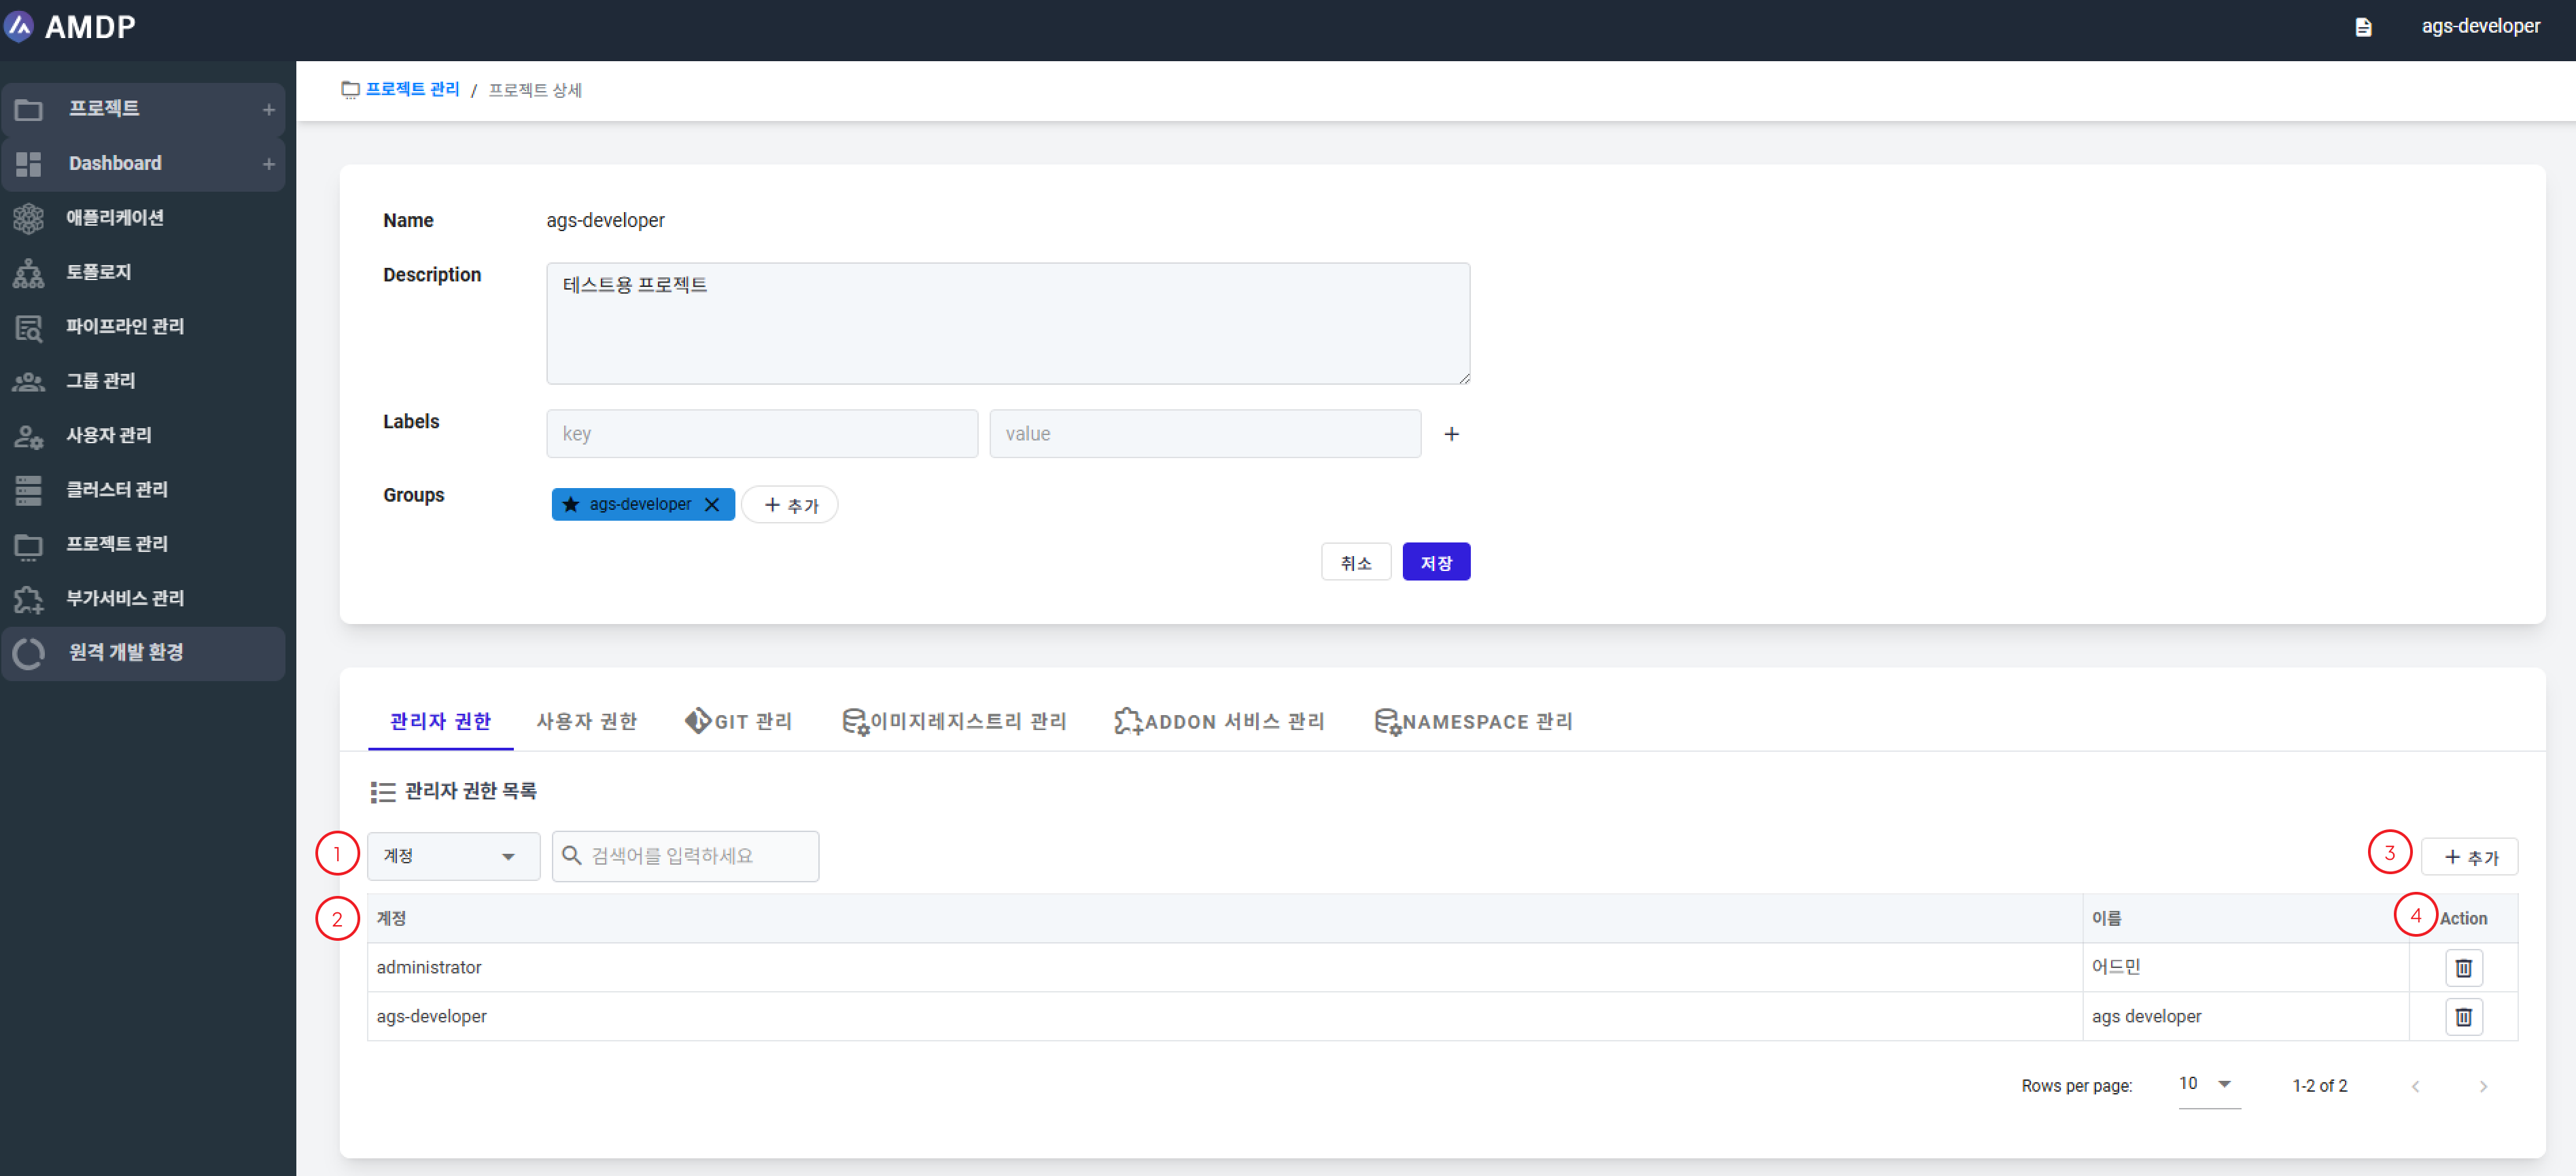
① The search function allows users to search by account and name.
② Lists currently registered administrators.
③ Includes a ADD button to register more users as administrators.
④ Features a Delete button to remove specific users from the administrator role.
- Adding Administrator Permissions:
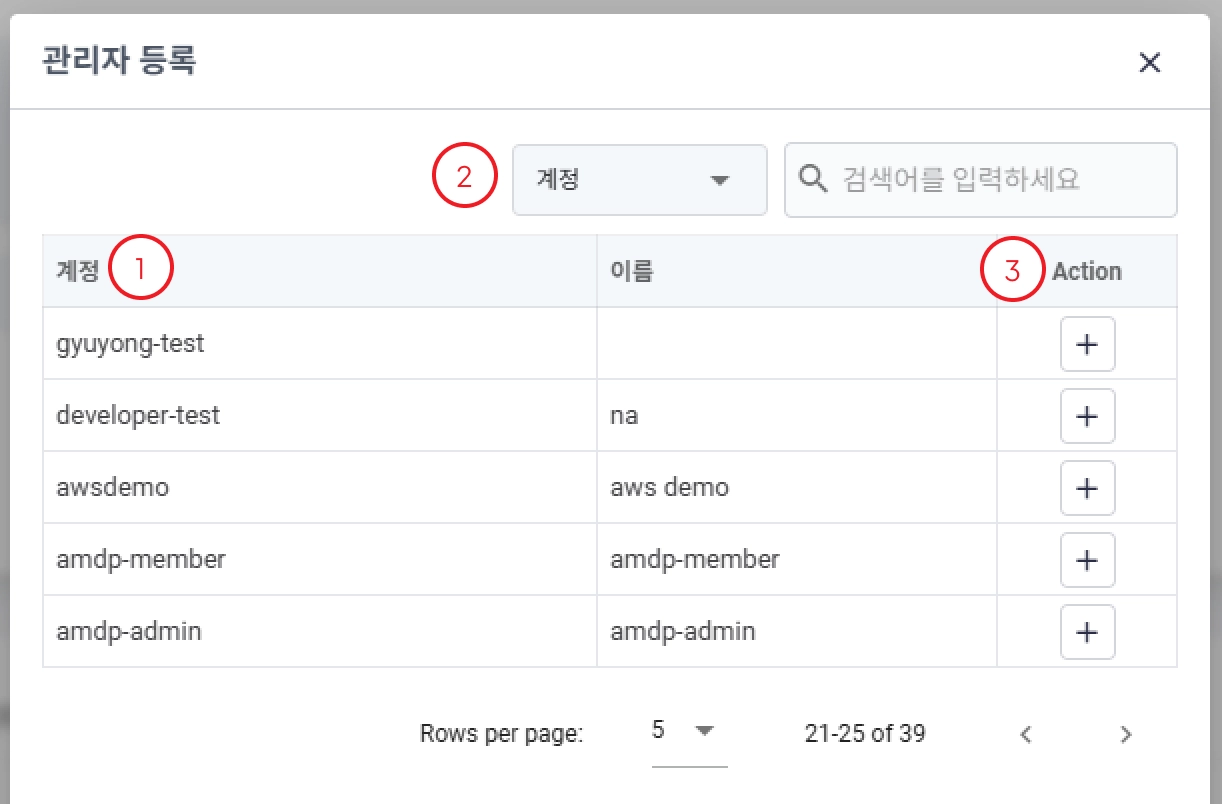
① Displays a list of users eligible for administrator role. Users already in the role or having user permissions are excluded.
To register a user with user permissions as an administrator, you must first remove them from the user permissions. If the user is part of a group that is registered under user permissions, they must also be removed from that group.
② Offers a filtering option to search for users to register.
③ The Action button immediately registers the selected user as an administrator.
User Permissions
- Description of the User Permissions tab:
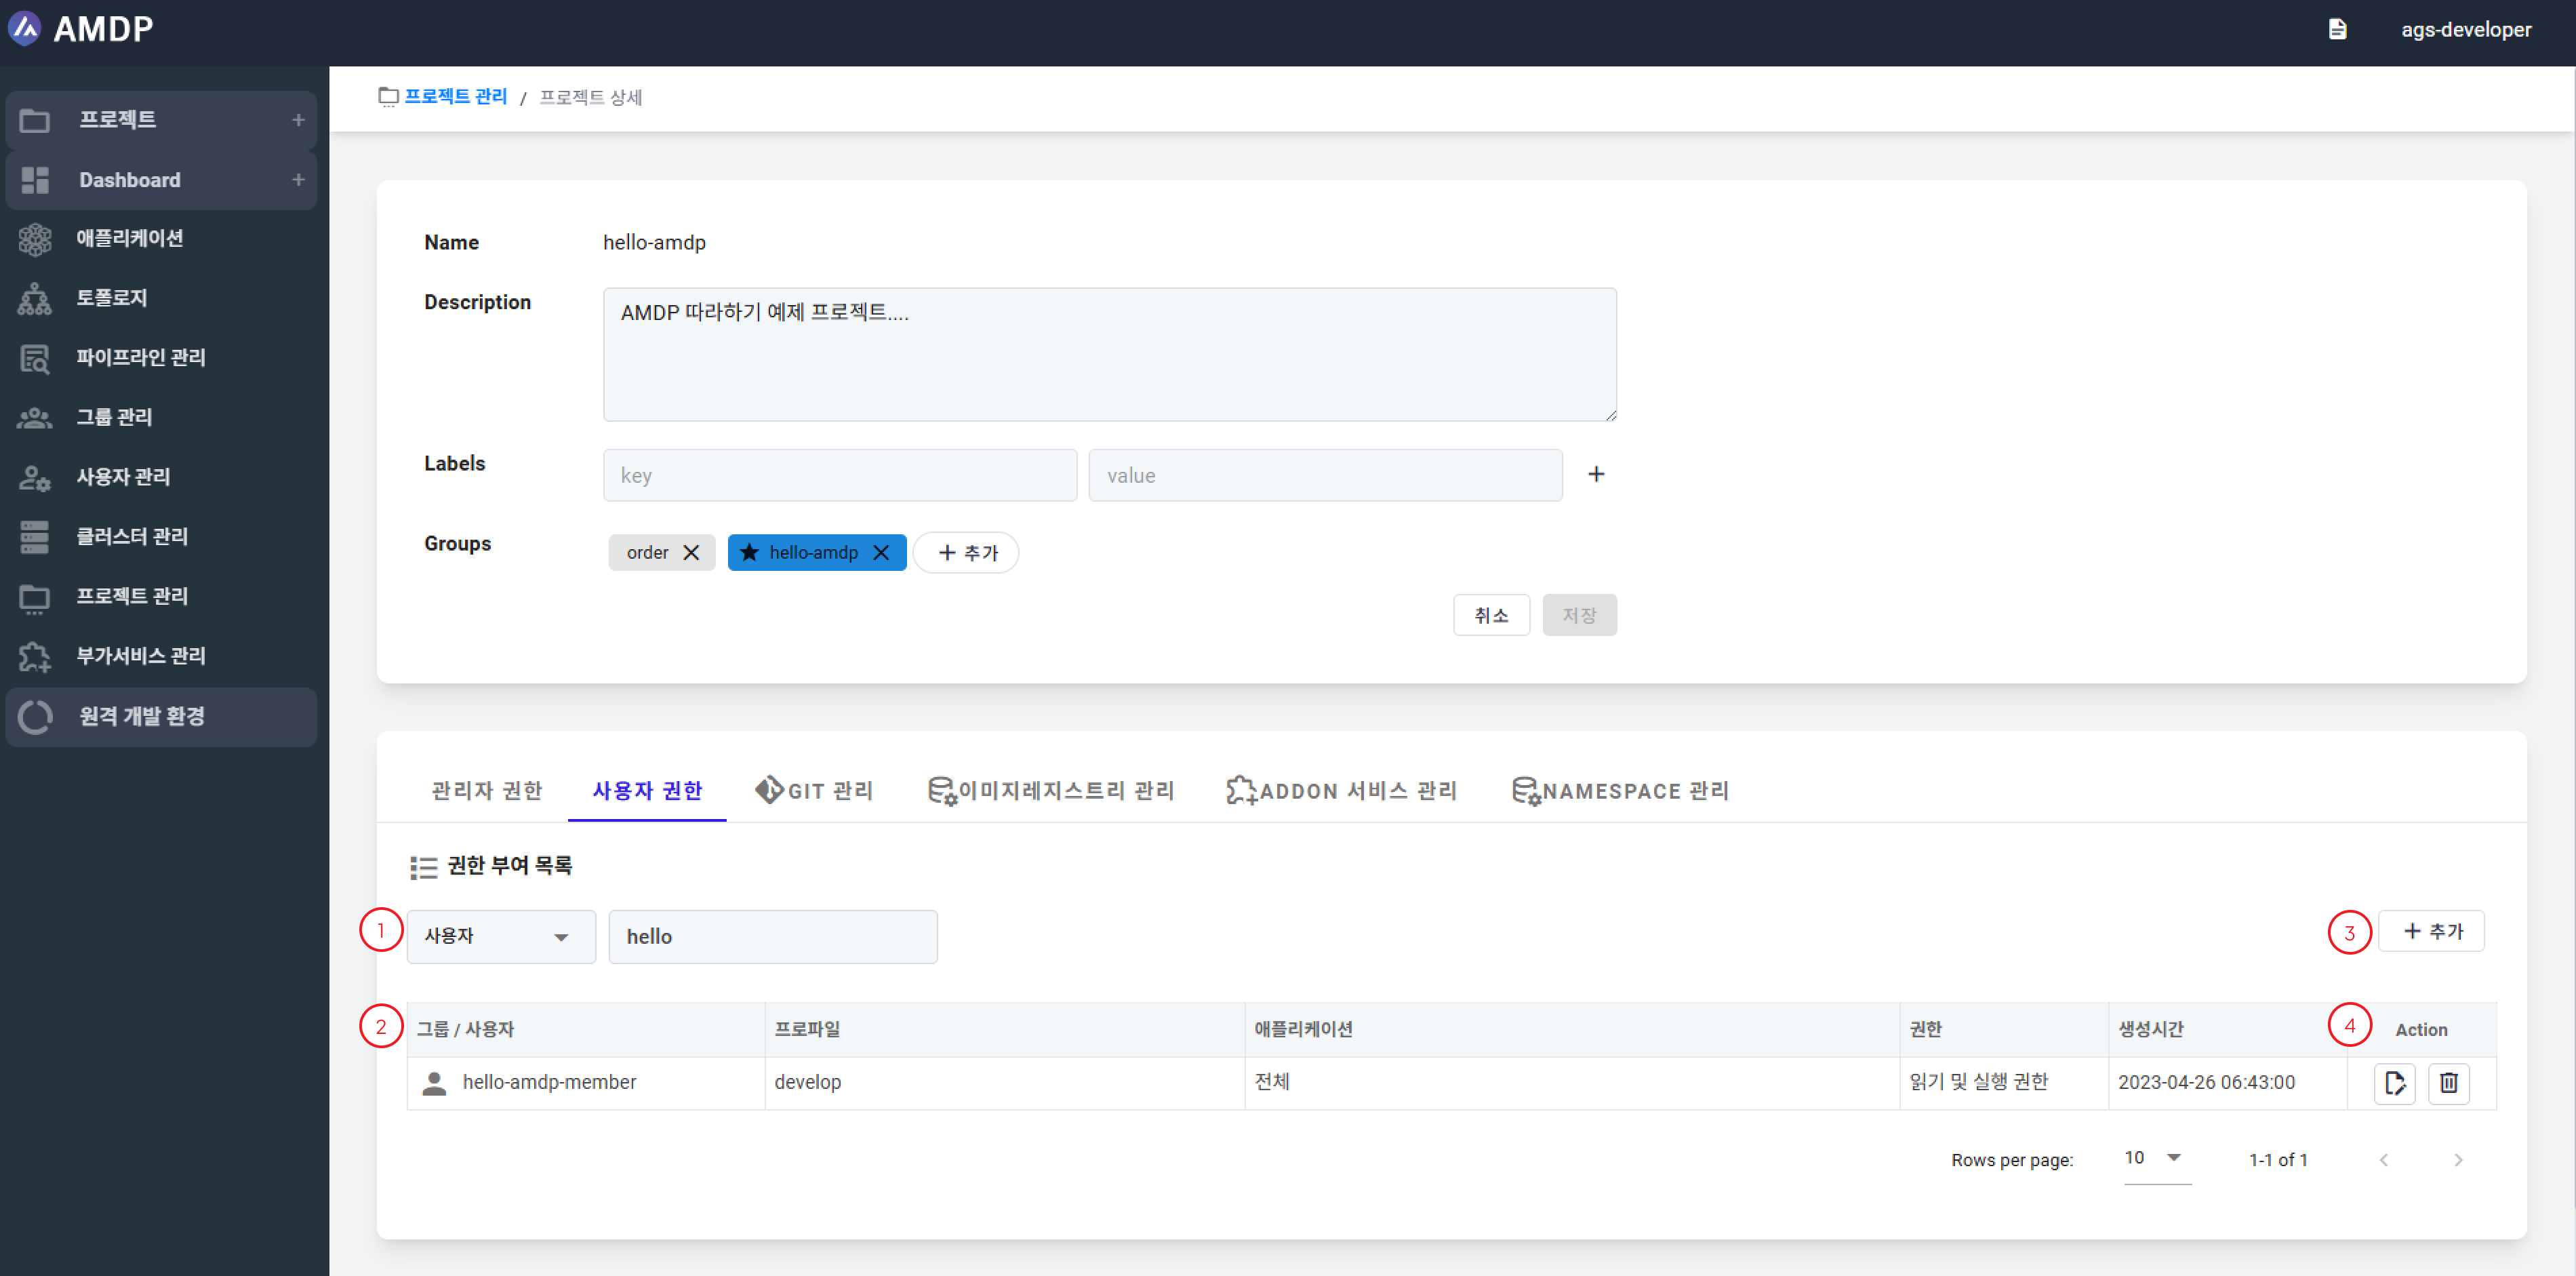
① You can filter the list by selecting All, Group, or User.
② Lists groups or users currently granted permissions.
- Group/User: Icons indicate whether an entry is a group or user, along with their name.
- Profile: It is the name of the profile to which permissions have been granted. It could be the entire profile or a specified profile name.
- Application: This is the name of an authorized application. It is the full or designated application name.
- Permission: Permissions for the application include read permission, read and execute permission, and full permission. For detailed settings, please refer to User Permission Management.
- Creation Time: Displays the time when the user permissions were created. Action: Includes buttons to modify or delete user permissions.
③ You can assign specific permissions to a group or user by pressing the ADD button.
④ It is the Action button for modifying or deleting individual items.
- Pressing the “modify” button allows you to change the permissions that have been granted.
- Pressing the “delete” button removes the permissions granted to a group or user, thereby deleting the project's permissions for that entity.
- Adding User Permissions (Registration)
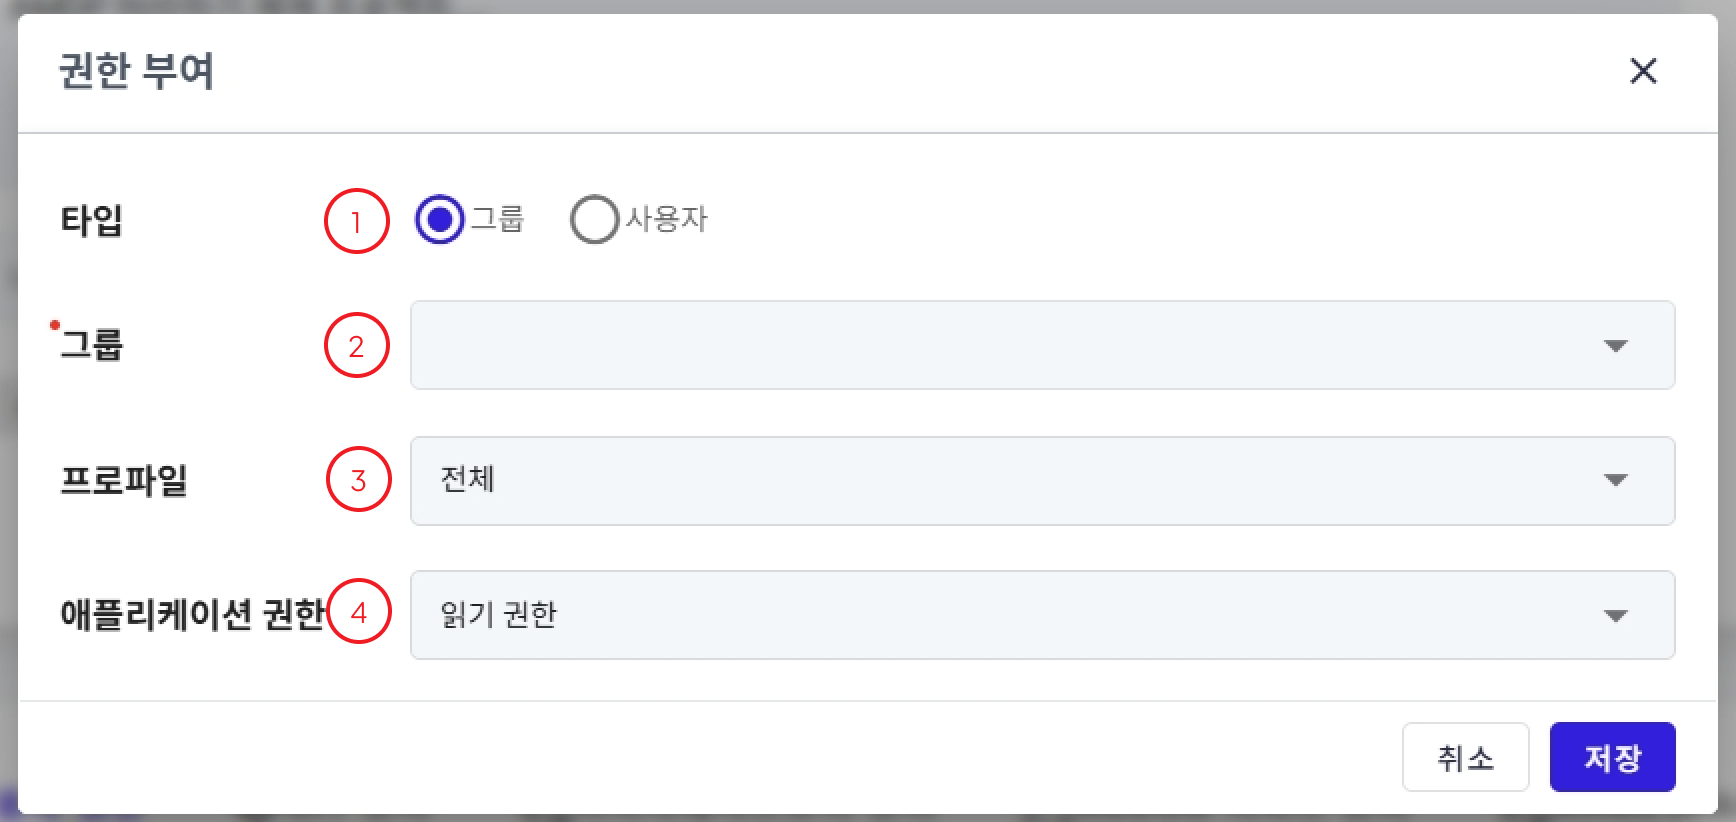
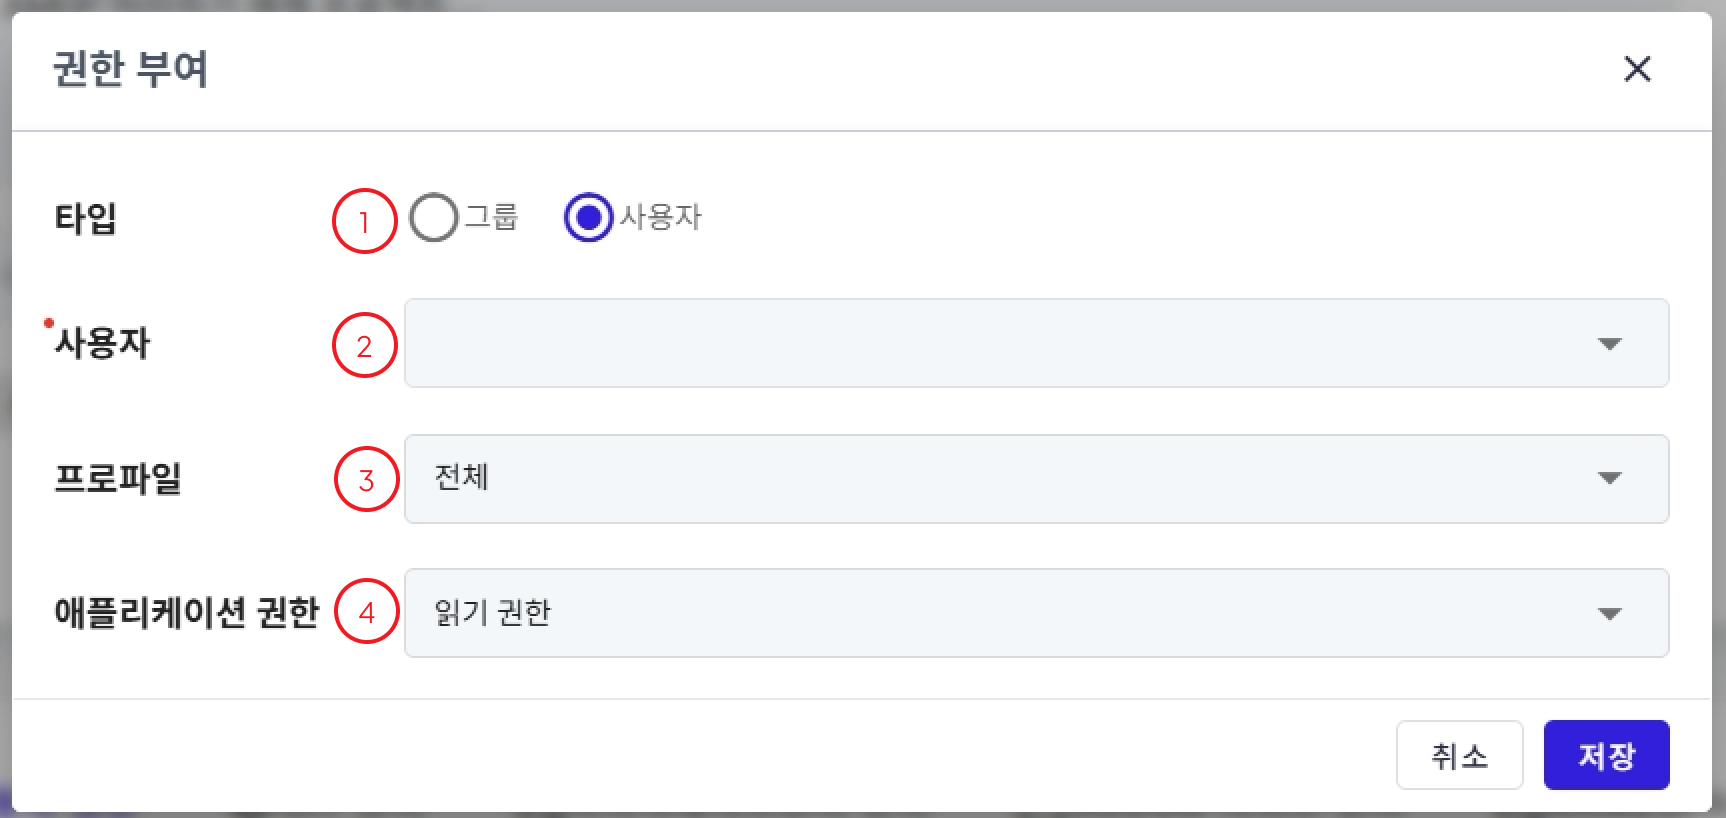
① Target: Select a group or user to whom you want to grant permissions.
② Group/User: Depending on the target, choose from the available groups or users. Project administrators are excluded from the user list.
③ Profile: Select the profile to which permissions will be granted. This can be either All or a specific profile.
④ Application Permissions: Choose the level of permissions for the application, which can be 'Read', ' Read and Execute', or ' Full ' permissions.
GIT Management
GIT List Management
This is a description of the various sections within the GIT Management tab.
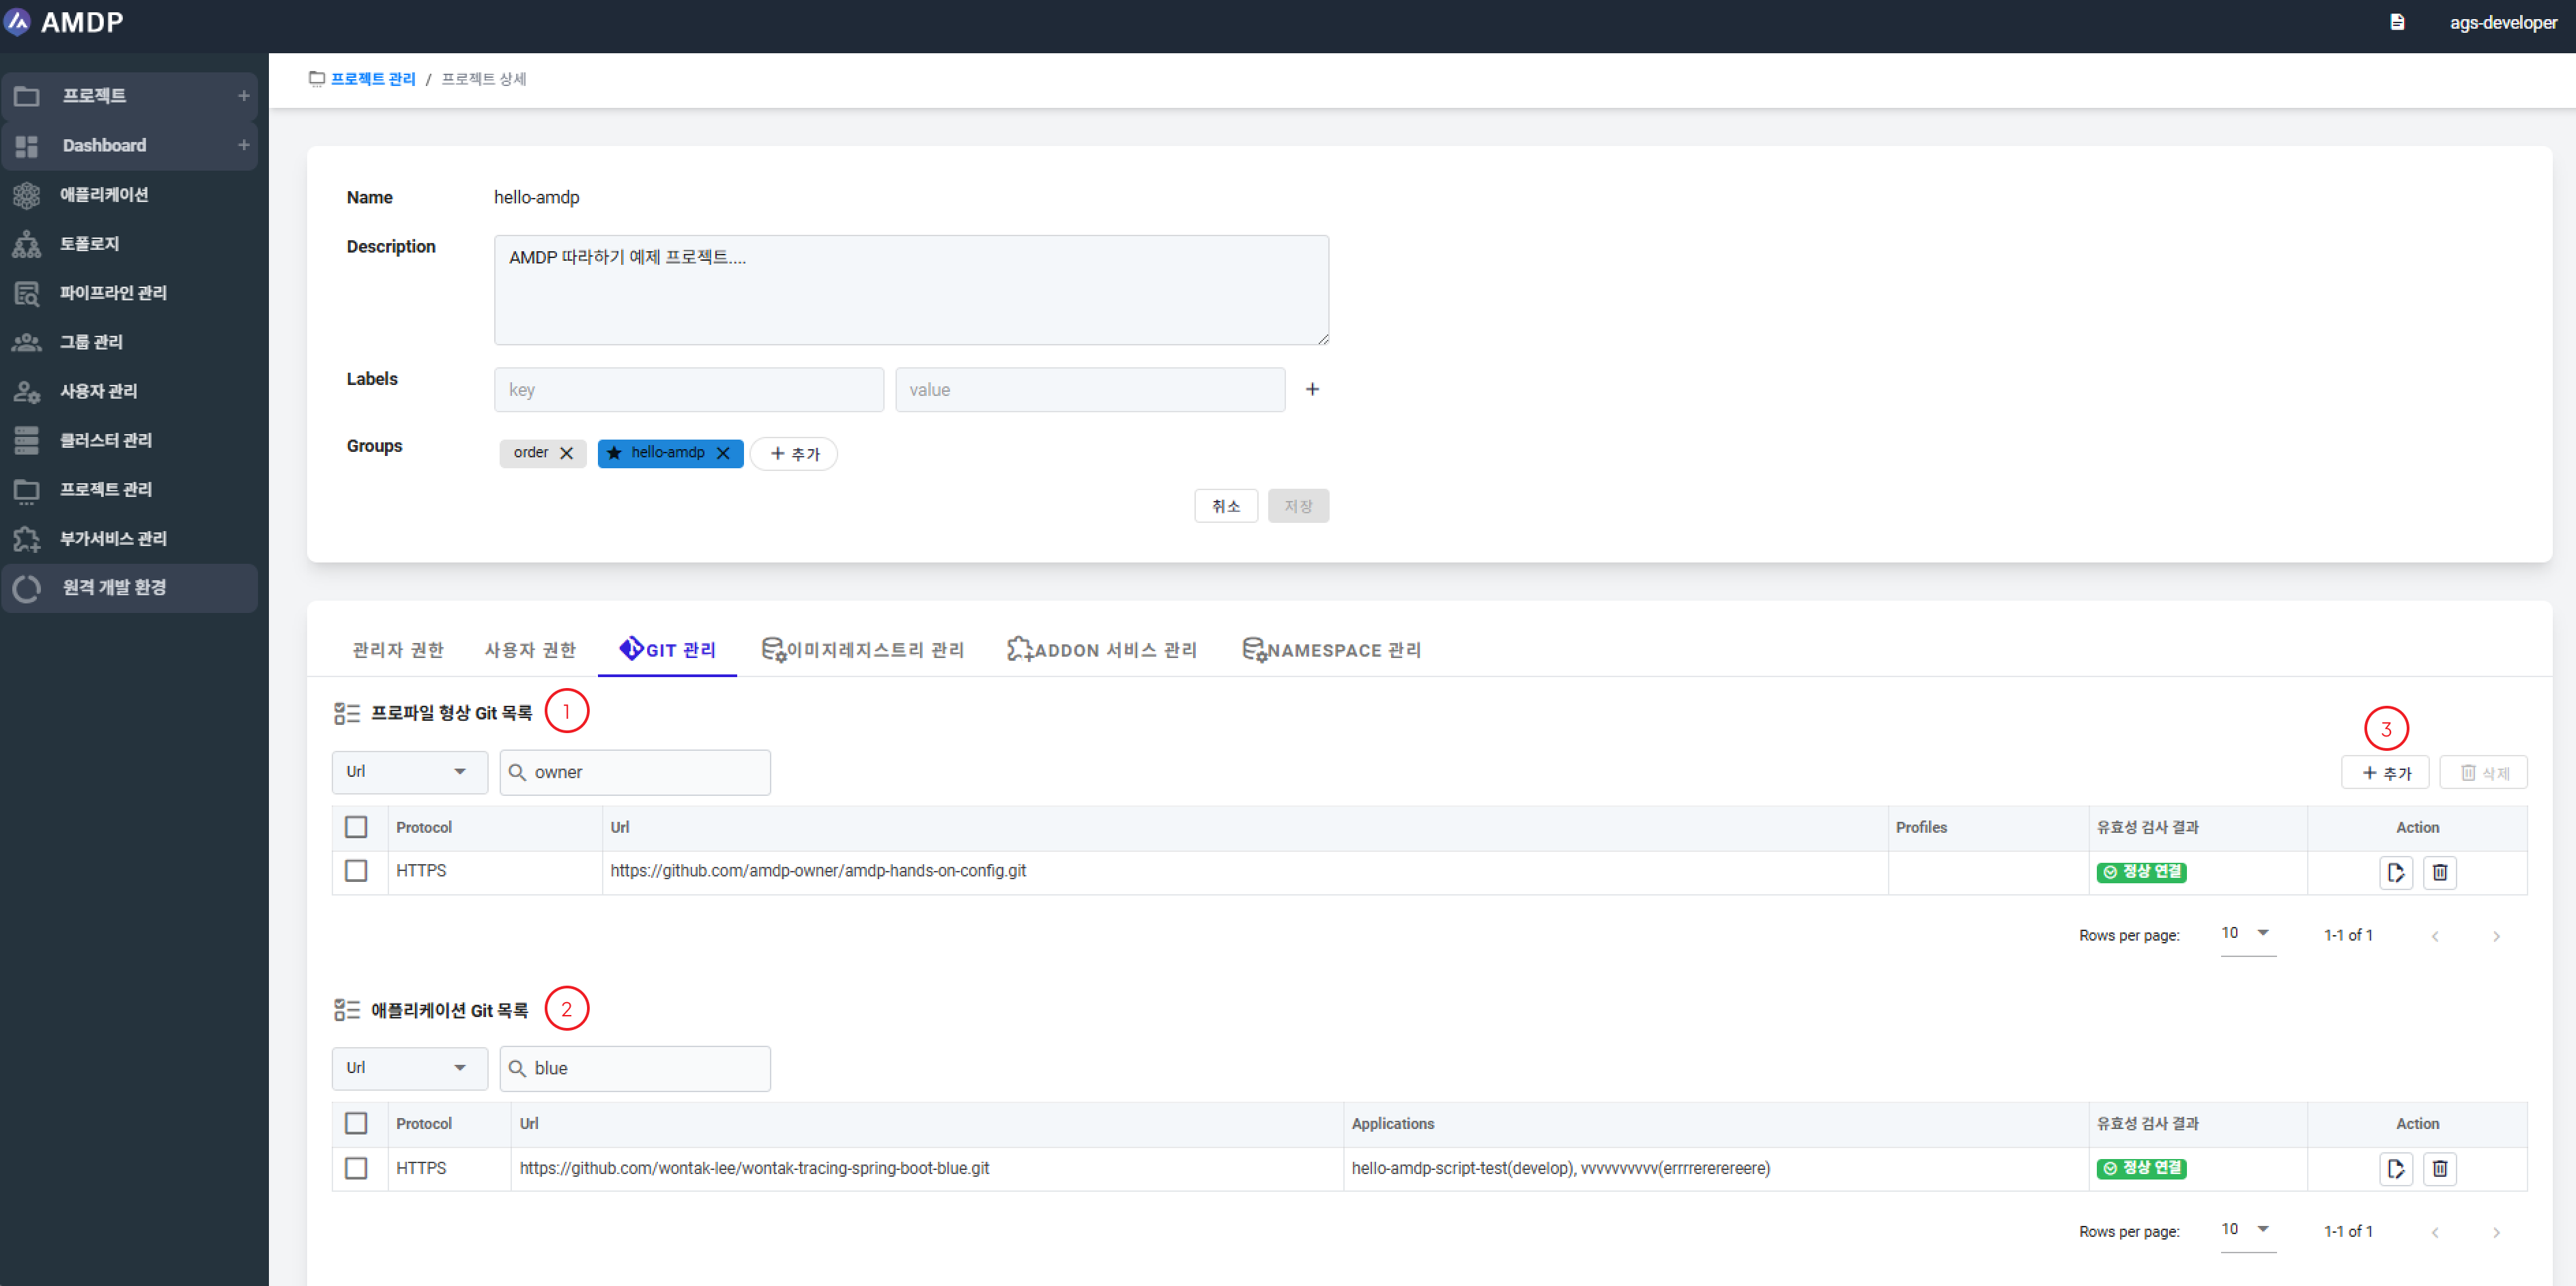
① The GIT Management tab provides a list of Git repositories for profile settings.
- Protocol: The authentication protocol used during registration, either HTTPS or SSH.
- Url: The complete address of the Git repository.
- Profile: List of profiles using this Git repository.
- Validation Results: The results from validation checks done during addition or modification.
- Action: Buttons for modifying or deleting the Git repository.
② This section covers the list of GIT repositories that store application sources.
- Protocol: The authentication protocol used during registration, either HTTPS or SSH.
- Url: The full address of the Git repository.
- Application: List of applications currently using this Git repository.
- Validation Results: The outcomes of validations performed during additions or modifications.
- Action: Buttons for item-specific modifications or deletions.
③ This is a button to add profile settings or application GIT information.
Additional GIT Registration
- It is a registration using the HTTPS protocol.
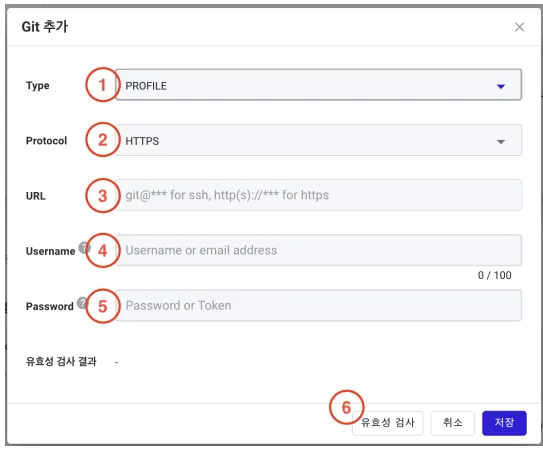
① Type: Specifies the target for the Git information being added, either PROFILE or MICROSERVICE
② Protocol: Selects the protocol for Git connection, either HTTPS or SSH .
③ URL: The URL corresponding to the chosen Git protocol.
④ Username: The username or email address of the user.
⑤ Password: The user's password or access token.
Github officially requires the use of personal access tokens instead of passwords
⑥ Validation Button: This is a button to verify the correctness of the entered information and to check the connection's validity
- It is a registration using the SSH protocol.
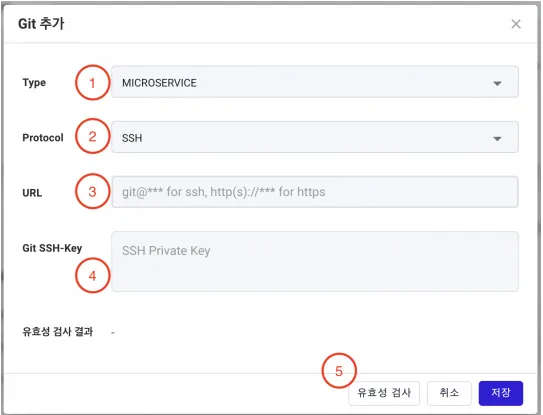
① Type: Designate the target for the Git information being added, either PROFILE or MICROSERVICE.
② Protocol: Choose the Git connection protocol, either HTTPS or SSH.
③ URL: The URL based on the selected Git protocol.
④ Git SSH-Key: Register a private key. However, the public key corresponding to the private key must be pre-registered in the repository
⑤ Validation Button: A button to check the correctness of the information registered and the connection's validity.
Image Registry Management
Image Registry List
This is a description of the various sections within the Image Registry Management tab.
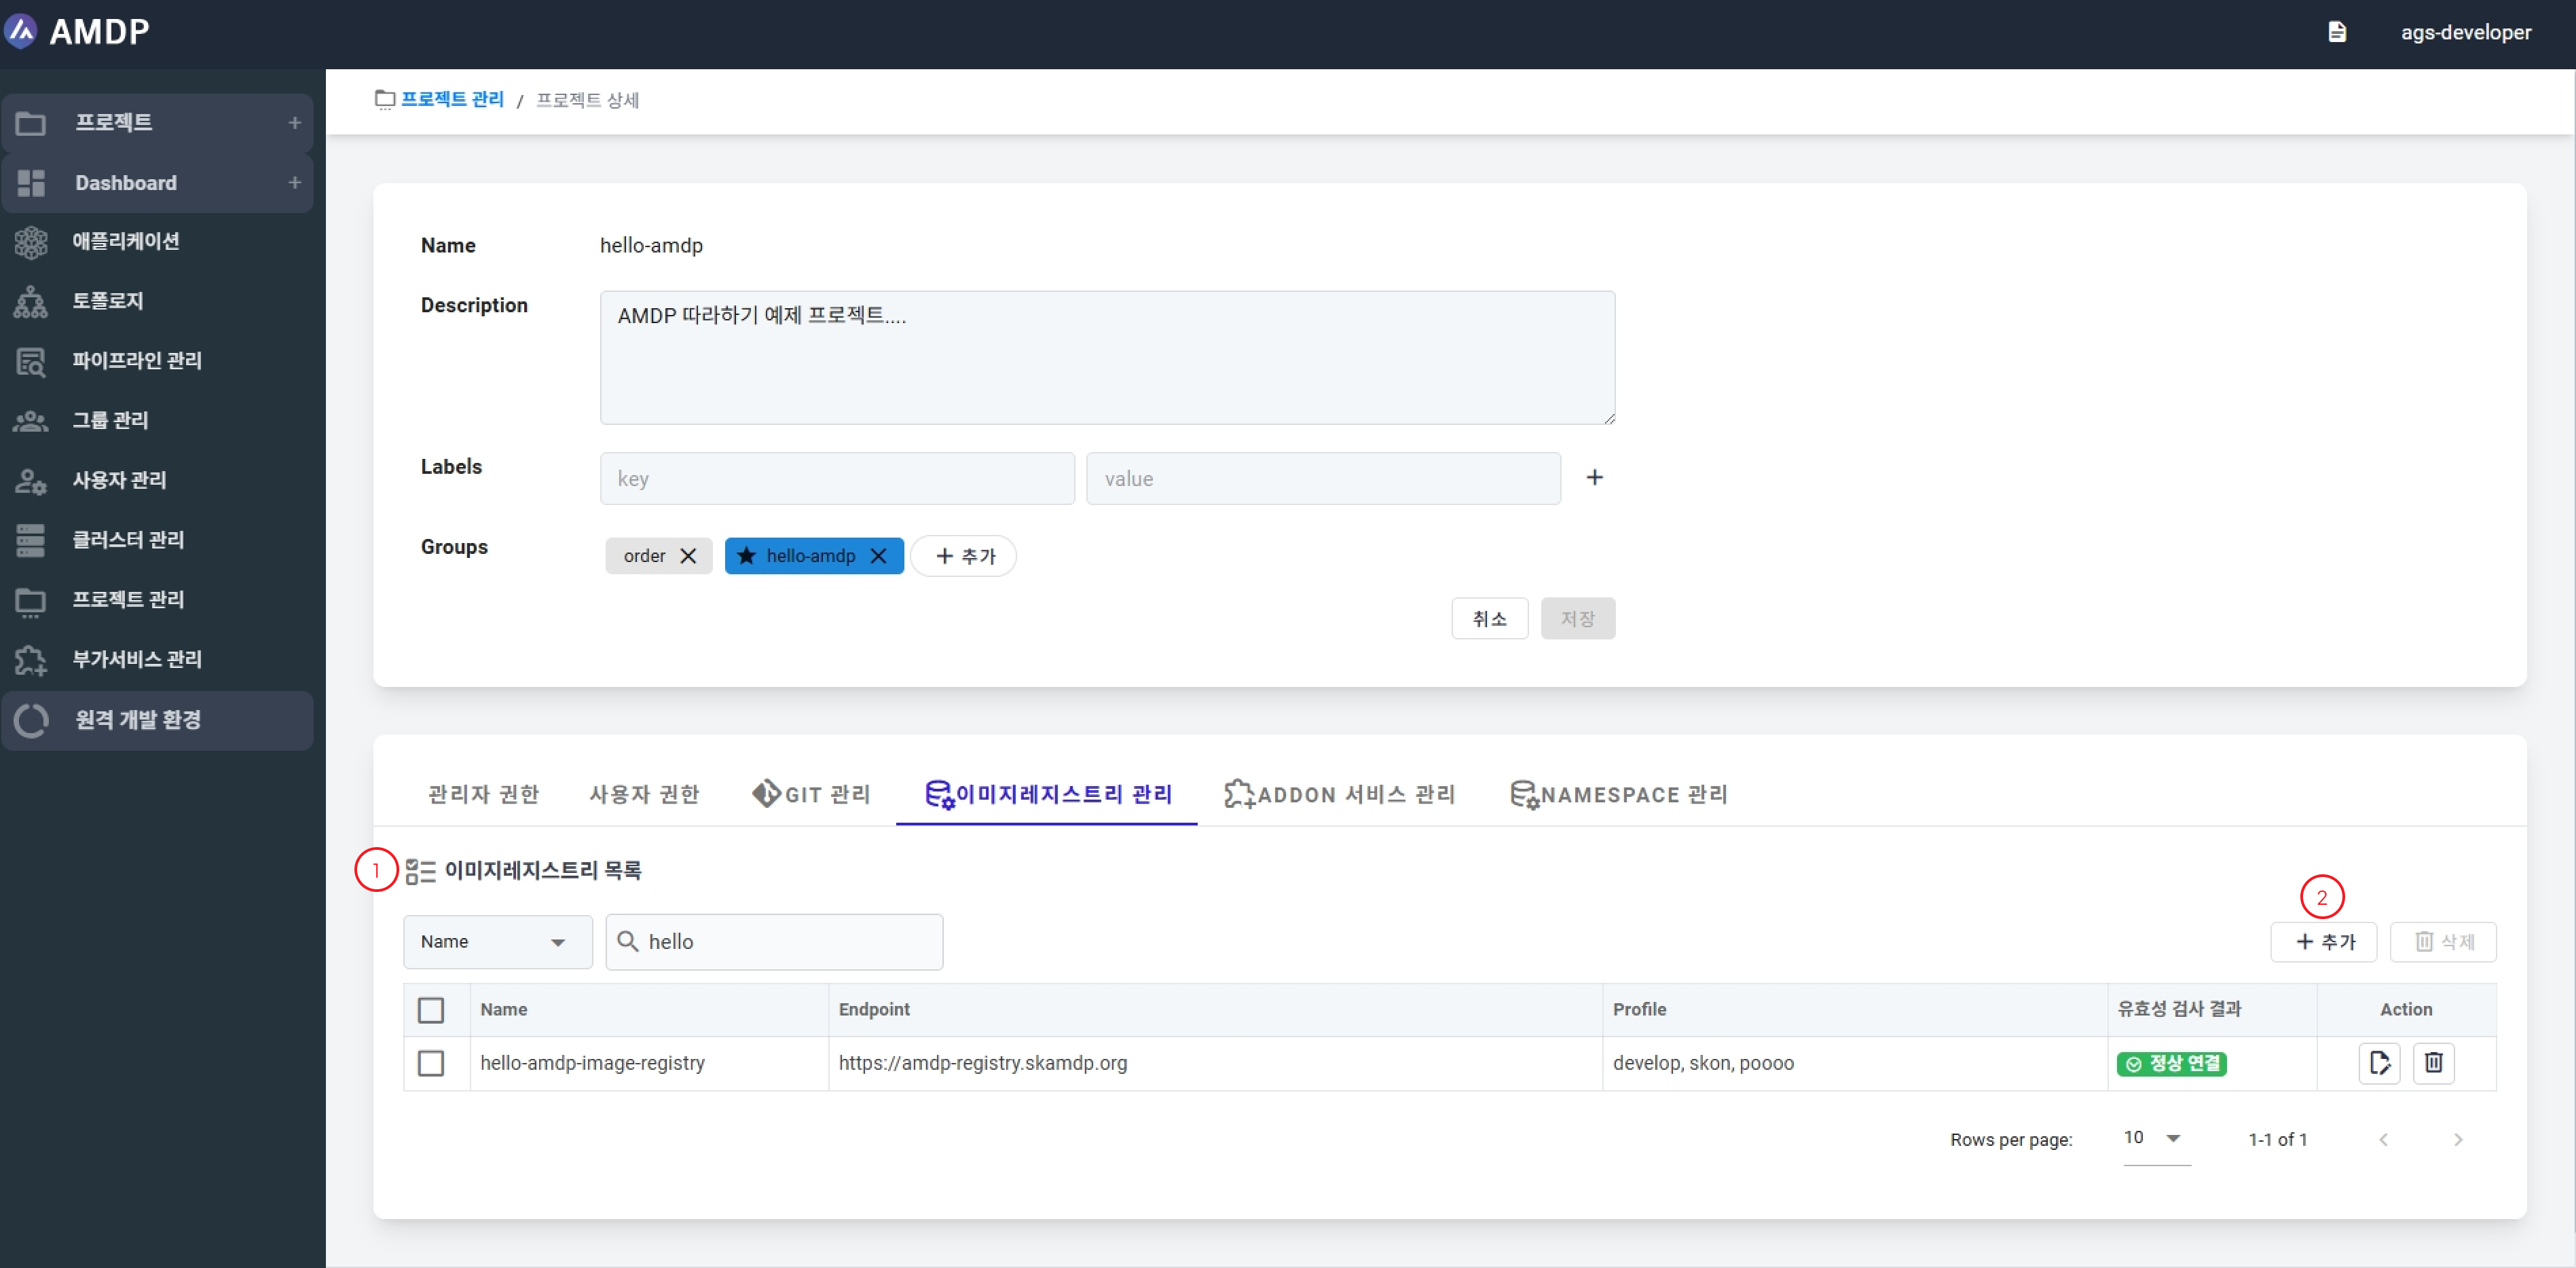
① The section provides a list of registered image registries.
- Search function: Allows users to search by Name, Endpoint, Profile.
- Displayed information:
- Name: The name of the registered image registry.
- Endpoint: The address of the registered image registry.
- Profile: List of profiles using the registered image registry.
- Validation Results: Outcomes from validation checks during addition or modification.
It does not conduct periodic checks. To update, you must press the modify button and then press the validation check button in the edit popup window.
- Action: Buttons for modifying or deleting the specific image registry.
② This is a button to add new image registries.
Add Image Registry
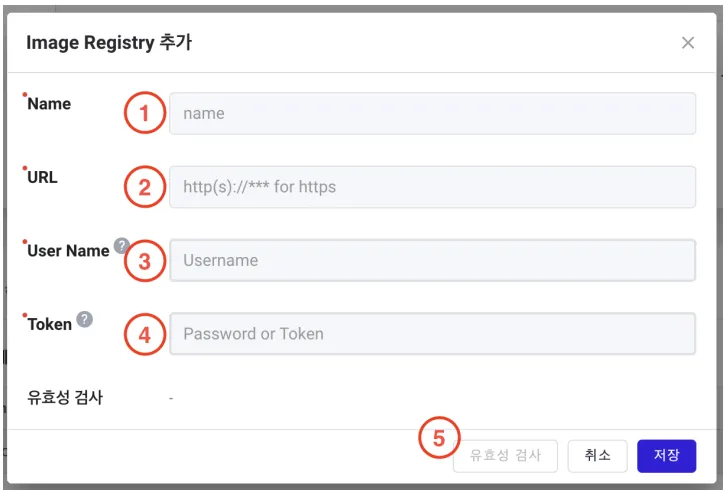
① Name: The name used to distinguish the registered image registry.
② URL: The address of the registered image registry.
③ Username: The username or ID used for authentication with the registered image registry.
④ Token: The token used for authentication with the registered image registry
⑤ Validation Button: This button is activated when you enter the URL, username, and token for the image registry. It is used to verify if the information is correct.
Addon Service Management
Addon Service List
This section describes how to manage Addon services in Project Settings.
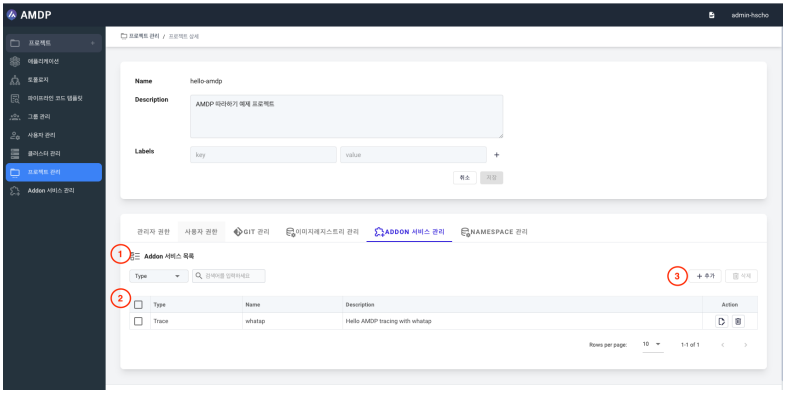
① Provides a list of Addon services based on matching values in the fields of “Type”, “Service Name”, and “Description”
② List of Addon services:
- Type: Information about the type of Addon service (Logging, Monitoring, Trace, IssueTracker, CICD).
- Name: The registered name of the Addon service.
- Description: Description of the Addon service.
- Action: Buttons to edit or delete the respective Addon service.
③ Button to add Addon services
Addon Service Addition/Modification
The Addon service addition page is similar to the modification page.

① Type: Information about the type of Addon service (Logging, Monitoring, Trace, IssueTracker, CICD, etc.).
② Name: Name used to distinguish the Addon service.
③ Description: Description of the Addon service.
④ Predefined Env: Information about reserved keywords based on the type.
AMDP currently provides predefined environment variables like PD_MICROSERVICENAME, PD_PROJECTNAME, PD_SERVICENAME , PD_PROFILENAME, PD_NAMESPACE, PD_PODNAME, PD_DEPLOYNAME, etc.
⑤ Custom Env: Information about environment variables to be added within the Addon service.
⑥ YAML Template: Provides data configured for the Addon service in YAML file format.
In the yaml template:
- Environment variables must be entered in the $
{pd_variable_name}format for AMDP to recognize them as predefined variables. - Environment variables must be entered in the “$
{variable_name}format for AMDP to recognize them as custom variables.
⑦ Save or cancel the entered Addon service details.
Addon Service Deletion
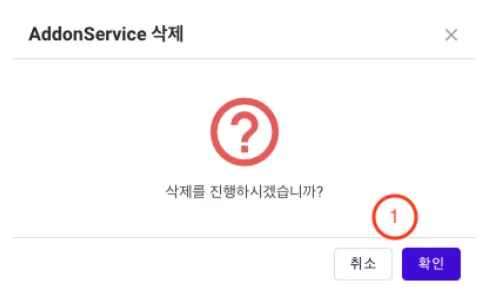
① Addon Service Deletion Screen for deleting an Addon service.
NAMESPACE Management
NAMESPACE List
Explanation of NAMESPACE Management by Section
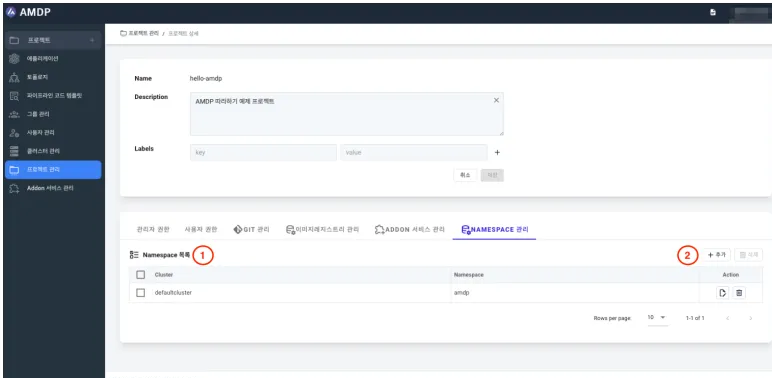
① This is a list of registered NAMESPACE.
- Cluster: Information about the cluster to which the registered Namespace belongs.
- Namespace: The name of the registered Namespace.
- Action: Buttons for editing/deleting the respective Namespace.
② This is the button for adding a NAMESPACE
Add NAMESPACE

① Cluster: Information about the parent Cluster for the Namespace being registered. Selecting this value allows you to choose from a list of associated Namespace options.
② Namespace: Select from the list of Namespace options created within the chosen Cluster.
③ Registration List: When you select a Namespace, you can review additional information such as Network Configuration and Label Information in this list. The final addition is based on the target selected from this list.