Build Pipelines
Under Application menu in the ZCP console, you can use the Build Pipelines feature to automate the process of building your application artifacts and container images directly from your source code. This feature is a crucial component of the CI/CD capabilities offered by the platform.
Before configuring build pipelines of an application, you need to register and manage that application. If the application already exists, select it from the Application list or follow the Register New Application guideline on how to create a new application in ZCP.
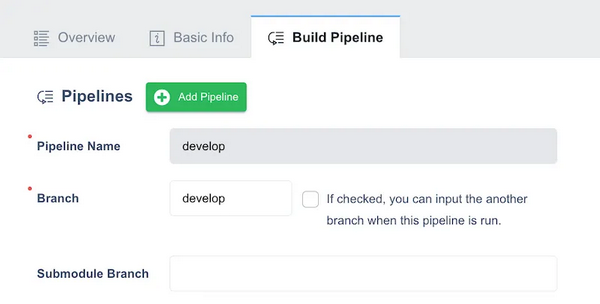
Configure Build Pipelines
Each application can have multiple build pipelines, allowing for different build configurations (e.g., for different branches or build tools). After registering an application, select the application from Application Listing page and navigate to Build Pipeline tab to start configuring build pipelines:
Run and Monitor Builds
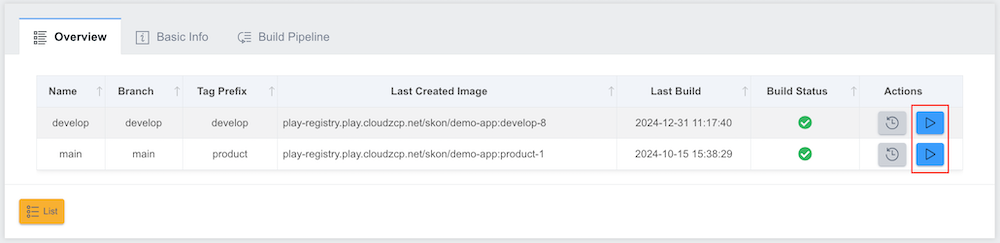
Run a Build Pipeline
- On the Application > Overview tab, find the desired pipeline in the list and click its Build button (the ‘play’ icon in the Actions column).
-
A pop-up window will appear, displaying live logs of the build process. If you close this pop-up, the build continues to run on the server side. The build history will be updated upon completion.
-
While a build is in progress and the build pop-up window is open, you can click the Build Abort button to stop the build.
View Build History
- From the Application > Overview tab, click the View Build History button (the
clockicon in the Actions column) for the pipeline that you want to see the build history.
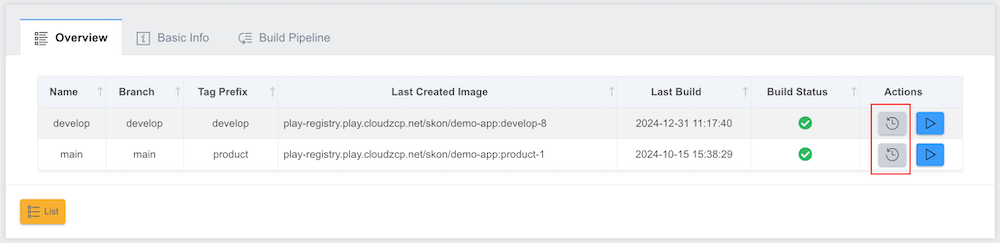
- The build history is displayed in a modal UI on the right of the screen:
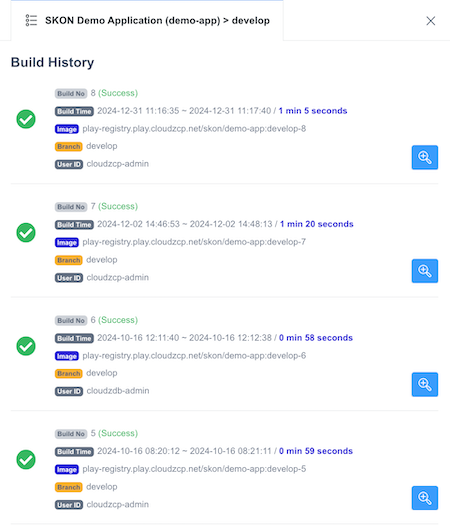
You can tab on the Search icon to view more details:
- Build Result icon: Indicates success, failure, or running state.
- Build No: The unique build number for that pipeline, with the result in parentheses.
- Build Time: Start and end times of the build.
- Duration: Overall build duration.
- Image: URL of the image produced by the build (Registry/Project/Repository:Tag).
- Branch: Source code branch used for the build.
- User ID: The ID of the user who initiated the build.
- View Build Log button: Allows you to view detailed build logs for troubleshooting or review.