Deploy a Model to a Cluster
登録されたモデルをKubernetesクラスターにデプロイして、実際のサービス環境で運用することができます。デプロイされたモデルは、クラスター内でInferenceServiceとして実行され、外部リクエストに対してリアルタイムの予測や応答を提供します。
モデルをデプロイする方法
ステップ 1: モデルデプロイメントの開始
モデルをデプロイする方法は2つあります:
オプション 1: モデルのホーム画面または左メニューから、Model Serving > Serve Modelに移動します。

オプション 2: Model Registry > Model Listで、デプロイしたいモデルを選択し、Deployボタンをクリックします。

ステップ 2: デプロイメントターゲットの設定
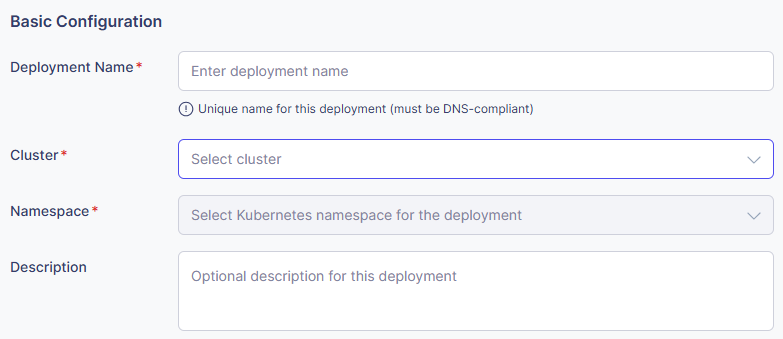
- Deployment Name (必須)
- このデプロイメントのためのユニークな名前を入力します。
- これはKubernetesリソース名として使用されます。
- 例: ”bert-classifier-prod”、”gpt2-service-v1”
- Cluster (必須)
- モデルをデプロイしたいKubernetesクラスターを選択します。
- 登録されたクラスターのリストから選択します。
- Namespace (必須)
- デプロイメントのためのネームスペースを選択します。
- クラスターが選択されると、そのクラスターの利用可能なネームスペースが自動的に読み込まれます。
ステップ 3: モデルの選択
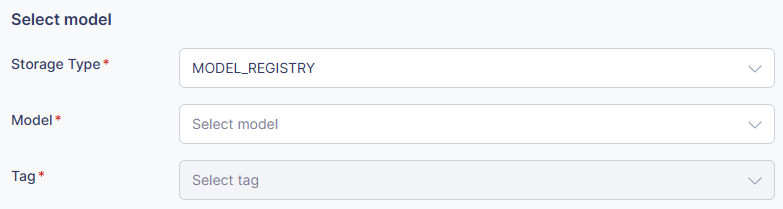
- Model (必須)
- モデルレジストリに登録されたモデルのリストからデプロイするモデルを選択します。
- プロジェクト名とモデル名の両方が表示されます。
- Tag (必須)
- デプロイするモデルのバージョン(タグ)を選択します。
- 例: ”latest”, ”v1.0.0”, ”prod”
- Serving Framework (必須)
- サービングフレームワークを選択します。
- 例: HuggingFace (vLLM), PyTorch, TensorFlow, ONNX, Triton など。
- Description (任意)
- デプロイメントの説明を入力します。
ステップ 4: リソースの構成
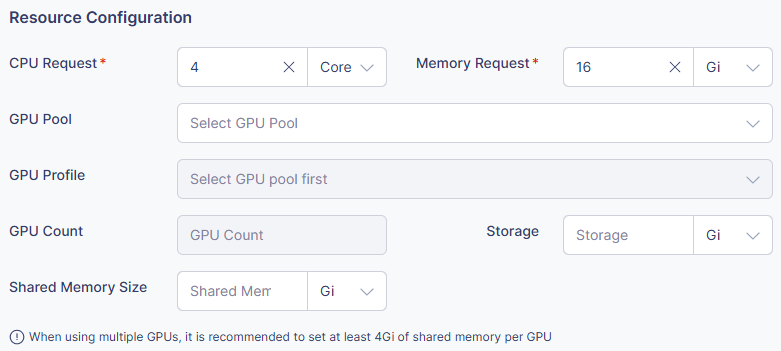
-
CPU Request
- リクエストするCPUリソースの量を指定します。
- 利用可能な単位: Core, m (ミリコア)
- 例: ”2 Core”, ”1000m”
-
Memory Request
- リクエストするメモリの量を指定します。
- 利用可能な単位: Gi, Mi
- 例: ”4Gi”, ”2048Mi”
-
GPU Pool
- 使用するGPUプールを選択します。
-
GPU Profile
- GPUの種類と仕様を選択します。
- 例: NVIDIA Tesla V100, A100 など。
-
GPU Count
- 必要なGPUの数を指定します。
- 例: ”1”, ”2”, ”4”
-
Storage
- ストレージサイズを指定します。
- 単位: Gi, Mi
- 例: ”10Gi”
-
Shared Memory
- 共有メモリのサイズを指定します。
- 単位: Gi
- 例: ”2Gi”
ヒント
💡 推奨: デプロイメントモデルを選択する際、モデルのメタデータに基づいて推奨および最小リソース(GPU、CPU、RAM)のヒントが提供されます。
ステップ 5: 高度な設定 (任意)
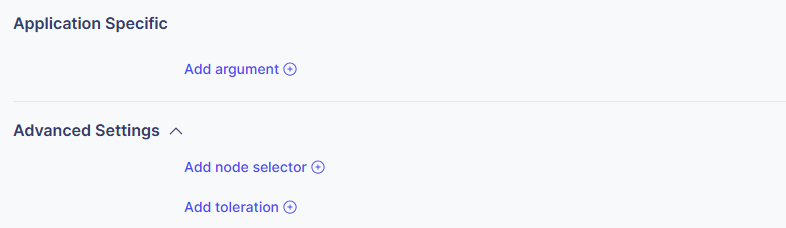
- Additional Arguments
モデルサーバーに渡す追加の引数を設定します。
- キーと値のペアとして入力します。
- 例: ”-max_batch_size=32”, ”-timeout=60”
- Node Selectors 特定のノードへのデプロイを制限します。
- キーと値のペアとして入力します。
- 例: ”node-type=gpu”,”zone=us-east-1a”
- Tolerations
特定の汚染を持つノードでのデプロイを許可します。
- キー、オペレーター、効果、および値を入力します。
- 例:
- キー: ”gpu”
- オペレーター: ”Equal”
- 効果: ”NoSchedule”
- 値: ”true”
ステップ 6: デプロイを実行
- すべての設定を確認します。
- Deploy ボタンをクリックします。
- デプロイが開始されると、Inference Service List ページにリダイレクトされます。
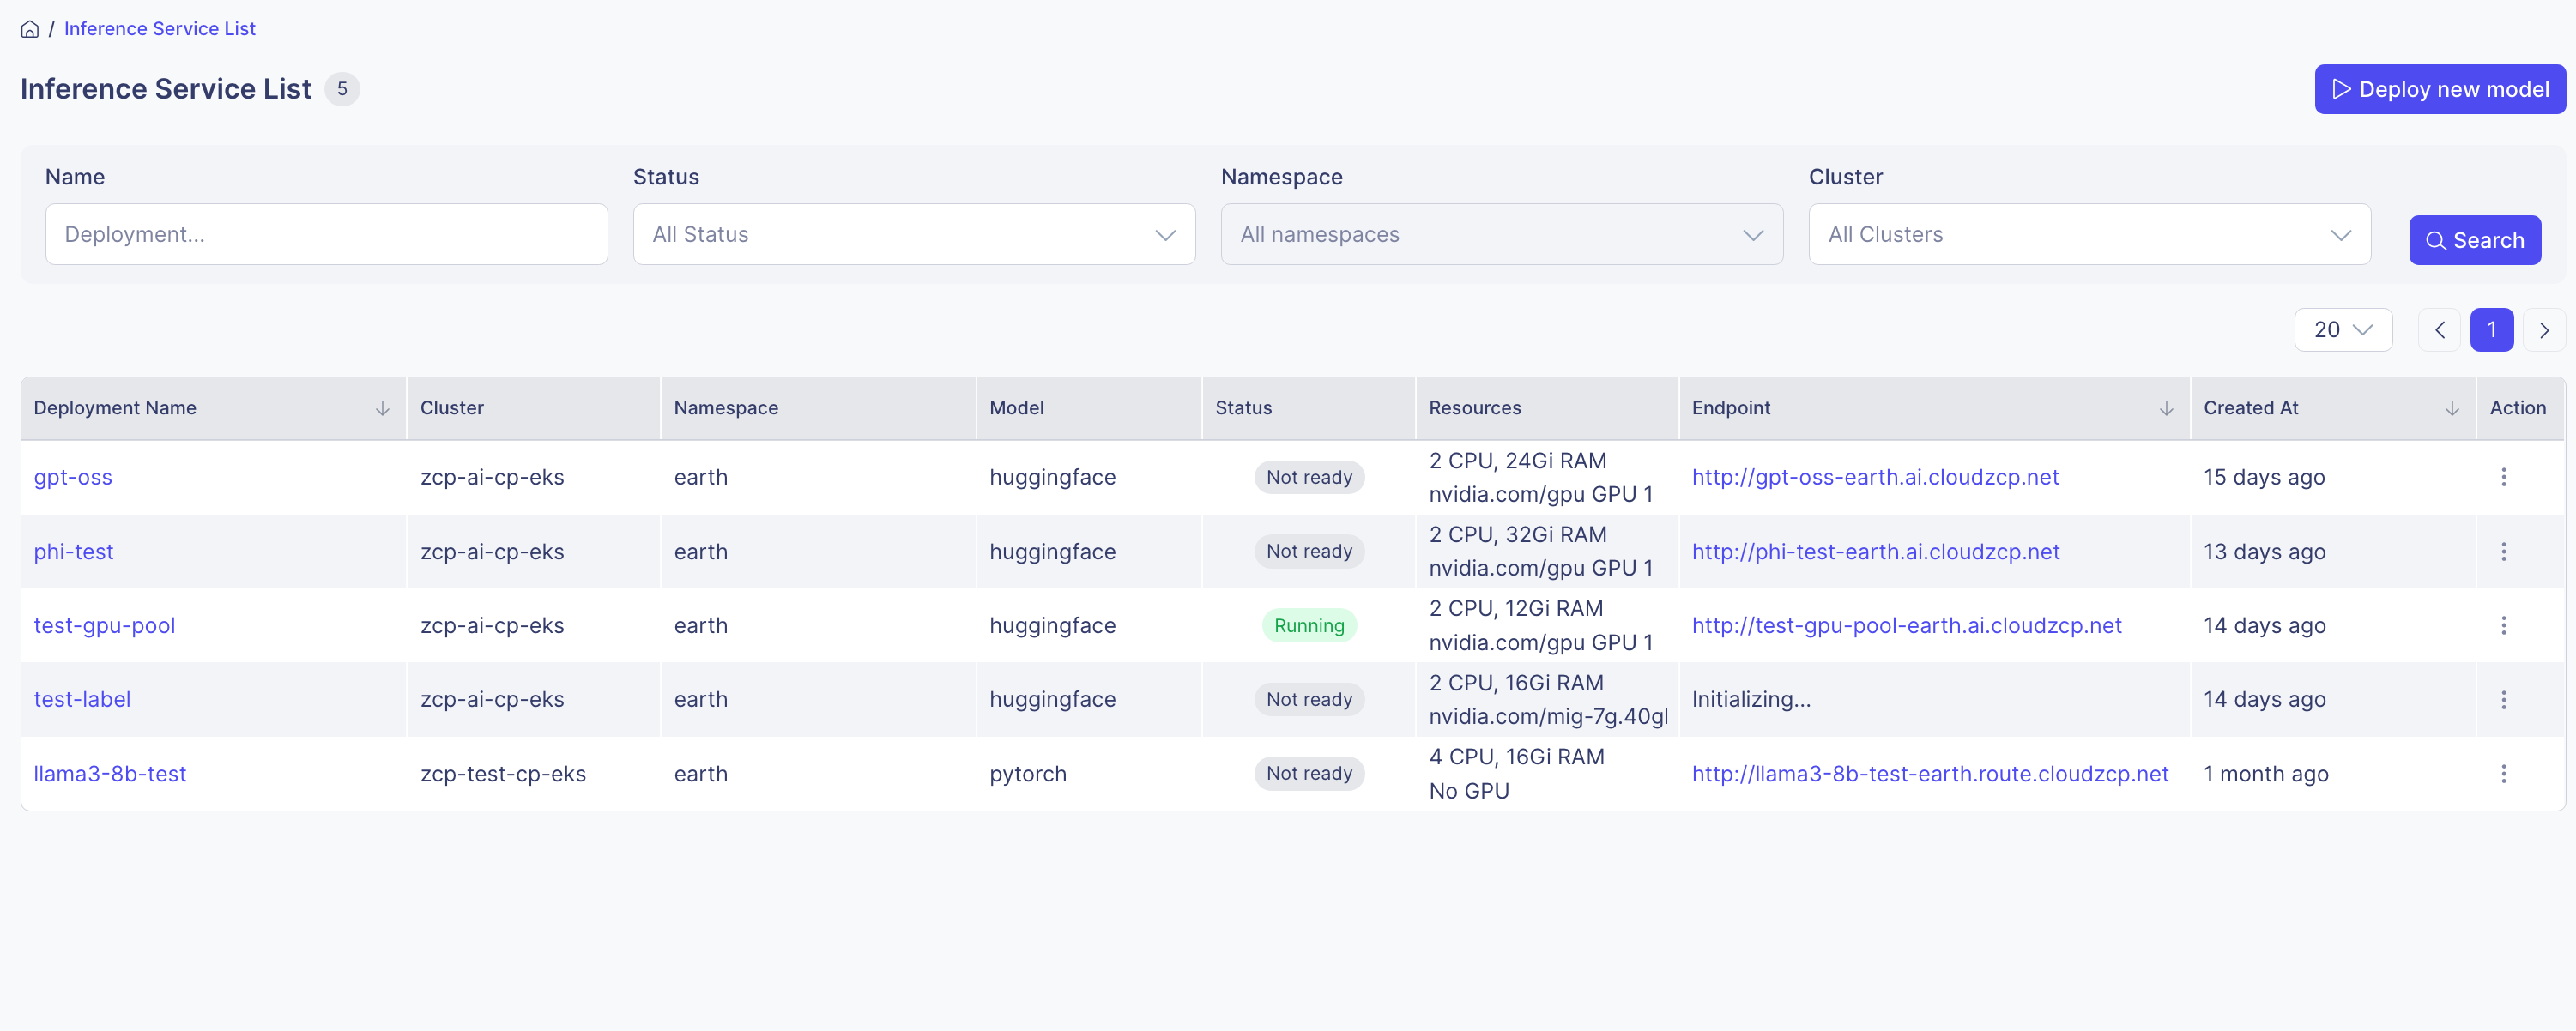
ステップ 7: デプロイ状況を確認
- Inference Service List でデプロイ状況を確認します。
- Running: 正常に実行中
- Not Ready: 実行中ですが、モデルはまだ初期化中です
- Stopped: デプロイが一時停止しています
- Unknown: 状態を判断できません
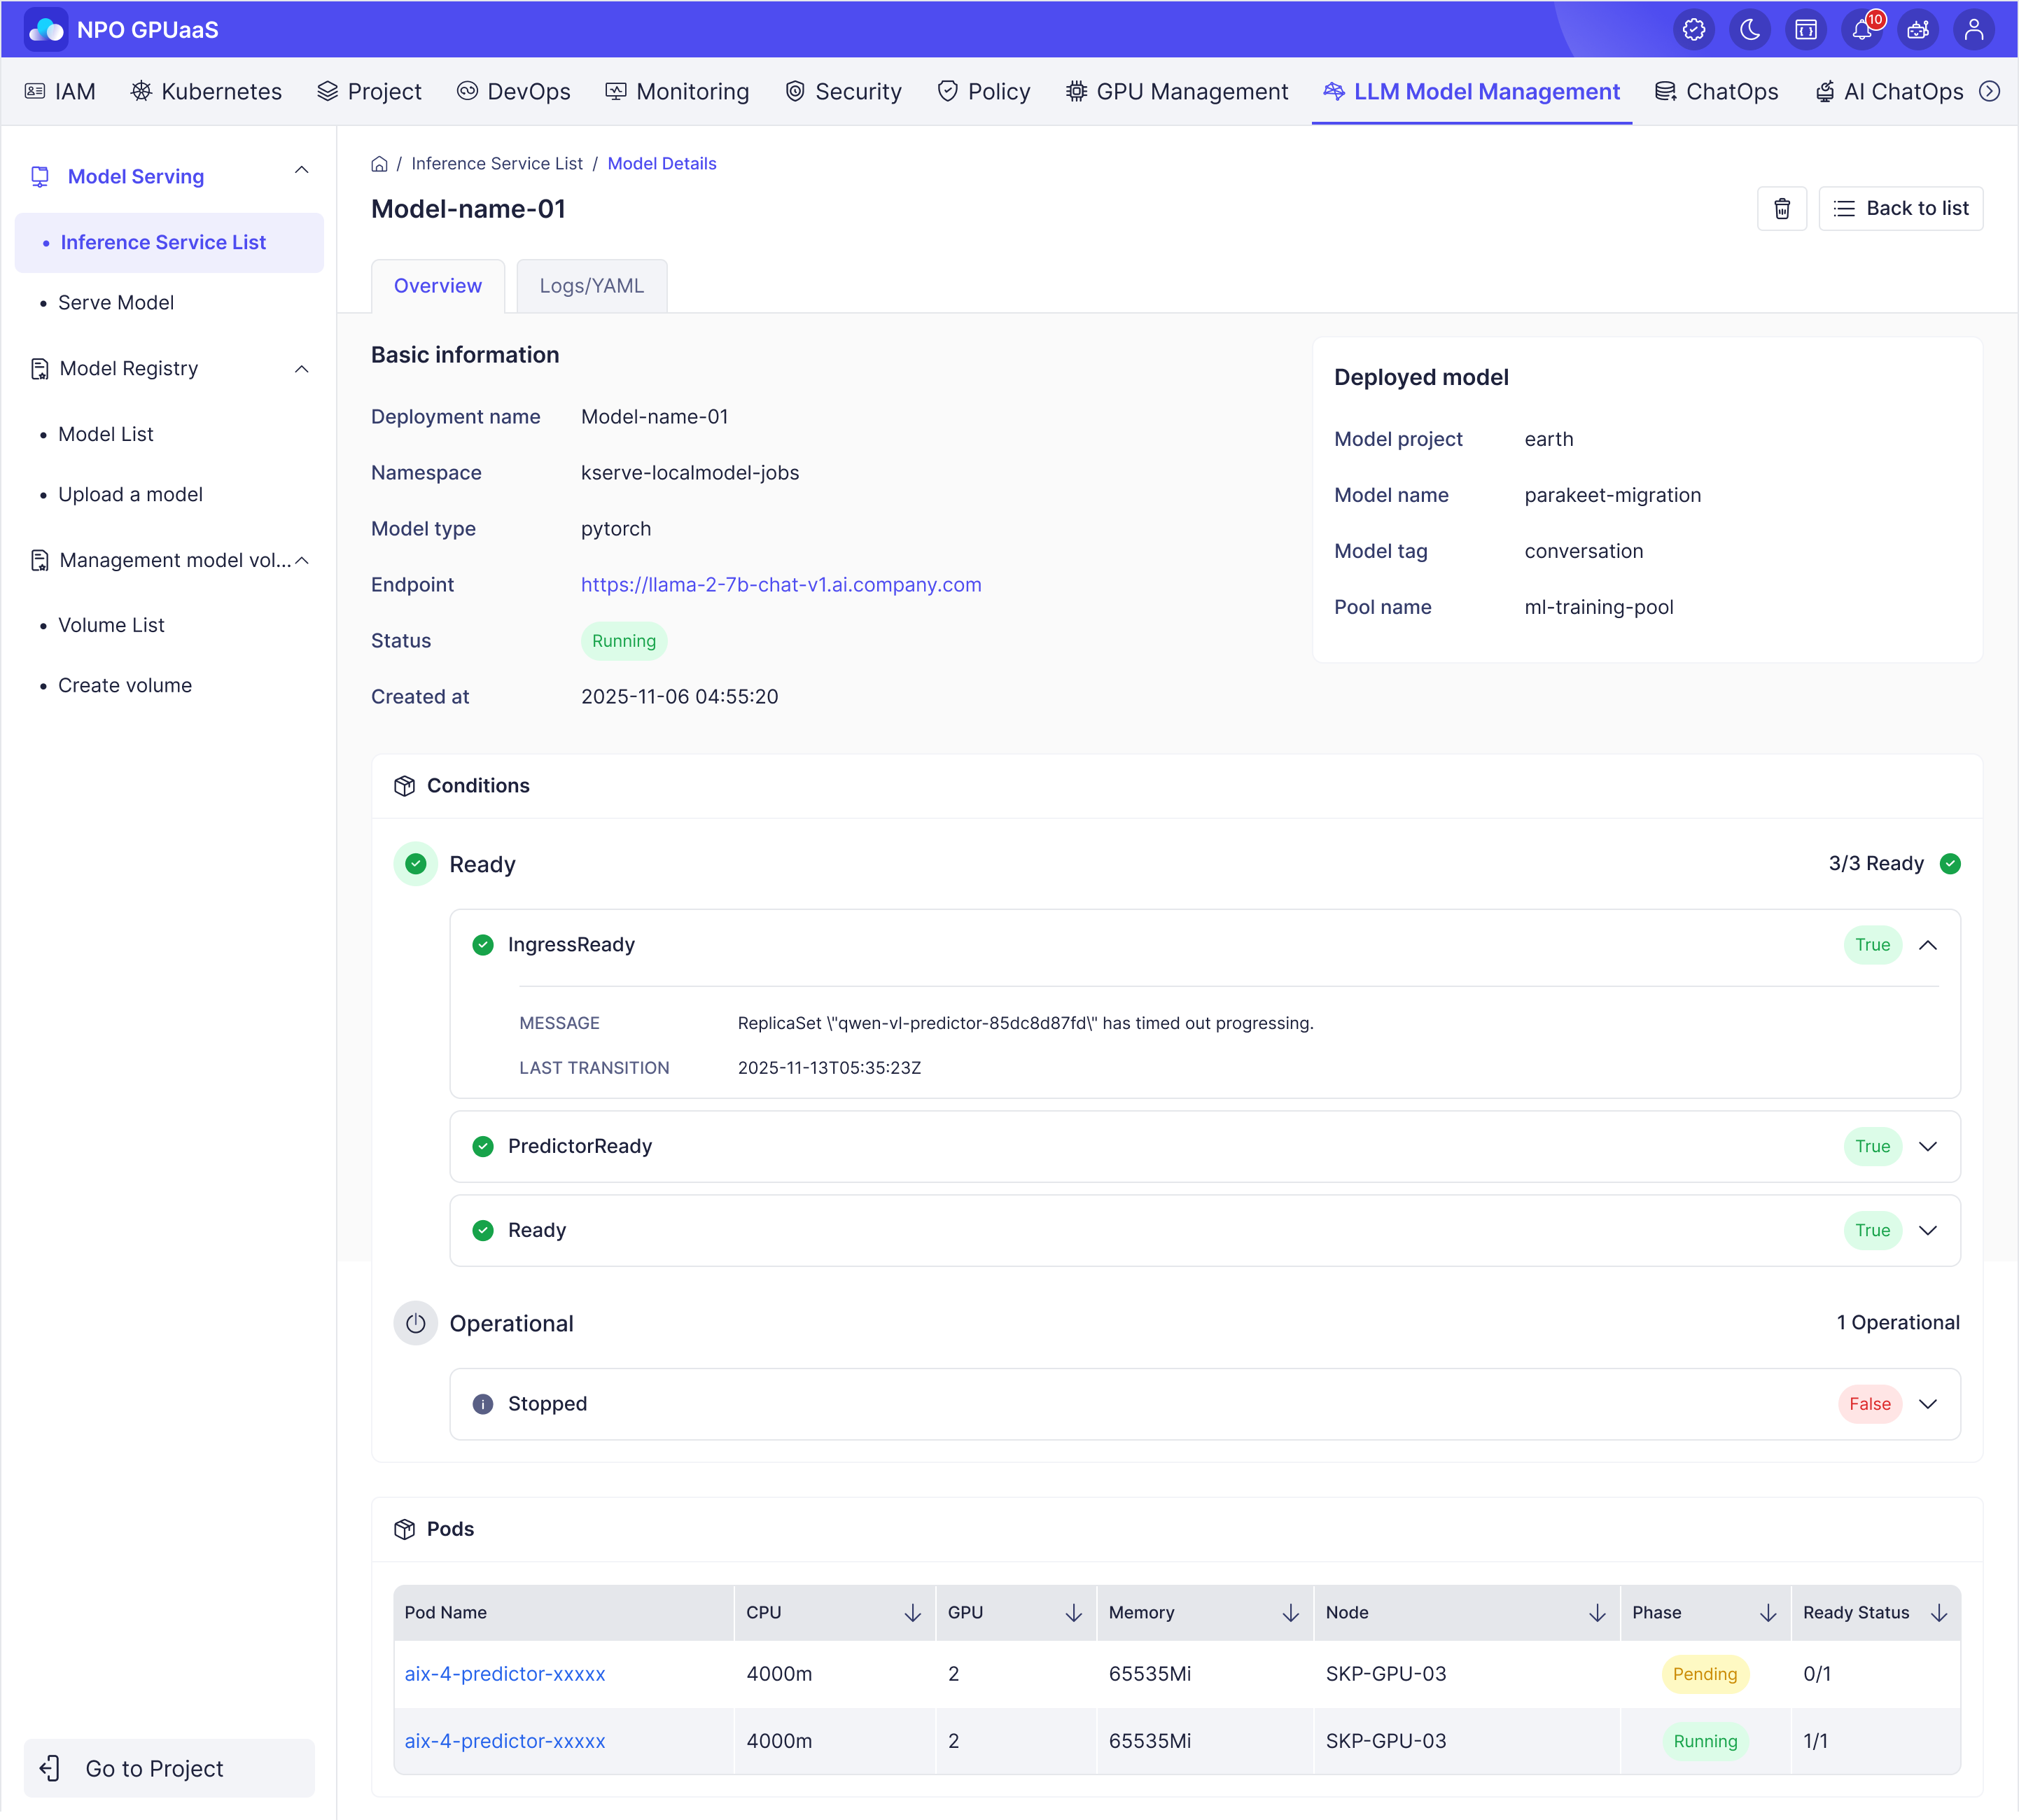
- デプロイ名をクリックして、ポッドの状態、エンドポイント情報、デプロイ YAML、ログなどの詳細を表示します。
ステップ 8: デプロイを管理
アクションメニューから、次の操作を実行できます。
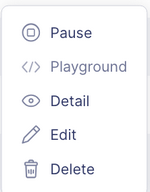
- Pause/Start: デプロイを一時停止または再開します
- Playground: 実行中のモデルをクエリするか、API経由でテストします
- Detail: モデルに関する詳細情報を表示します
- Edit: モデルのバージョンまたはデプロイ設定を変更します
- Delete: デプロイを削除します