Import Models into Model Registry
ZMPモデル管理は、モデルをモデルレジストリに登録するための2つの方法を提供します。
始めに
- Select a Project: まず、作業したいプロジェクトを選択します。
- Access the Model Registry Page: 左側のメニューまたはホームページから「モデルレジストリ」をクリックします。
ヒント
モデルレジストリはプロジェクトごとに管理されており、登録されたすべてのモデルを一目で確認できます。
新しいモデル画面にアクセス
システム内のさまざまなエントリポイントから新しいモデル画面にアクセスできます:
エントリポイントA: モデルリスト画面から開始
- システム管理者コントロールパネルから、メインナビゲーションでModelをクリックします。次に、左側のナビゲーションでModel Listを選択します。
- Model List画面で、ユーザーが右上隅のImport from Hugging FaceボタンまたはCreate model repoボタンをクリックすると、システムは自動的にNew Model画面に移動します。
エントリポイントB: モデルをアップロード画面から開始
システム管理者コントロールパネルから、メインナビゲーションでModelをクリックします。次に、左側のナビゲーションでUpload a modelを選択します。
Hugging Faceからモデルをインポート
Hugging Faceは、さまざまなオープンソースAIモデルが共有される代表的なモデルハブです。Hugging Faceで公開されているモデルを直接選択して、別のダウンロードプロセスなしでモデルレジストリに登録できます。これにより、外部モデルの迅速な採用とテスト、または内部プロジェクトとの統合時の効率的な管理が可能になります。
ステップ1: モデルのインポートを開始
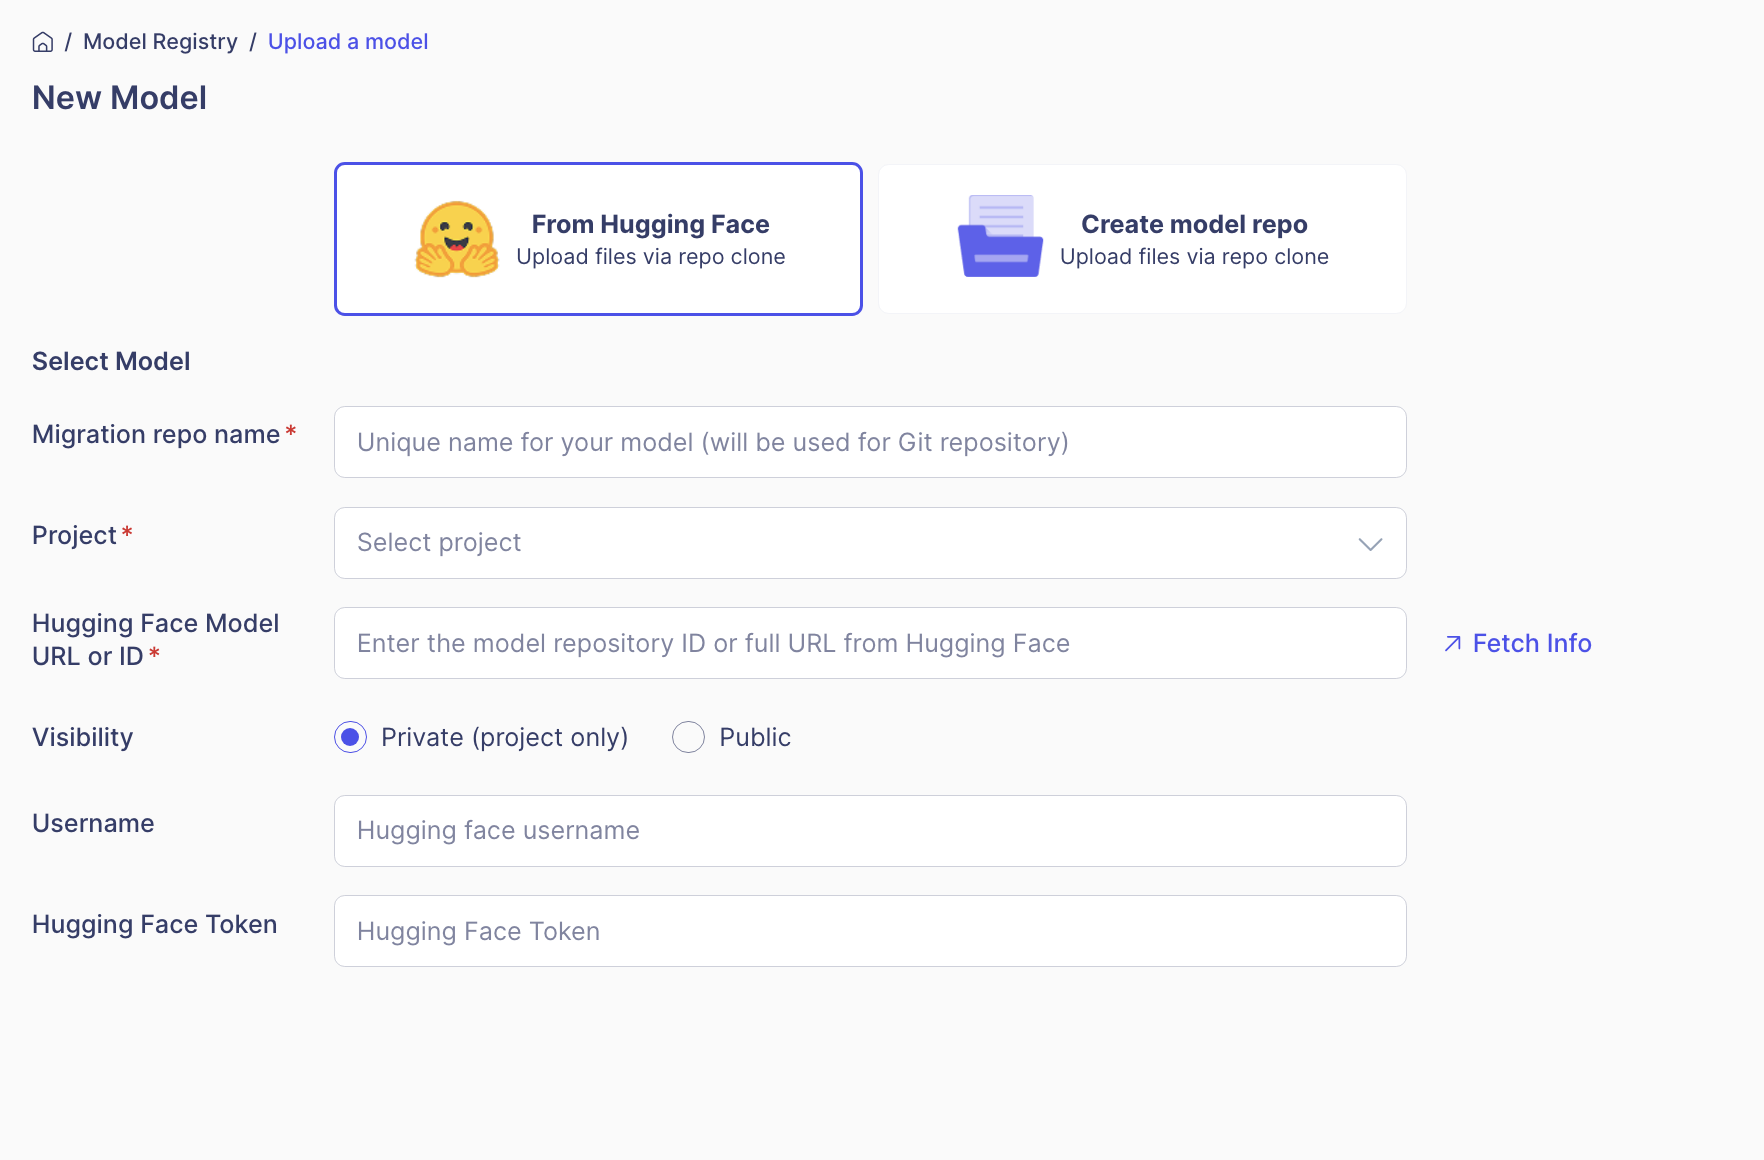
モデル作成タイプ選択画面で、"From Hugging Face"カードを選択します。 カードにはHugging Faceのロゴと「リポジトリのクローンを介してファイルをアップロード」という説明が表示されます:
ステップ 2: 基本情報の入力
- Migration Repo Name (必須)
- モデルのユニークな名前を入力してください。
- この名前はGitリポジトリ名として使用されます。
- 例:
my-bert-model,gpt2-finetuned
- Project (プロジェクトコンテキストが存在しない場合のみ表示)
- モデルを登録するプロジェクトを選択してください。
ステップ 3: Hugging Faceモデル情報の入力
- Hugging Face Model ID(必須)
- Hugging FaceモデルIDを入力してください。
- 例:
- モデルID:
google-bert/bert-base-uncased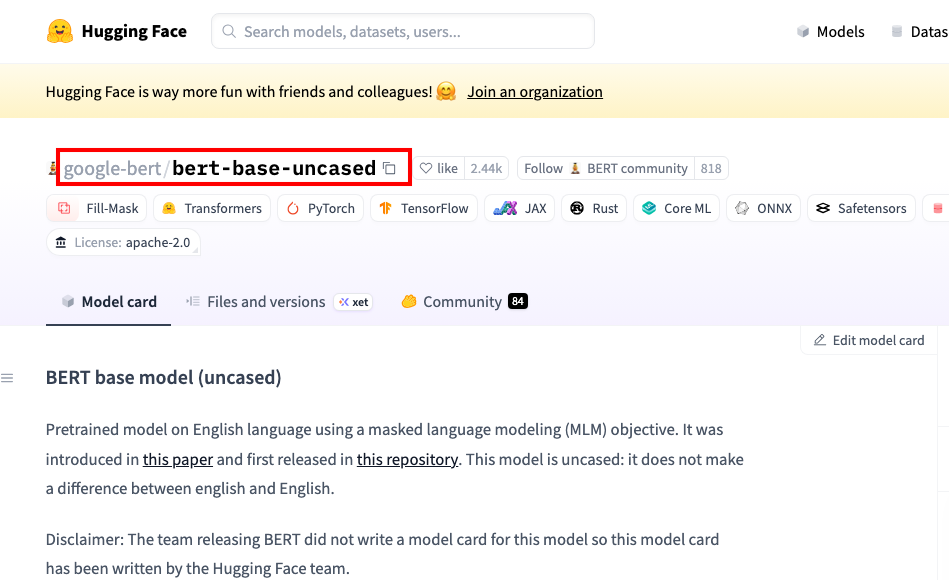
- モデルID:
- Click “Fetch Info” button
- 入力したモデル情報を取得してプレビューするには、Fetch Infoボタンをクリックしてください。
- モデルへのアクセス権限がない場合は、エラーメッセージが表示されます。
ステップ 4: 認証情報の入力(オプション)
- Username
- Hugging Faceのユーザー名を入力してください。
- プライベートモデルにアクセスするために必要です。
- Hugging Face Token
- Hugging Faceアクセストークンを入力してください。
- プライベートモデルまたは認証が必要なモデルに必要です。
ステップ 5: 可視性の設定
デフォルトはプライベートで、以下の2つのオプションのいずれかを選択できます:
- Private (project only): 選択したプロジェクト内でのみアクセス可能。
- Public: すべてのユーザーがアクセス可能。
ステップ 6: モデルインポートの完了
- すべての情報が入力されたら、右上の「保存」ボタンをクリックしてください。
- 成功メッセージが表示され、自動的にモデルリストページにリダイレクトされます。
- インポートしたモデルがリストに表示されていることを確認します。
- モデルのステータスを確認して、インポートが成功したことを確認します。
- モデルのステータス:
READY: マイグレーションが成功裏に完了しました; モデルはデプロイの準備が整っています。MIGRATING: モデルのマイグレーションが現在進行中です。FAILED: マイグレーションに失敗しました; "詳細"をクリックして失敗の原因を確認してください。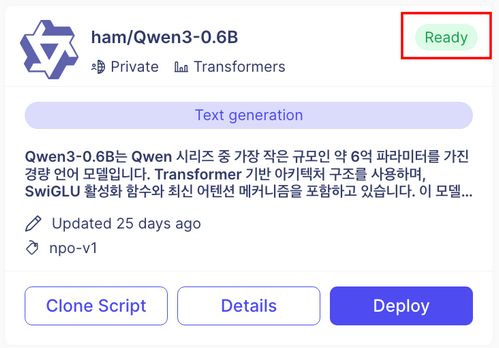
警告
- Hugging Face Tokenを安全に保管してください。
- プライベートモデルの場合、必要なアクセス権限があることを確認してください。
- 大きなモデルのインポートには時間がかかる場合があります。
カスタムモデルの作成
プライベートモデルリポジトリを作成することで、内部で開発されたカスタマイズされたモデルや自己作成したモデルを登録、保存、管理できます。トレーニング済みモデルをアップロードし、バージョンを管理することで、モデル資産を集中化し、コラボレーションと再利用を容易にします。
ステップ 1: モデルリポジトリの作成を開始する
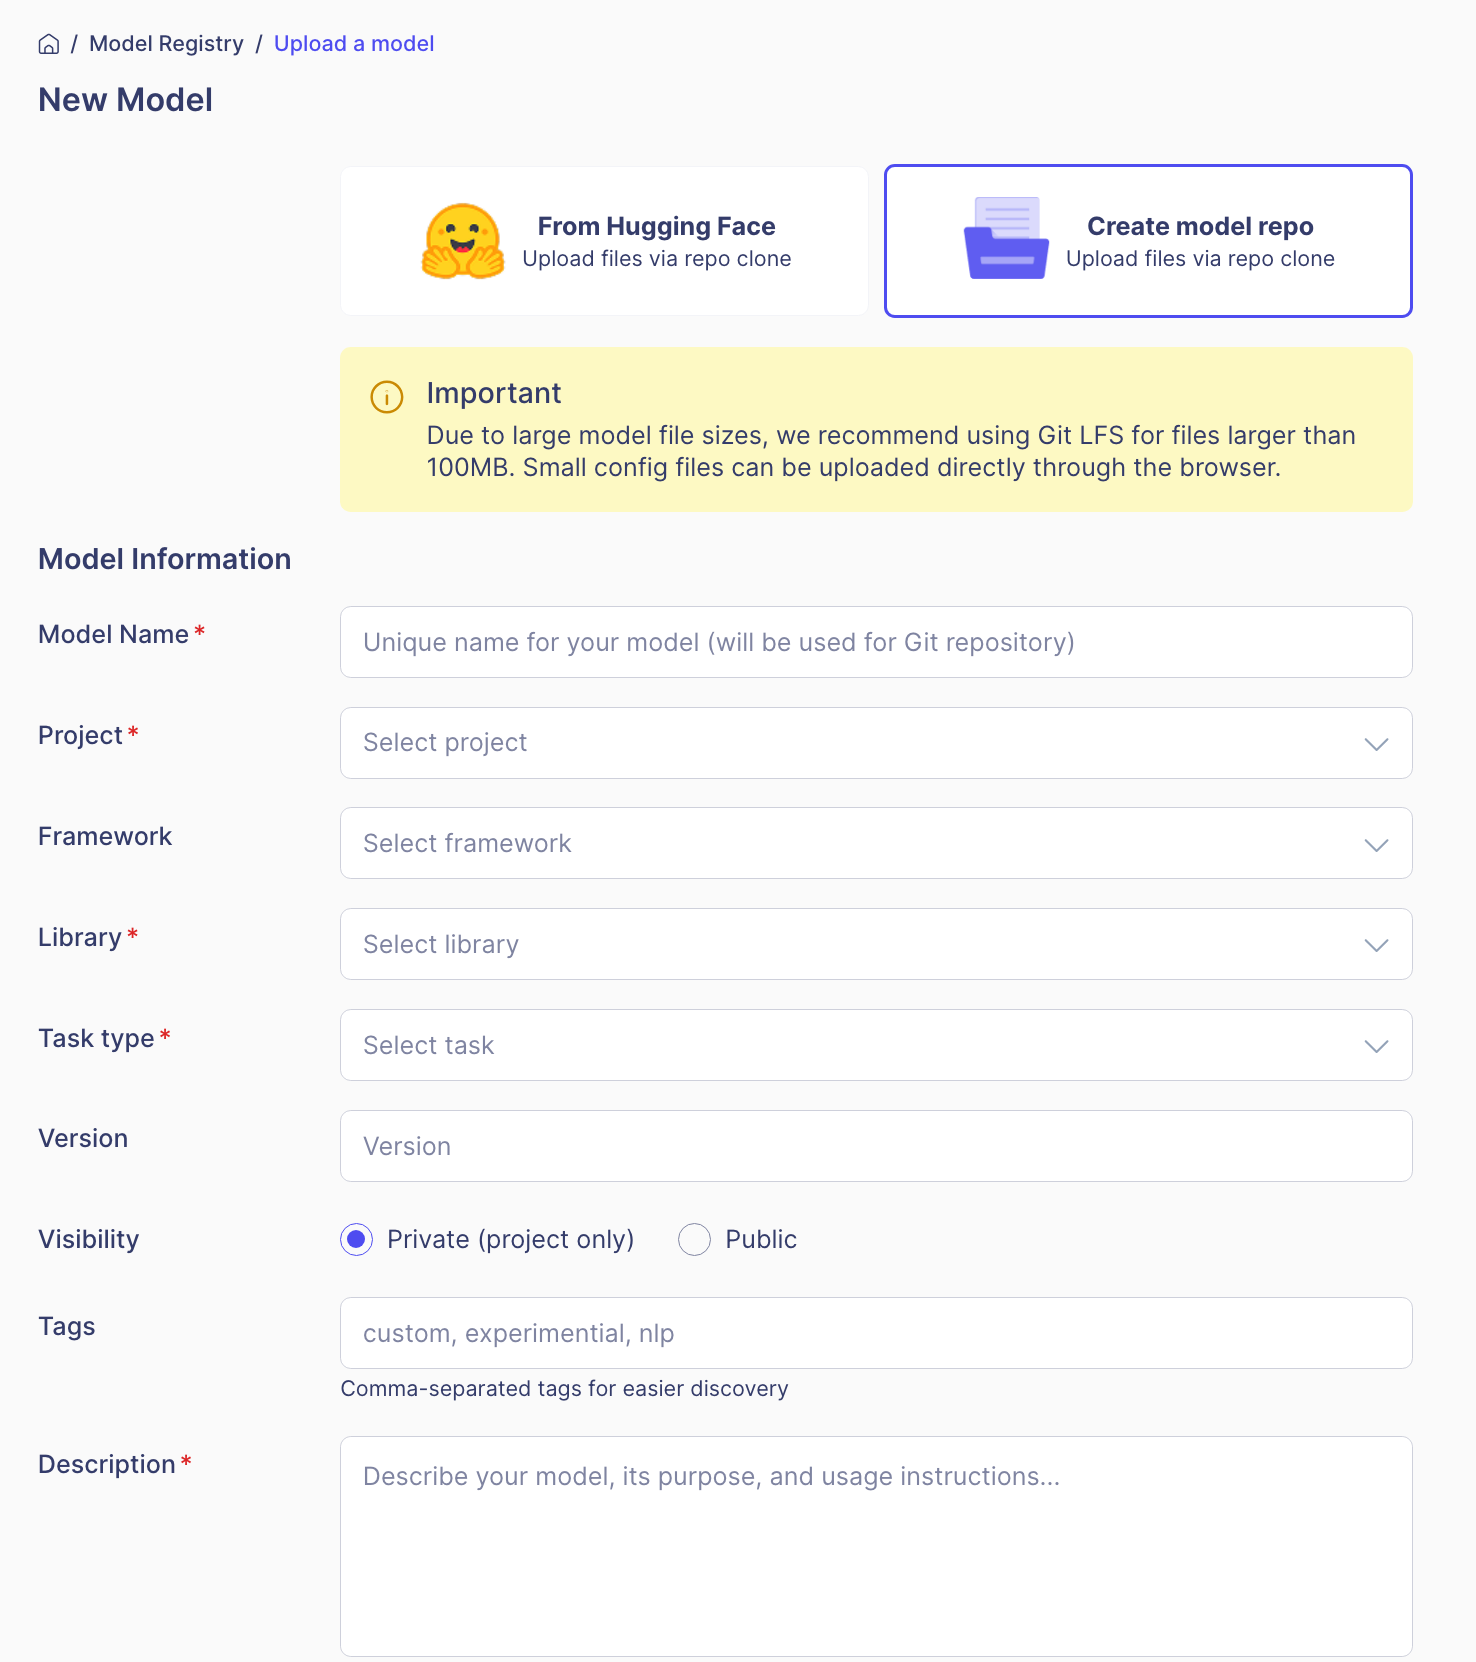
- モデル作成タイプ選択画面で、Create model repoカードを選択します。
- カードにはフォルダー/ファイルのロゴと「リポジトリクローンを介してファイルをアップロード」という説明が表示されます:
警告
Important Notice:
- 大きなモデルファイル(100MB以上)の場合、Git LFSの使用を推奨します。
- 小さな設定ファイルはブラウザを介して直接アップロードできます。
ステップ 2: モデルの基本情報を入力する
- Model Name (必須)
- モデルのユニークな名前を提供してください。
- この名前はGitリポジトリ名として使用されます。
- 例:
resnet50-custom,my-transformer-model
- Project (プロジェクトコンテキストが存在しない場合のみ表示)
- モデルを登録するプロジェクトを選択します。
- Framework (オプション)
- モデルが使用するフレームワークを選択してください。
- 例: TensorFlow, PyTorch, ONNX など。
- Library (必須)
- モデルが使用するライブラリを選択してください。
- 例: transformers, diffusers, timm など。
- Task Type (必須)
- モデルのタスクタイプを選択してください。
- 利用可能なオプション:
- テキスト分類
- トークン分類
- 質問応答
- 翻訳
- 要約
- 画像分類
- 物体検出
- 音声認識
- テキスト読み上げ
- Version (オプション)
- モデルのバージョンを入力してください。
- 例: “1.0.0”, ”v2.1-beta”
ステップ 3: 権限とメタデータの設定
- Visibility
- Private (project only): 選択したプロジェクト内でのみアクセス可能 (デフォルト)
- Public: すべてのユーザーがアクセス可能
- Tags (オプション)
- モデル検索を容易にするためのタグをカンマで区切って入力してください。
- 例: ”custom”, “experimental”, “nlp”
- Description (必須)
- モデルの詳細な説明を提供してください。
- 推奨される内容:
- モデルの目的
- 使用方法
- トレーニングデータ
- パフォーマンスメトリクス
- 制限事項
- Model Icon (オプション)
- モデルを表すアイコンをアップロードしてください。
- サポートされているフォーマット: .png, .svg
- 最大ファイルサイズ: 5MB
ステップ 4: リポジトリ作成の完了
- 必要な情報をすべて入力した後、右上の Save ボタンをクリックしてください。
- 成功すると、新しく作成されたモデルの詳細ページに自動的にリダイレクトされます。
ステップ 5: モデルファイルのアップロード
モデルリポジトリが作成されたら、以下の方法でモデルファイルをアップロードできます。
- モデルカードで、クローンスクリプトを使用してローカルディレクトリにリポジトリを設定します。
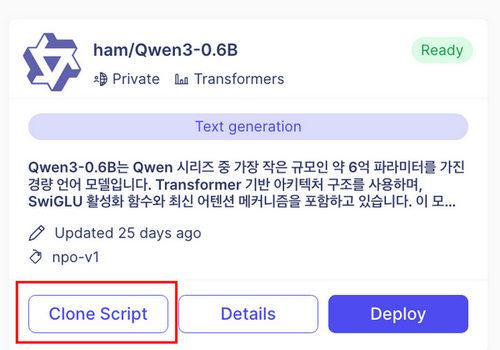
- 大きなファイルを Git LFS を使用してアップロードする(大きなファイルには推奨)
# Git LFS 初期化
git lfs install

# 大容量ファイルの追跡設定
git lfs track "*.bin"
git lfs track "*.safetensors"
git lfs track "*.h5"

# モデルファイルを追加してコミット
git add .
git commit -m "Add model files"
git push
Example Model Repository Structure
典型的なモデルリポジトリは次のようになります:
my-model/
├── config.json              # モデル設定
├── pytorch_model.bin        # モデルの重み(PyTorch)
├── tokenizer_config.json    # トークナイザー設定
├── vocab.txt                # 語彙ファイル
├── README.md                # モデルのドキュメント
└── .gitattributes           # Git LFS 設定