Deploy a Model to a Cluster
You can deploy registered models to a Kubernetes cluster to operate in a real service environment. The deployed model runs as an InferenceService within the cluster, providing real-time predictions or responses to external requests.
How to deploy a model
Step 1: Start Model Deployment
You have two ways to deploy a model:
Option 1: From the Model home screen or the left menu, navigate to Model Serving > Serve Model.

Option 2: In the Model Registry > Model List, select the model you wish to deploy and click the Deploy button.

Step 2: Configure Deployment Target
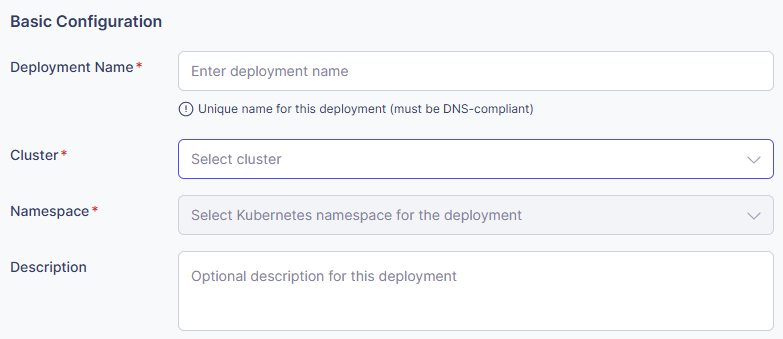
- Deployment Name (Required)
- Enter a unique name for this deployment.
- This will be used as the Kubernetes resource name.
- Examples: ”bert-classifier-prod”, ”gpt2-service-v1”
- Cluster (Required)
- Select the Kubernetes cluster where you want to deploy the model.
- Choose from the list of registered clusters.
- Namespace (Required)
- Select the namespace for deployment.
- Once a cluster is selected, the available namespaces for that cluster will be loaded automatically.
Step 3: Select Model
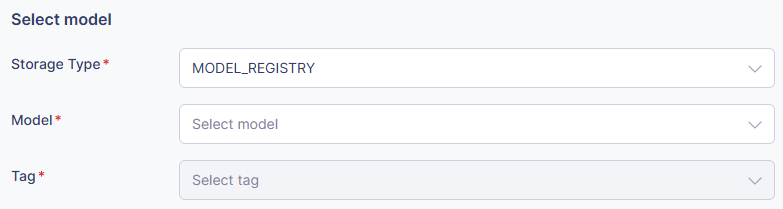
- Model (Required)
- Select the model to deploy from the list of models registered in the Model Registry.
- Both the project and model name will be displayed.
- Tag (Required)
- Select the version (tag) of the model to deploy.
- Examples: ”latest”, ”v1.0.0”, ”prod”
- Serving Framework (Required)
- Select the serving framework.
- Examples: HuggingFace (vLLM), PyTorch, TensorFlow, ONNX, Triton, etc.
- Description (Optional)
- Enter a description for the deployment.
Step 4: Configure Resources
-
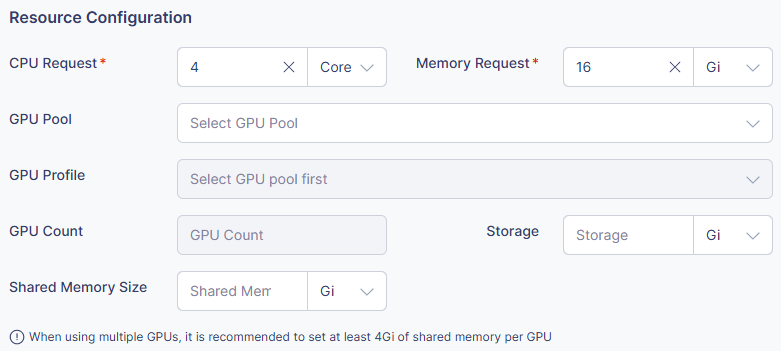
CPU Request
- Specify the amount of CPU resources to request.
- Available units: Core, m (millicore)
- Examples: ”2 Core”, ”1000m”
-
Memory Request
- Specify the amount of memory to request.
- Available units: Gi, Mi
- Examples: ”4Gi”, ”2048Mi”
-
GPU Pool
- Select the GPU pool to use.
-
GPU Profile
- Choose the GPU type and specification.
- Examples: NVIDIA Tesla V100, A100, etc.
-
GPU Count
- Specify the number of GPUs required.
- Examples: ”1”, ”2”, ”4”
-
Storage
- Specify the storage size.
- Units: Gi, Mi
- Example: ”10Gi”
-
Shared Memory
- Specify the size of shared memory.
- Unit: Gi
- Example: ”2Gi”
💡 Recommended: When selecting a deployment model, hints for recommended and minimum resources (GPU, CPU, RAM) are provided based on the model’s metadata.
Step 5: Advanced Settings (Optional)

- Additional Arguments
Set additional arguments to pass to the model server.
- Enter as key-value pairs.
- Examples: ”-max_batch_size=32”, ”-timeout=60”
- Node Selectors
Restrict deployment to specific nodes.
- Enter as key-value pairs.
- Examples: ”node-type=gpu”,”zone=us-east-1a”
- Tolerations
Allow deployment on nodes with specific taints.
- Enter Key, Operator, Effect, and Value.
- Example:
- Key: ”gpu”
- Operator: ”Equal”
- Effect: ”NoSchedule”
- Value: ”true”
Step 6: Execute Deployment
- Review all settings.
- Click the Deploy button.
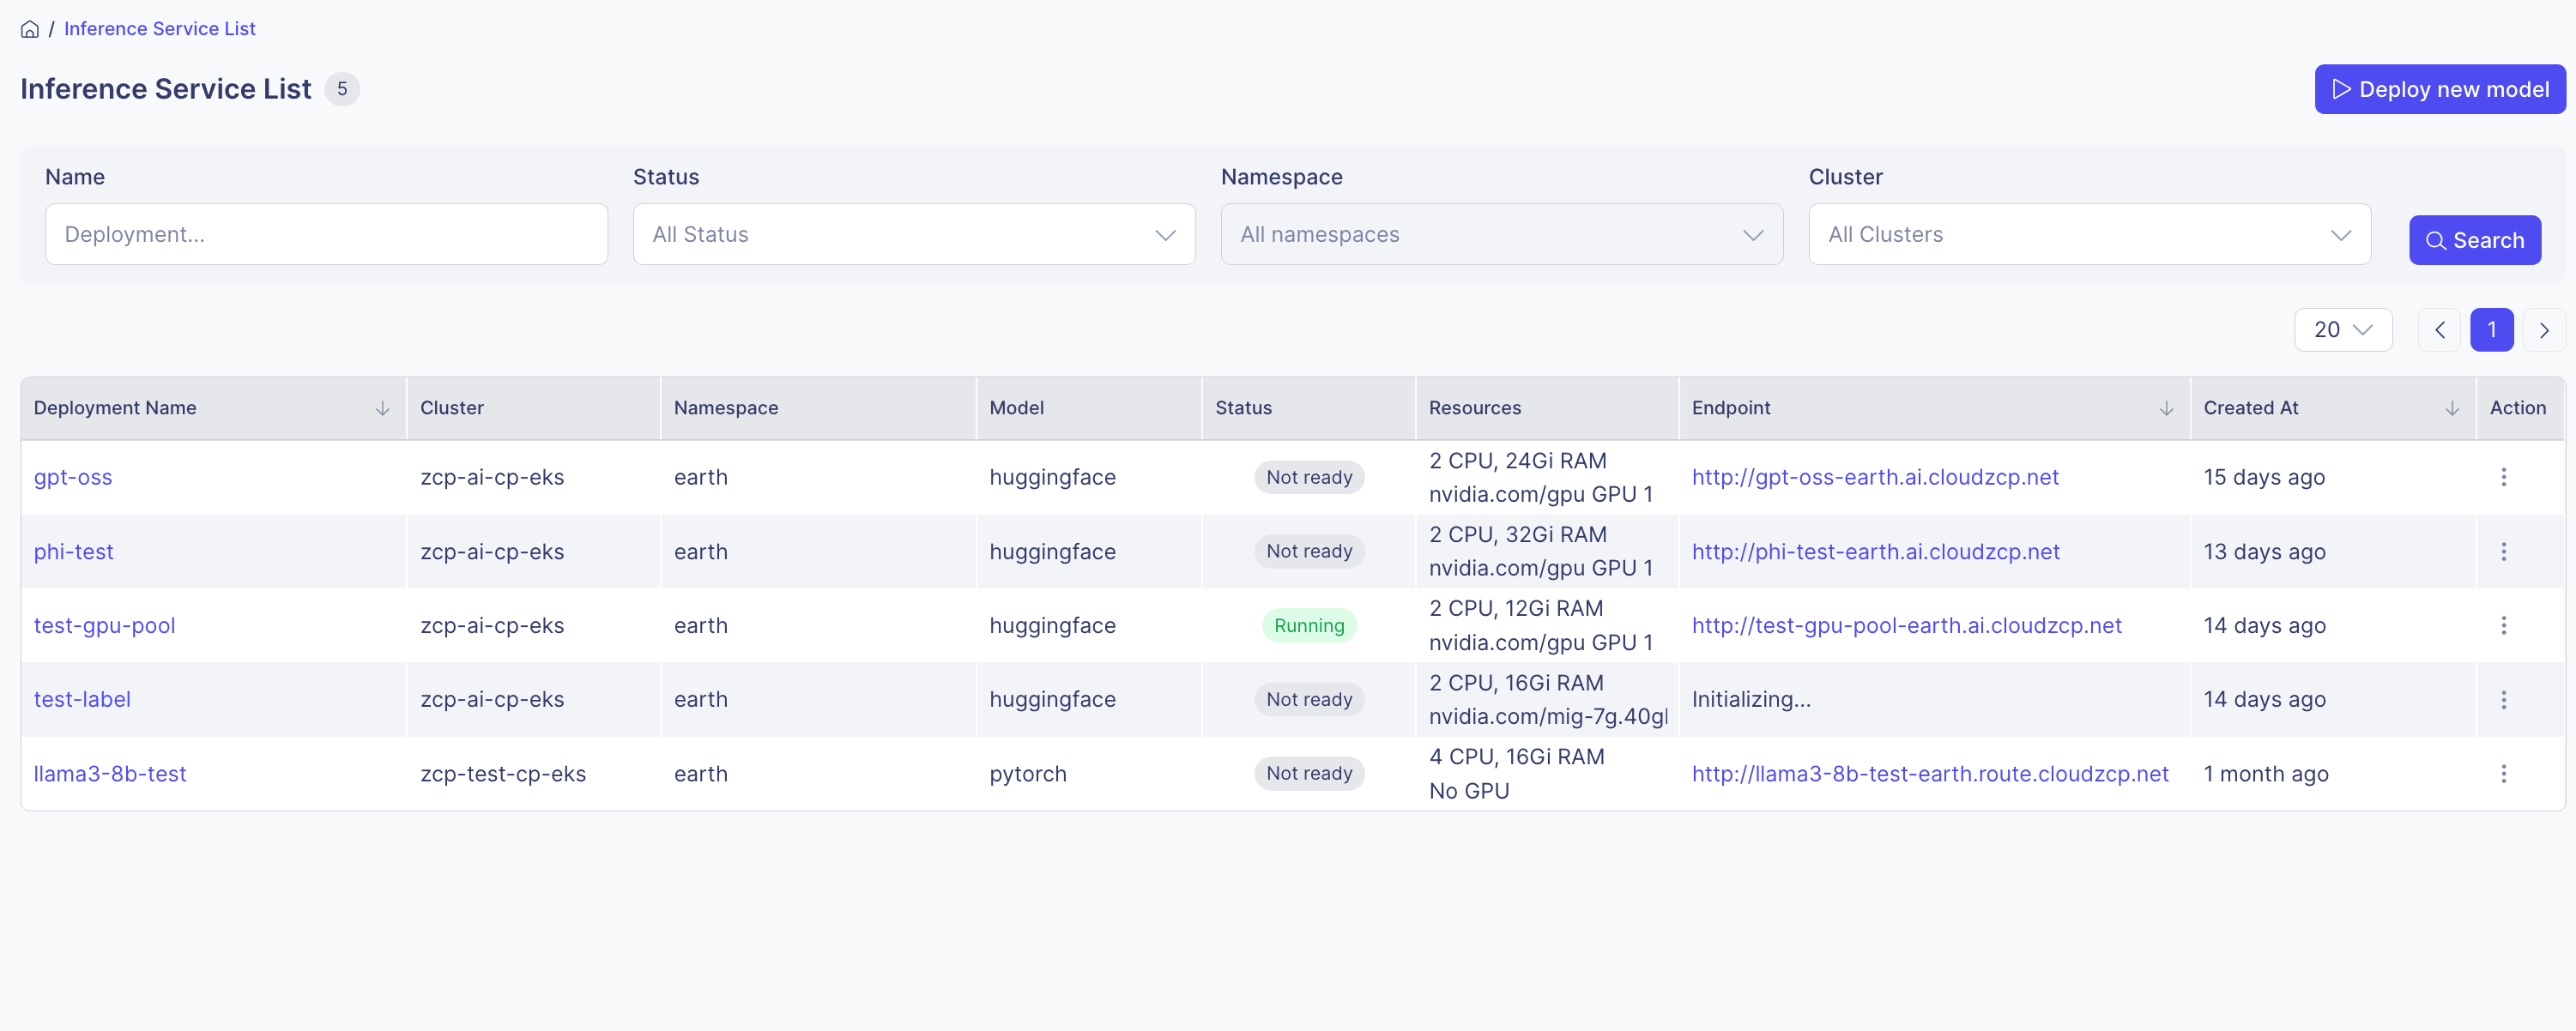
- Once deployment starts, you’ll be redirected to the Inference Service List page.
Step 7: Check Deployment Status
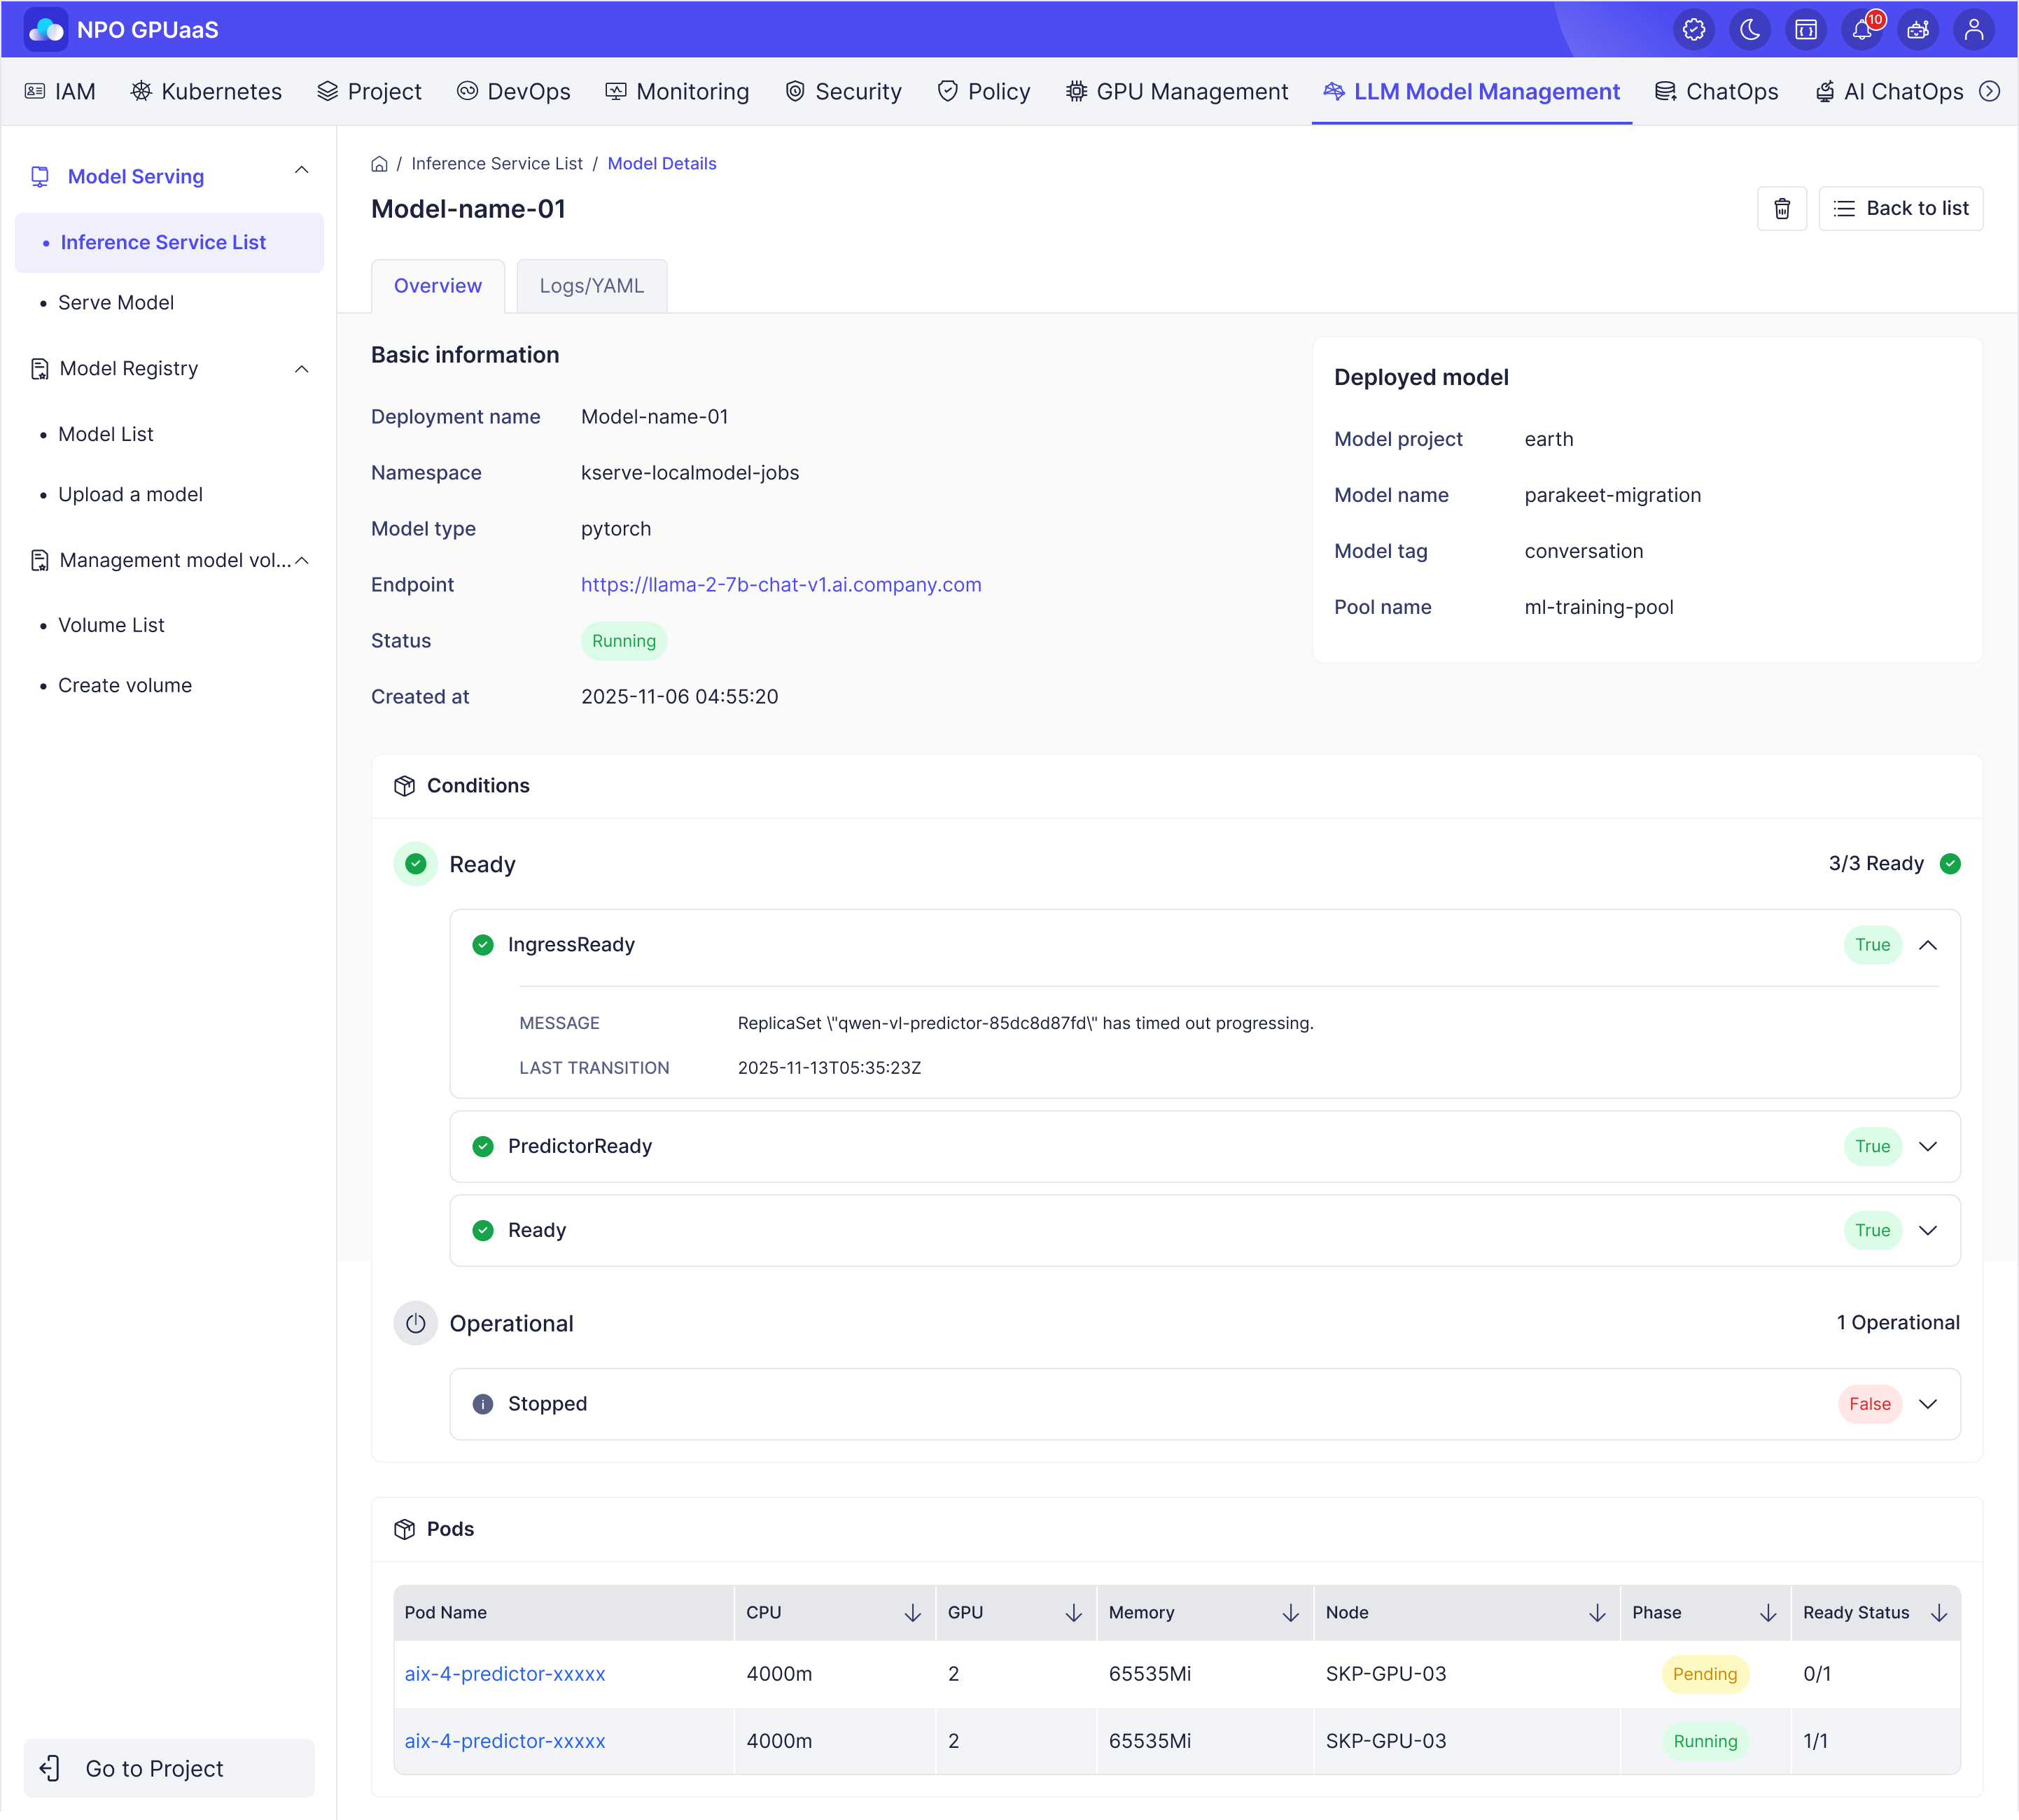
- Check the deployment status in the Inference Service List.
- Running: Successfully running
- Not Ready: Running, but the model is still initializing
- Stopped: Deployment is paused
- Unknown: Status cannot be determined
- Click on the deployment name to view details such as pod status, endpoint information, deployment YAML, logs, and more.
Step 8: Manage Deployment
From the Action menu, you can perform the following operations:
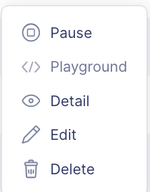
- Pause/Start: Pause or resume the deployment
- Playground: Query the running model or test it via API
- Detail: View detailed information about the model
- Edit: Change the model version or deployment settings
- Delete: Remove the deployment