Create and manage RDE
To set up an RDE, the RDE workspace that requires the environment must exit.
Create RDE Workspace
To set up an RDE workspace, the profile, project that require the remote environment must exit.
The administrator and the user has been granted access and permission to create RDE
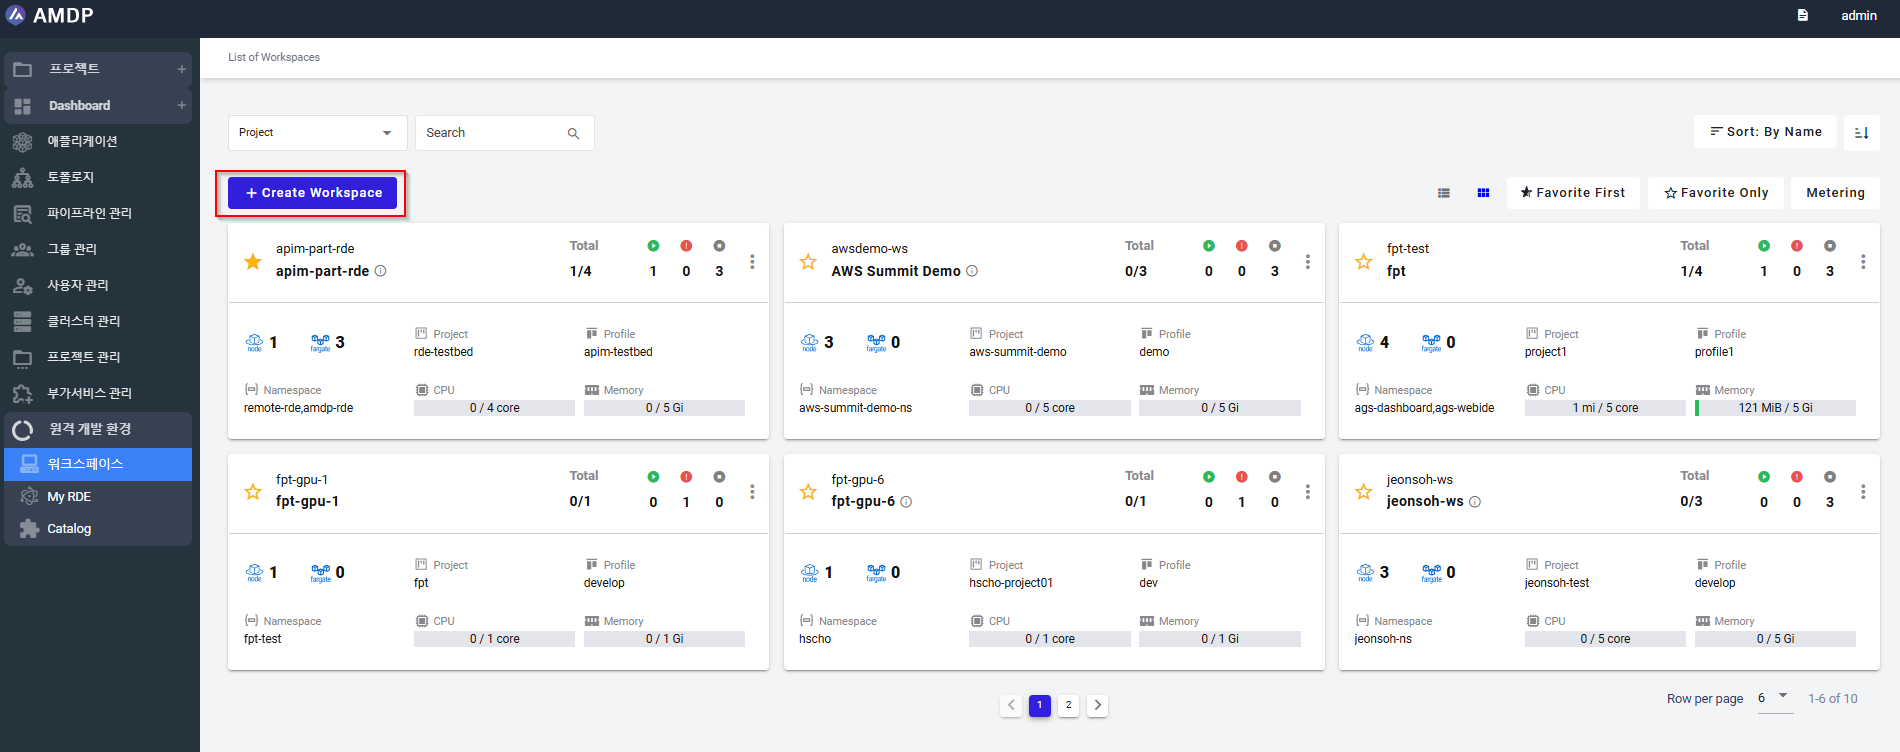
- Select button “Create Workspace” on the List of workspace screen:
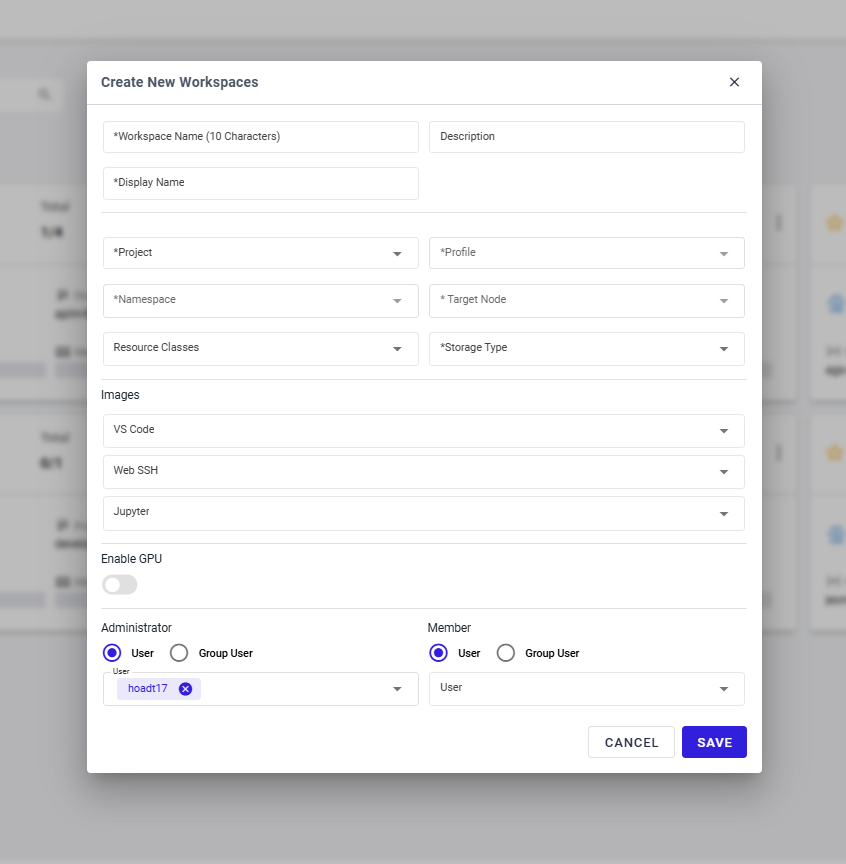
- On the Create New Workspaces, fill in mandatory fields as following:
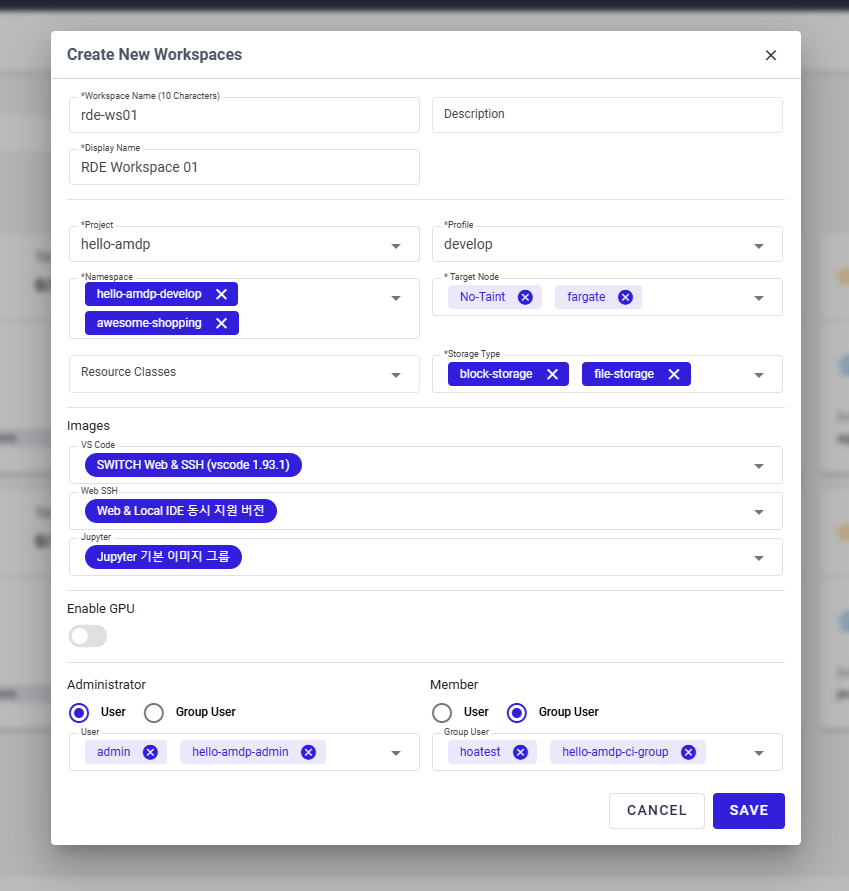
Fill in the required fields then click SAVE button to complete the RDE workspace registration:
Create RDE
Only administrator and the user have been granted access and permission to RDE can create RDE
To set up an RDE, the workspace that requires the environment must exit.
If the workspace does not exist, we need to create a RDE Workspace.
- Access to Remote / Workspaces to view List of Workspace:
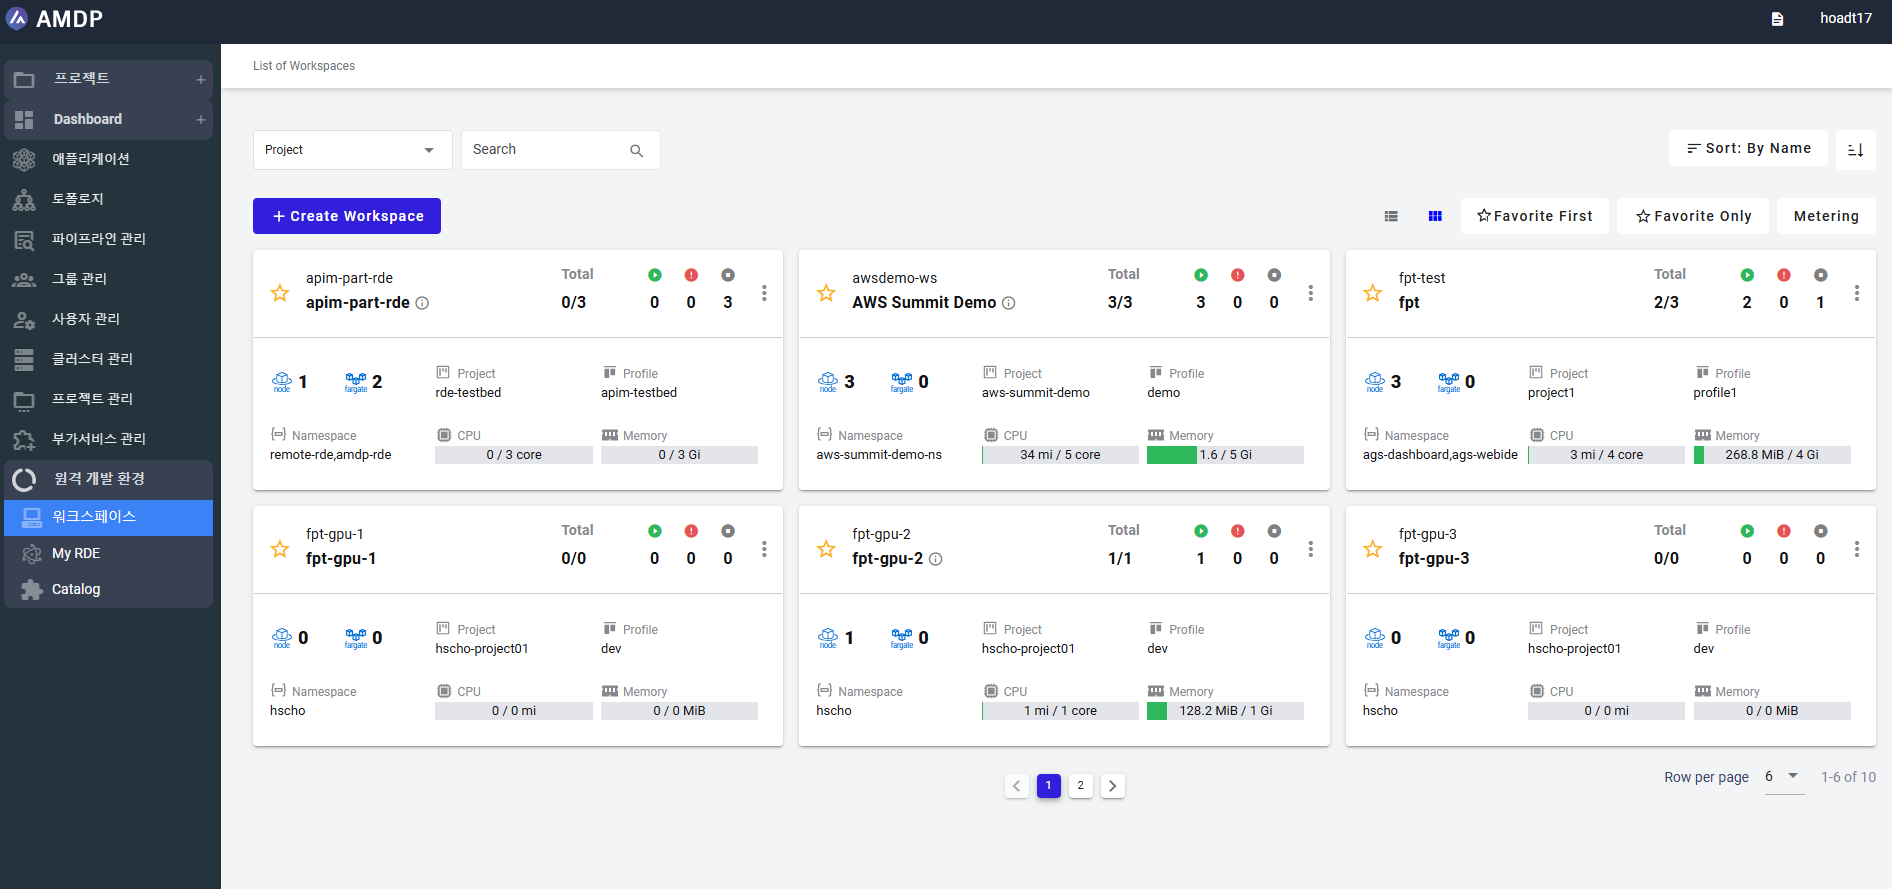
- Select a workspace on List of Workspace screen:
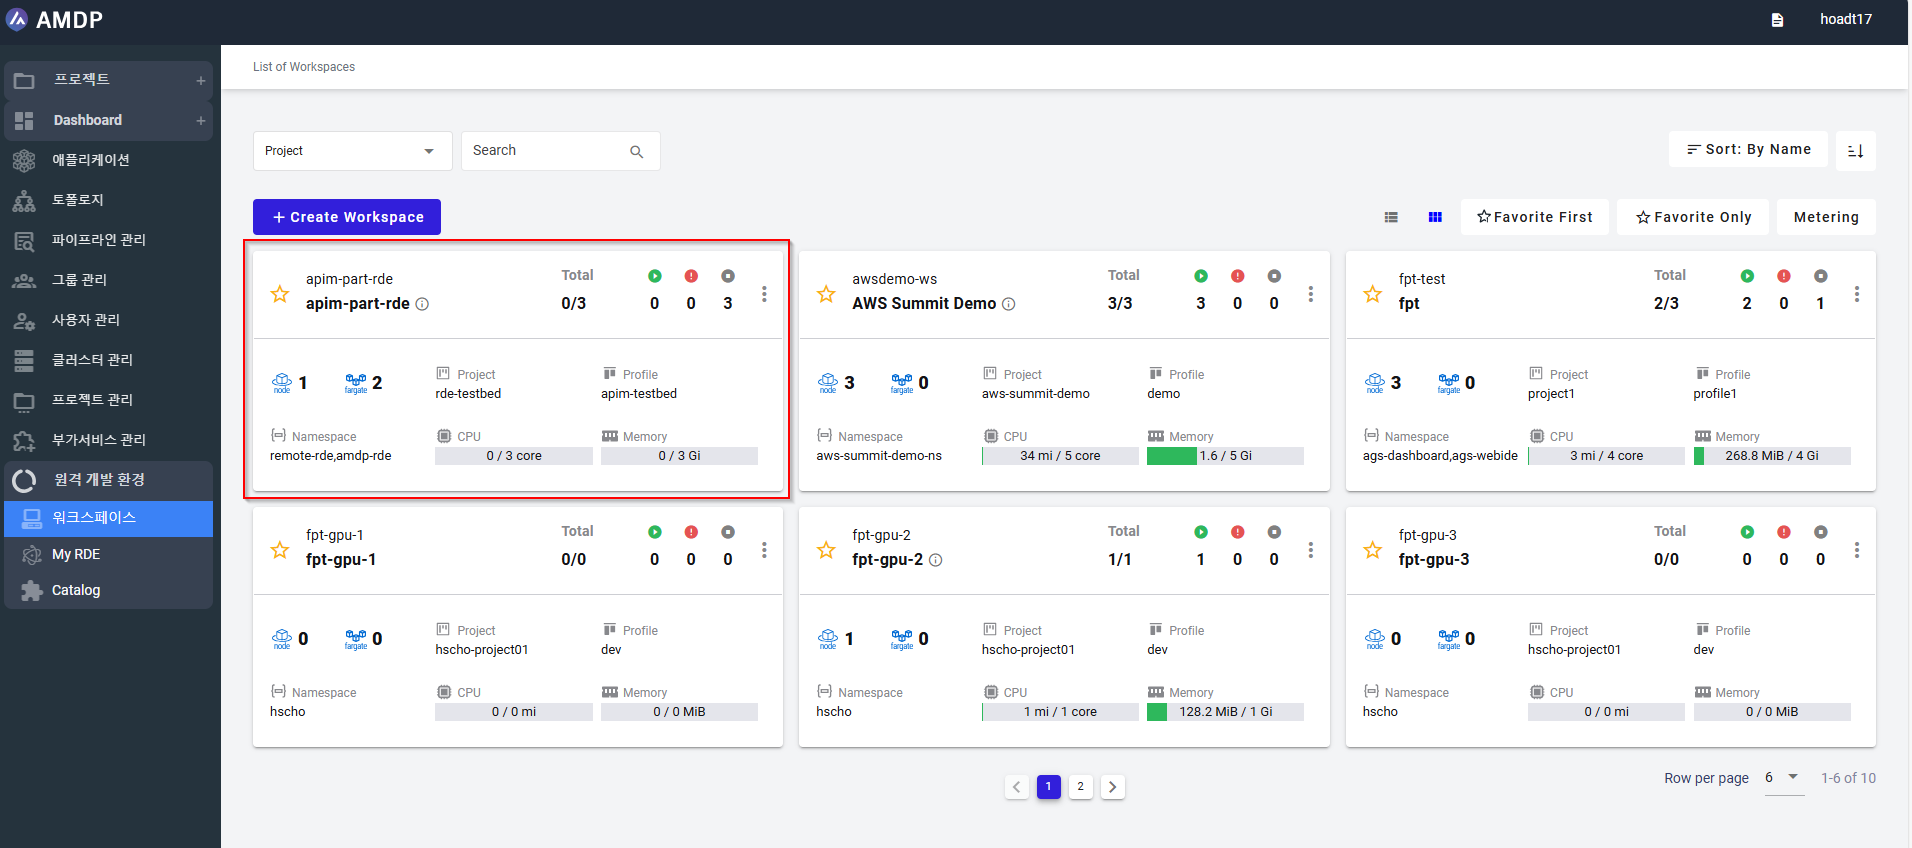
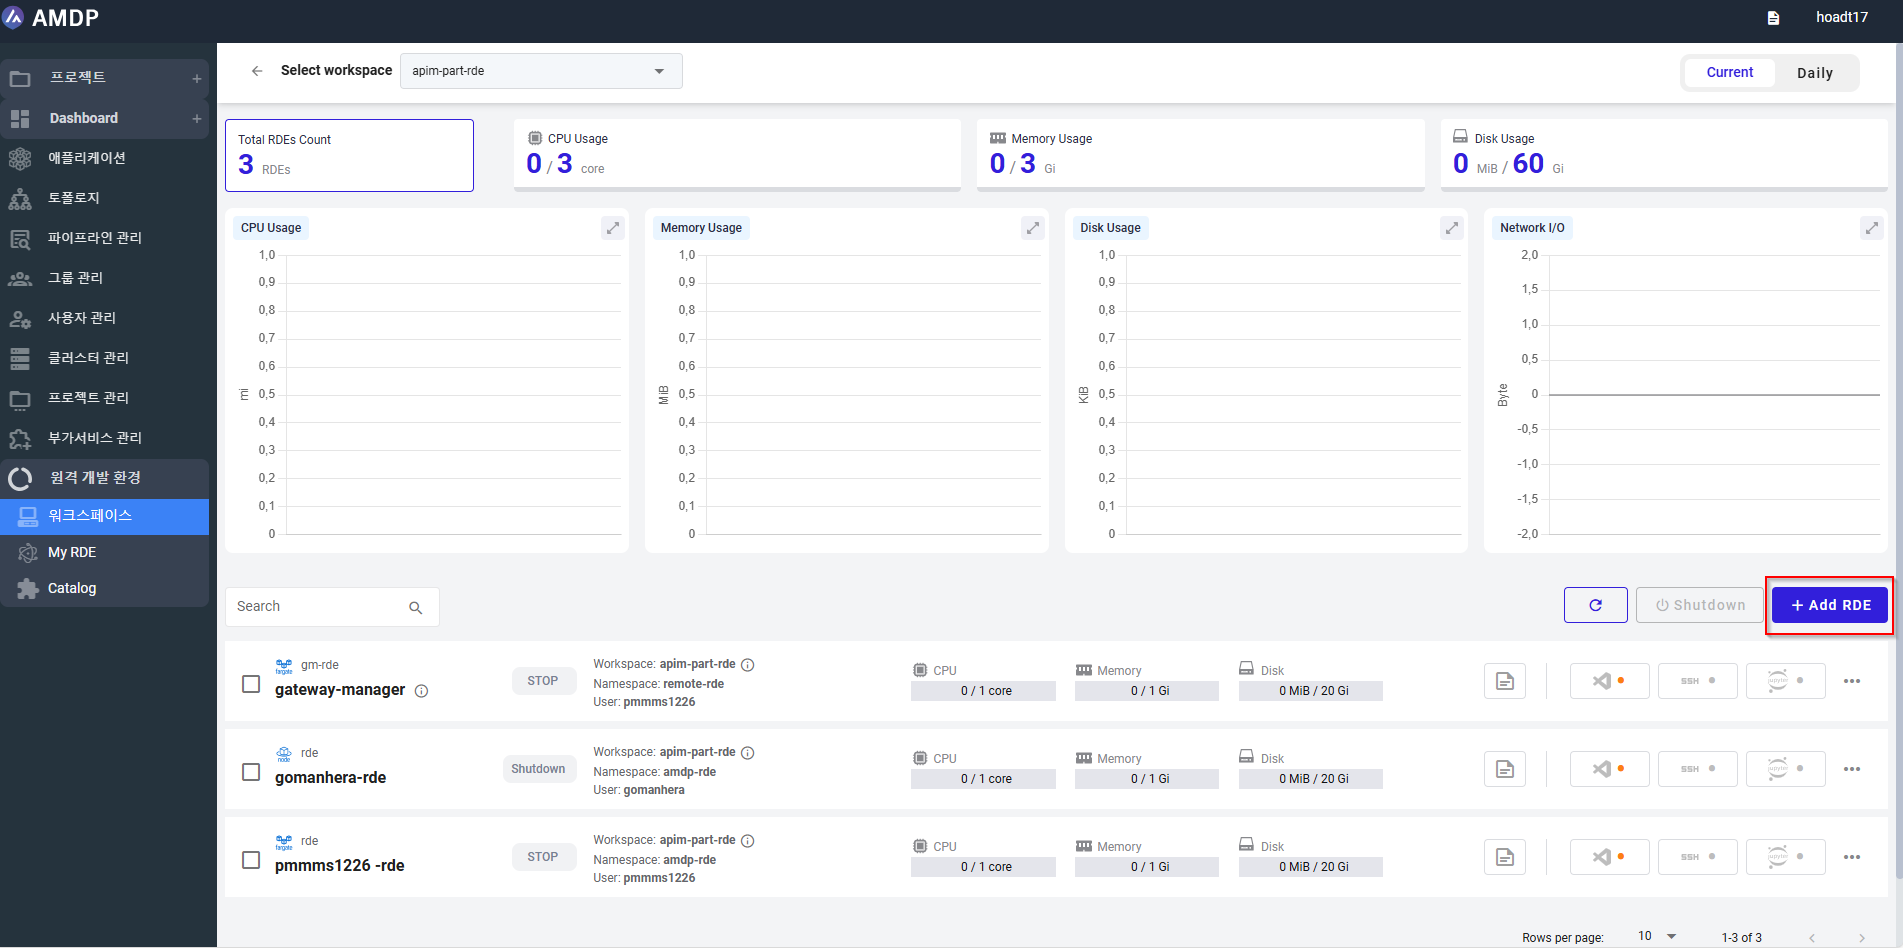
- On a specific workspace screen, select button Add RDE:
- Fill in the required fields:
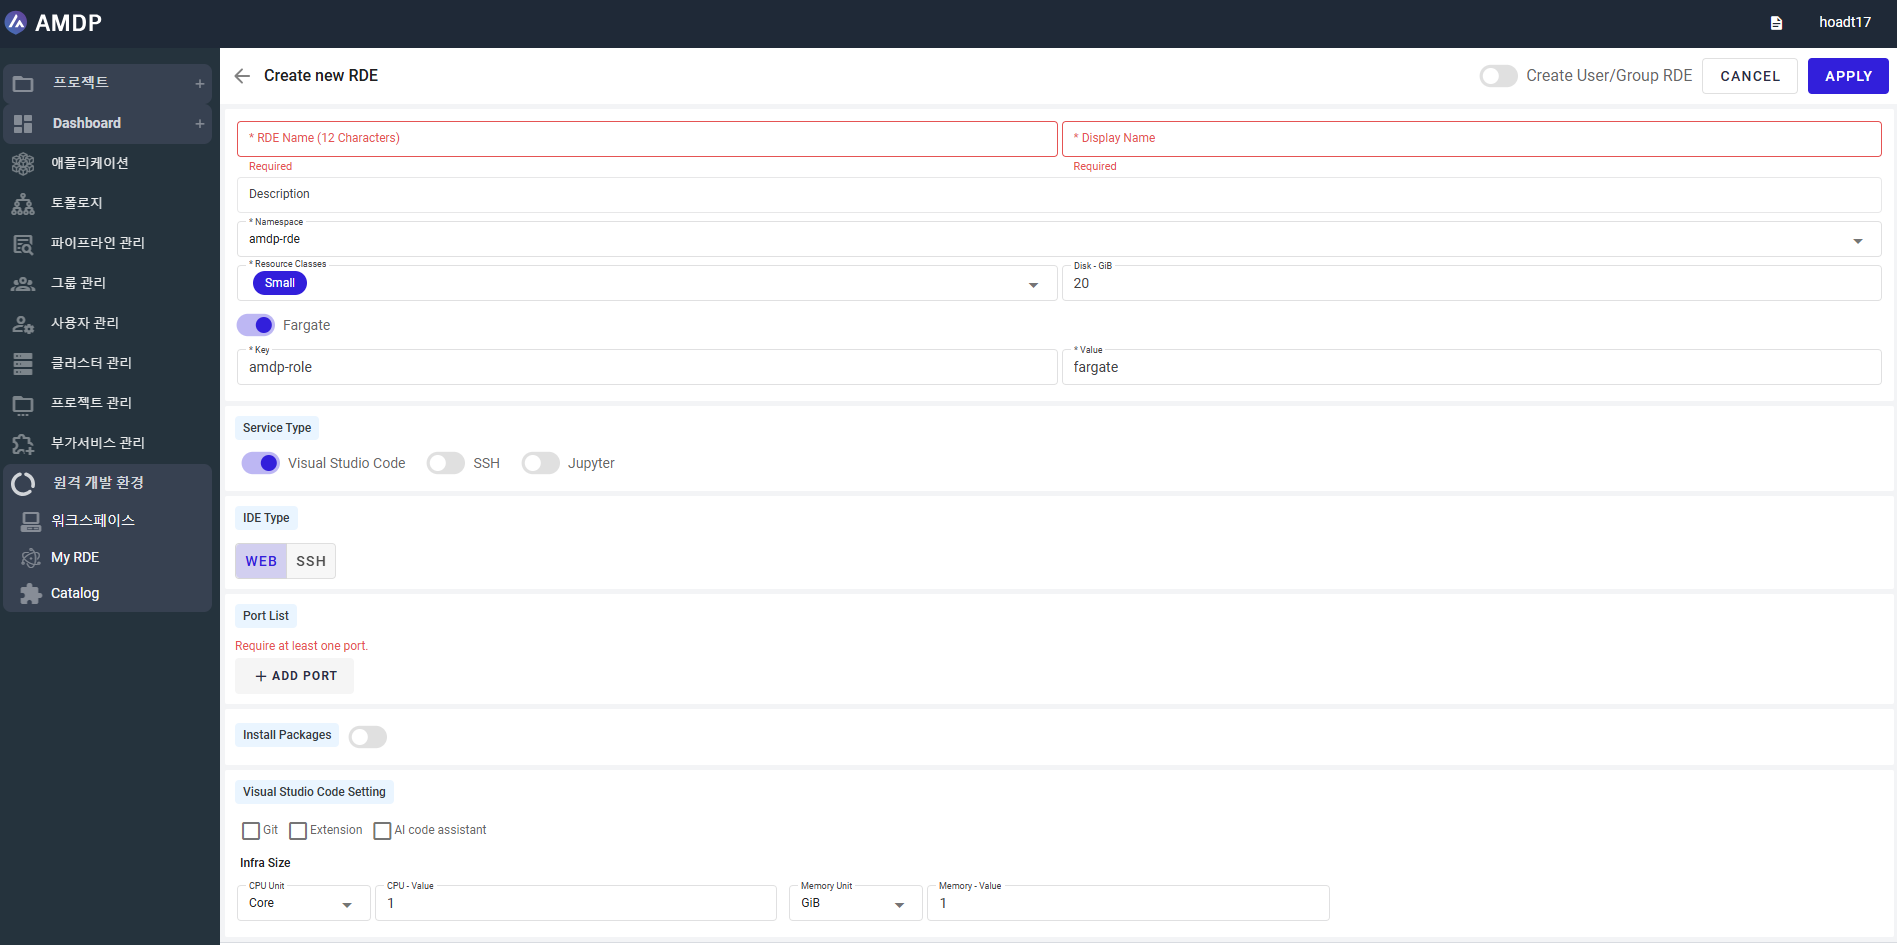
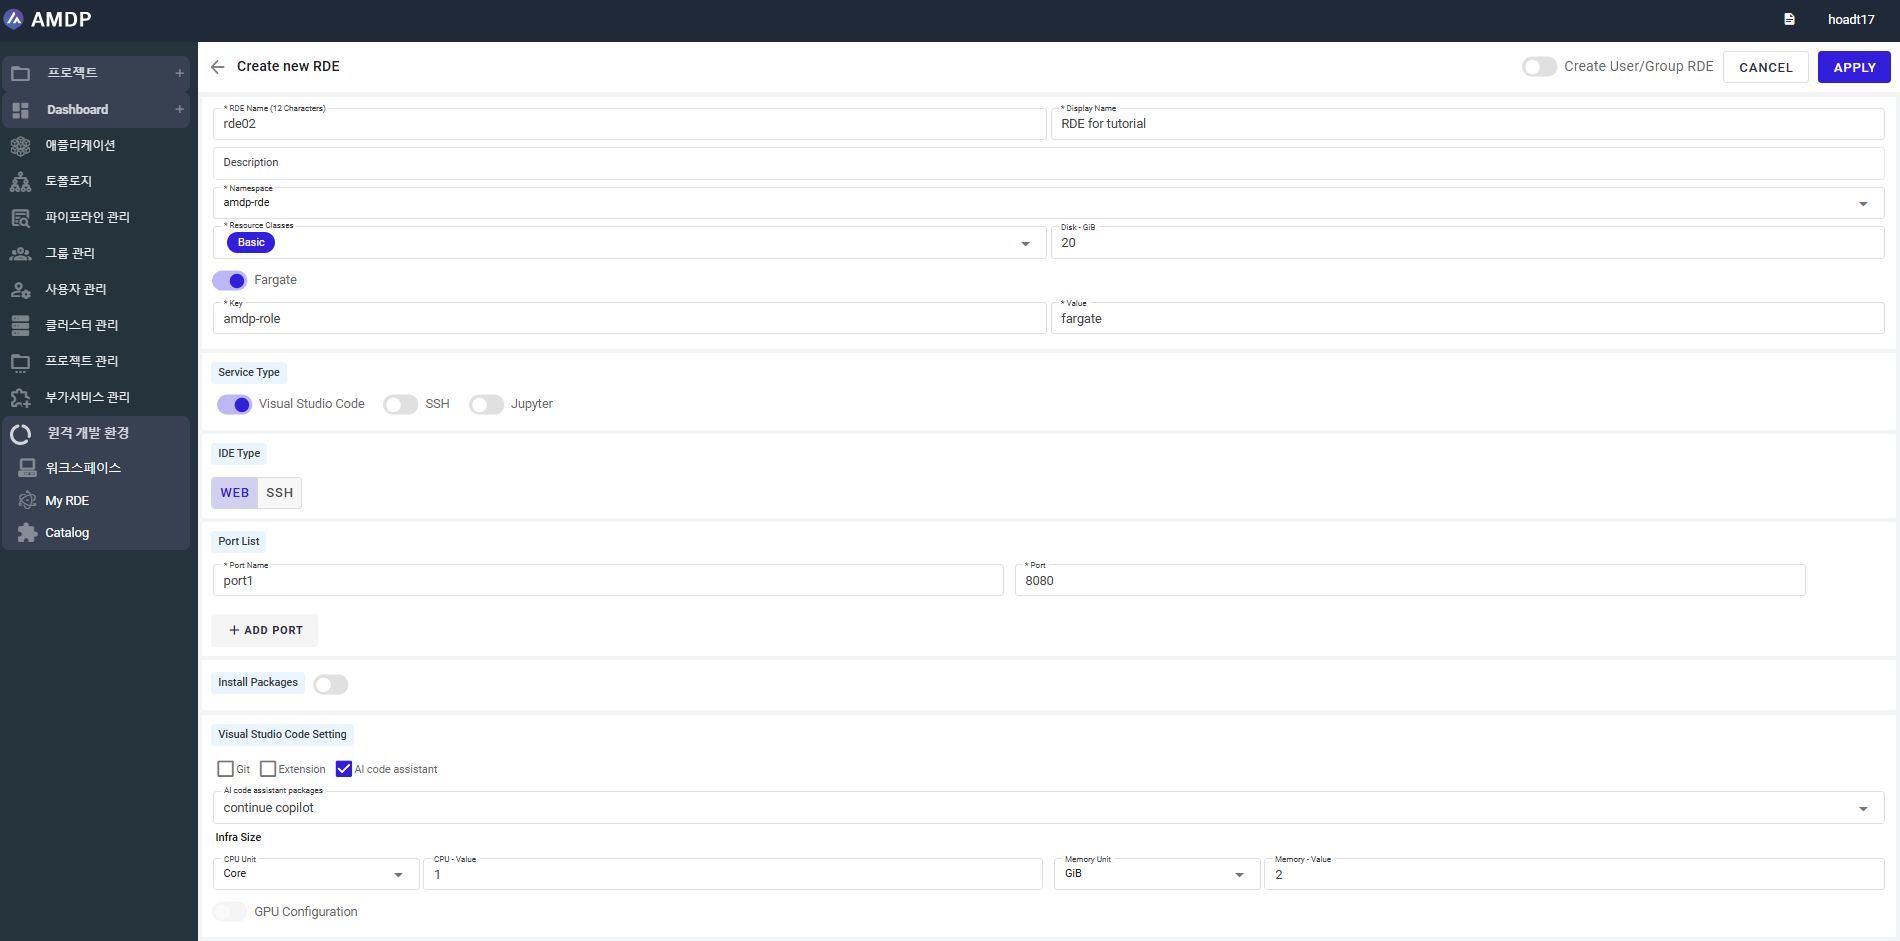
- RDE Name (Required): Unique RDE identifier (max 12 characters).
- Display Name (Required): Display Name of RDE.
- Description: Short description about the RDE.
- Namespace: Select Kubernetes namespace where the RDE resources will be created.
- Resource Classes: A predefined resource profile that automatically sets the CPU and Memory allocated to the RDE.
- Disk-GiB: Persistent disk size allocated for the RDE.
- Target Node: Controls where the RDE will be scheduled to run.
- Storage Type: The storage backend type used for the RDE.
- Service Type: The services type of this RDE. (Visual Studio Code/SSH/Jupyter)
Depending on the service type, different configuration sections and mandatory fields will be shown:
For Visual Studio Code
- IDE Type: Select how to access VS Code (WEB/SSH)
- Port List: Define the port to expose for the RDE service. Must configure at least one port.
- Install Packages: Allows to configure what will be installed and mounted into the RDE at creation time.
- Visual Studio Code Setting: Enable optional capabilities for the VS Code-based RDE and configure the compute resources.
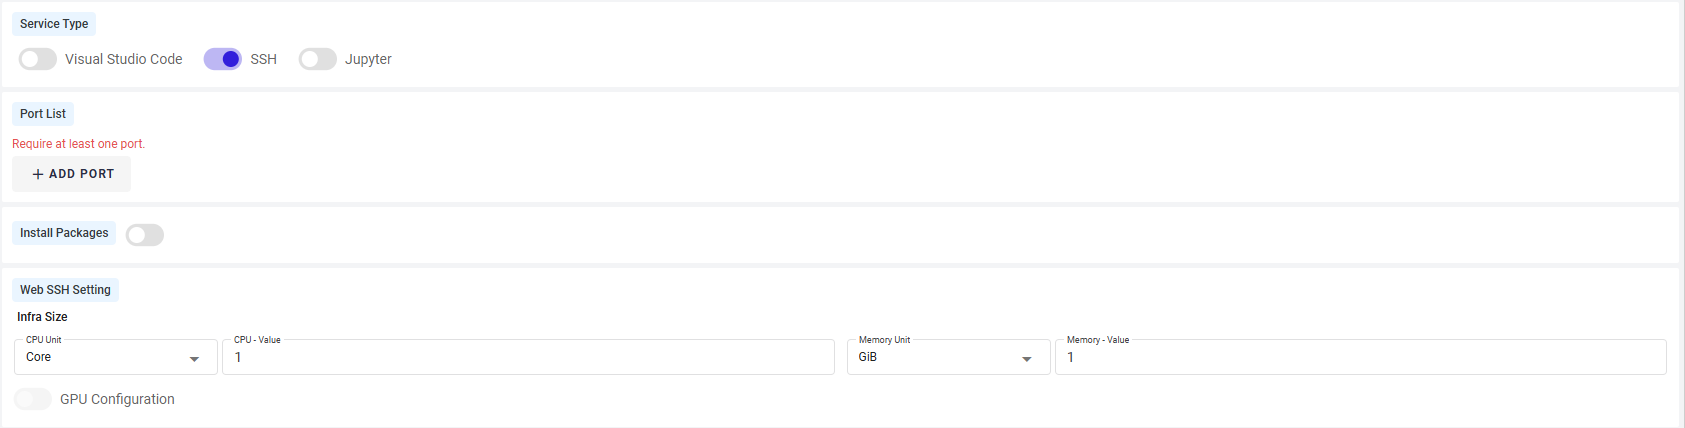
- Port List: Define the port to expose for the RDE service. Must configure at least one port.
- Install Packages: Allows to configure what will be installed and mounted into the RDE at creation time.
- Web SSH Setting: Define the compute resources for the SSH-based RDE.
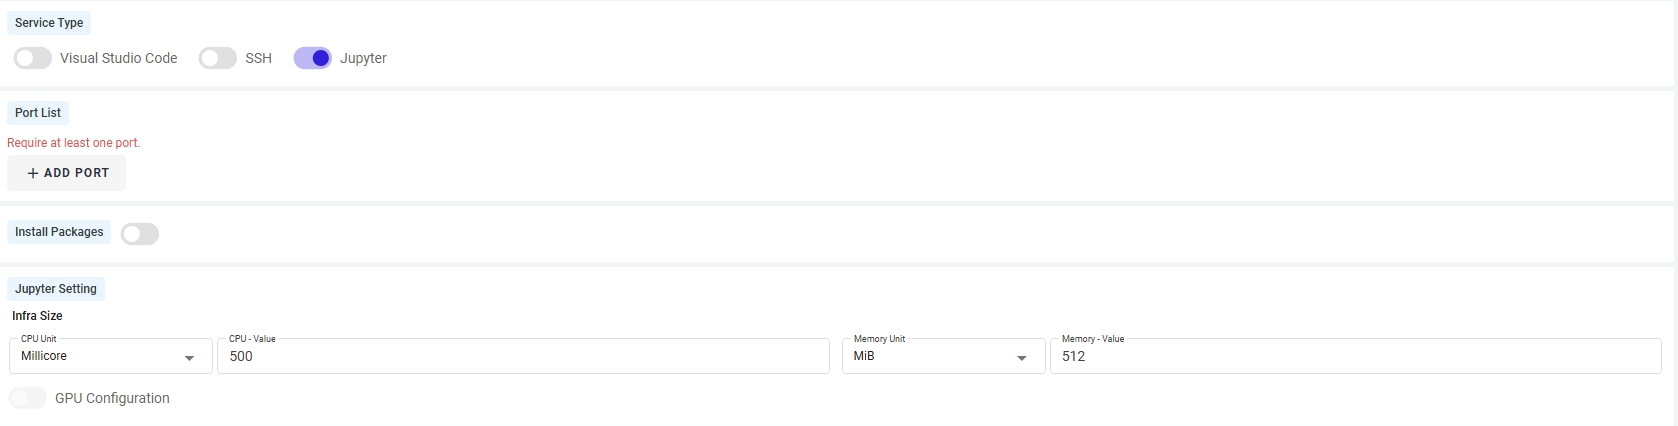
- Port List: Define the port to expose for the RDE service. Must configure at least one port.
- Install Packages: Allows to configure what will be installed and mounted into the RDE at creation time.
- Web SSH Setting: Define the compute resources for the Jupyter-based RDE.
To grant the access of the current RDE to the other user/ user group, enable the button “Create User/Group RDE”:

then adding user account or user group in the “Create Multiple RDE” section:


5. When all the required parameters are filled in, then click button Apply to finish the RDE creation. Once a new DRE is created, it will be displayed on the DRE list screen following the alphabet order:
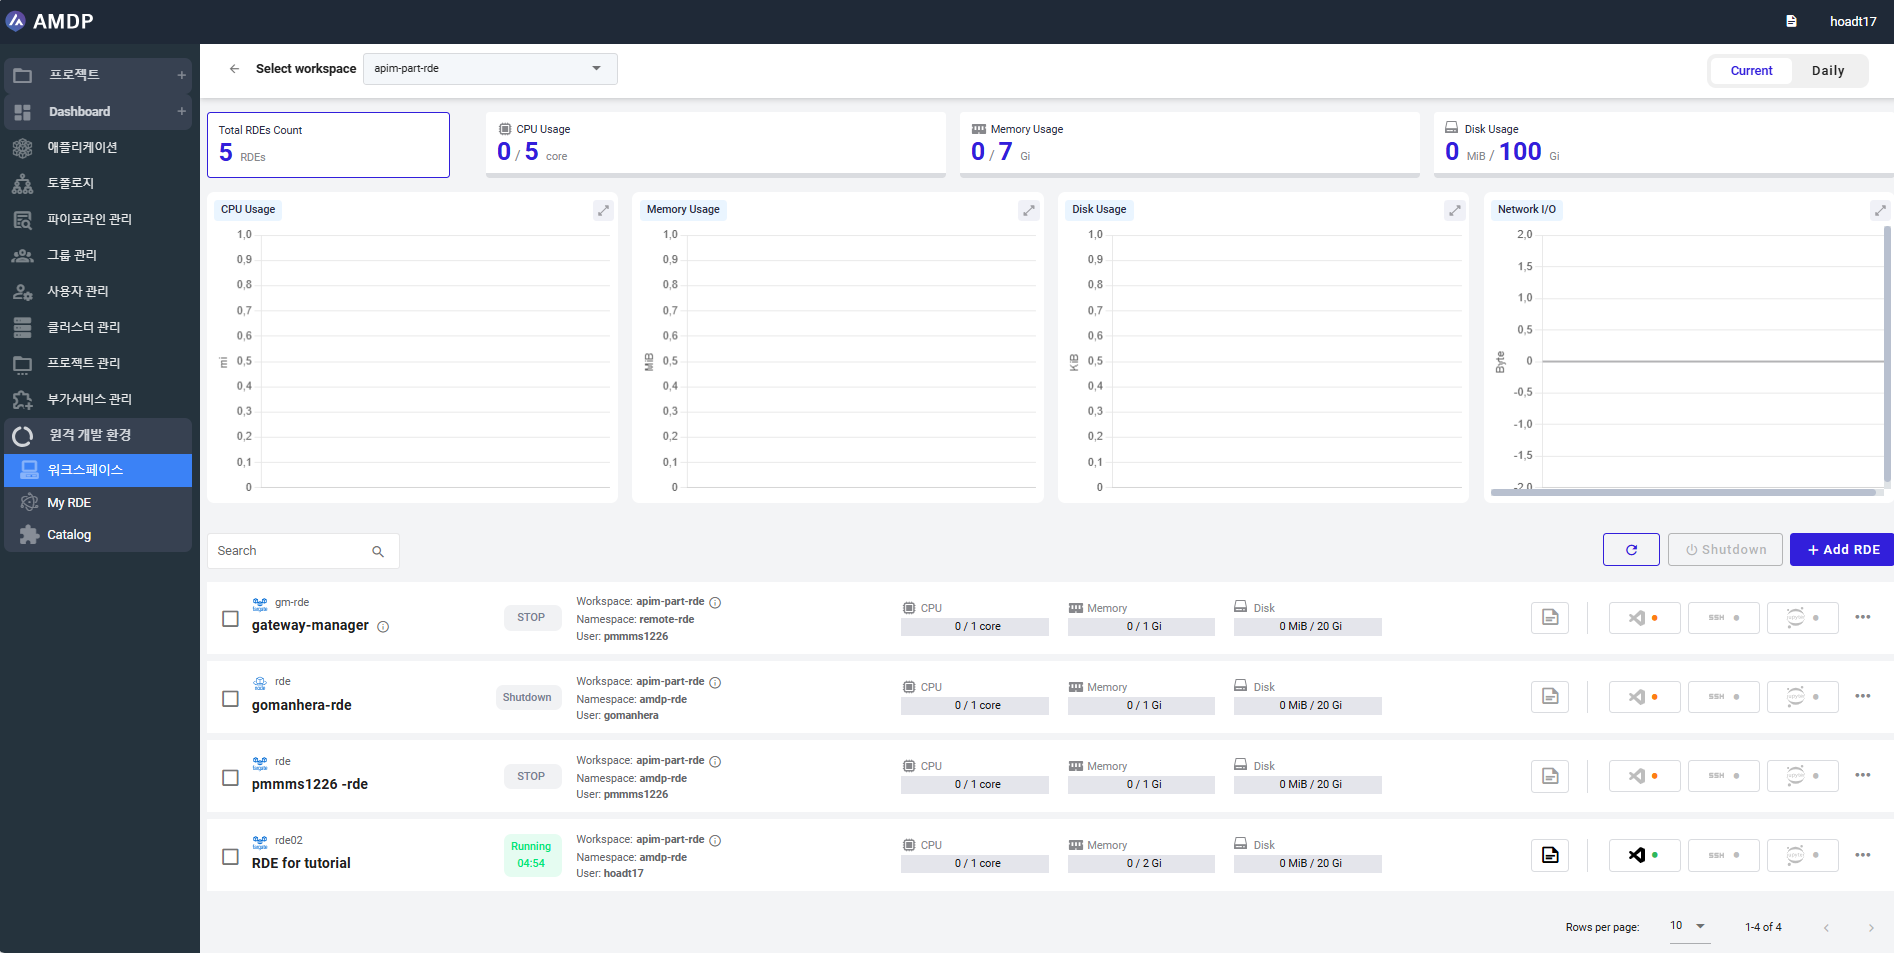
Manage RDE

Once the RDE setup is completed, the subsequent actions can be performed:
Force restartApply when RDE is Failed, Shutdown and Running. If the RDE restarts successfully, its status changes to Running.
ResumeApply when a RDE is Stop. If the RDE resume successfully, its status changes to Running
StopApply when RDE is Running.
ShutdownApply when RDE is Running, Failed and Stop. User can shut down single or multiple RDEs by selecting RDE then select button” Shutdown”.
In other case, each running or failed RDE can be shutdown by selecting the “…” at the end of each RDE then select “Shutdown”
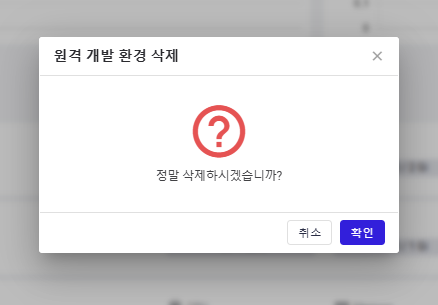
DeleteCan apply for RDE in all status. When RDE is confirmed to be deleted on the message popup, the RDE is no longer displayed on the screen.
Apply when RDE is Failed and Running. When modify the existing RDE, all of the parameters can be updated except for RDE Name, Namespace, Disk-GiB and Storage Type of Target Node (if have)
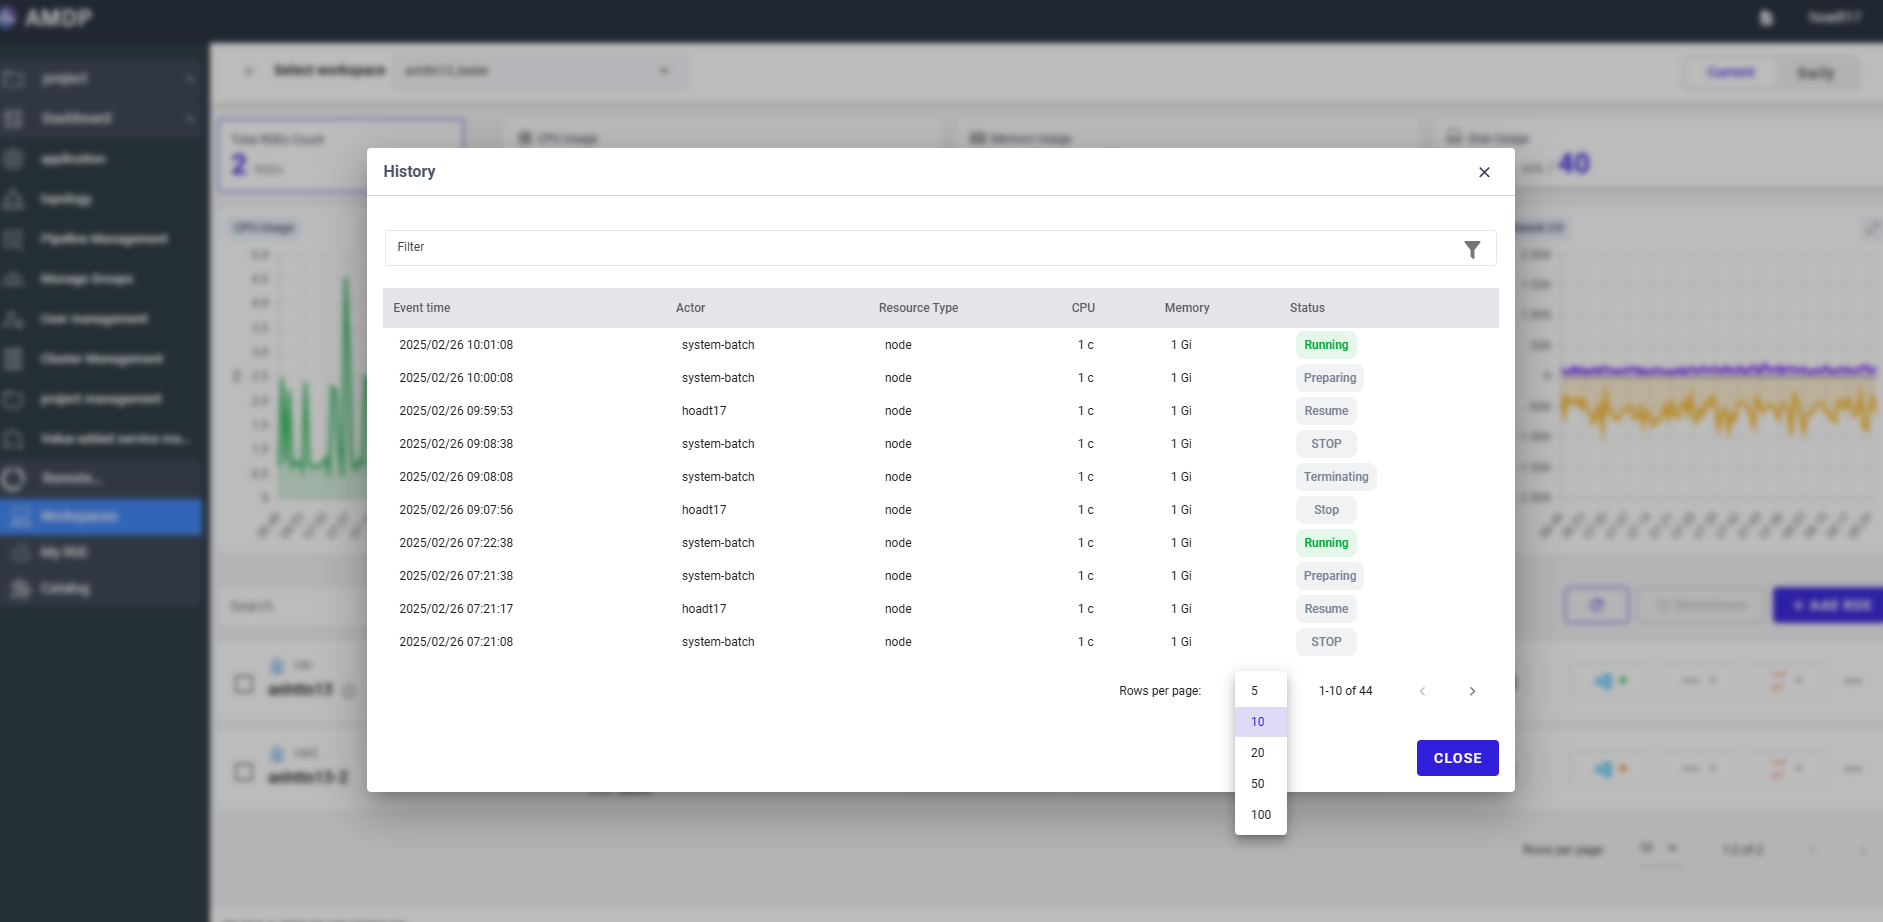
View HistoryView History of the DRE in which the row number per page can be modified:
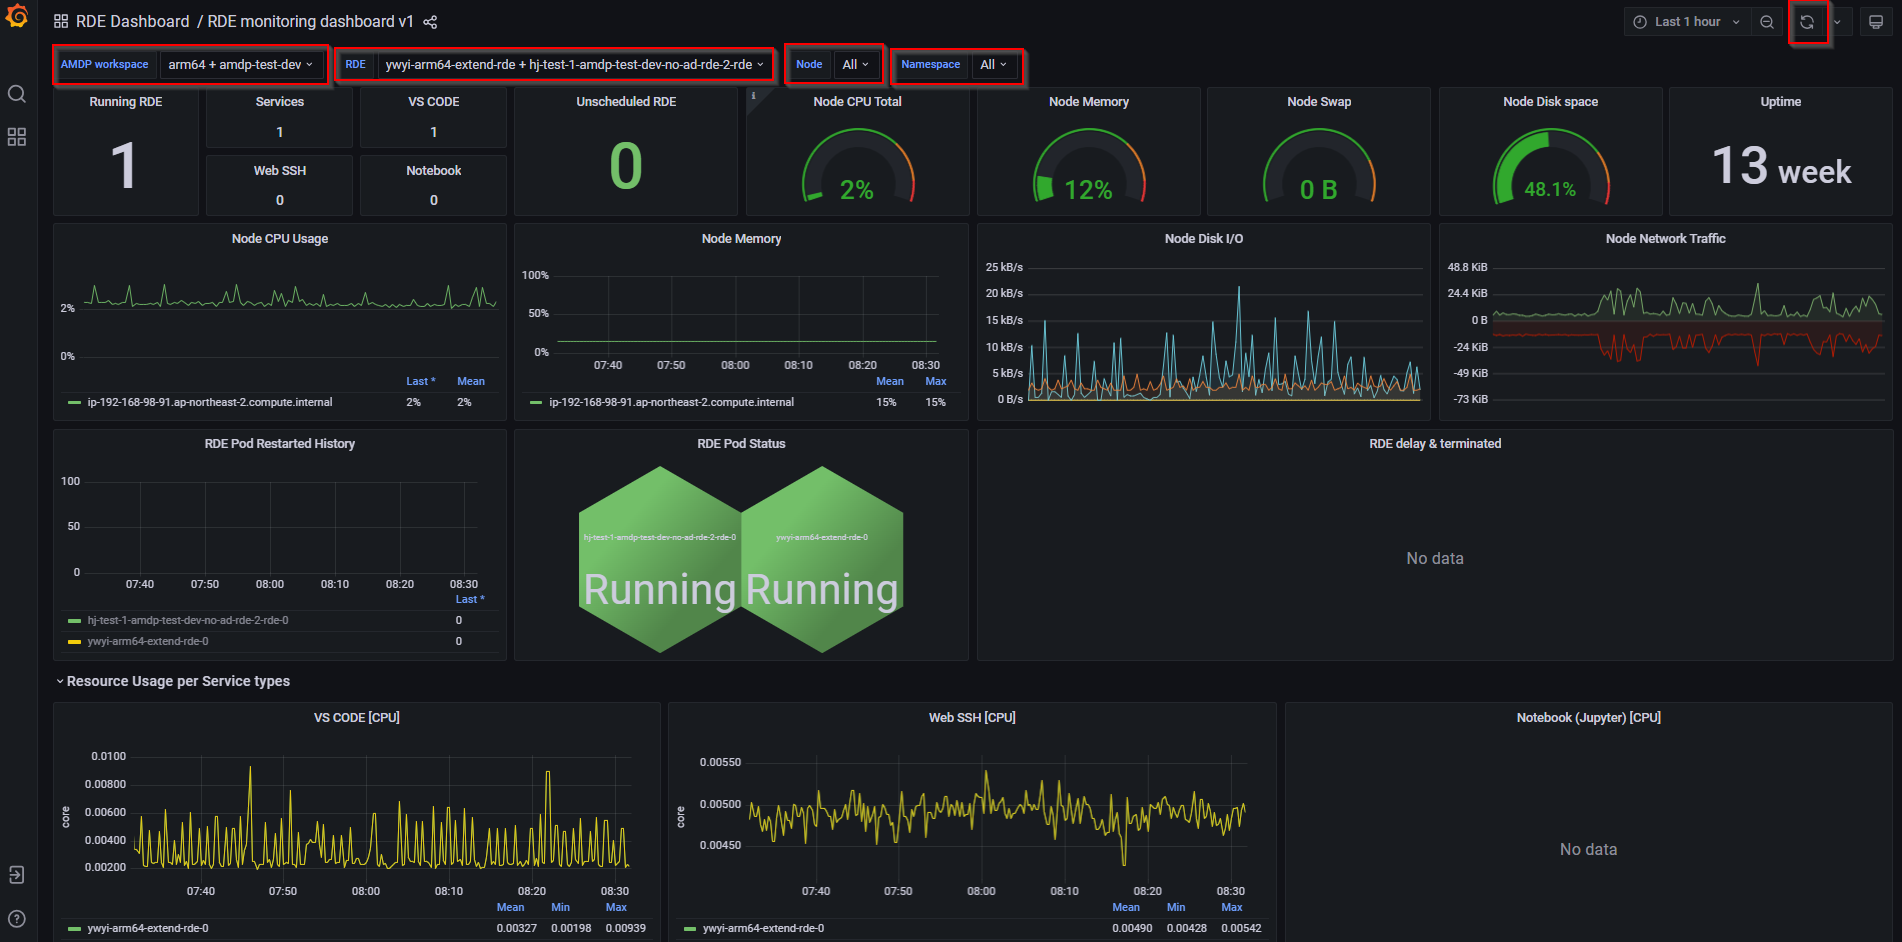
Monitor the RDE regarding: AMDP space, RDE, Node, Namespace
The Grafana dashboard can be setting as auto- refresh in 5s, 10s, 30s, 1m, 5m, 15m, 30m, 1h, 2h, 1d
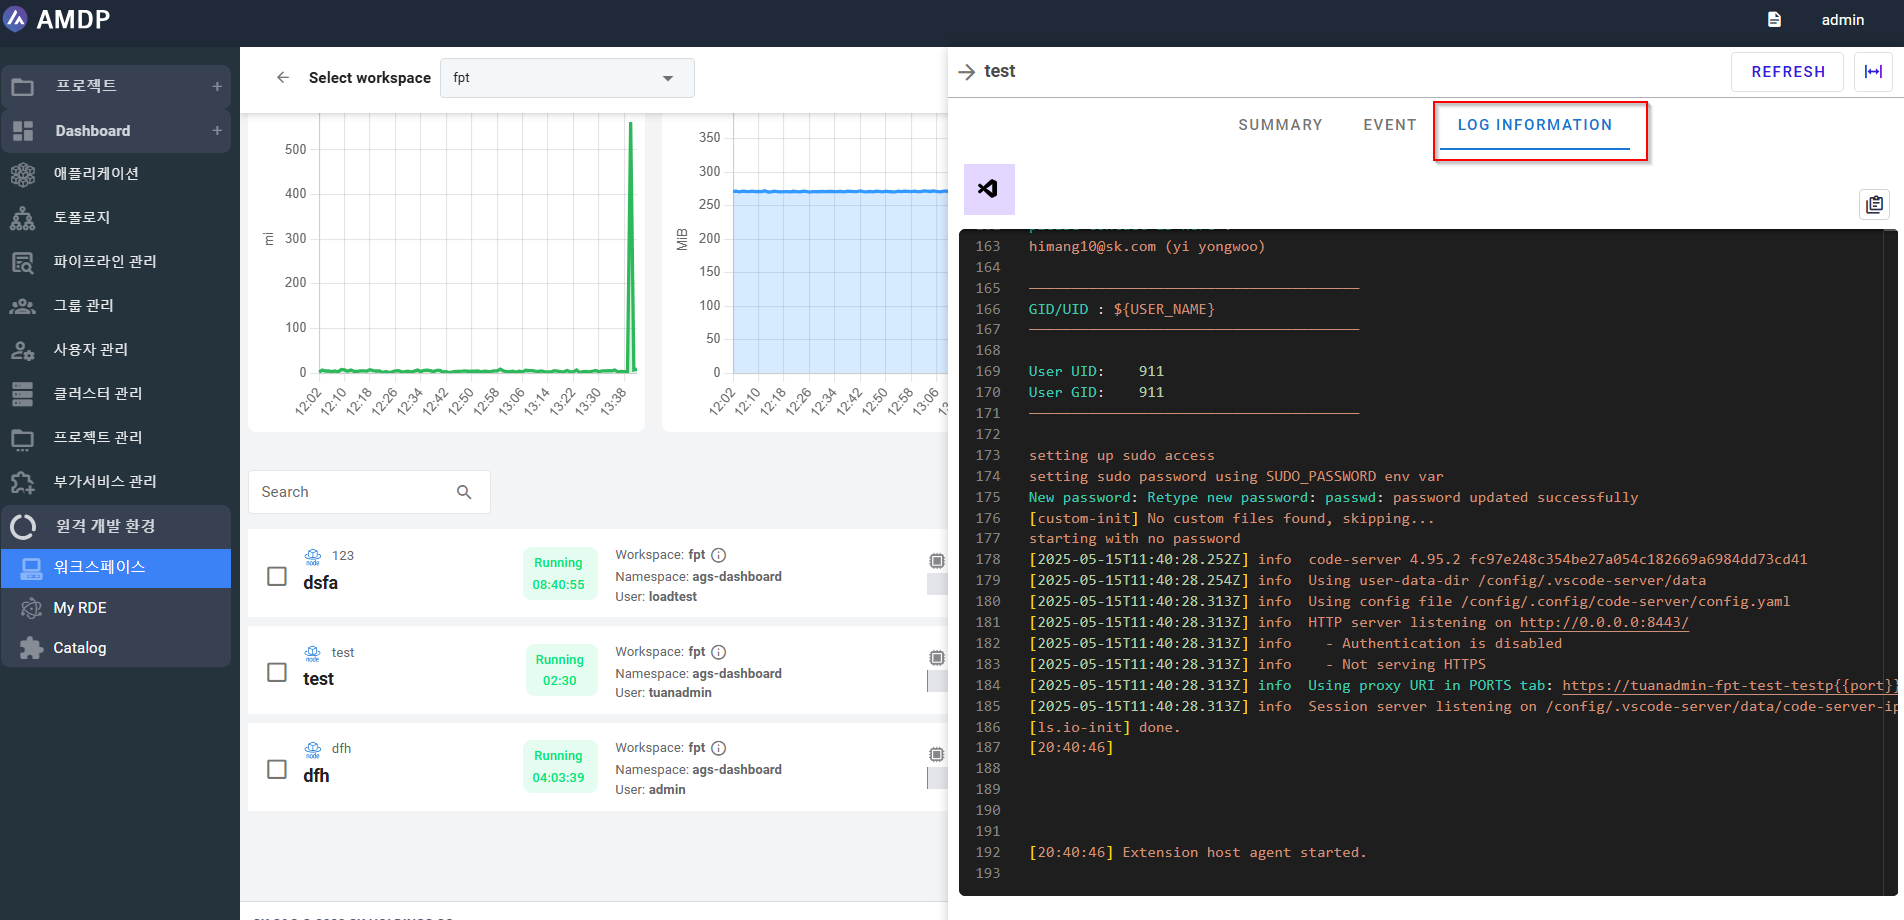
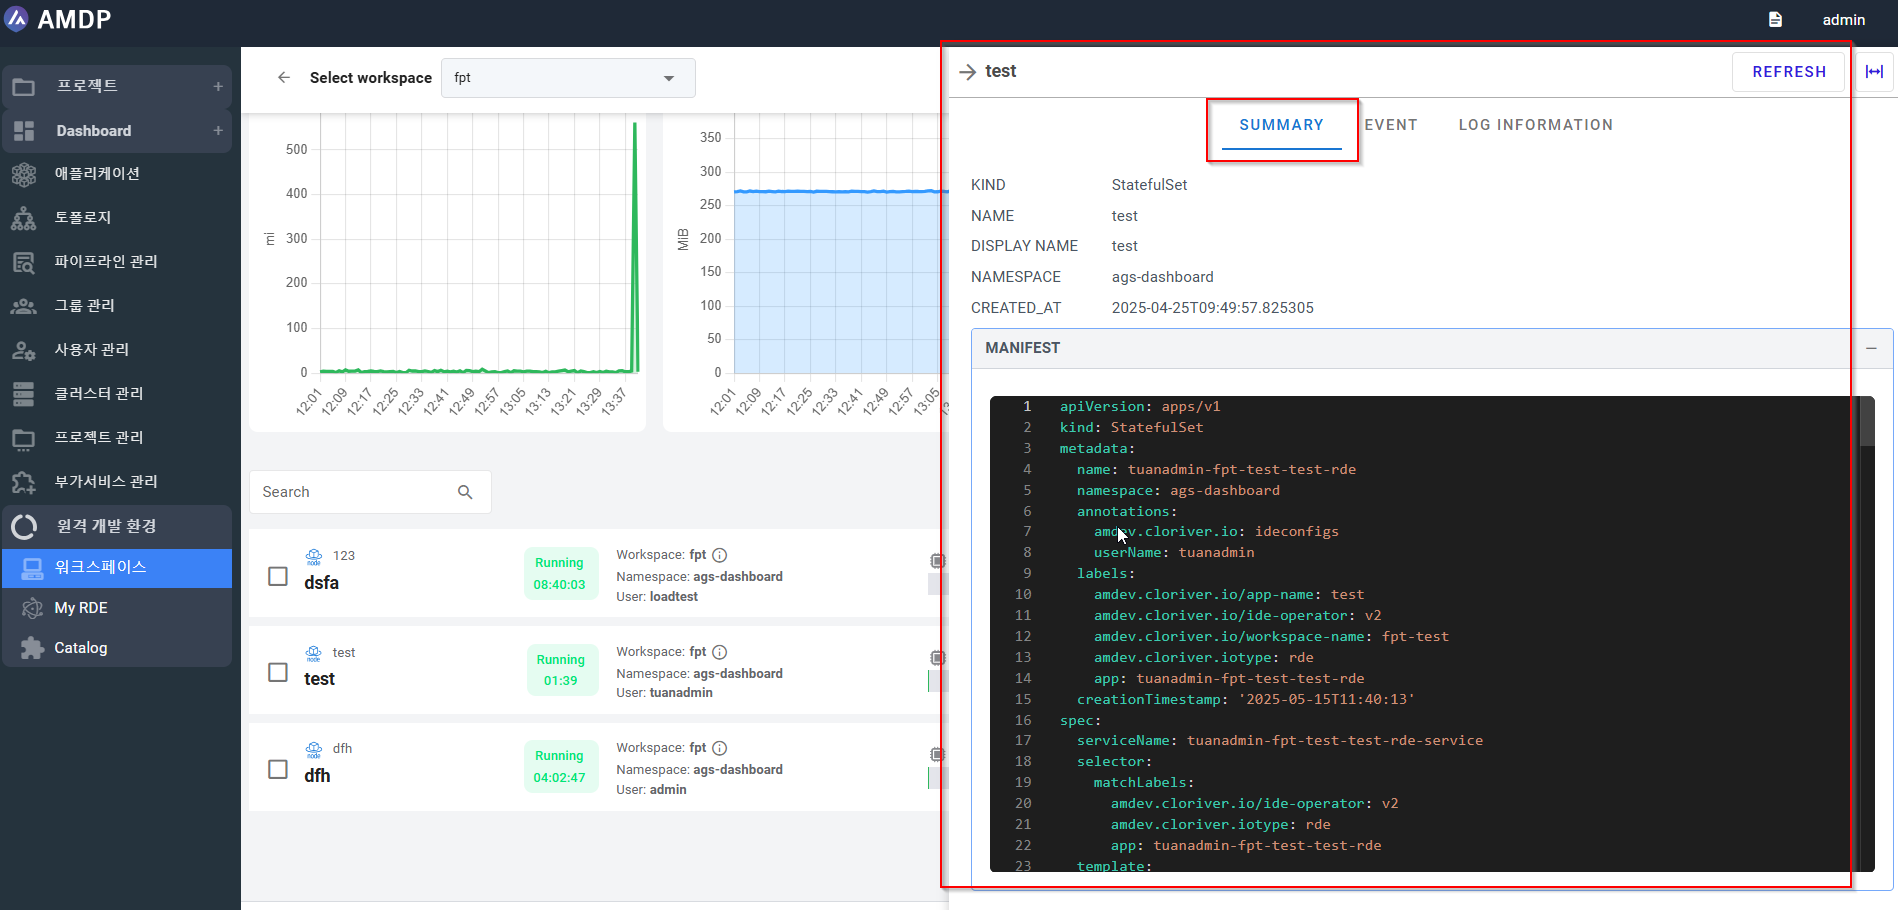
StatusThe detailed information of the RDE information, event and log history:
RDE information:
Event:
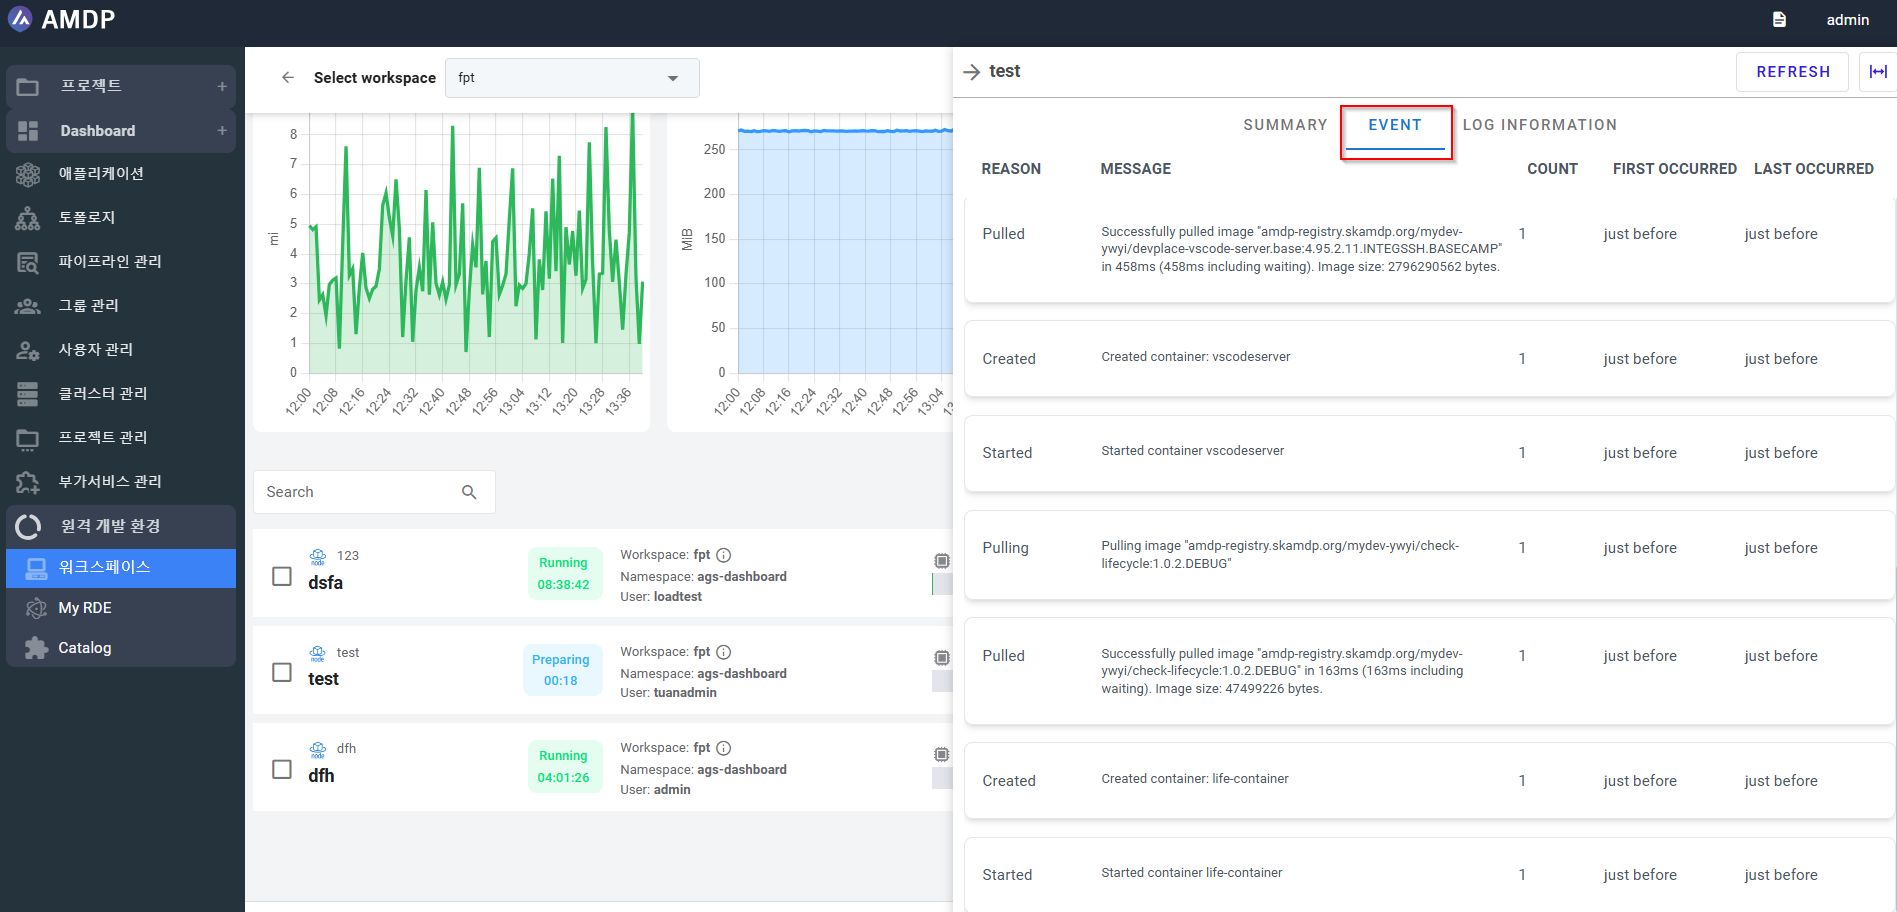
Log information: