Workload
Accessing the GPU Inventory Page
Project mode: Scheduler > Workload
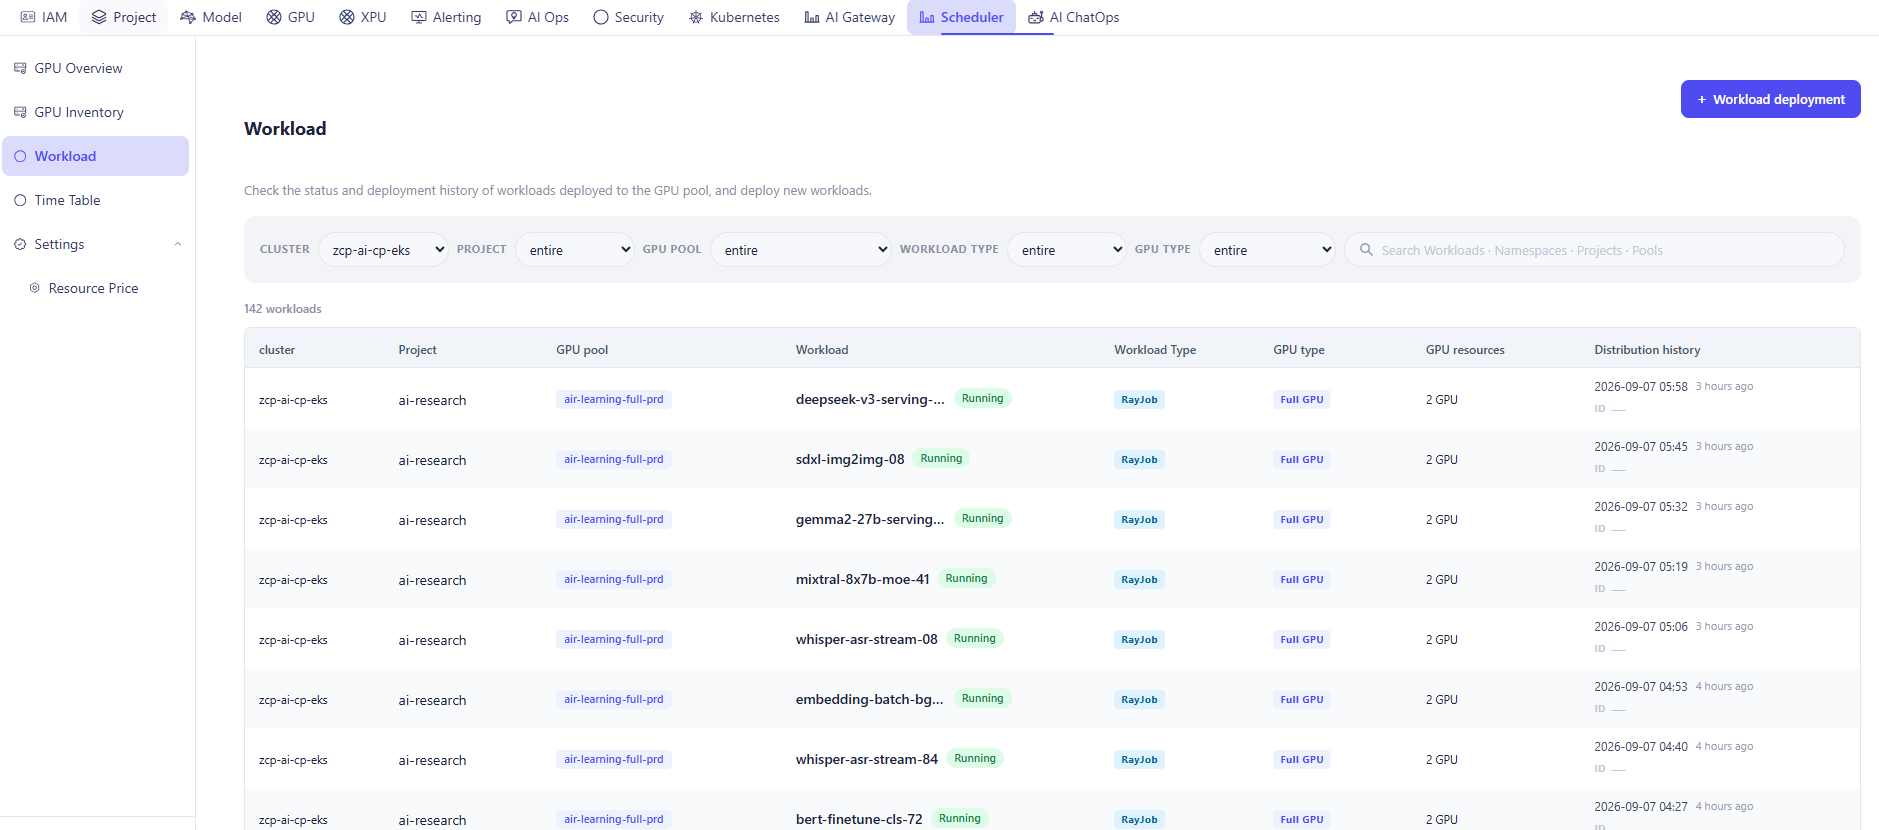
1. Filter Bar
| Filter | Meaning |
|---|---|
| CLUSTER | list of clusters |
| PROJECT | Filters by project, defaults to "entire" (all projects) |
| GPU POOL | Filters by GPU pool (Volcano queue), defaults to "entire" |
| WORKLOAD TYPE | Filters by workload kind (RayJob, InferenceService), defaults to "entire" |
| GPU TYPE | Filters by GPU sharing mode (Full GPU/MIG/Time-Slicing), defaults to "entire" |
| Search box | Searches Workloads · Namespaces · Projects · Pools |
2. Workload table
The number of workloads matching the current filters is shown above the table (e.g. "142 workloads"). Columns:
| Column | Content |
|---|---|
| cluster | Cluster name |
| Project | Owning project |
| GPU pool | GPU pool name (Volcano queue) |
| Workload | Workload name + status badge (e.g. Running) |
| Workload Type | Kubernetes resource kind used to run it |
| GPU type | GPU sharing mode |
| GPU resources | Number of GPUs allocated to the workload |
| Distribution history | Deploy timestamp (absolute date/time + "X hours ago") and ID |
Besides these, the page's shared column set also includes (depending on the active view/config): Priority, Preemptible, GPU Health (clicking it opens the corresponding GPU directly in GPU Inventory), CPU/Memory. Rows needing attention are flagged with "Action needed".
Clicking a workload row opens Workload Detail (see section 6).
3. "+ Workload deployment" button (deploying a new workload)
This button sits above the table, and opens a two-step dialog:
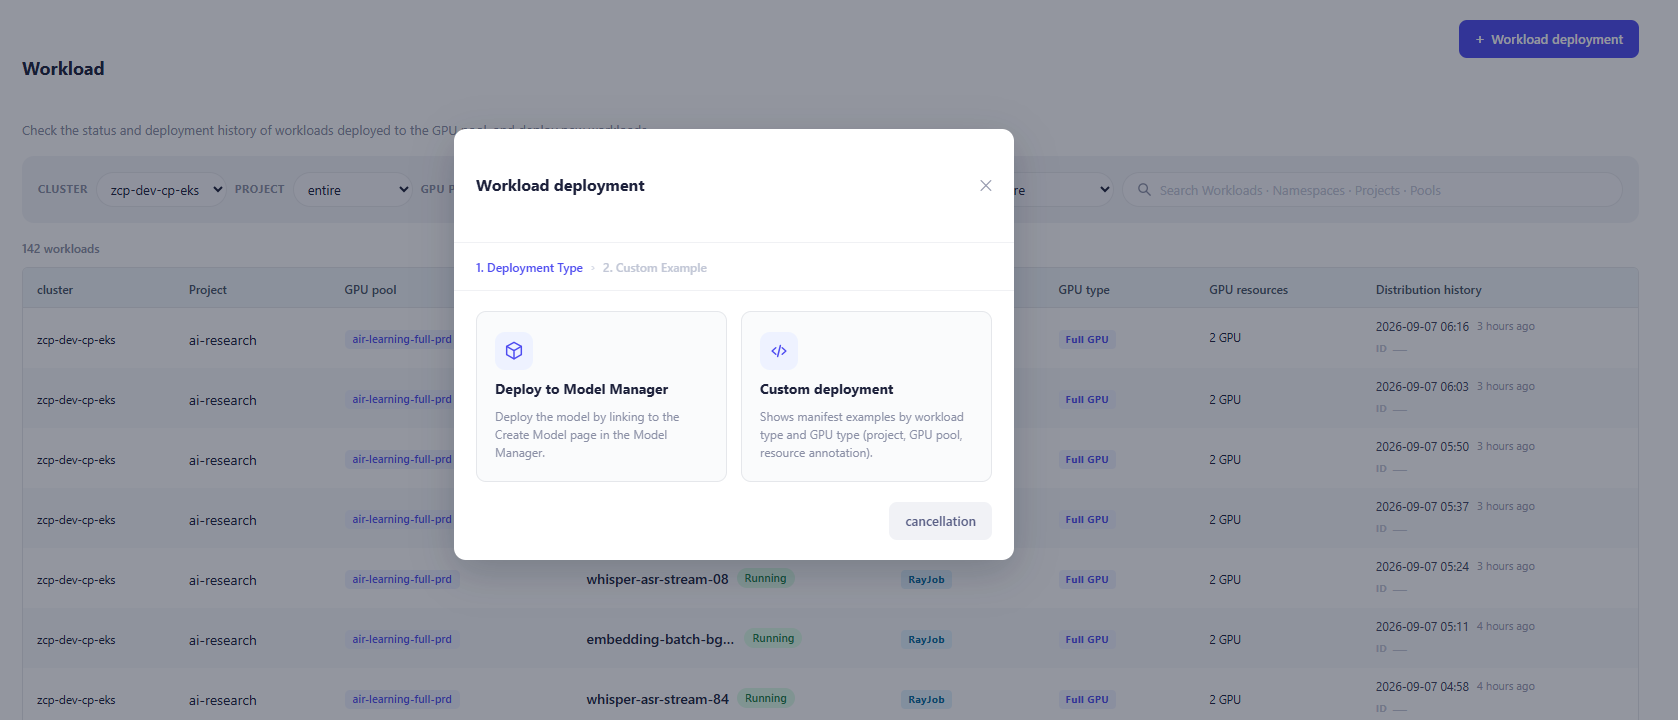
Step 1 — Deployment Type
- Deploy via Model Manager: hands off to the Model Manager module's Create Model page to deploy a model through that flow (not deployed directly from this screen).
- Custom Deployment: shows a manifest example based on the chosen Workload Kind and GPU Type — this path only generates an example, it does not deploy anything.
Step 2 — Custom Example (only reached via Custom Deployment)
- Workload Kind: InferenceService, RayJob, PyTorchJob.
- GPU Type: Full GPU / MIG / Time-Slicing (depending on what's available).
- Number of GPUs— if MIG is chosen, MIG Profile + Count are added; if a vGPU-style allocation is chosen, vGPU cores (%) + vGPU memory (GB) are added.
- Once selections are made, the Deployment Example (YAML) block auto-generates a sample manifest with inline comments for the important fields: project (annotation skax.com/modelmanager-project), GPU pool (annotation axmp.io/gpu-pool), and the relevant GPU resource field.
- A Copy Example button copies the YAML to the clipboard (shows "Copied ✓" on success).
Important: this dialog is only a manifest-example generator — the user still has to apply the generated YAML themselves (e.g. kubectl apply -f ...); the form does not deploy automatically.