3. Resource Management
Resource Search

SNB
Resources can be viewed from various perspectives:
-
Node Tab
- Displays a tree structure of the registered clusters and the nodes in each cluster.
- The number at the end of a node name represents the number of pods running on that node.
- Node load levels are indicated by text color.
-
Namespace Tab
- Displays resources organized by cluster and namespace, focusing on major resource types within each namespace.
-
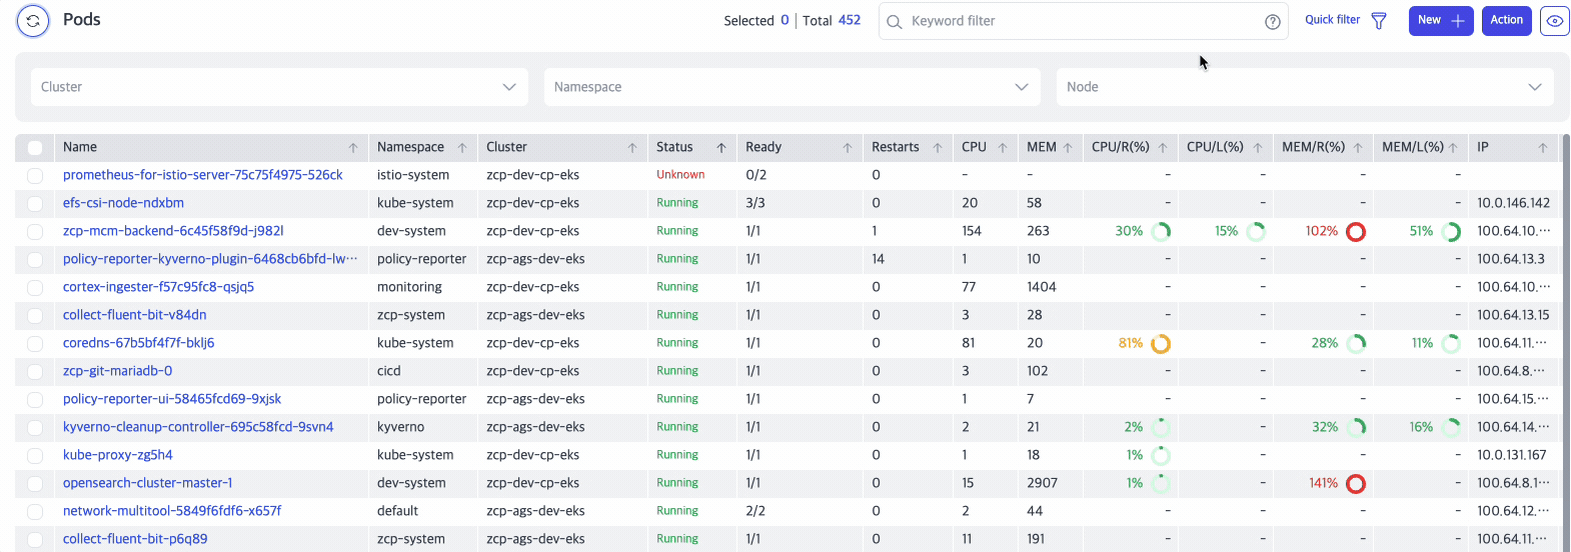
Resource Tab
- Displays resource lists centered around Kubernetes resource types.
Refresh
Refreshes resources while maintaining the currently selected filters and queries. The resource type currently being viewed is also displayed.
Filter
Filters resources by selecting clusters, nodes, and namespaces.
Pager
Controls the number of items displayed per page in the table view. Adjustable between 10–50 items per page.

Query Filter and Actions
Search for resources by entering keywords in the format fieldName:keyword. Filters can include operators for size, date, or CIDR depending on the field type.
Quick Search Filter (Node, Pod only)
Save frequently used or complex queries under a custom name for reuse. Selecting a saved query immediately applies it.
Creating a Quick Search Filter
Create a Quick Search Filter to find cases where CPU/Memory requests/limits exceed 80%.
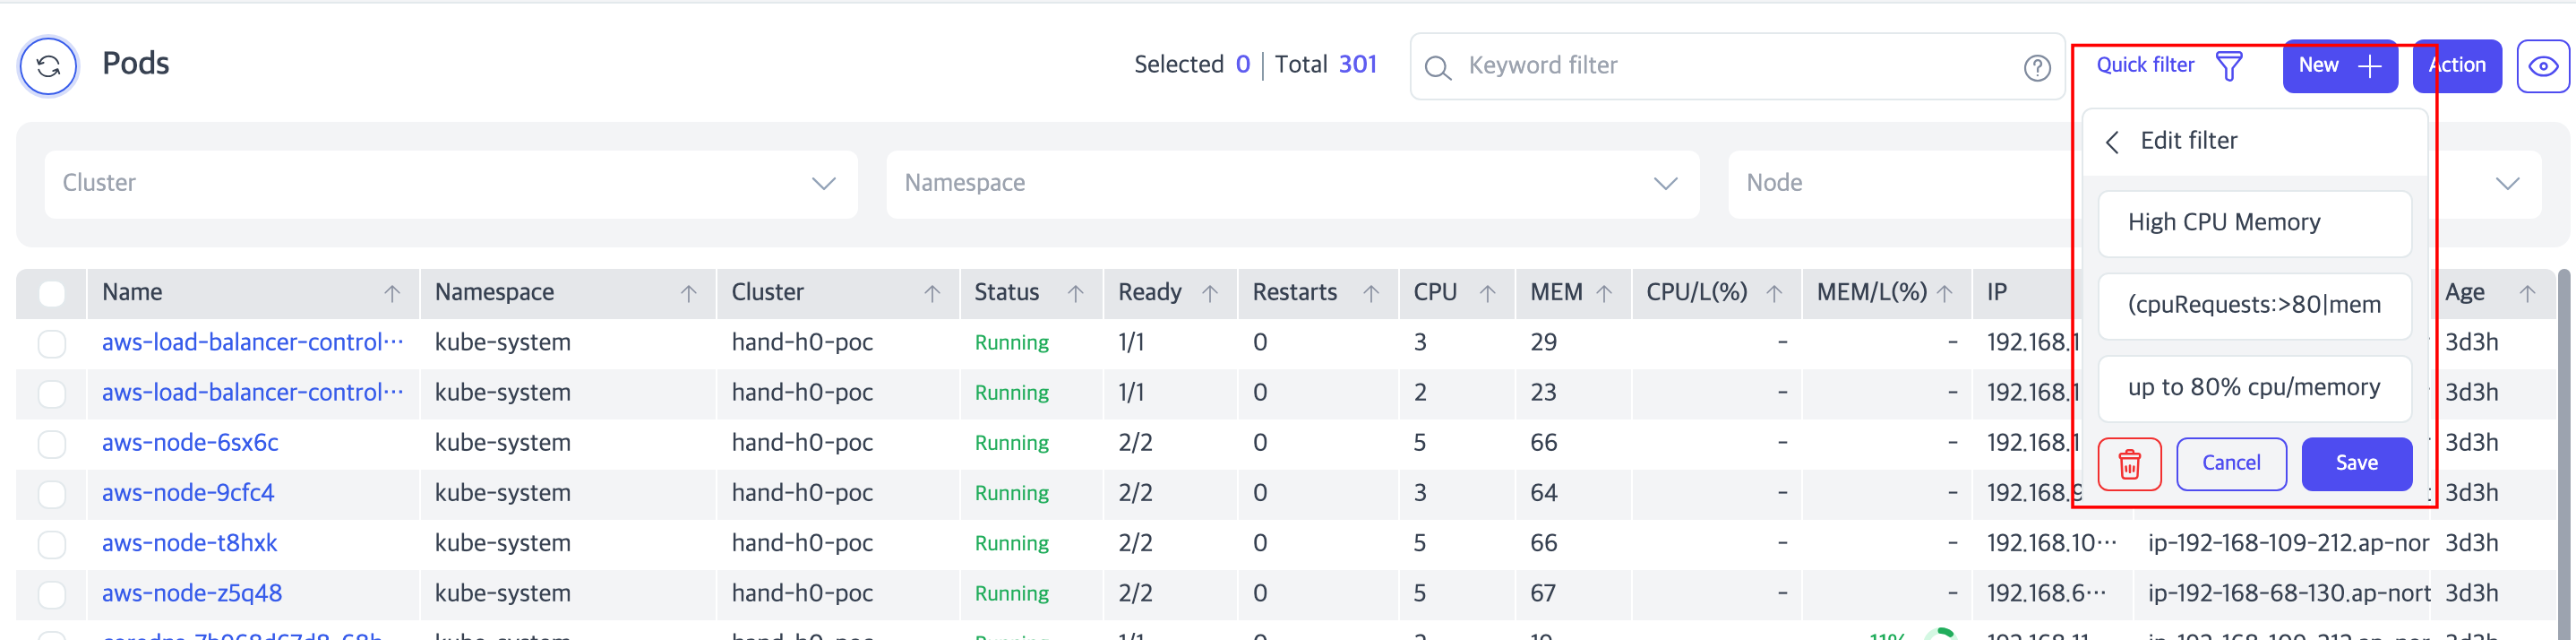
- Name: Set the filter's name.
- Example: High CPU Memory
- Query: Specify the query to apply.
- Example:
(cpuRequests:>80|memoryRequests:>80)|(cpuLimits:>80|memoryLimits:>80)
- Example:
- Description: Provide details about the filter.
- Example: Up to 80% CPU/Memory usage.
Performing Actions
Actions can be executed on resources. Multi-select resources with checkboxes to apply actions in bulk.
| Action | Description | Target |
|---|---|---|
| Delete | Deletes the resource | All |
| Label | Adds/updates a label | All |
| SetImage | Updates the container image | Pod, Deployment, StatefulSet, DaemonSet |
| Scale | Adjusts workload replicas | Deployment, StatefulSet, DaemonSet |
| Expand | Expands resource capacity (e.g., storage) | PersistentVolumeClaim |
| Trigger | Manually triggers an action | CronJob |
| Schedule | Sets the scheduled time for a CronJob | CronJob |
| Cordon/Uncordon | Enables/disables resource scheduling on a node | Node |
| Drain | Moves all pods on a node to other nodes | Node |
| Taint | Adds a taint to a node to limit pod scheduling | Node |
Creating a New Resource
New resources can be created from the resource list screen using the ‘New+’ button.
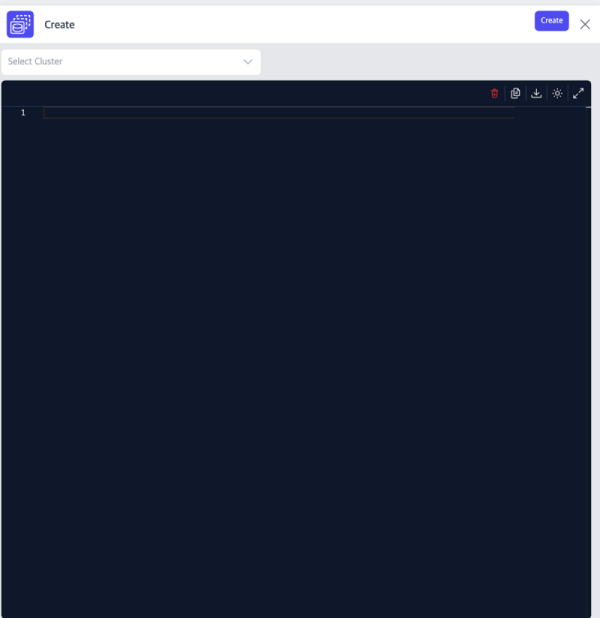
- Select a Cluster for deployment.
- Use the YAML Editor to define the resource in YAML format and deploy.
Resource View
Clicking a resource name on the right sidebar in the table opens a panel on the right with detailed information and actionable buttons.
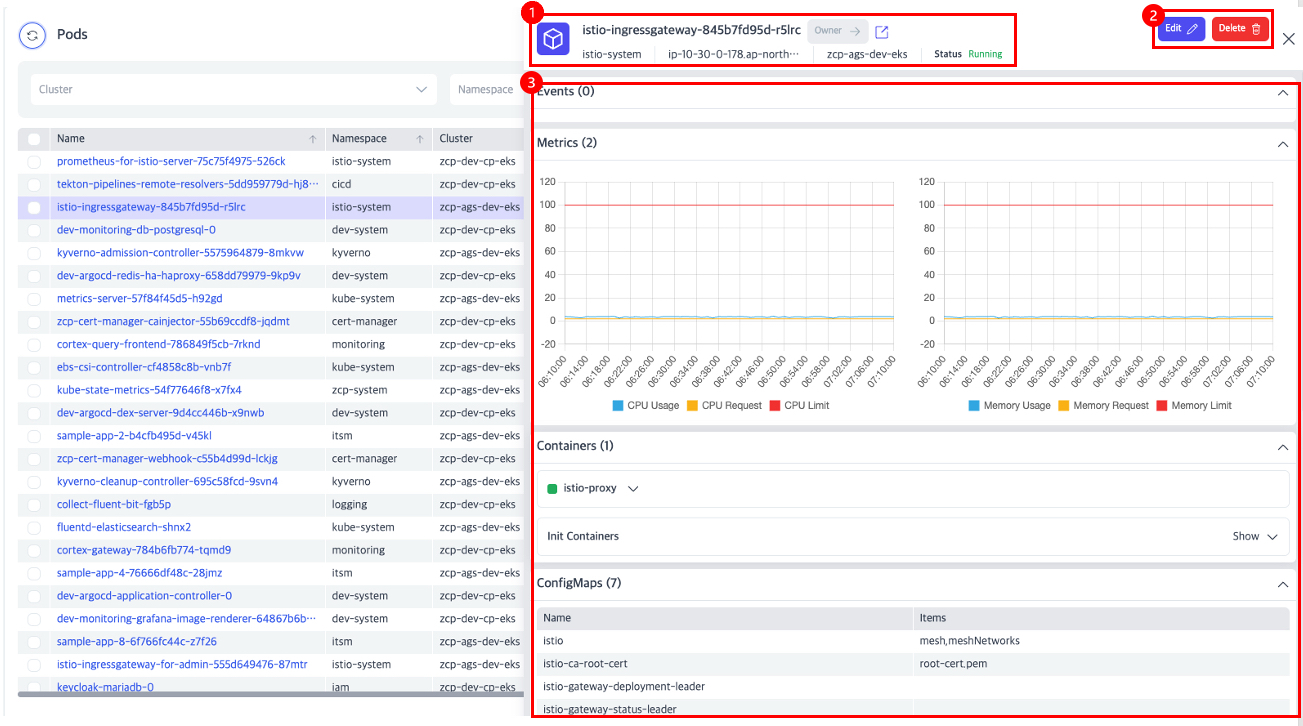
- Title Section: Displays the resource name, location (namespace, node, cluster), and status.
- Action Area: Includes buttons for modifying or deleting the resource.
- Content Area: Provides resource details, with additional icons for more specific information (e.g., Pod resources).
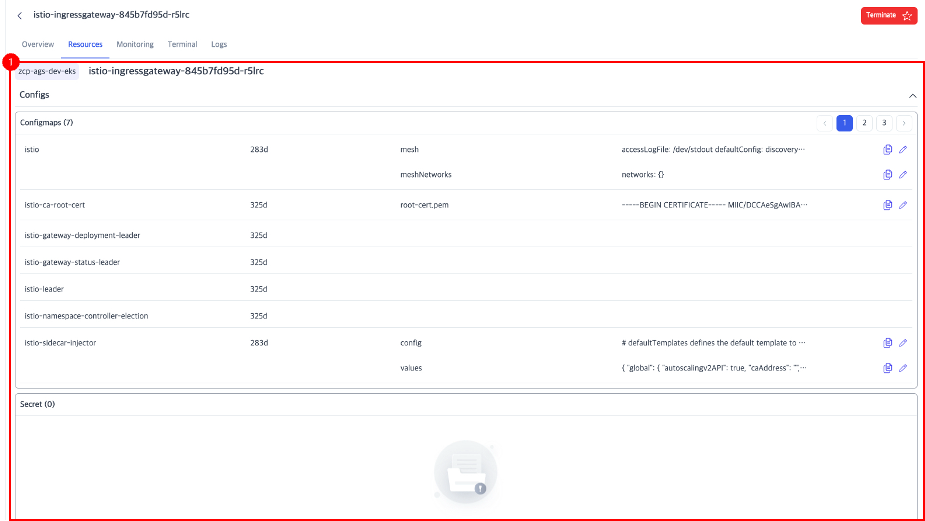
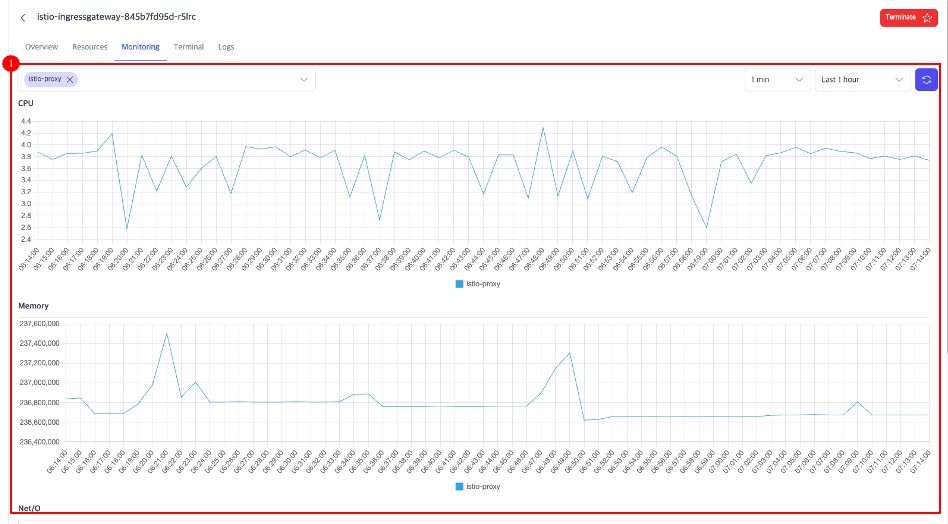
Detailed View
The detailed view provides in-depth information about Pod resources only.
Overview Tab
- Title Area: Displays the selected resource name and navigation to return to the previous screen.
- Tabs Area: Categorizes Pod details.
- Action Buttons: Provides actions applicable to the resource.
- Content Area: Displays the contents of the selected tab.

Resource Tab
Lists related resources and allows simple actions.
Monitoring Tab
Displays the metrics for the selected Pod.
Terminal Tab
If the container image includes a shell, it provides access to the Pod's shell terminal.

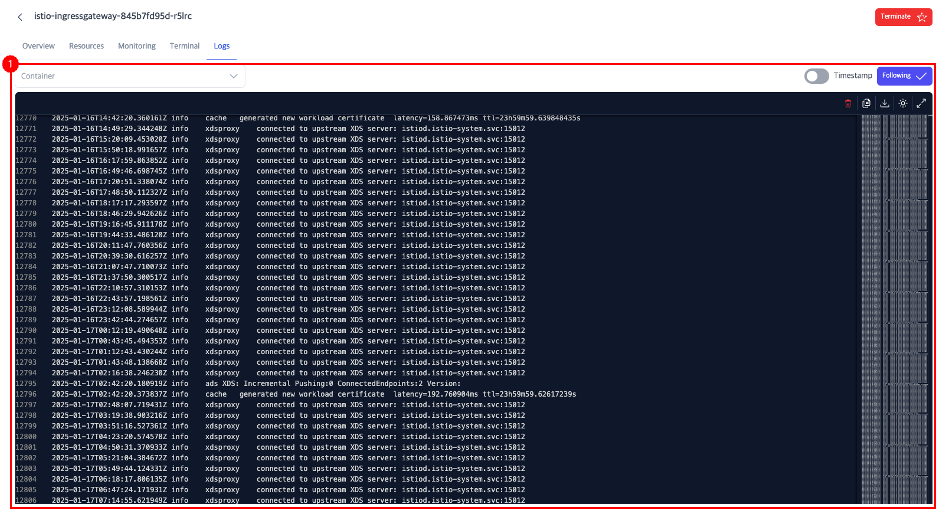
Log Tab
Displays the Pod's logs.