1. Building a Demo Application
In this tutorial, you will create a new ZCP Application for the demo application and configure a pipeline for building it.
Demo Application:
🔗 https://github.com/cloudz-modern-platform-demo/cloud-movie-demo
Adding the Demo Application
Steps to Set Up the Source Repository:
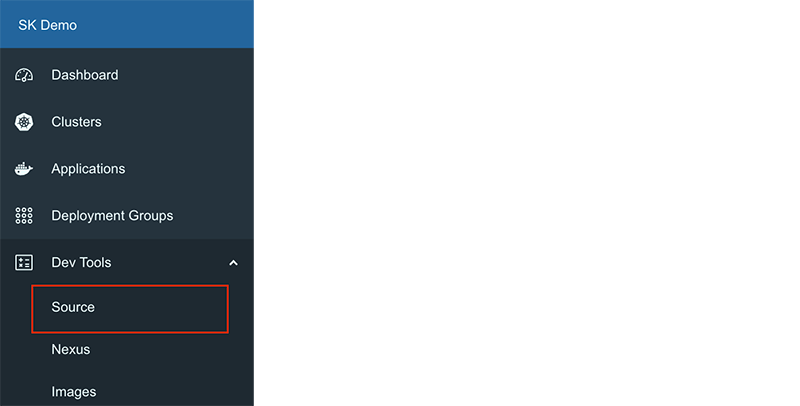
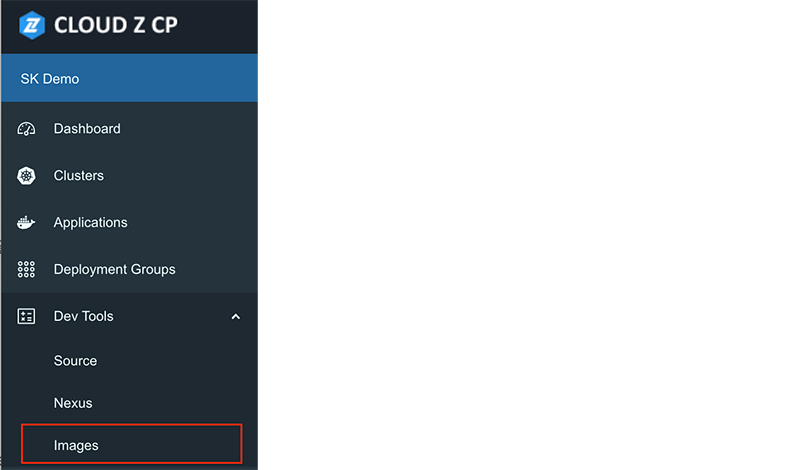
- In the left-side menu of the console, navigate to Dev Tools > Source.
-
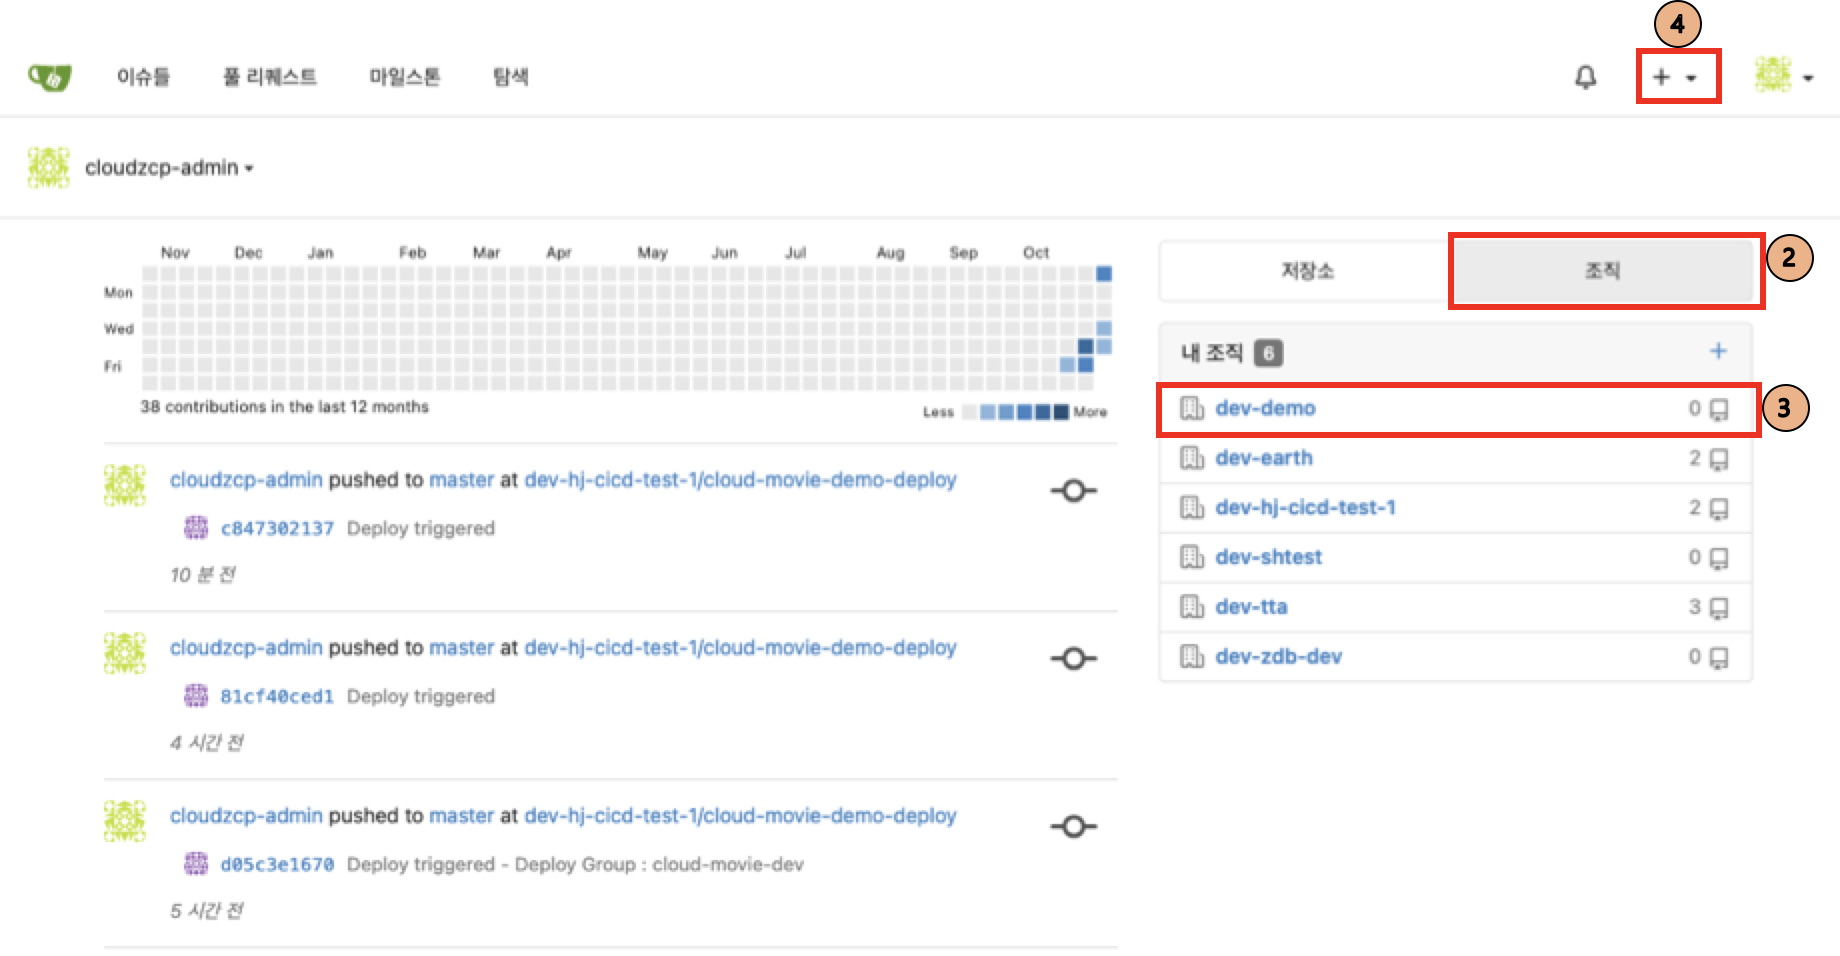
When the Source Repository Dashboard opens in a new window, click the Organizations tab.
-
In the organization list, click dev-demo (The organization name may vary depending on the test environment).
-
Click the + button in the top right corner and select New Migration.
- In the New Migration screen, enter the following details:
- URL Address:
https://github.com/cloudz-modern-platform-demo/cloud-movie-demo - Migration Options: Disable the Mirror option.
- Owner: Select dev-demo (The actual organization name may differ in your test environment).
- Repository Name: Enter
cloud-movie-demo.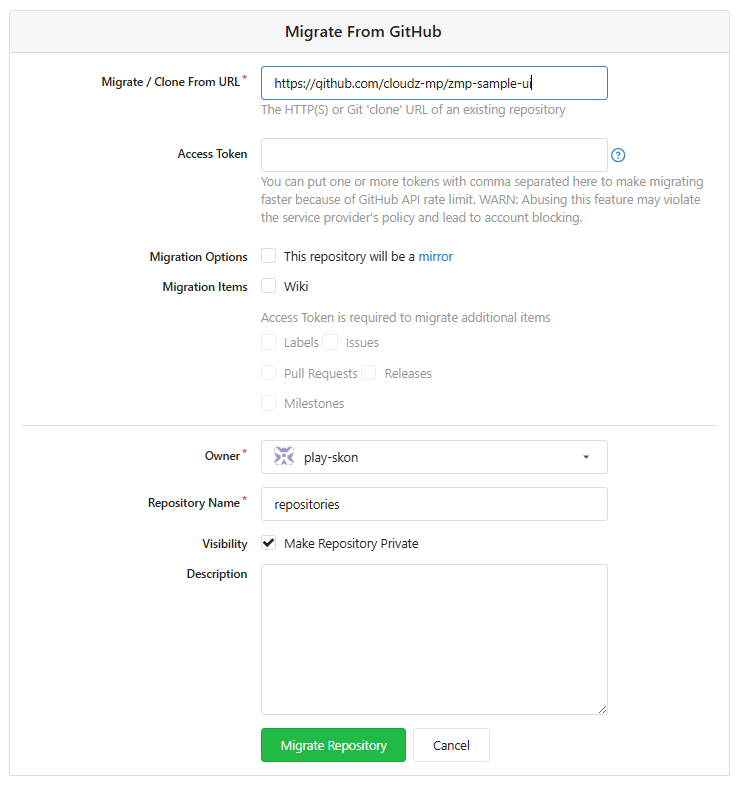
-
Click the Repository Migration button at the bottom of the screen to complete cloning the sample application.
-
Create a
developbranch in the cloned sample application. -
Copy the Gitea repository URL of the created sample application:
https://git.dev.cloudzcp.net/dev-demo/cloud-movie-demo.git(The actual Gitea URL may vary depending on your test environment)
Creating a Robot Account for Container Images
To configure a container image, a robot account must be created in the project's registry.
Steps to Create a Harbor Robot Account:
-
In the console's left-side menu, go to Dev Tools > Images.
-
When the Registry screen opens in a new window, select the
demoproject from the Projects list. (The actual project name may differ in your test environment).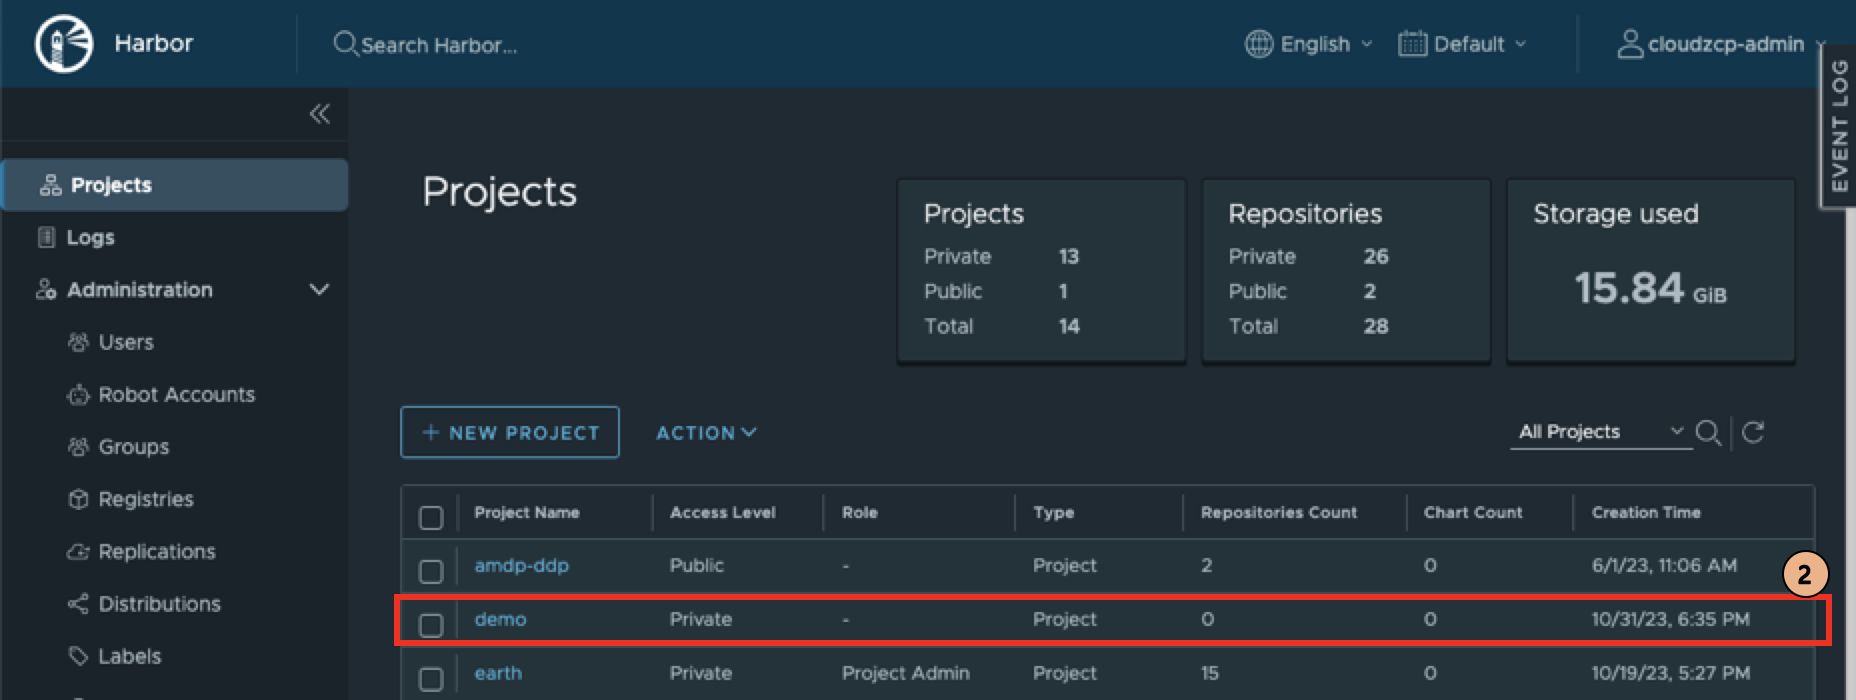
-
In the
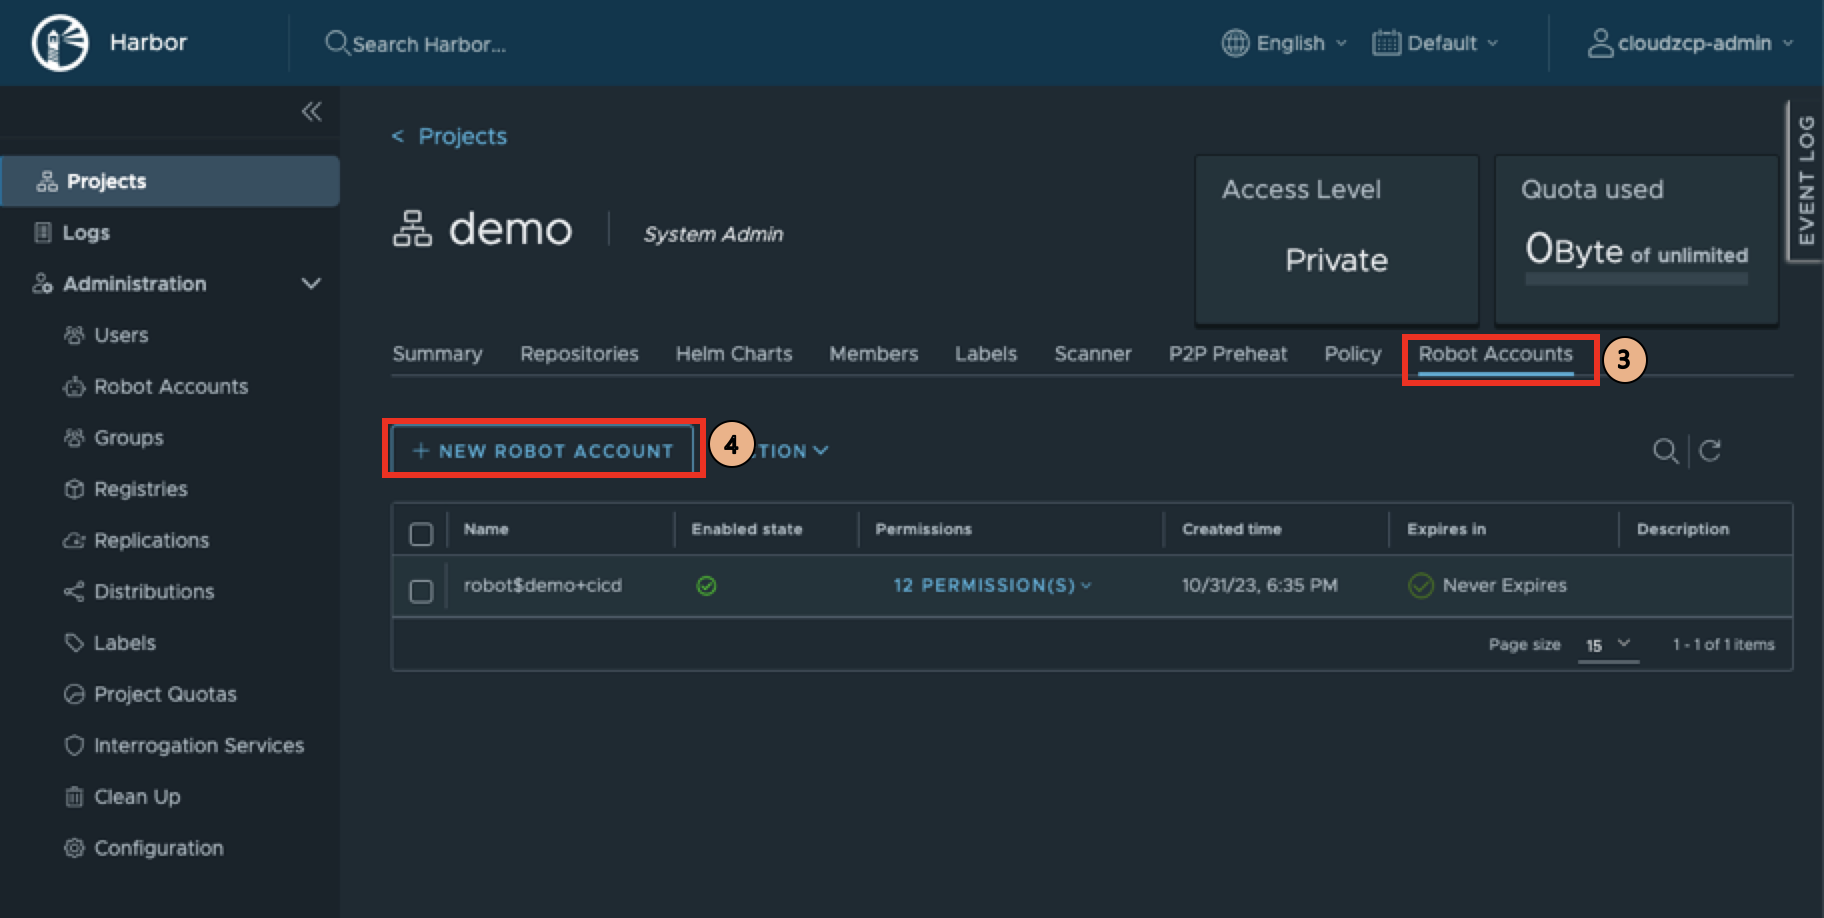
demoproject screen, navigate to the Robot Accounts tab. -
Click the NEW ROBOT ACCOUNT button.
-
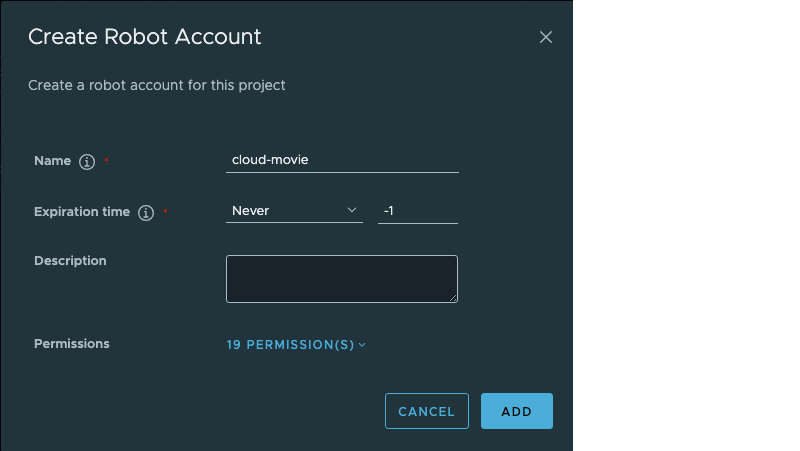
Enter the following details:
- Name:
cloud-movie - Expiration time: Select
Never.
Then click ADD:
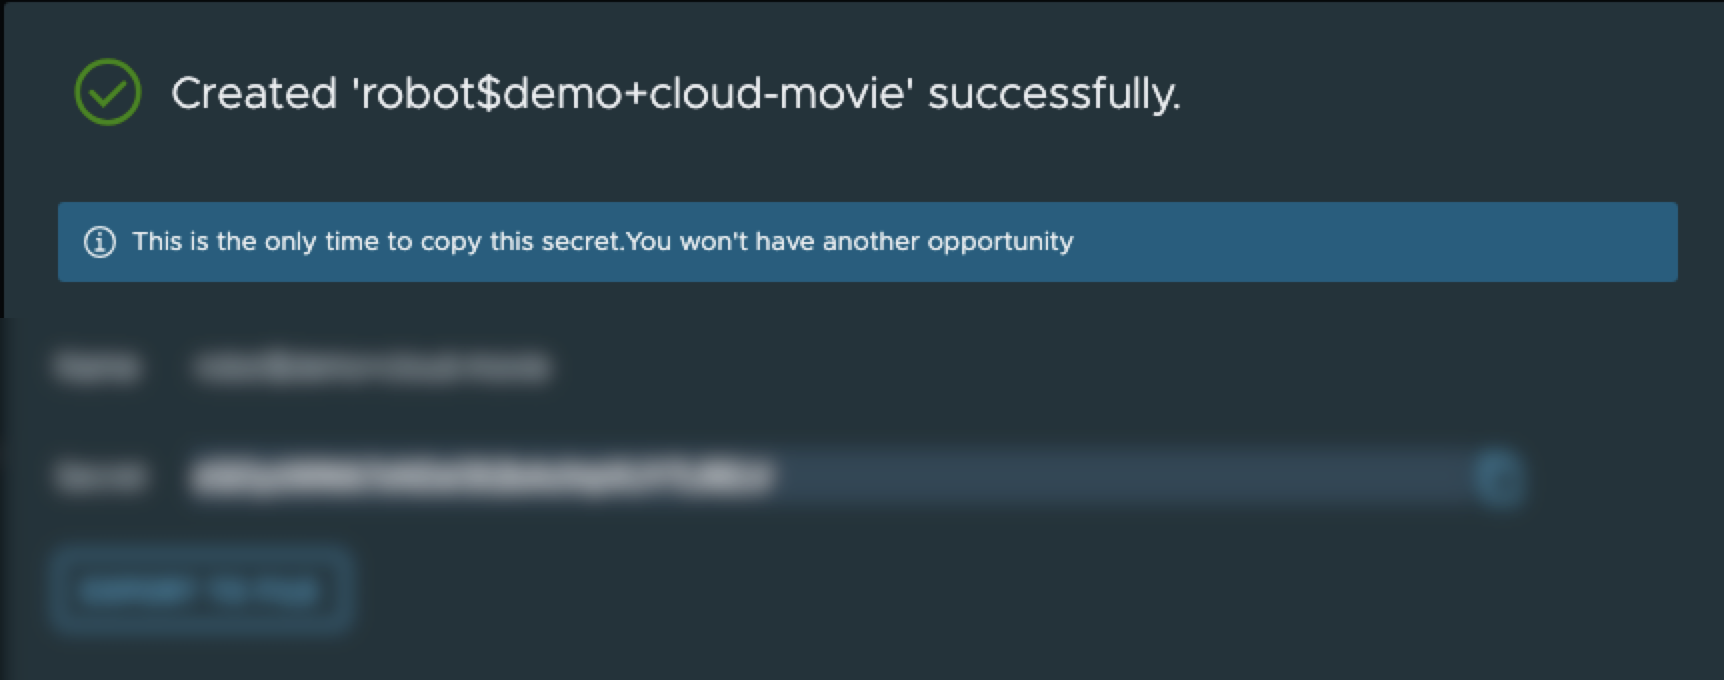
- The Name and Token of the created robot account will be displayed.
Since the Token value will not be displayed again, click EXPORT TO FILE at the bottom to save it as a separate file.
Creating the Demo Application
Steps to Create a Demo Application:
-
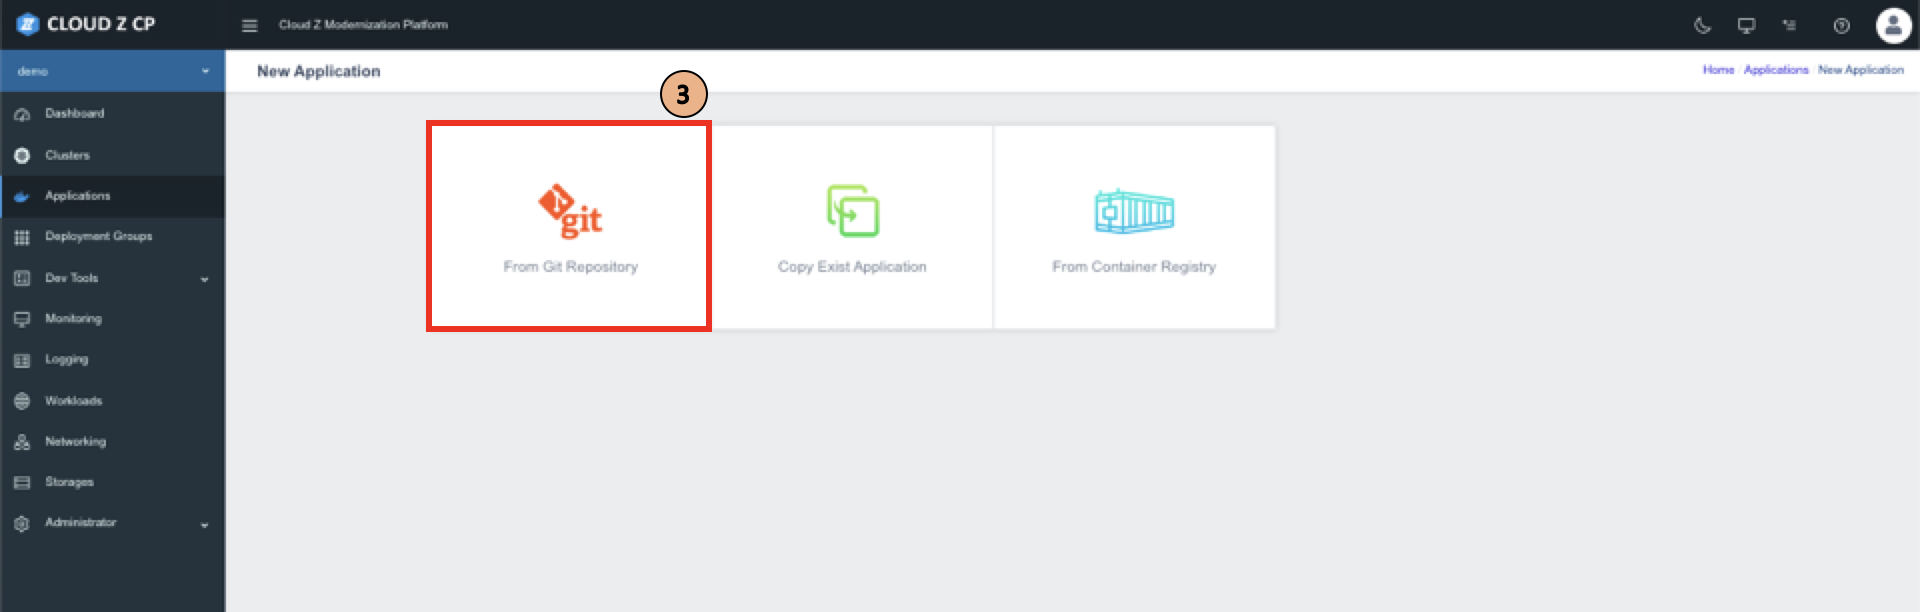
In the console's left-side menu, go to Applications.
-
Click the Create Application button at the top of the screen:

- Select From Git Repository:
- Fill in the Application section as follows:
- Name: Enter
cloud-movie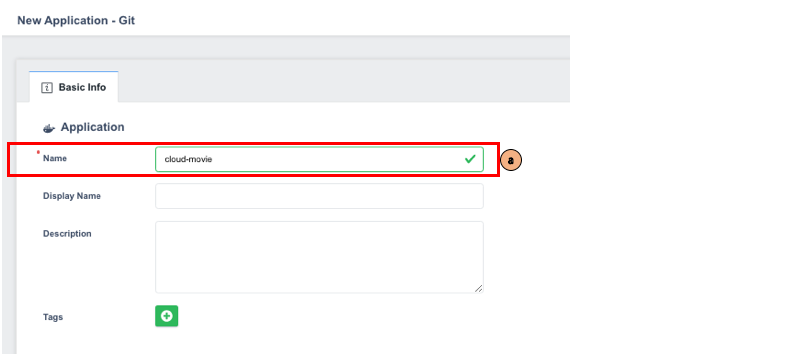
- Configuring the Source Repository
a. Enter the following details in the Source Repository section:
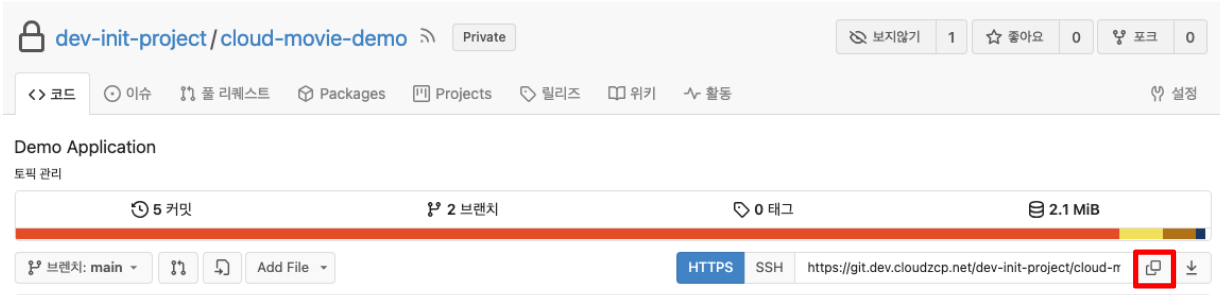
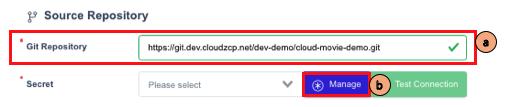
In the Git Repository field, enter: https://git.dev.cloudzcp.net/dev-demo/cloud-movie-demo.git (The actual repository name may vary in your test environment).
You can either manually enter the Git Repository URL or copy it directly from the previously created Gitea Repository.
b. Click the Manage button next to the Secret field to create a secret for the source repository.
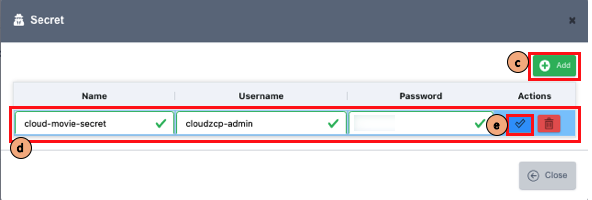
c. In the Secret popup window, click the Add button at the top.
d. Enter the following details:
- Name:
cloud-movie-secret - Username: Your user ID
- Password: Your password
e. Click Save to complete the setup and close the popup window.
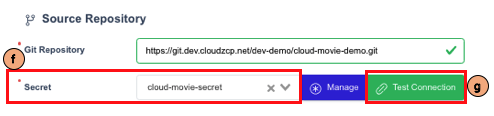
f. In the Secret field, select the newly created cloud-movie-secret.
g. Click Test Connection to verify the connection.
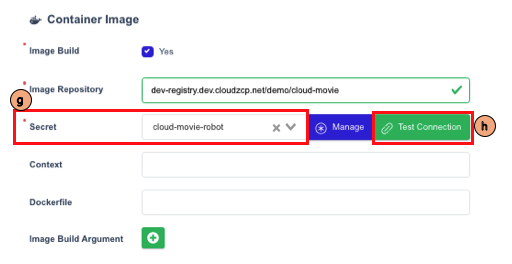
- Configuring the Container Image
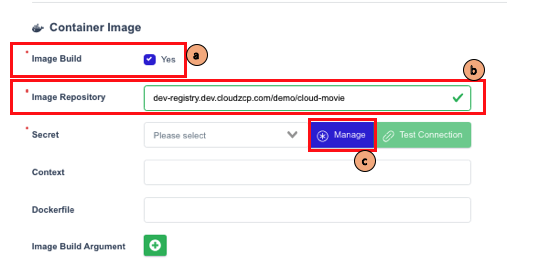
a. Enter the following details in the Container Image section:
- Check Yes for the Image Build option
- If unchecked, only the application build will be performed without an image build.
b. In the Image Repository field, enter:
dev-registry.dev.cloudzcp.net/demo/cloud-movie
(The actual repository name may vary in your test environment).
c. Click the Manage button next to the Secret field to create a secret for the image registry.
d. In the Secret popup window, click the Add button at the top.
e. Enter the following details (the actual robot account name may vary in your test environment):
- Name:
cloud-movie-robot - Username: The robot account name (e.g.,
robot-skccproject+cloud-movie) - Password: The token value from the previously created robot account
f. Click Save to complete the setup and close the popup window.
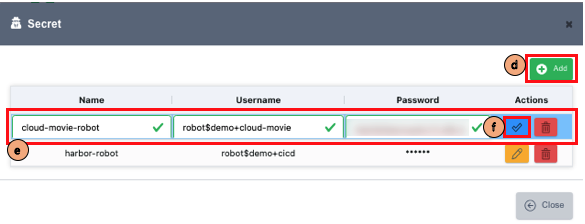
g. In the Secret field, select the newly created cloud-movie-robot.
h. Click Test Connection to verify the connection.
- Review all the inputs and click Save to create the ZCP Application.
Creating Build Pipelines
Steps to Create a Build Pipeline:
- Click the Build Pipeline tab.

-
The demo application requires two pipelines:
developandproduction. -
First, create the
developpipeline with the following settings:
- Enter
developin the Pipeline Name field. - Enter
developin the Branch field (do not check the checkbox). Checking the box allows selecting a branch as an input each time the pipeline runs. - Select
mavenfor Build Tool. - Select
jdk-8for JDK Version. - Enter
clean packagein the Maven Goals field. - Select
Disabledfor SonarScanning. - Enter
developin the Auto Tagging > Tag Prefix field. - Click Save to create the pipeline.
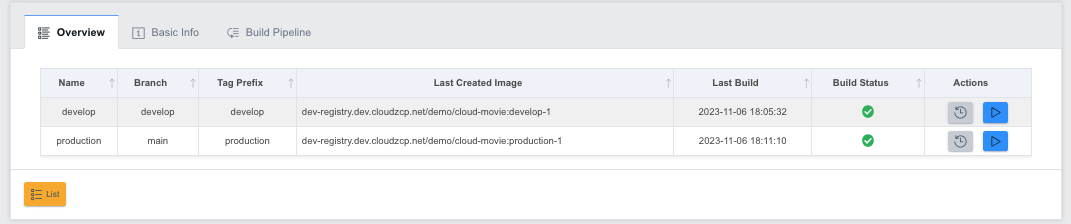
Running Each Pipeline
Steps to Run a Pipeline:
-
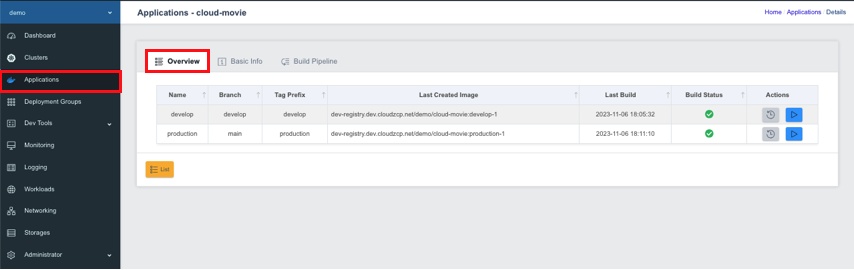
In the Applications menu, click the Overview tab.
-
Navigate to the Build Pipeline tab, where the two created pipelines will be listed.
- Start the
developpipeline:
- Click Run in the Actions column for the
developpipeline.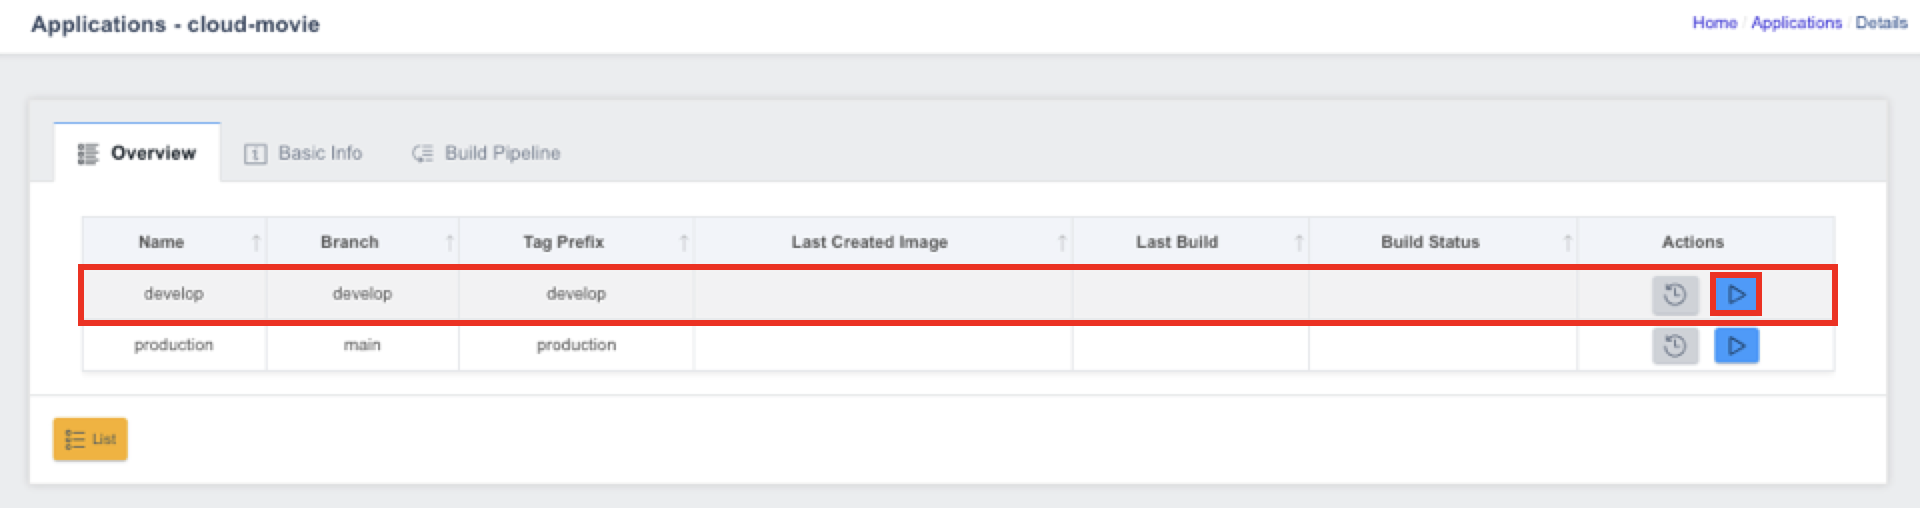
- When the Run button is clicked, the console starts building the source code and pushing it to the registry.
- The build logs can be viewed in real-time in the Build Log popup window.
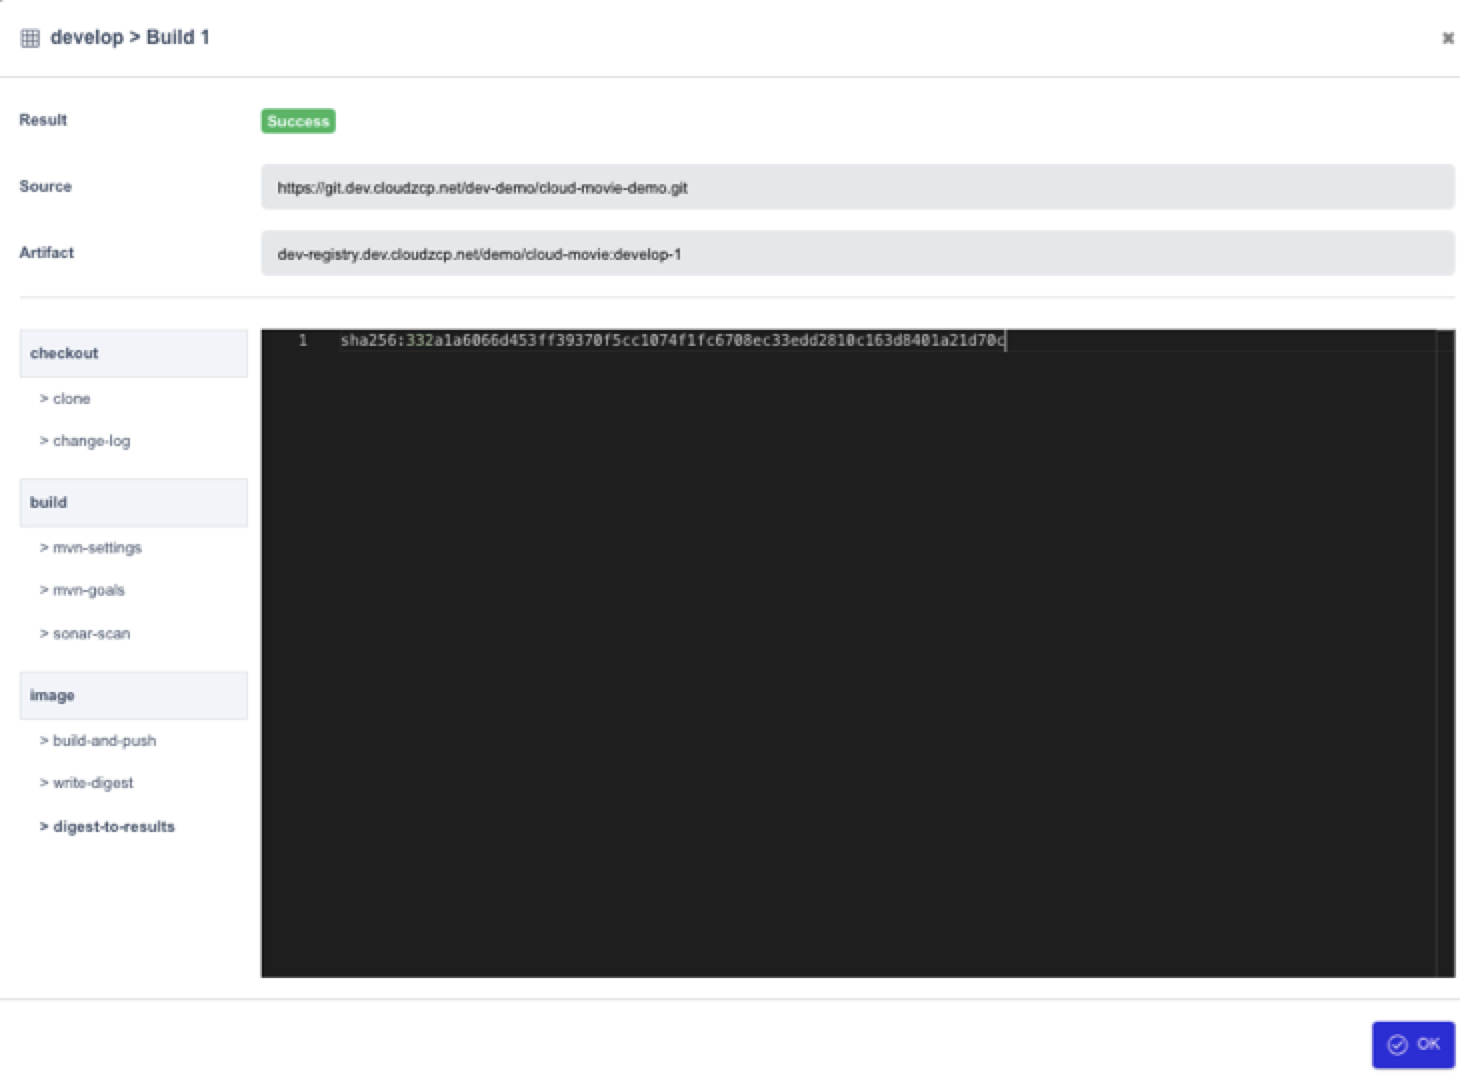
Once the build is complete, the Result field in the popup window will display Success or Failed.
After both pipelines are built, the build results can be viewed in the Overview tab, as shown below.