2. Deploying the Dev Application
Creating a Deployment Group
To start and run the demo application created in the previous step, you need to create a Deployment Group and deploy it to the cluster.
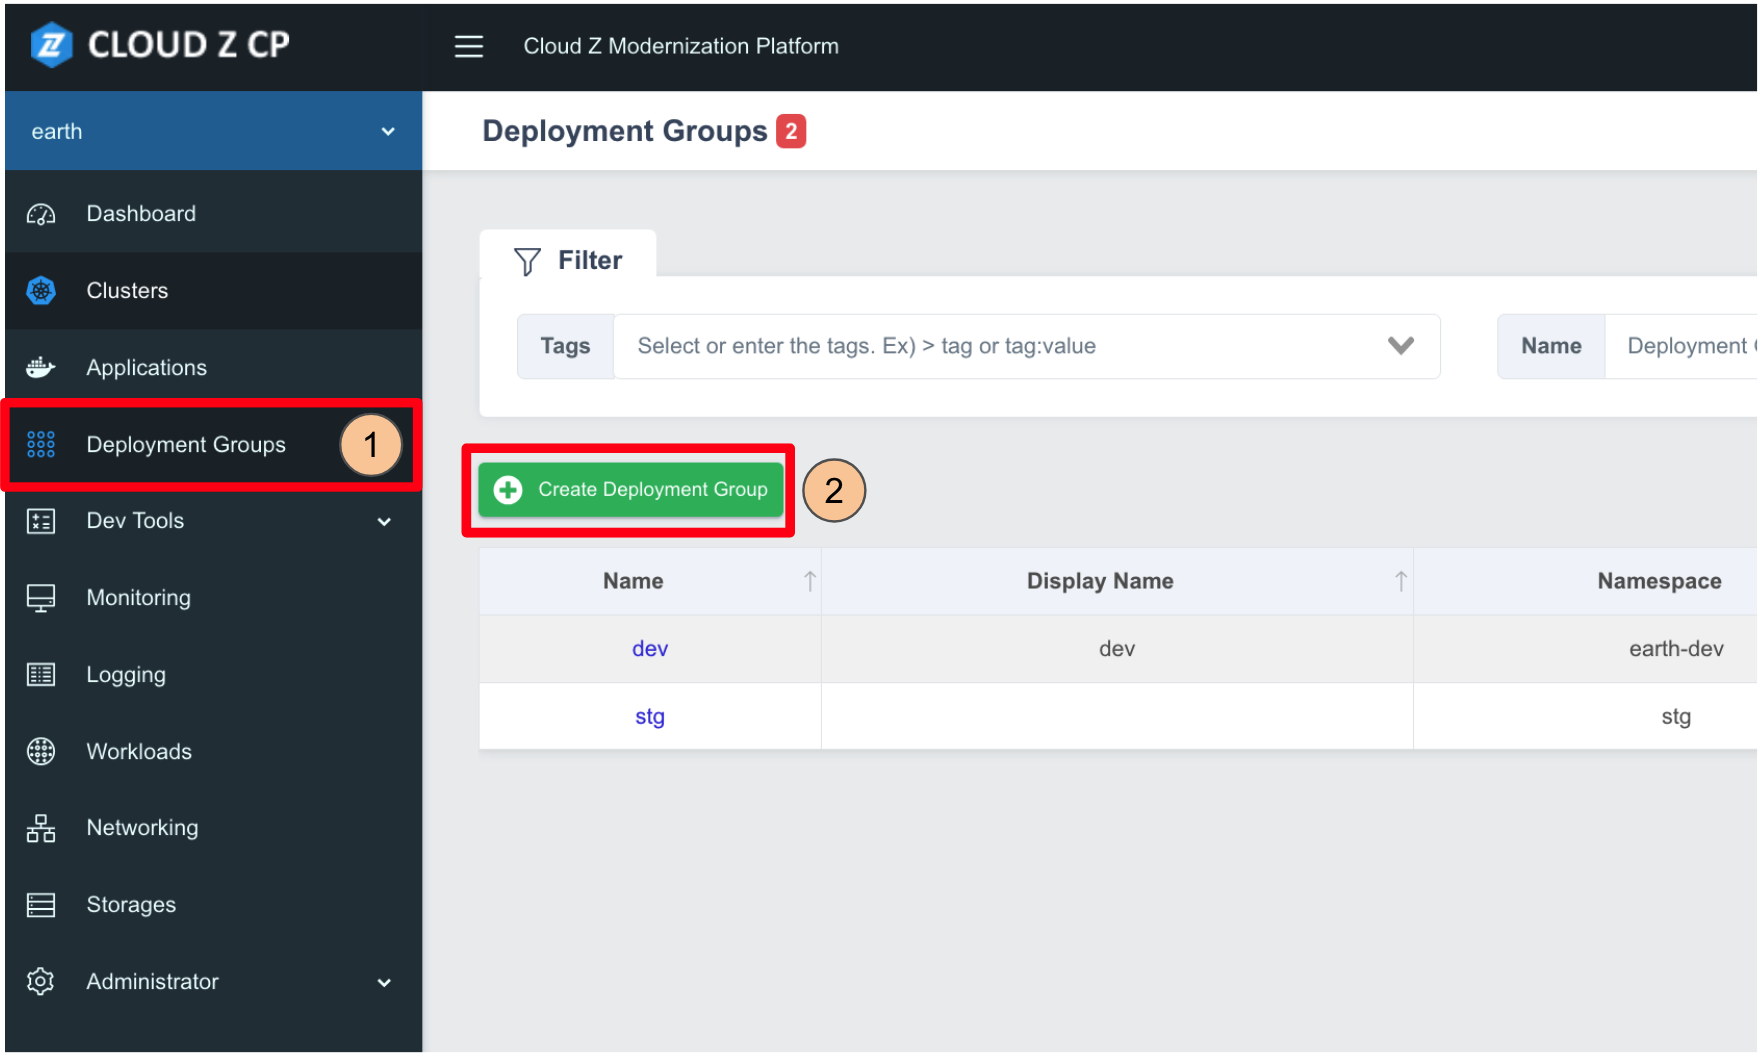
Steps to Create a Deployment Group:
- In the left menu of the console, click Deployment Groups.
- Click Create Deployment Group at the top of the screen.
- Enter
cloud-movie-devin the Name field. - Set Prevent Cascade Delete to its default value (Enabled).
- Enabled (Default): When the Deployment Group is deleted or a Cluster is removed from it, the deployed Resources and Namespaces in that cluster are not deleted.
- Disabled: When the Deployment Group is deleted or a Cluster is removed, all deployed Resources and Namespaces in that cluster are also deleted.
- Enter
cloud-movie-dev-nsin the Namespace field.- (The actual Namespace name may vary in the test environment).
- You cannot create a duplicate namespace if it is already being used by another Deployment Group.
- In the GitOps Repository field, enter the Git repository URL where the deployment-related YAML files will be stored.
- In this tutorial, use the Project Repository in Gitea and append ‘’deploy’’ to its name.
- Recommended format:
https://GIT_DOMAIN/PROJECT_NAME/APPLICATION_NAME-deploy.git.
- Select the Secret for the Git repository deployment.
- Click Test Connection to verify the credentials.
- Refer to Add a GitOps Repository Secret page in the Appendix for the guide on how to set up the Secret.
- Click Save to register the Deployment Group.

Adding a Cluster to the Deployment Group
Once the Deployment Group is created, you need to add a Cluster to it.
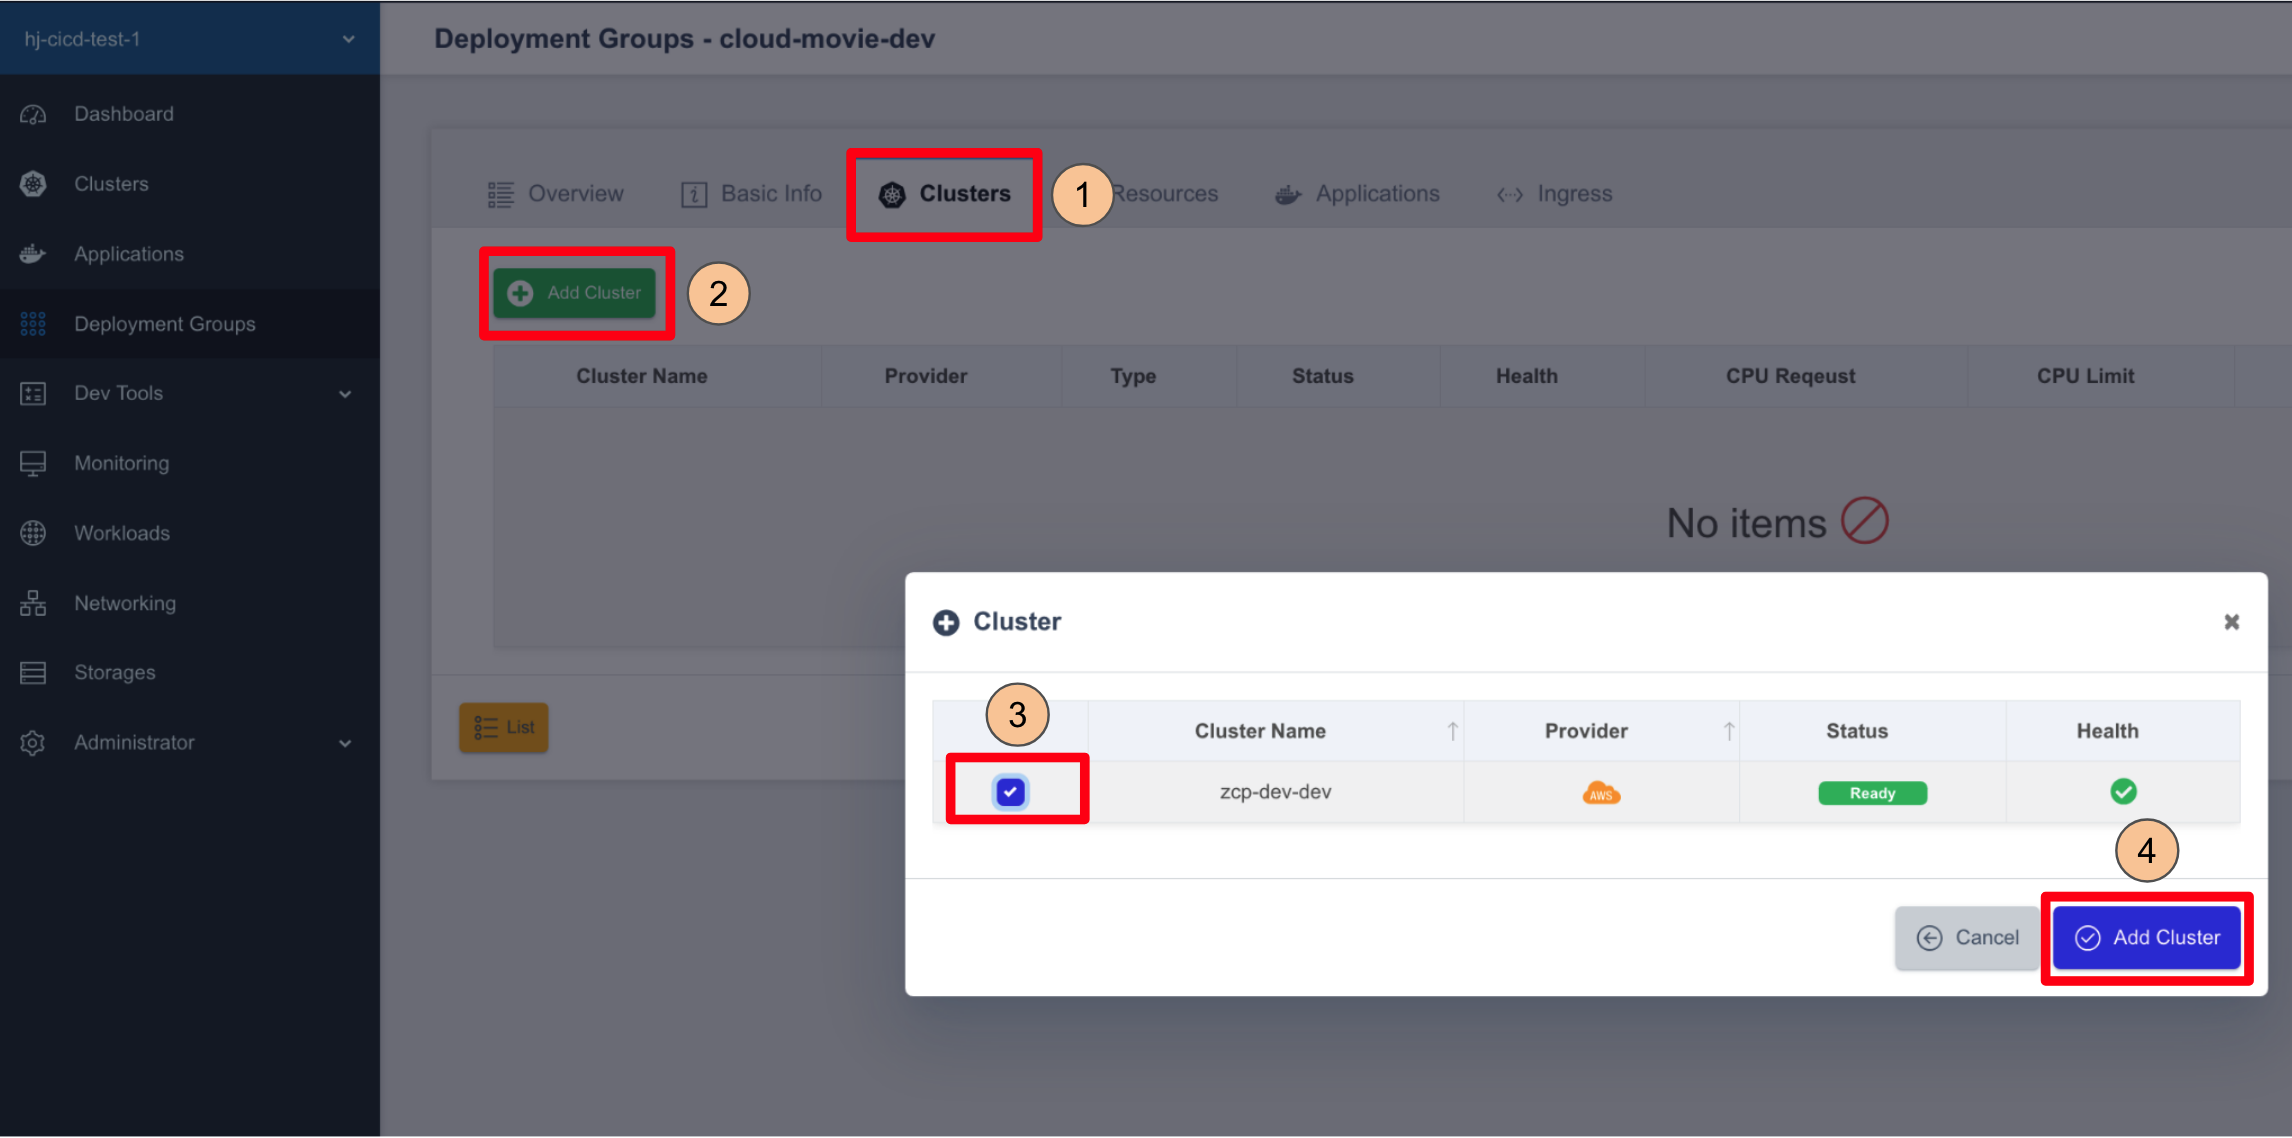
Steps to Add a Cluster to the Deployment Group:
- Click the Clusters tab at the top of the screen.
- Click Add Cluster at the top of the screen.
- In the Cluster popup window, select
skcc-mp-demo-dev.- (The actual Cluster Name may vary in the test environment).
- Click Add Cluster at the bottom of the screen to save the settings.
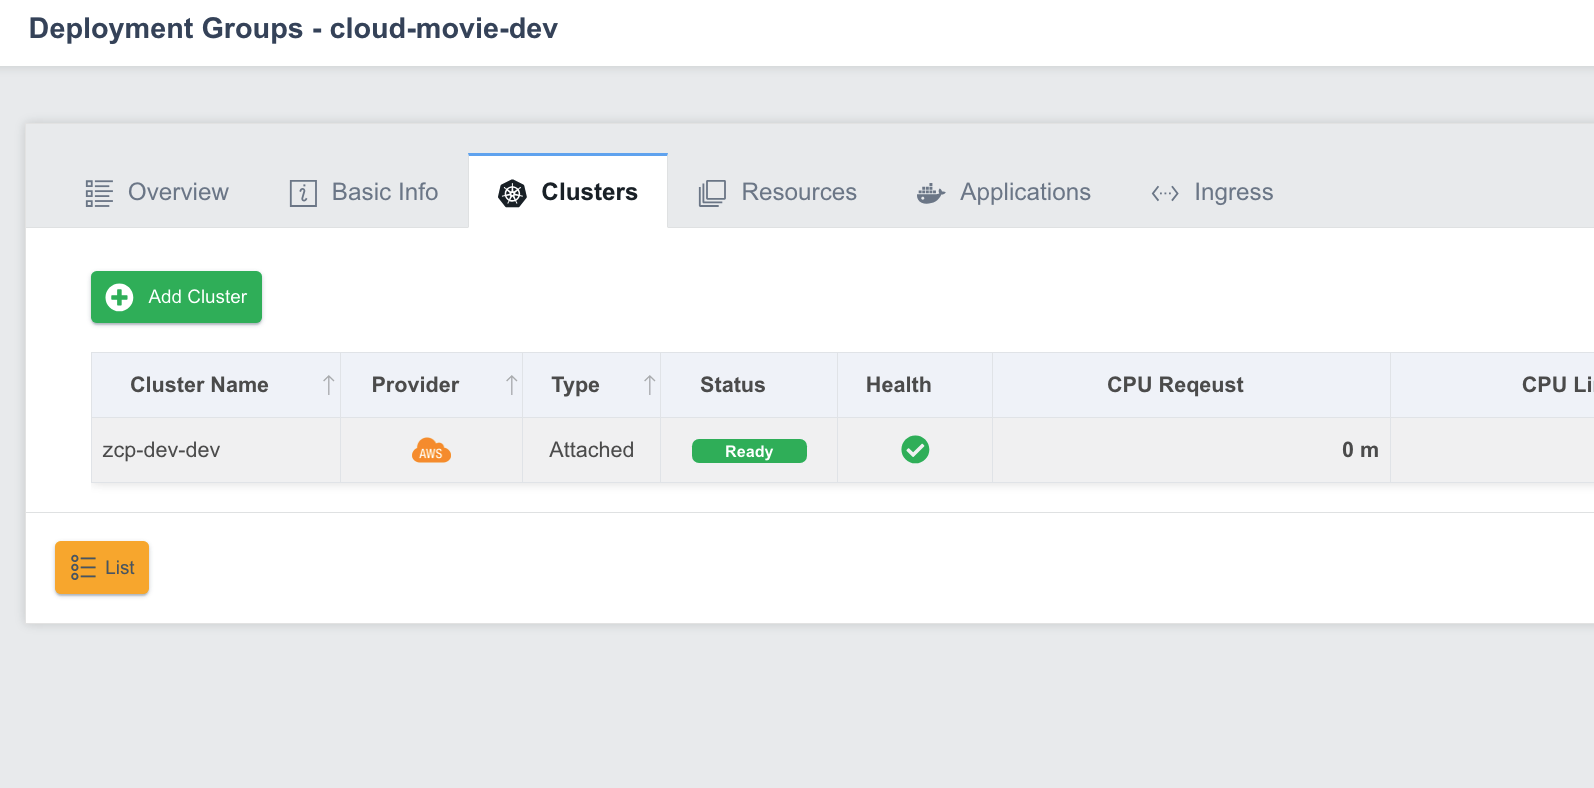
If the Cluster was successfully added, it will be displayed in the Clusters tab instead of showing "No items".
Adding the Demo Application to the Deployment Group
Now, add the demo application created earlier to the Deployment Group.
Steps to Add a Demo Application to the Deployment Group:
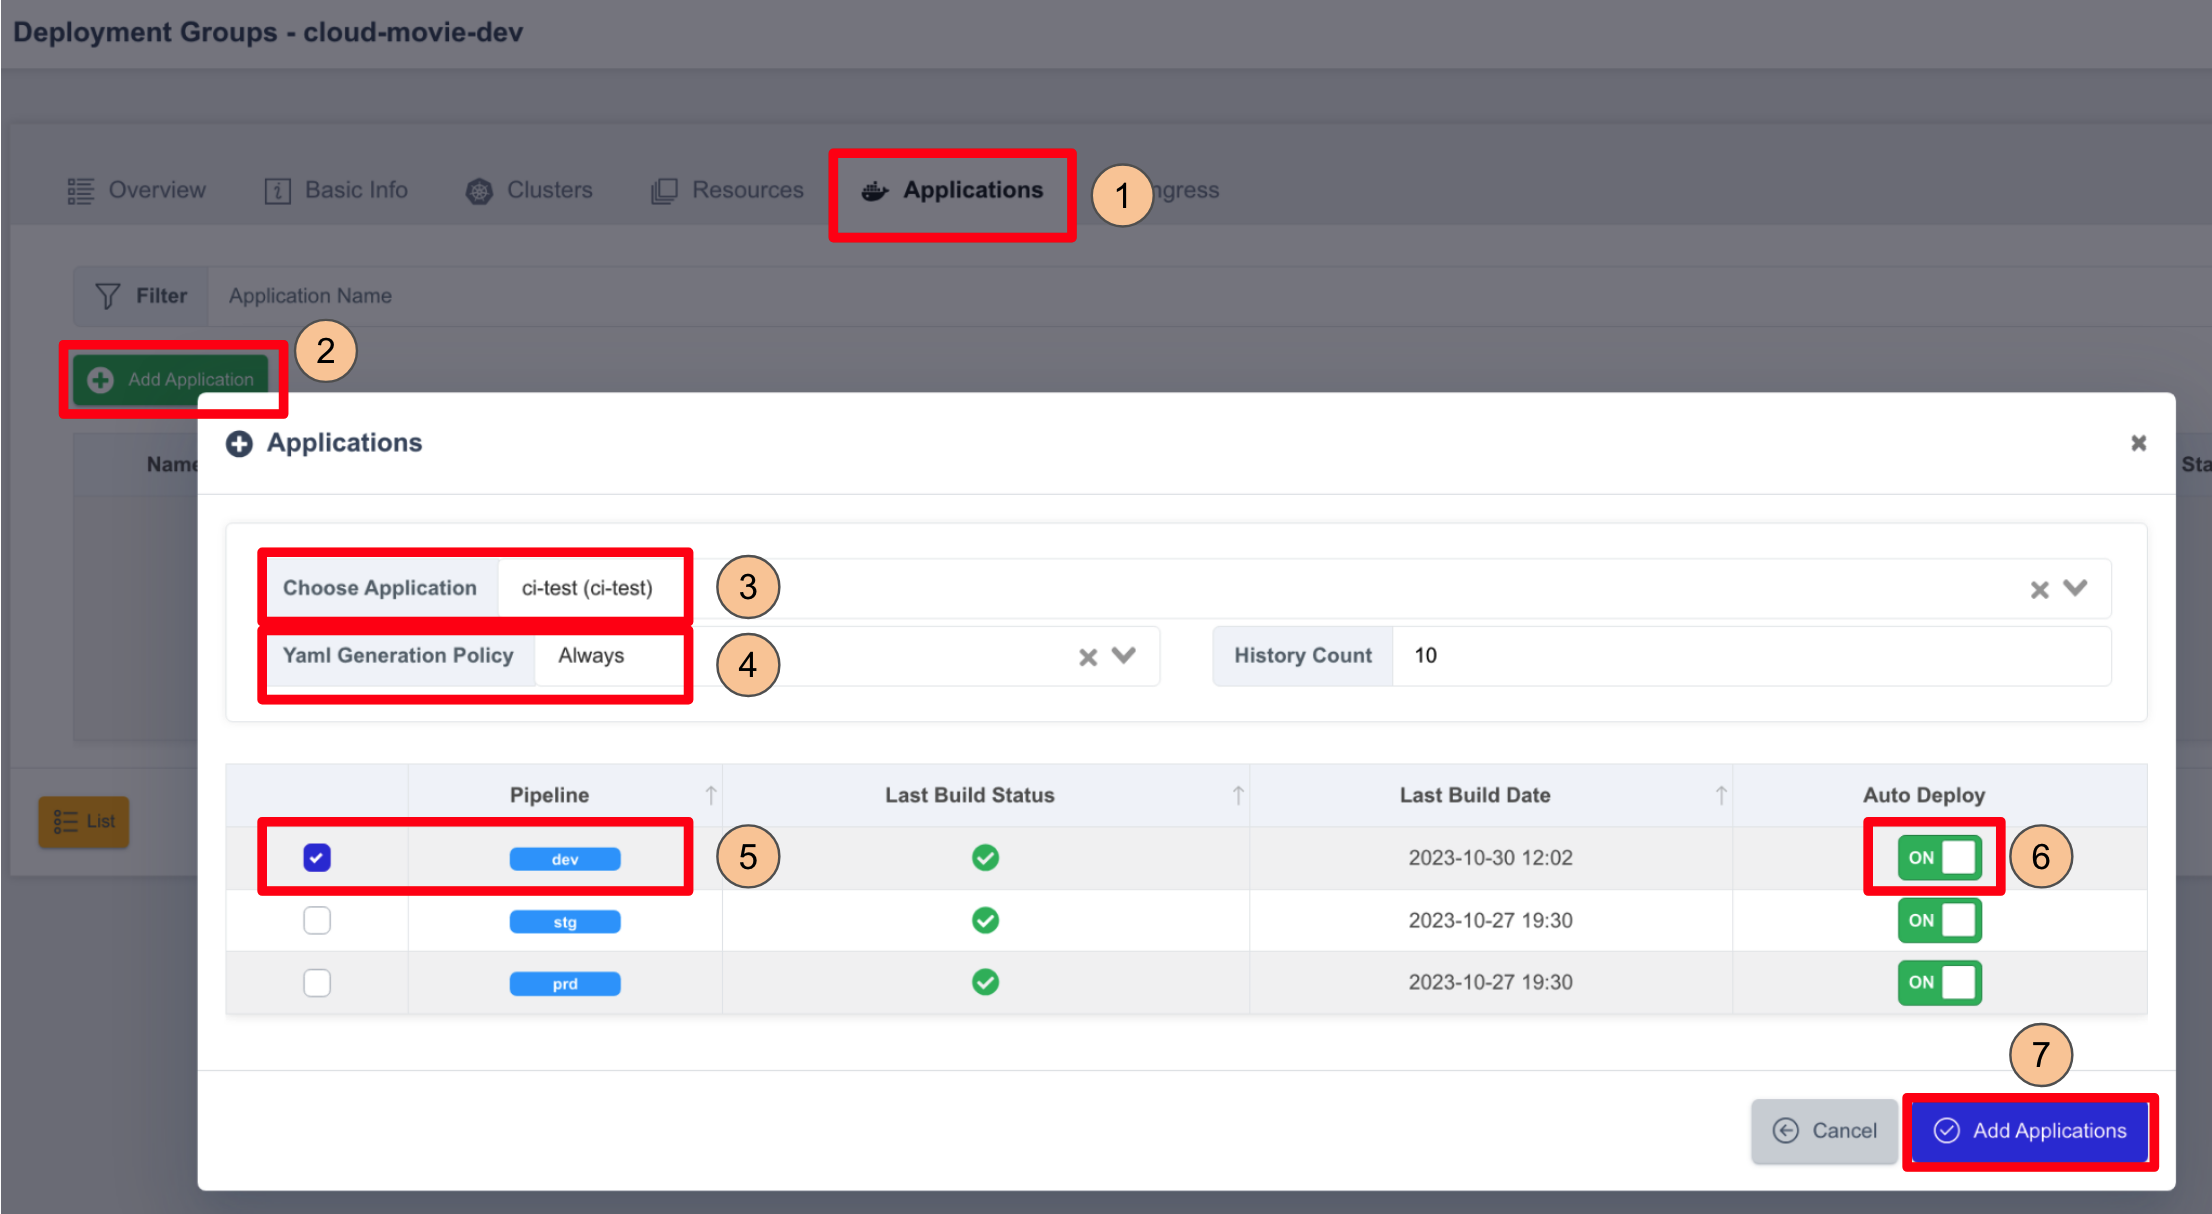
- Click the Applications tab at the top of the screen.
- Click Add Application to open the Applications popup window.
- In Choose Application, select
cloud-movie. - In Yaml Generation Policy, select
Always.- Always: When application settings are modified and deployed, the changes are reflected in the GitOps Repository.
- Image Only: When application settings are modified and deployed, the changes are not reflected in the GitOps Repository (only the first deployment is saved).
- In Pipeline, select
develop.- (The actual Pipeline Name may vary in the test environment).
- Set Auto Deploy to ON.
- ON: The application is automatically deployed whenever the selected pipeline successfully builds.
- OFF: The user must manually deploy the application after modifications.
- Click Add Applications at the bottom of the screen to save the settings.
If the application is successfully added, it will appear in the list instead of showing "No items".

Configuring the Demo Application
Steps to Configuring Deployment Specifications:
-
Click Configuration in the Actions column of
cloud-movie.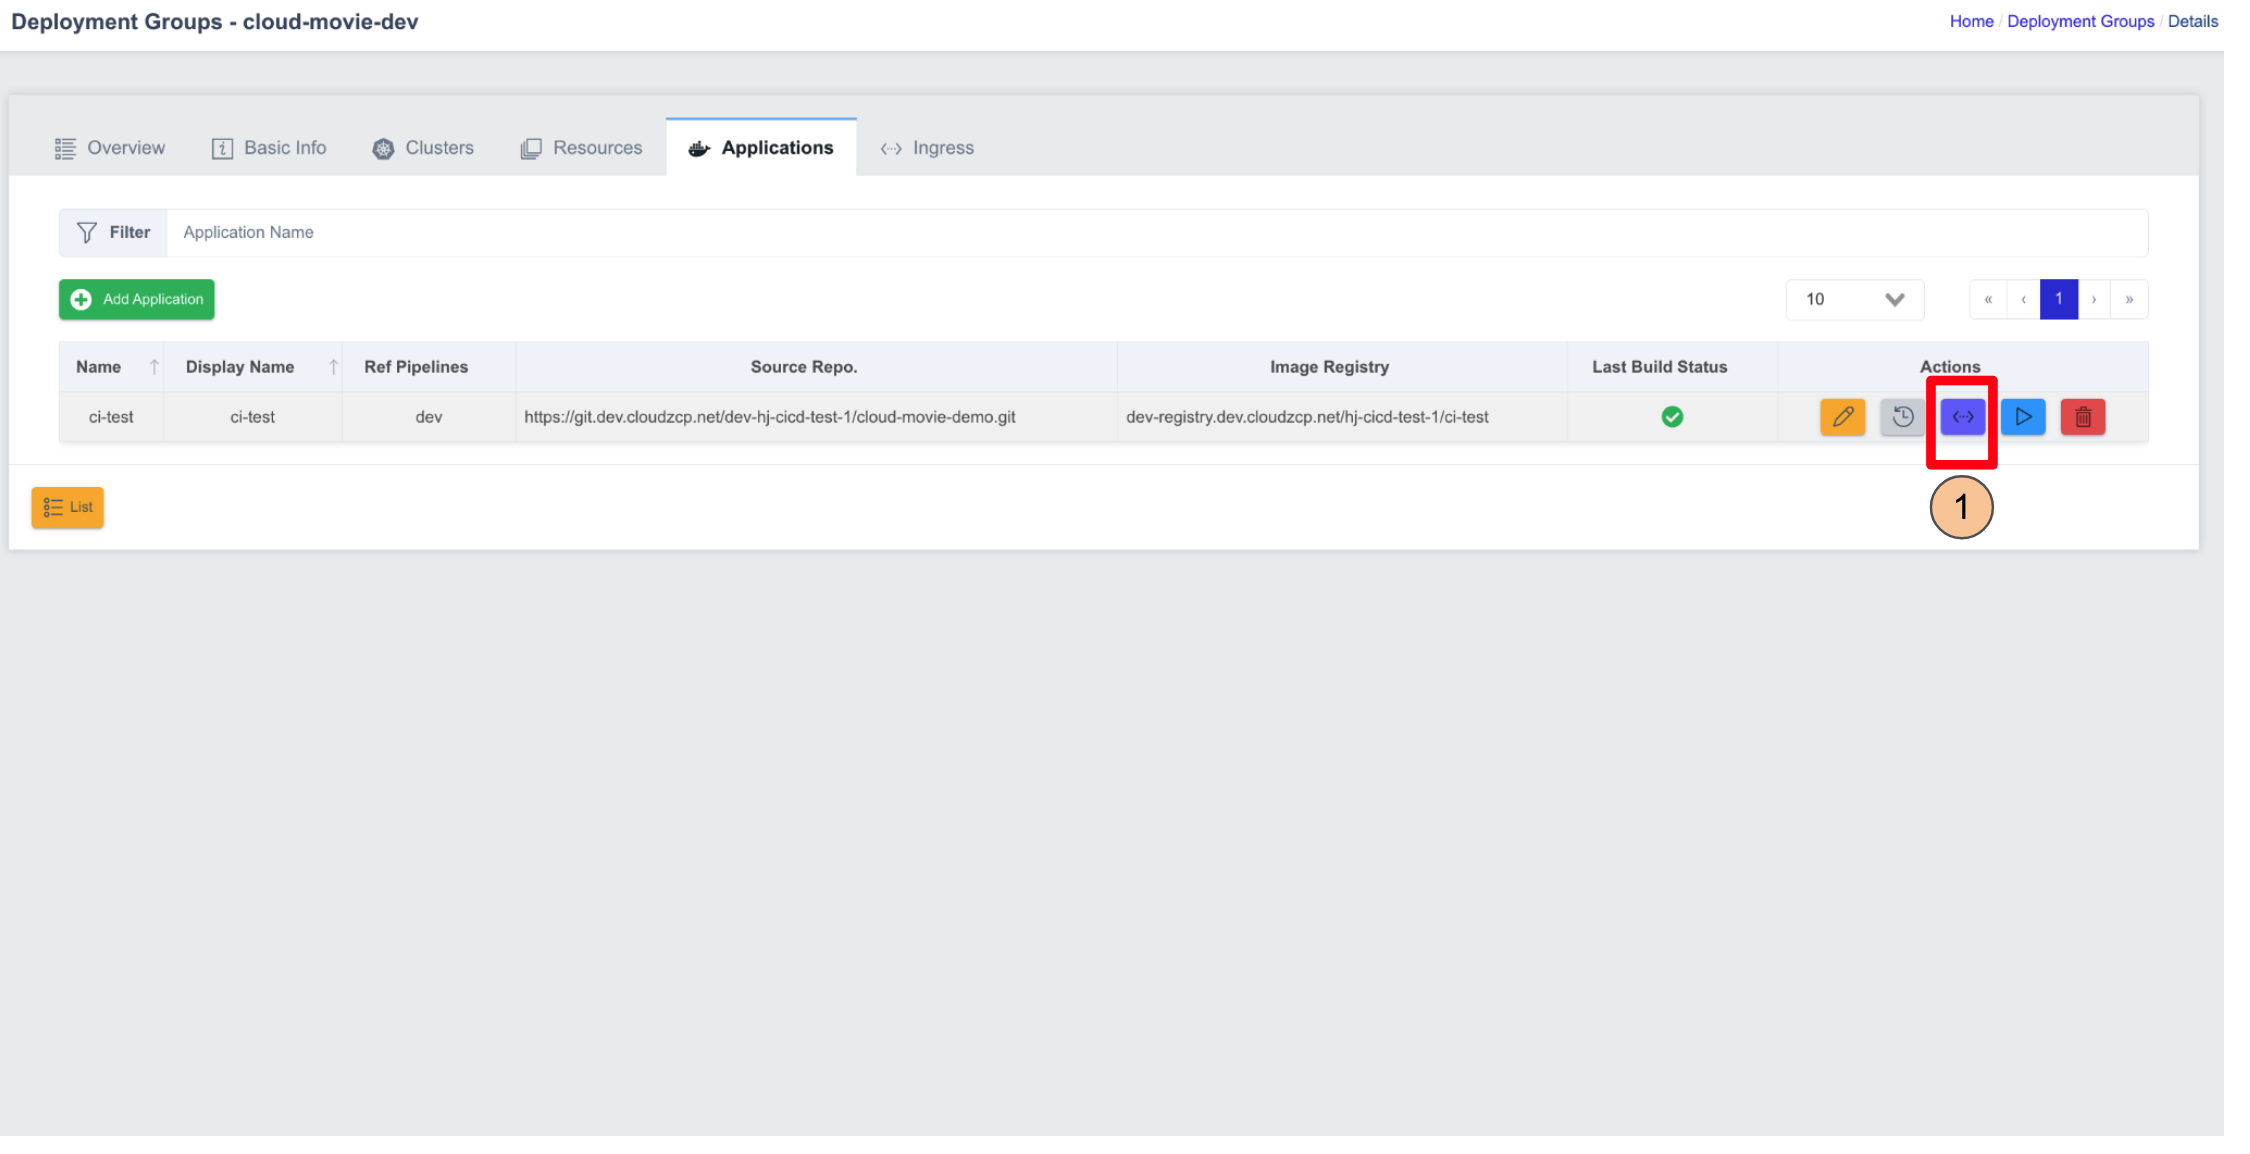
-
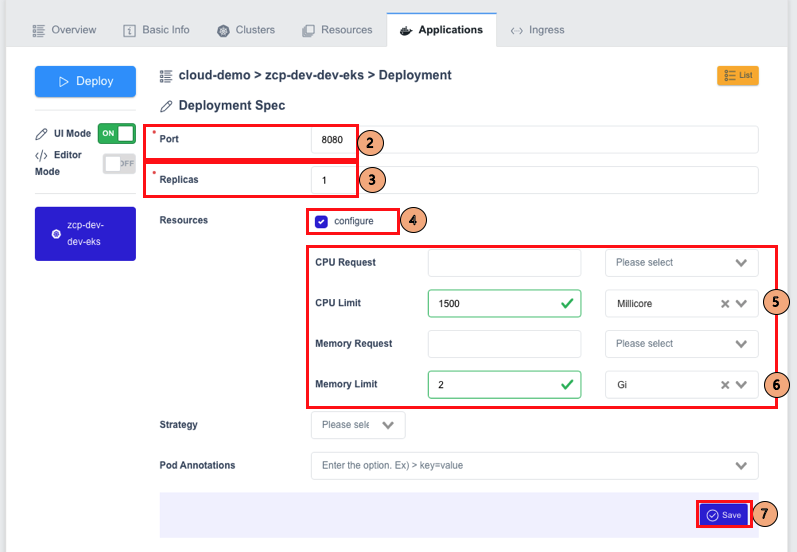
Enter
8080in the Port field. -
Enter
1in the Replicas field. -
Enable Resources > Configure.
-
Enter
100in CPU Request, select Millicore. Enter1000in CPU Limit, select Millicore. -
Enter
256in Memory Request, select Mi. Enter2in Memory Limit, select Gi. -
Click Save to save the settings.
Deploying the Demo Application
Steps to Deploy and Verify:
-
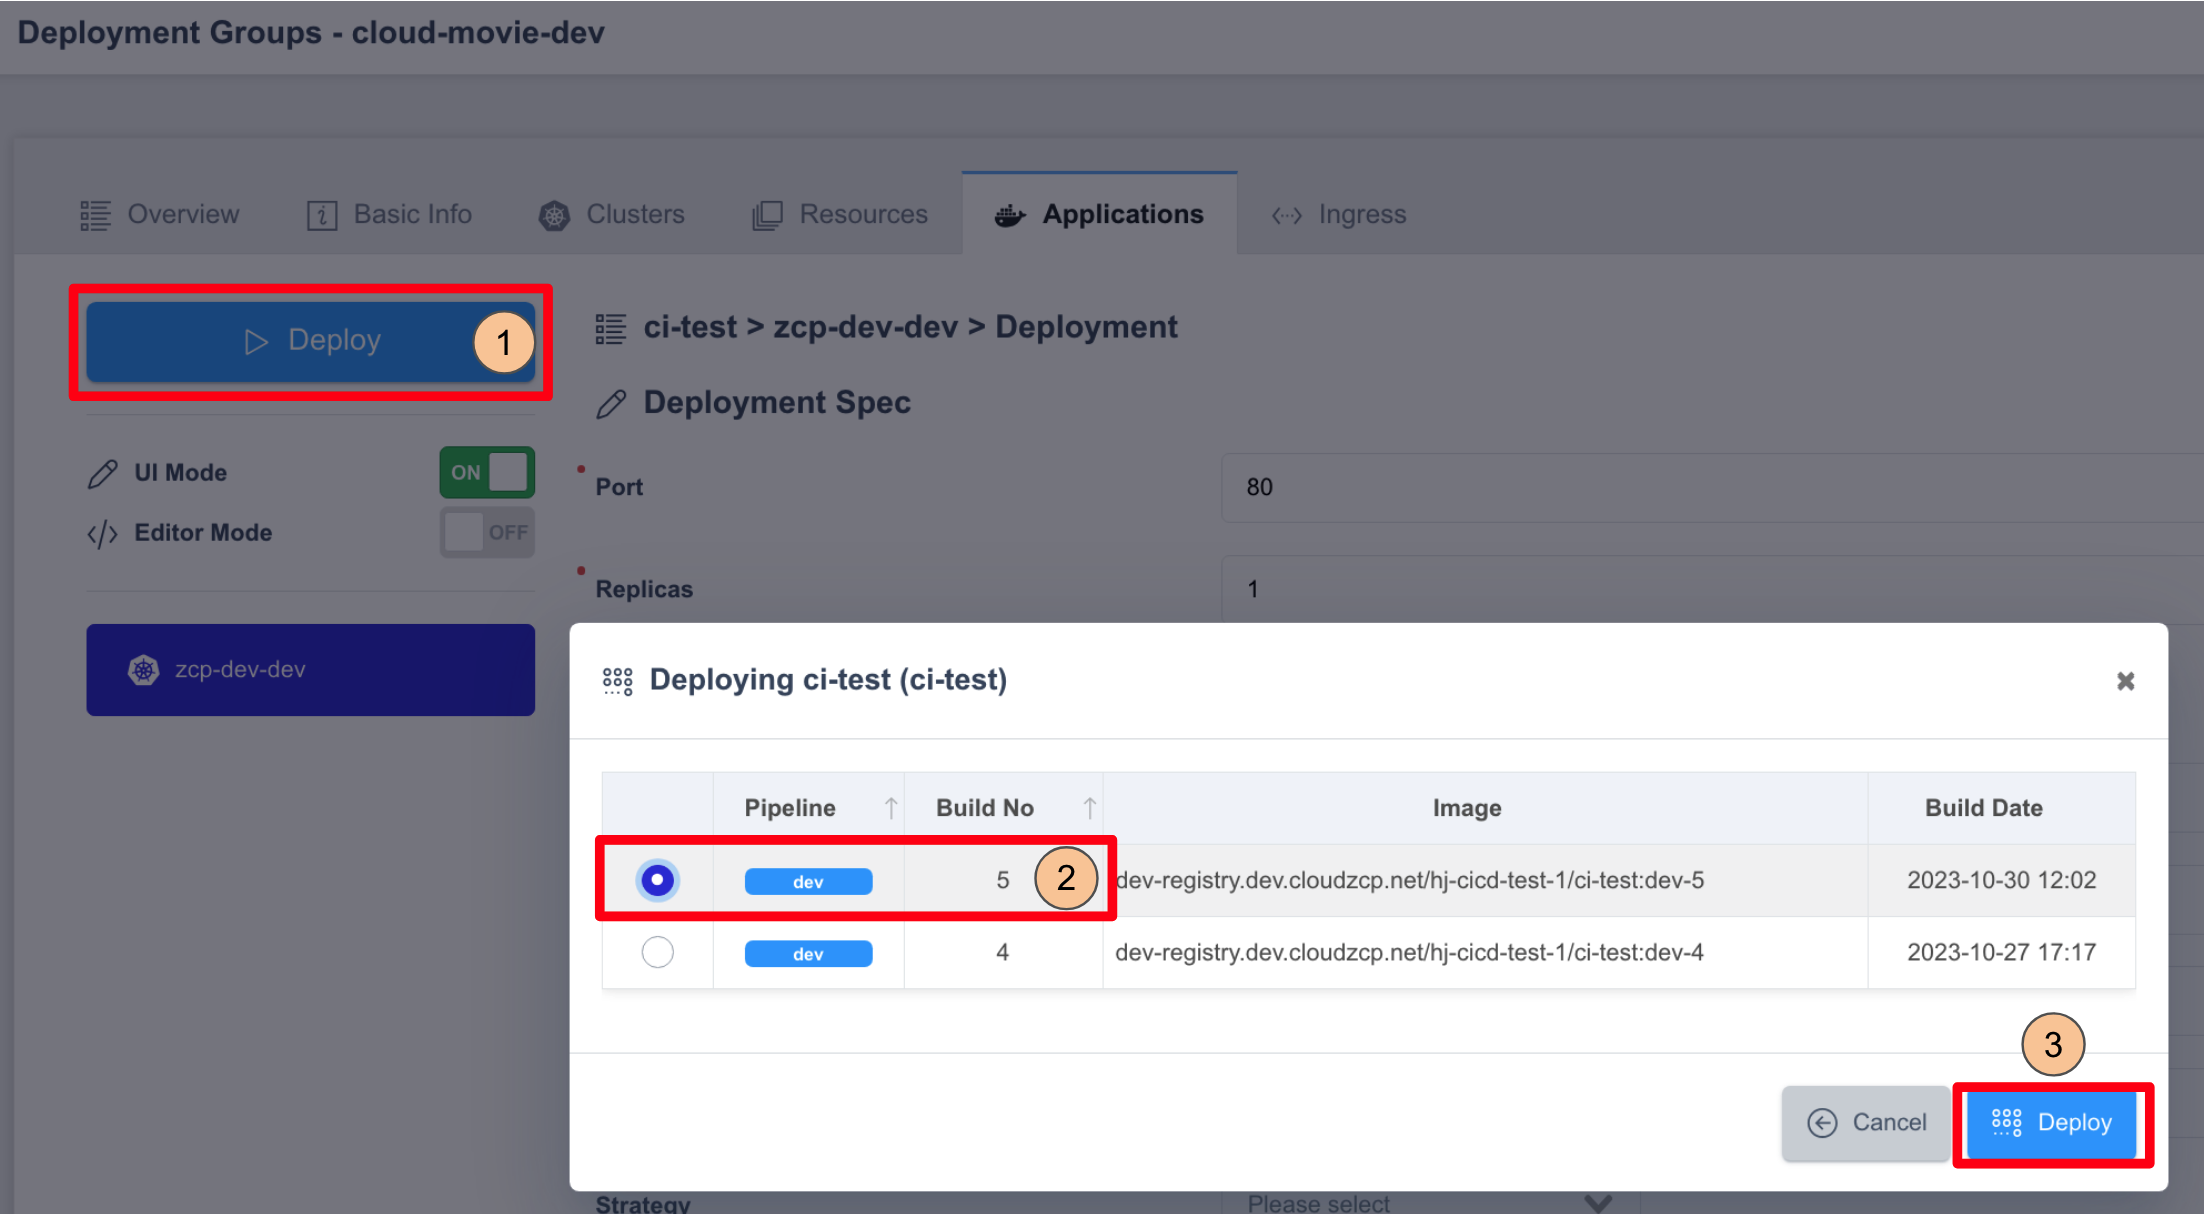
Click the Deploy button in the Applications section.
-
Select a Build Number from the build history.
- (The displayed information may vary depending on the test environment).
-
Click Deploy to deploy the application.
-
Click the Overviews tab at the top.
-
Click History to view past deployments.
-
Click the magnifying glass icon to view the deployment logs (Running status means successful deployment).
The deployed application is now running in the cluster selected during the setup process.
Creating and Deploying an Ingress for the Demo Application
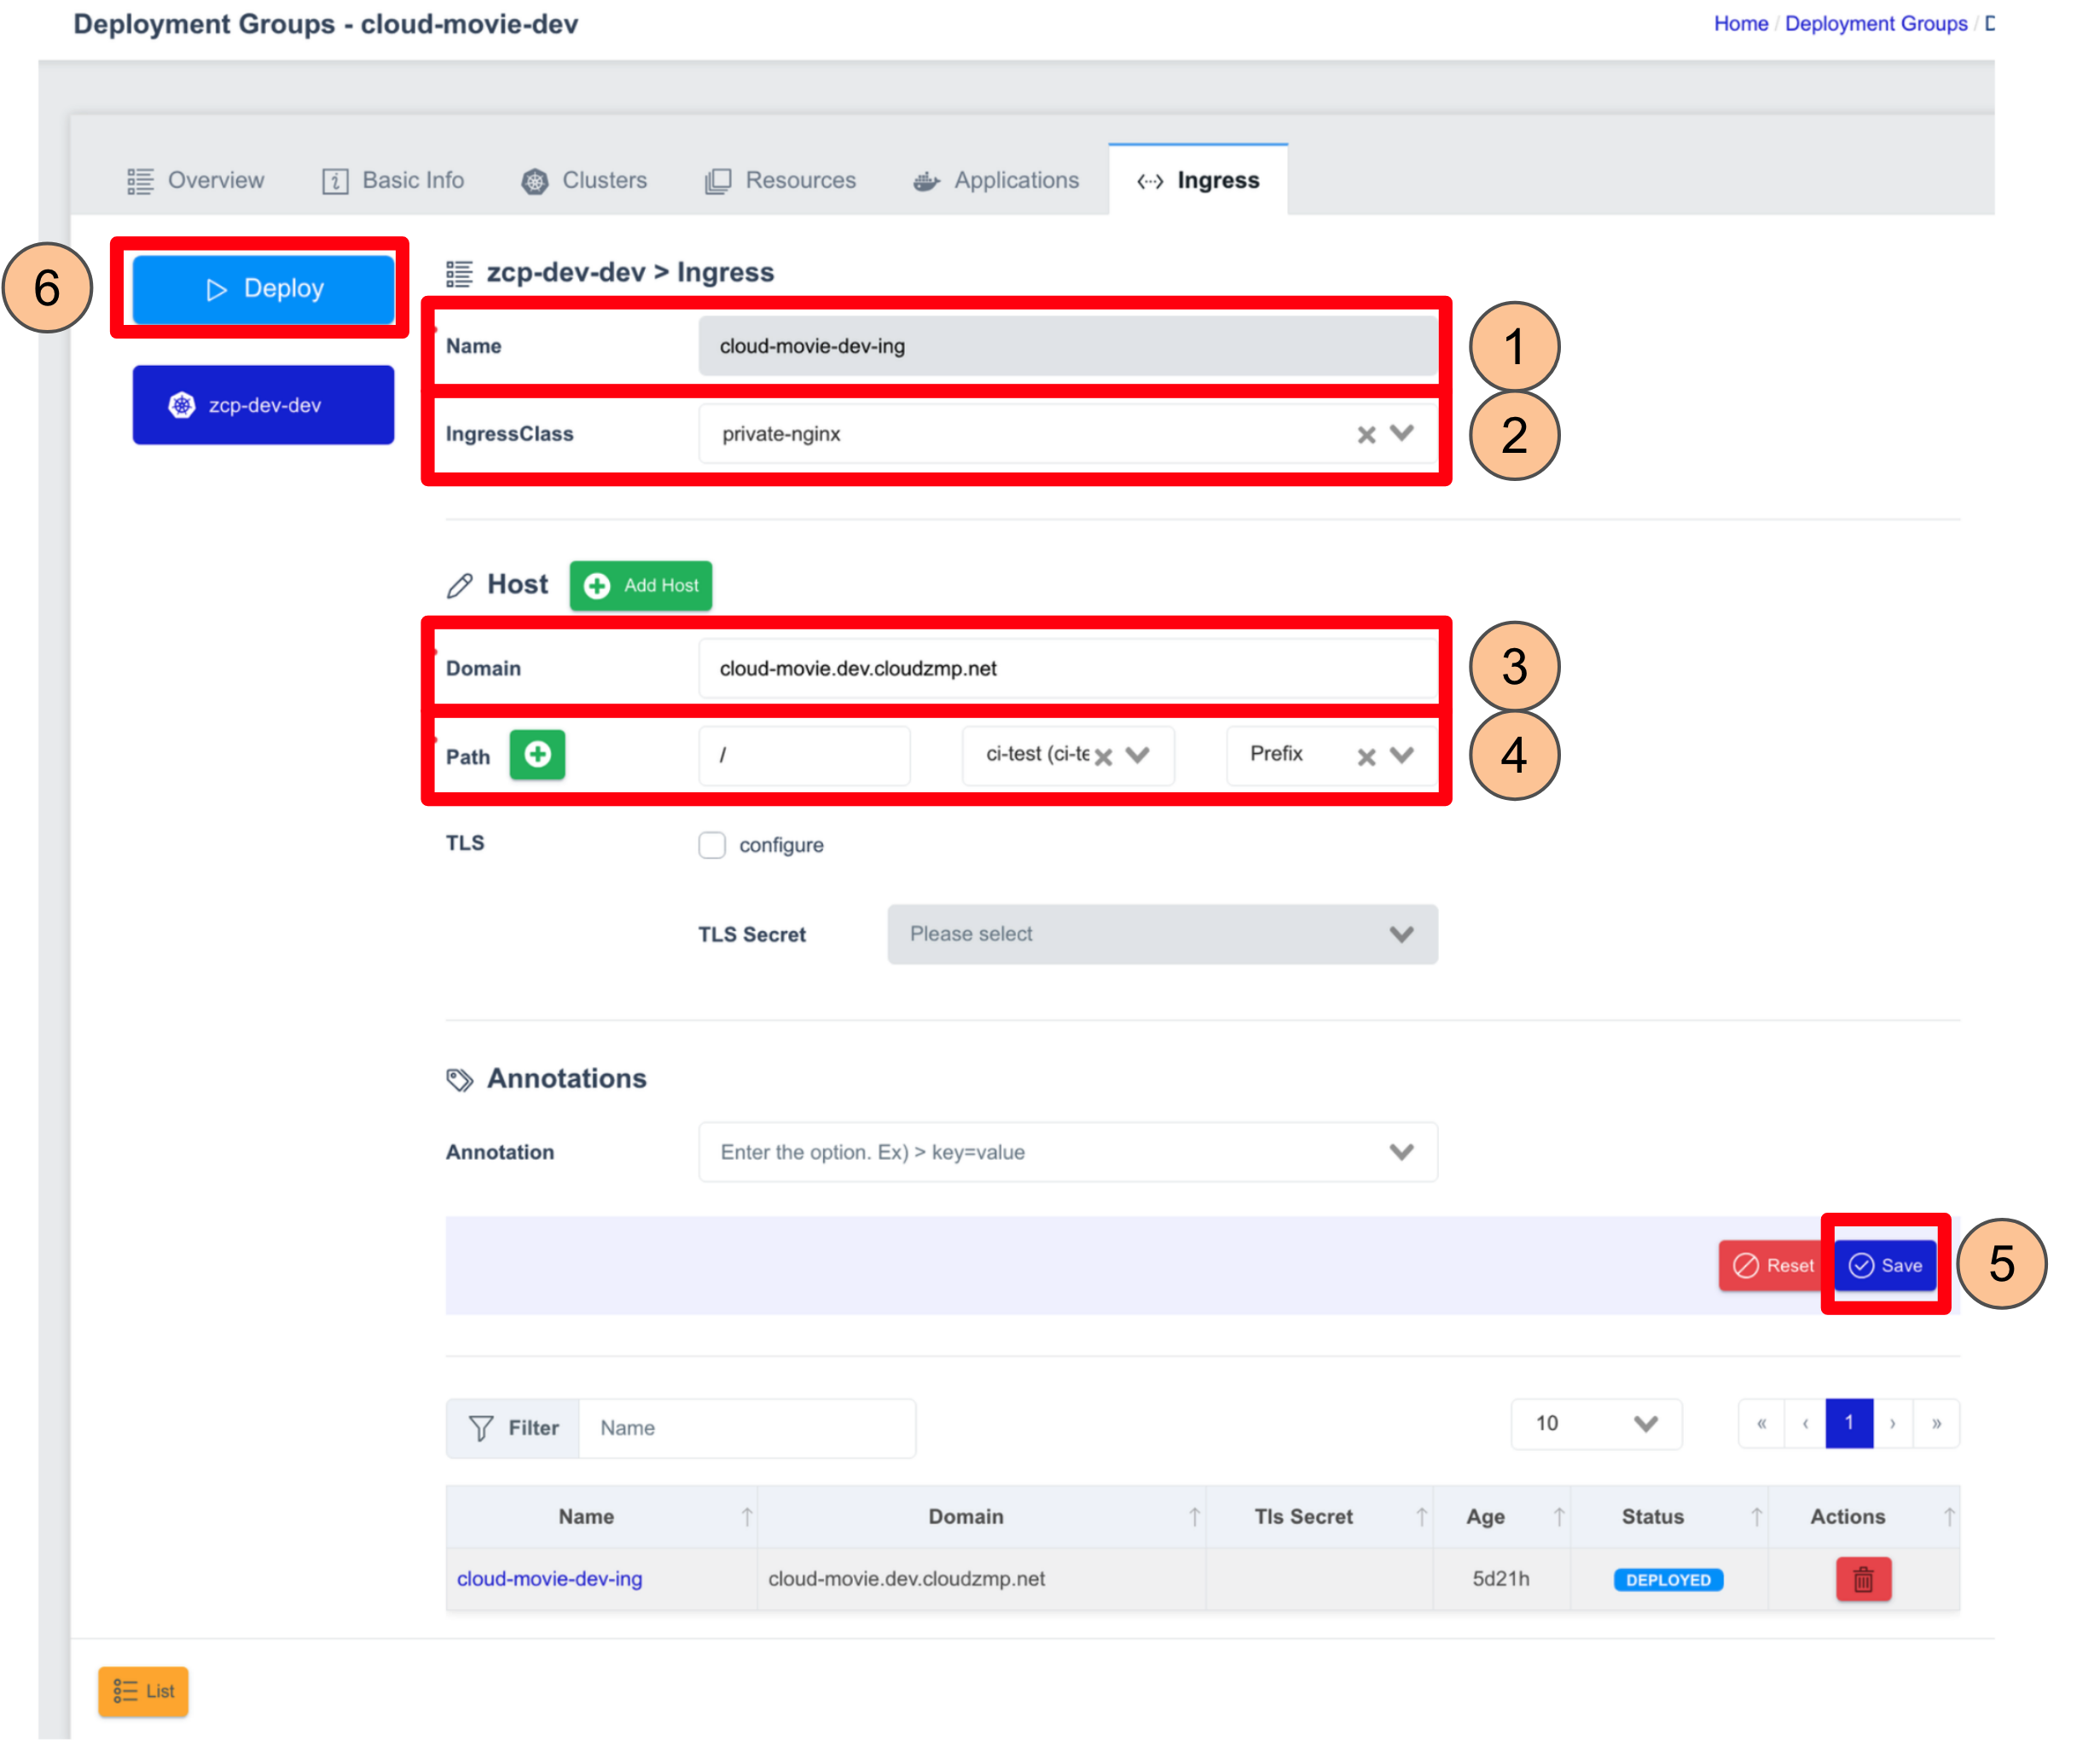
Steps to Create and Deploy Ingress:
- On the Ingress tab at the top of the screen. Enter
cloud-movie-dev-ingressin the Name field. - In IngressClass, select the Ingress Controller installed in the dataplane.
- (The available IngressClass may vary in different environments).
- Enter
cloud-movie.partners-demo.cloudzmp.netin the Domain field (The actual domain may vary depending on the test environment). - In the Path field:
- Enter
/. - In the second dropdown, select
cloud-movie(this is the backend service for the ingress). - In the third dropdown, select Prefix as the Path Type.
- Enter
- Click Save to save the configuration.
- Click Deploy at the top of the screen to deploy the Ingress.
You must use a pre-registered domain, and the DNS record should be configured to route traffic to the ZCP Load Balancer.
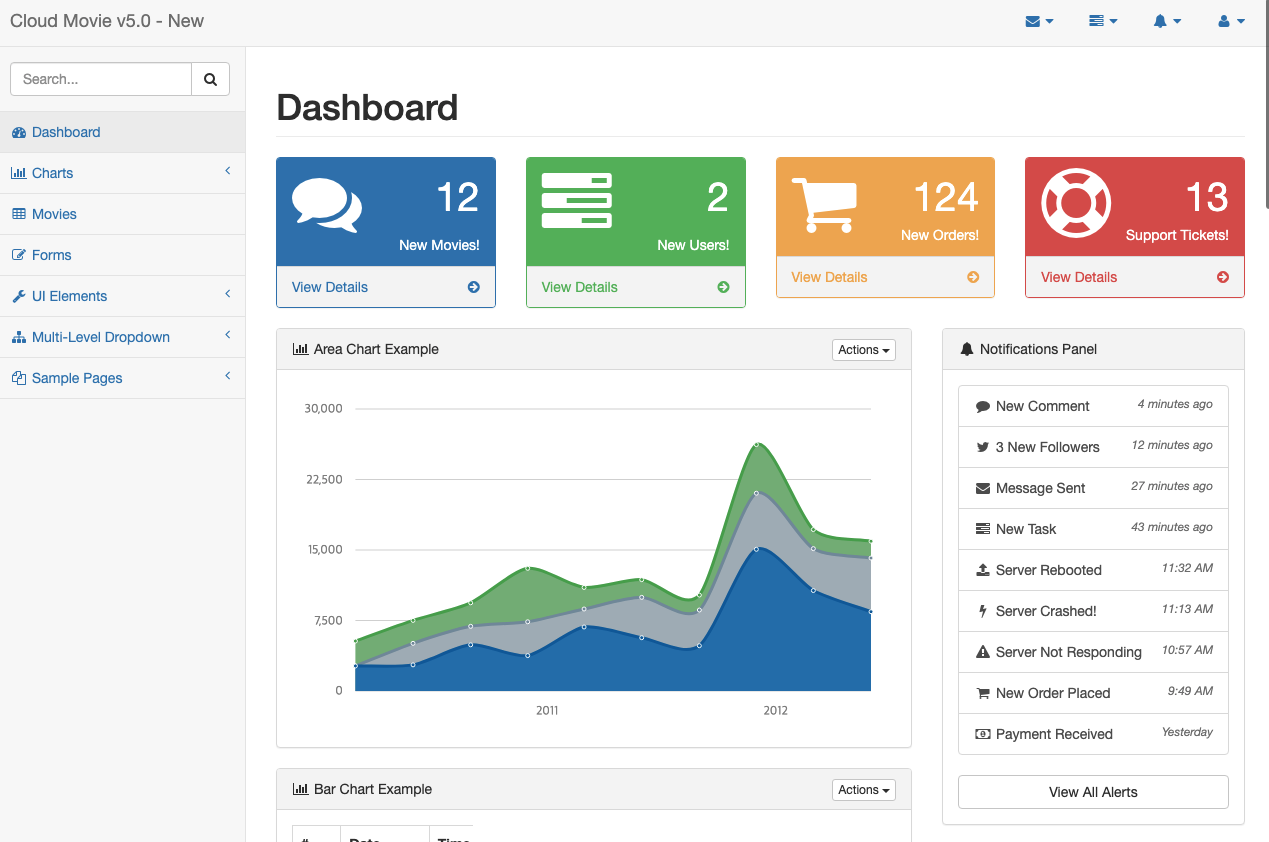
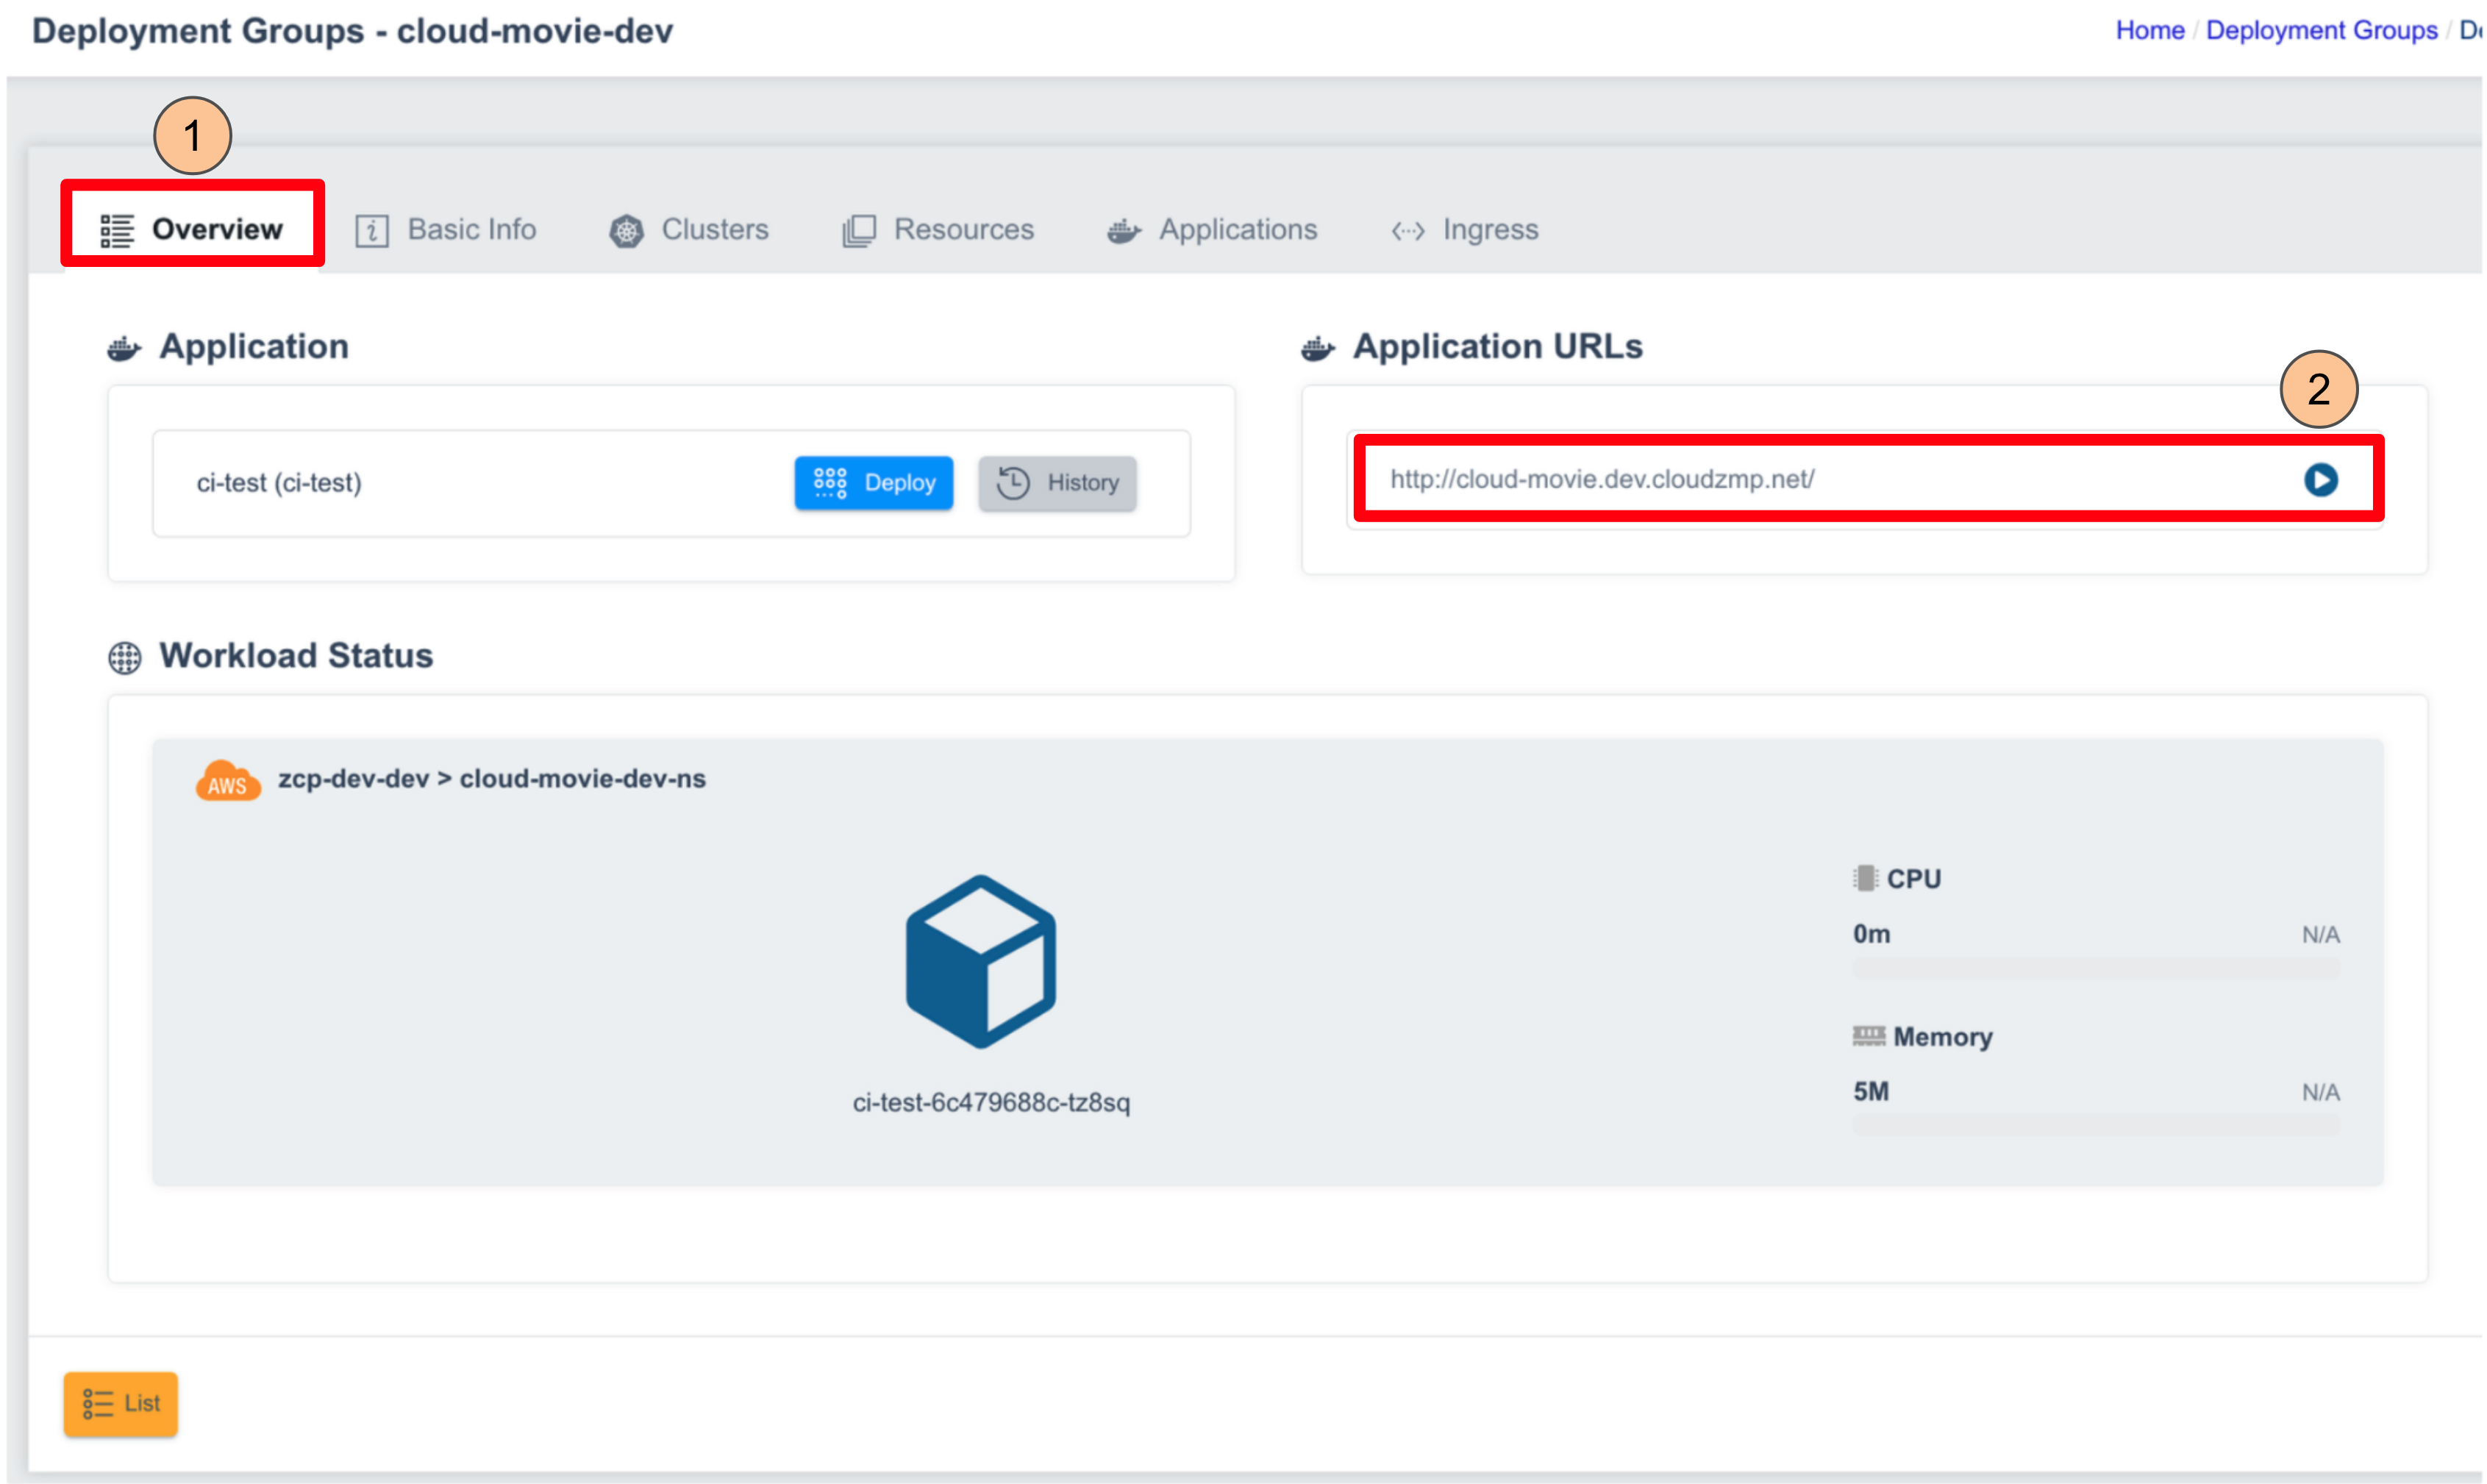
Accessing the Deployed Demo Application
- Click the Overview tab at the top of the screen.
- In Application URLs, click the deployed application URL:
- http://cloud-movie.partners-demo.cloudzmp.net/
(The actual URL may vary depending on the test environment).
- http://cloud-movie.partners-demo.cloudzmp.net/
(The actual URL may vary depending on the test environment).
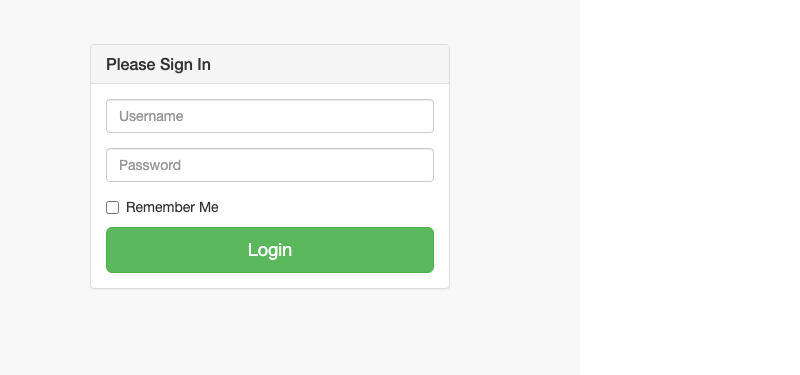
Cloud-movie Application Login Screen:
- On the login screen, enter:
- Username:
admin - Password:
1234
- Username:
- Click Login.
Cloud-movie Application Main Screen: