3. Resource Management
Tìm kiếm Tài nguyên
SNB
Tài nguyên có thể được xem từ nhiều góc độ khác nhau:
-
Node Tab
- Hiển thị cấu trúc cây của các cụm đã đăng ký và các nút trong mỗi cụm.
- Số ở cuối tên nút đại diện cho số lượng pod đang chạy trên nút đó.
- Mức tải của nút được chỉ định bằng màu văn bản.
-
Namespace Tab
- Hiển thị tài nguyên được tổ chức theo cụm và không gian tên, tập trung vào các loại tài nguyên chính trong mỗi không gian tên.
-
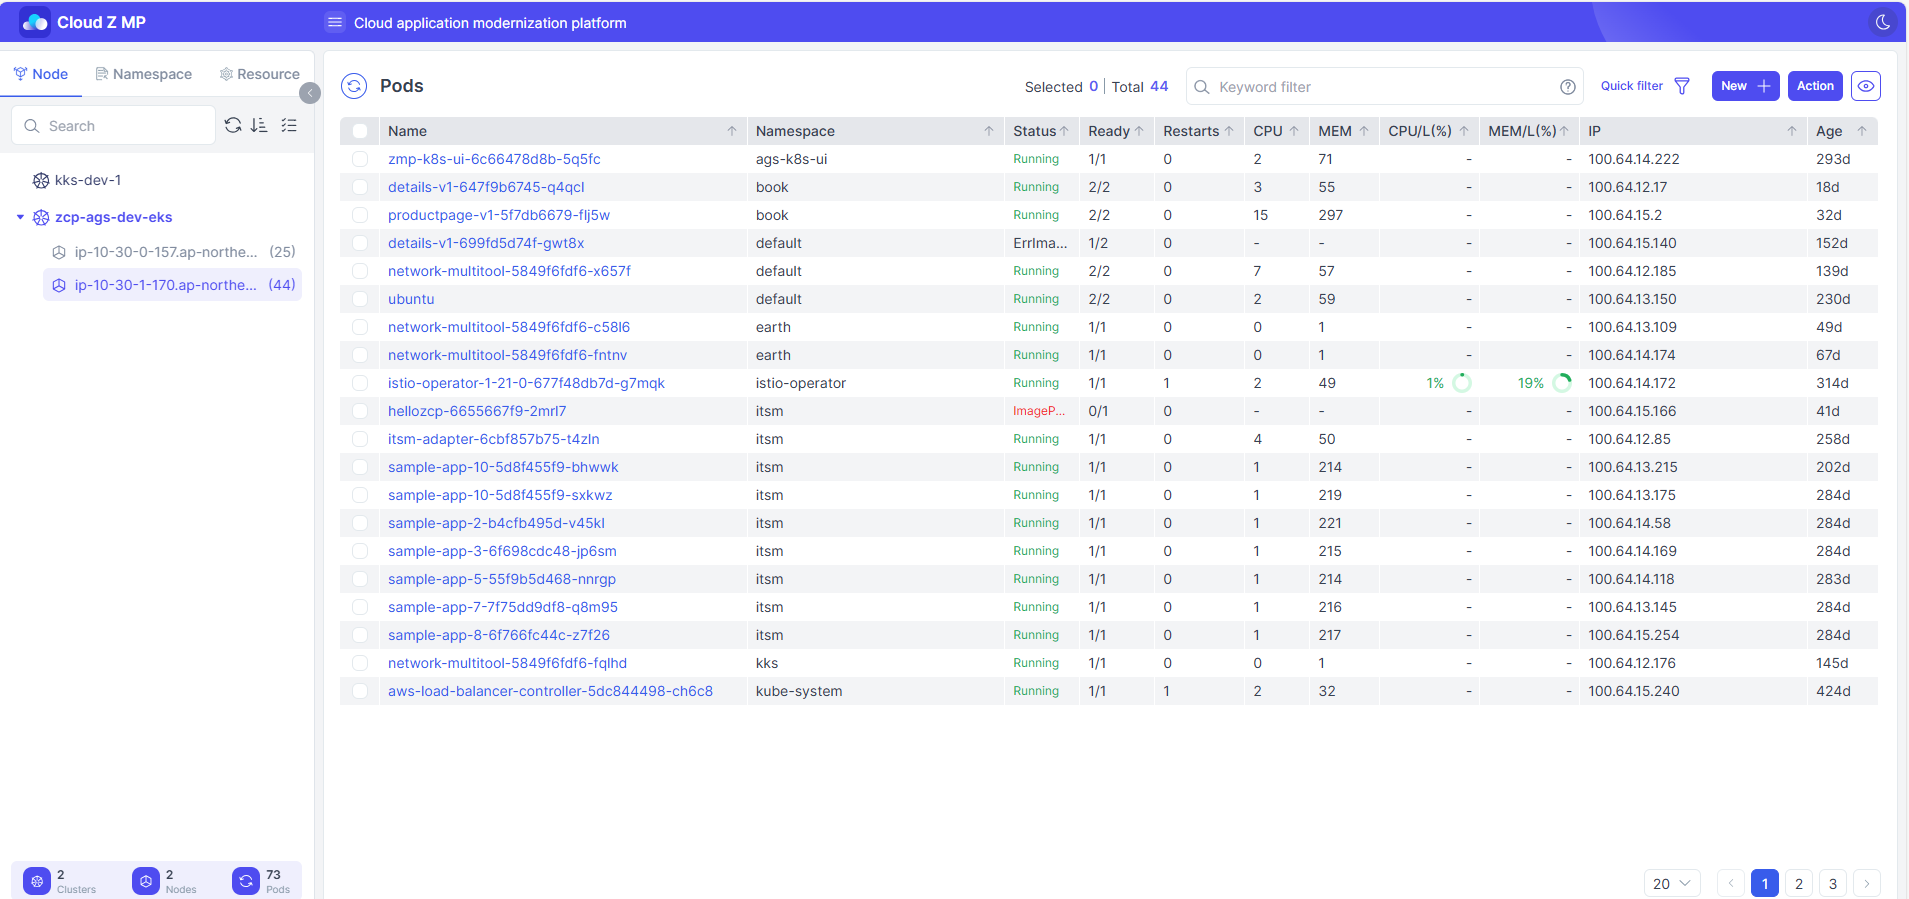
Resource Tab
- Hiển thị danh sách tài nguyên tập trung vào các loại tài nguyên Kubernetes.
Làm mới
Làm mới tài nguyên trong khi duy trì các bộ lọc và truy vấn hiện đang được chọn. Loại tài nguyên hiện đang được xem cũng được hiển thị.
Bộ lọc
Lọc tài nguyên bằng cách chọn các cụm, nút và không gian tên.
Trình phân trang
Kiểm soát số lượng mục được hiển thị trên mỗi trang trong chế độ xem bảng. Có thể điều chỉnh từ 10–50 mục mỗi trang.

Bộ lọc Truy vấn và Hành động
Tìm kiếm tài nguyên bằng cách nhập từ khóa theo định dạng fieldName:keyword. Các bộ lọc có thể bao gồm các toán tử cho kích thước, ngày tháng hoặc CIDR tùy thuộc vào loại trường.
Bộ lọc Tìm kiếm Nhanh (Chỉ Nút, Pod)
Lưu các truy vấn thường xuyên sử dụng hoặc phức tạp dưới một tên tùy chỉnh để tái sử dụng. Chọn một truy vấn đã lưu sẽ ngay lập tức áp dụng nó.
Tạo Bộ lọc Tìm kiếm Nhanh
Tạo một Bộ lọc Tìm kiếm Nhanh để tìm các trường hợp mà yêu cầu/giới hạn CPU/Bộ nhớ vượt quá 80%.

- Name: Đặt tên cho bộ lọc.
- Ví dụ: Bộ nhớ CPU cao
- Query: Chỉ định truy vấn để áp dụng.
- Ví dụ:
(cpuRequests:>80|memoryRequests:>80)|(cpuLimits:>80|memoryLimits:>80)
- Ví dụ:
- Description: Cung cấp chi tiết về bộ lọc.
- Ví dụ: Sử dụng CPU/Bộ nhớ lên đến 80%.
Thực hiện Hành động
Các hành động có thể được thực hiện trên các tài nguyên. Chọn nhiều tài nguyên bằng cách sử dụng hộp kiểm để áp dụng hành động hàng loạt.
| Action | Description | Target |
|---|---|---|
| Delete | Xóa tài nguyên | All |
| Label | Thêm/cập nhật nhãn | All |
| SetImage | Cập nhật hình ảnh container | Pod, Deployment, StatefulSet, DaemonSet |
| Scale | Điều chỉnh số lượng bản sao công việc | Deployment, StatefulSet, DaemonSet |
| Expand | Mở rộng dung lượng tài nguyên (ví dụ: lưu trữ) | PersistentVolumeClaim |
| Trigger | Kích hoạt hành động thủ công | CronJob |
| Schedule | Đặt thời gian đã lên lịch cho một CronJob | CronJob |
| Cordon/Uncordon | Bật/tắt lập lịch tài nguyên trên một nút | Node |
| Drain | Di chuyển tất cả các pod trên một nút sang các nút khác | Node |
| Taint | Thêm một taint vào một nút để giới hạn lập lịch pod | Node |
Tạo Tài nguyên Mới
Các tài nguyên mới có thể được tạo từ màn hình danh sách tài nguyên bằng cách sử dụng nút ‘New+’.

- Chọn một Cluster để triển khai.
- Sử dụng YAML Editor để định nghĩa tài nguyên theo định dạng YAML và triển khai.
Xem Tài nguyên
Nhấp vào tên tài nguyên trên thanh bên phải trong bảng sẽ mở một bảng điều khiển bên phải với thông tin chi tiết và các nút có thể hành động.
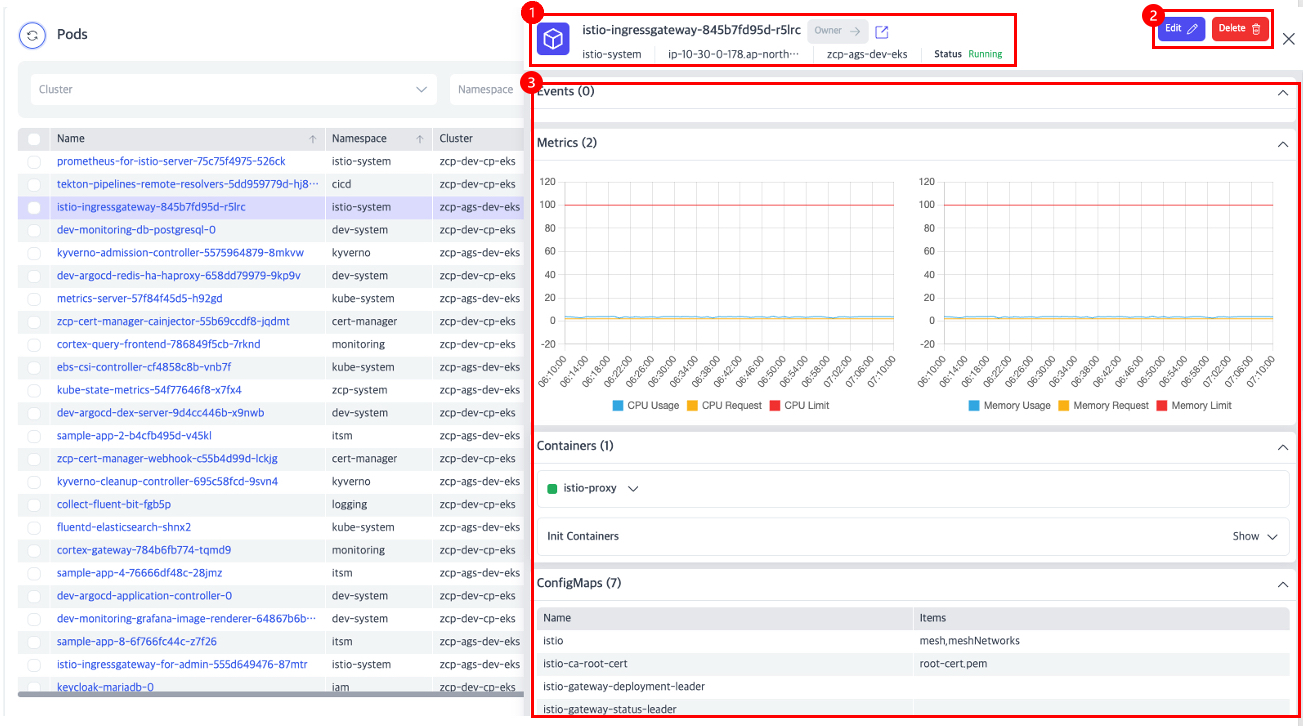
- Title Section: Hiển thị tên tài nguyên, vị trí (namespace, node, cluster) và trạng thái.
- Action Area: Bao gồm các nút để sửa đổi hoặc xóa tài nguyên.
- Content Area: Cung cấp chi tiết tài nguyên, với các biểu tượng bổ sung cho thông tin cụ thể hơn (ví dụ: tài nguyên Pod).
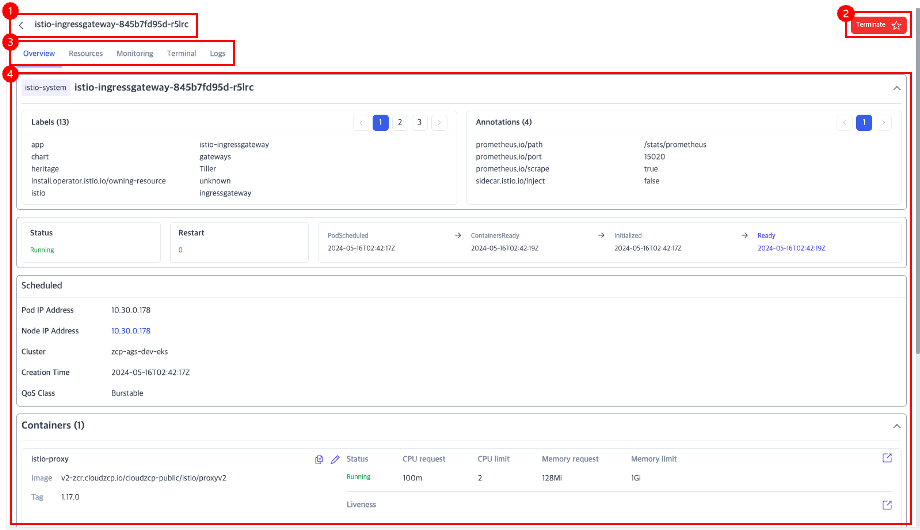
Chi tiết
Chế độ xem chi tiết cung cấp thông tin sâu về tài nguyên Pod chỉ.
Tab Tổng quan
- Title Area: Hiển thị tên tài nguyên đã chọn và điều hướng để quay lại màn hình trước đó.
- Tabs Area: Phân loại chi tiết Pod.
- Action Buttons: Cung cấp các hành động áp dụng cho tài nguyên.
- Content Area: Hiển thị nội dung của tab đã chọn.
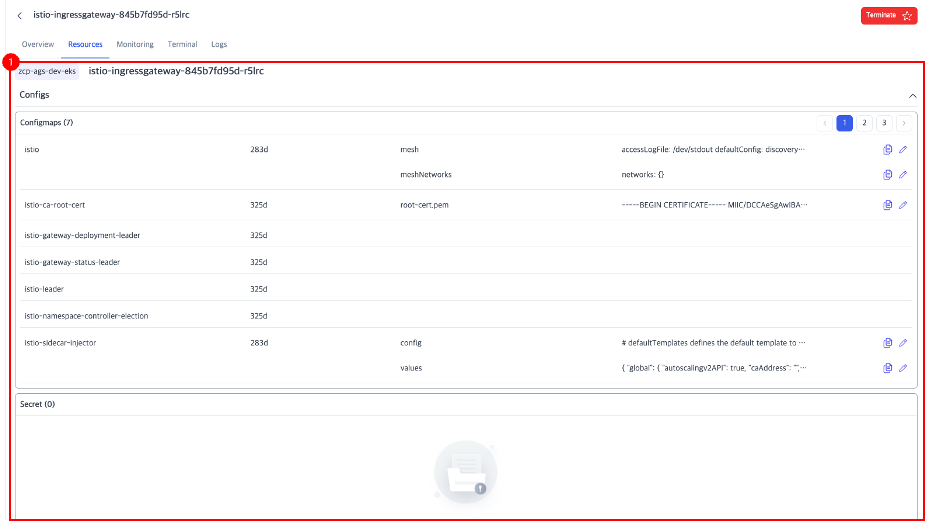
Tab Tài nguyên
Liệt kê các tài nguyên liên quan và cho phép các hành động đơn giản.
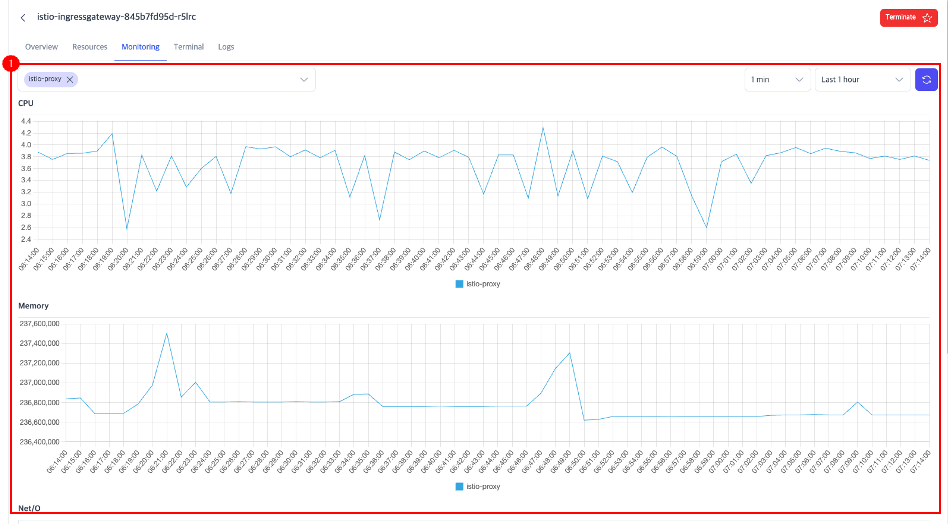
Tab Giám sát
Hiển thị các chỉ số cho Pod đã chọn.
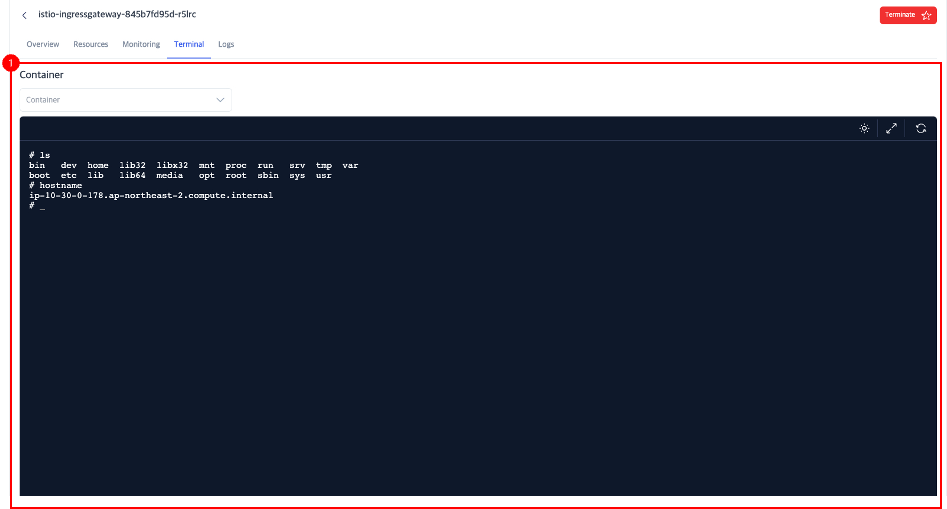
Tab Terminal
Nếu hình ảnh container bao gồm một shell, nó cung cấp quyền truy cập vào terminal shell của Pod.
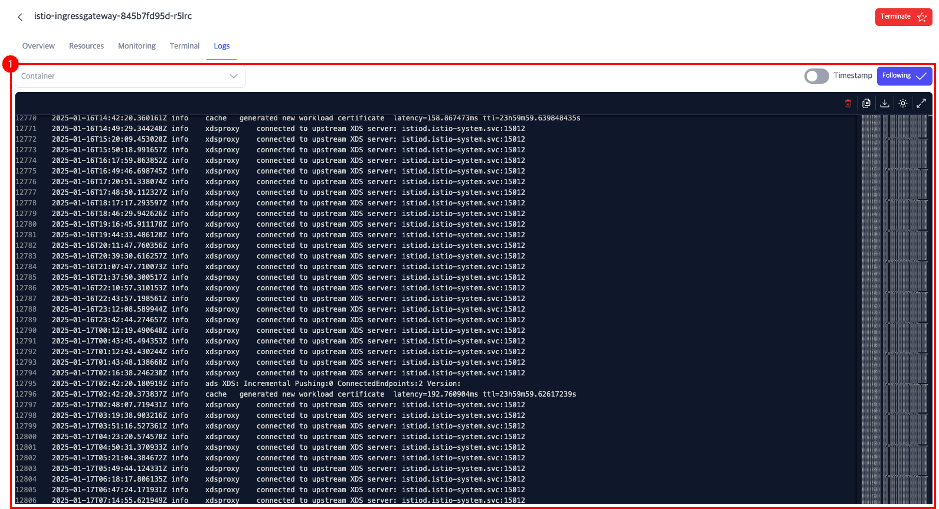
Tab Nhật ký
Hiển thị nhật ký của Pod.