Create New Volume
ボリュームは、モデルに割り当てられた共有ストレージであり、その重みを永続化するために使用されます。これにより、同じモデルを使用する複数のポッドが、重みをストレージからロードできるようになり、再ダウンロードする必要がなくなります。
これらの操作を実行するには、システム管理者の役割を持っている必要があります。
システム内のさまざまなエントリポイントからカスタムGPUプールのリクエストを開始できます。
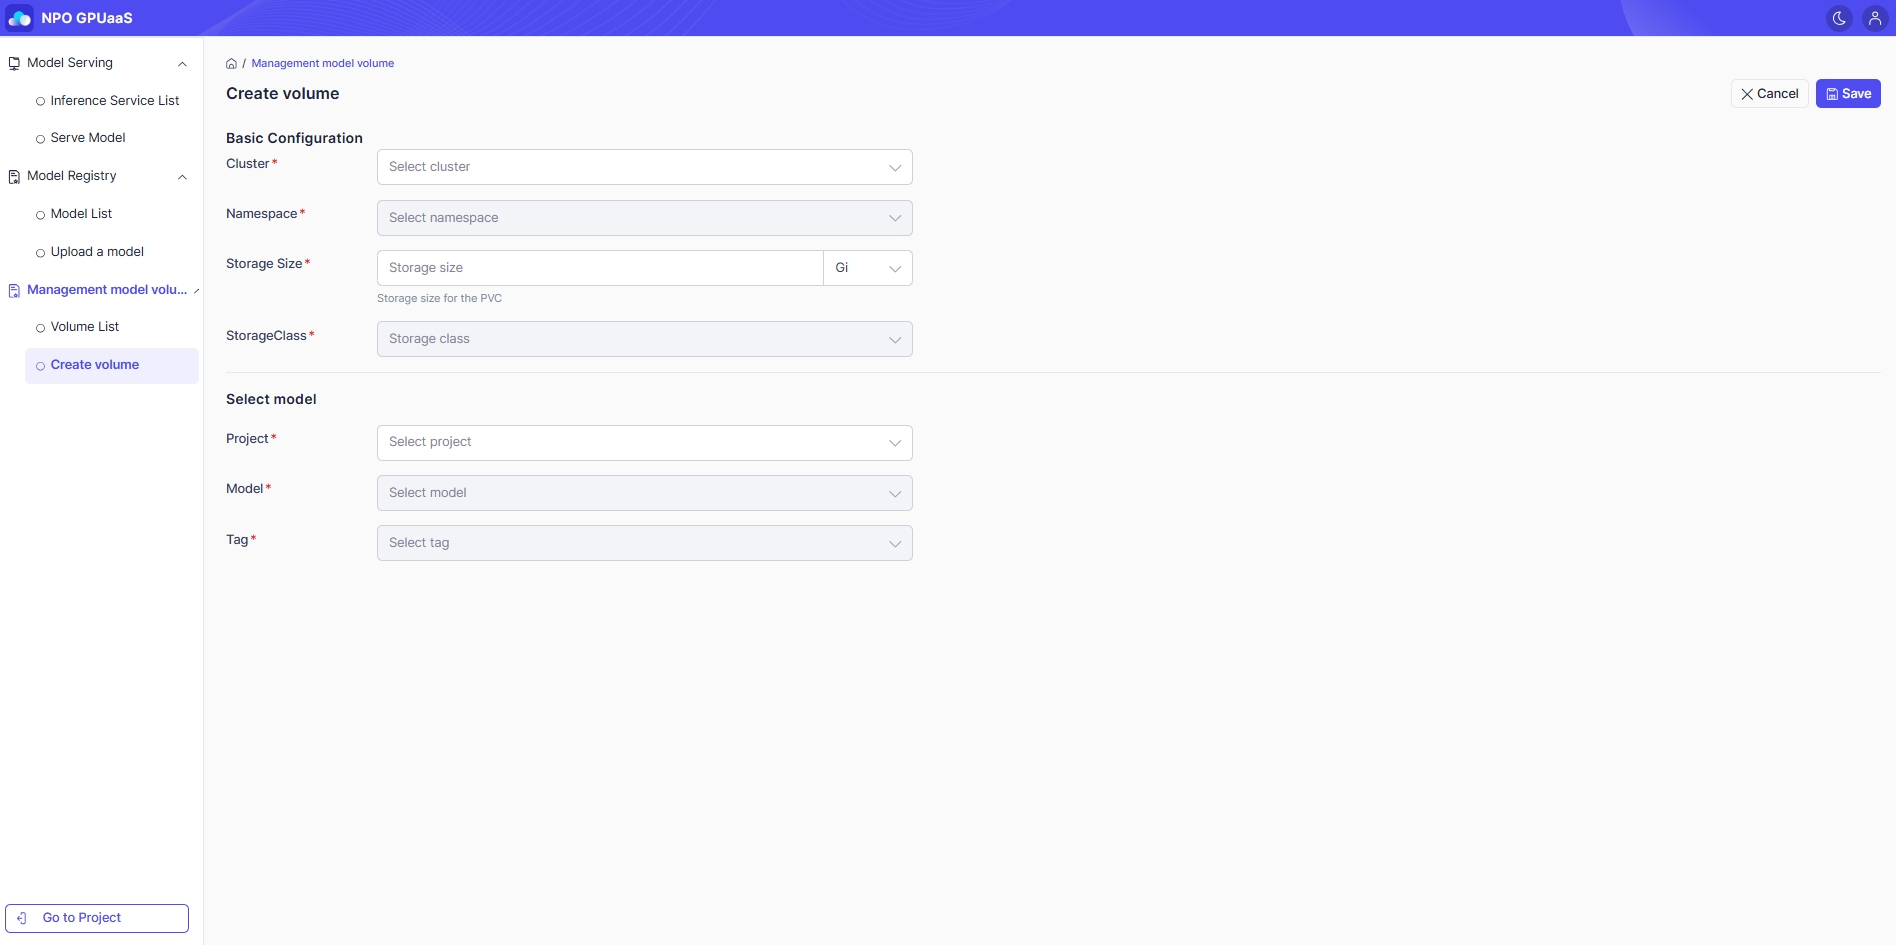
エントリポイントA: ボリューム作成画面から開始
システム管理者コントロールパネルから、メインナビゲーションで Model をクリックします。次に、左側のナビゲーションで Create Volumeを選択します:
エントリポイントB: ボリュームリスト画面から開始
-
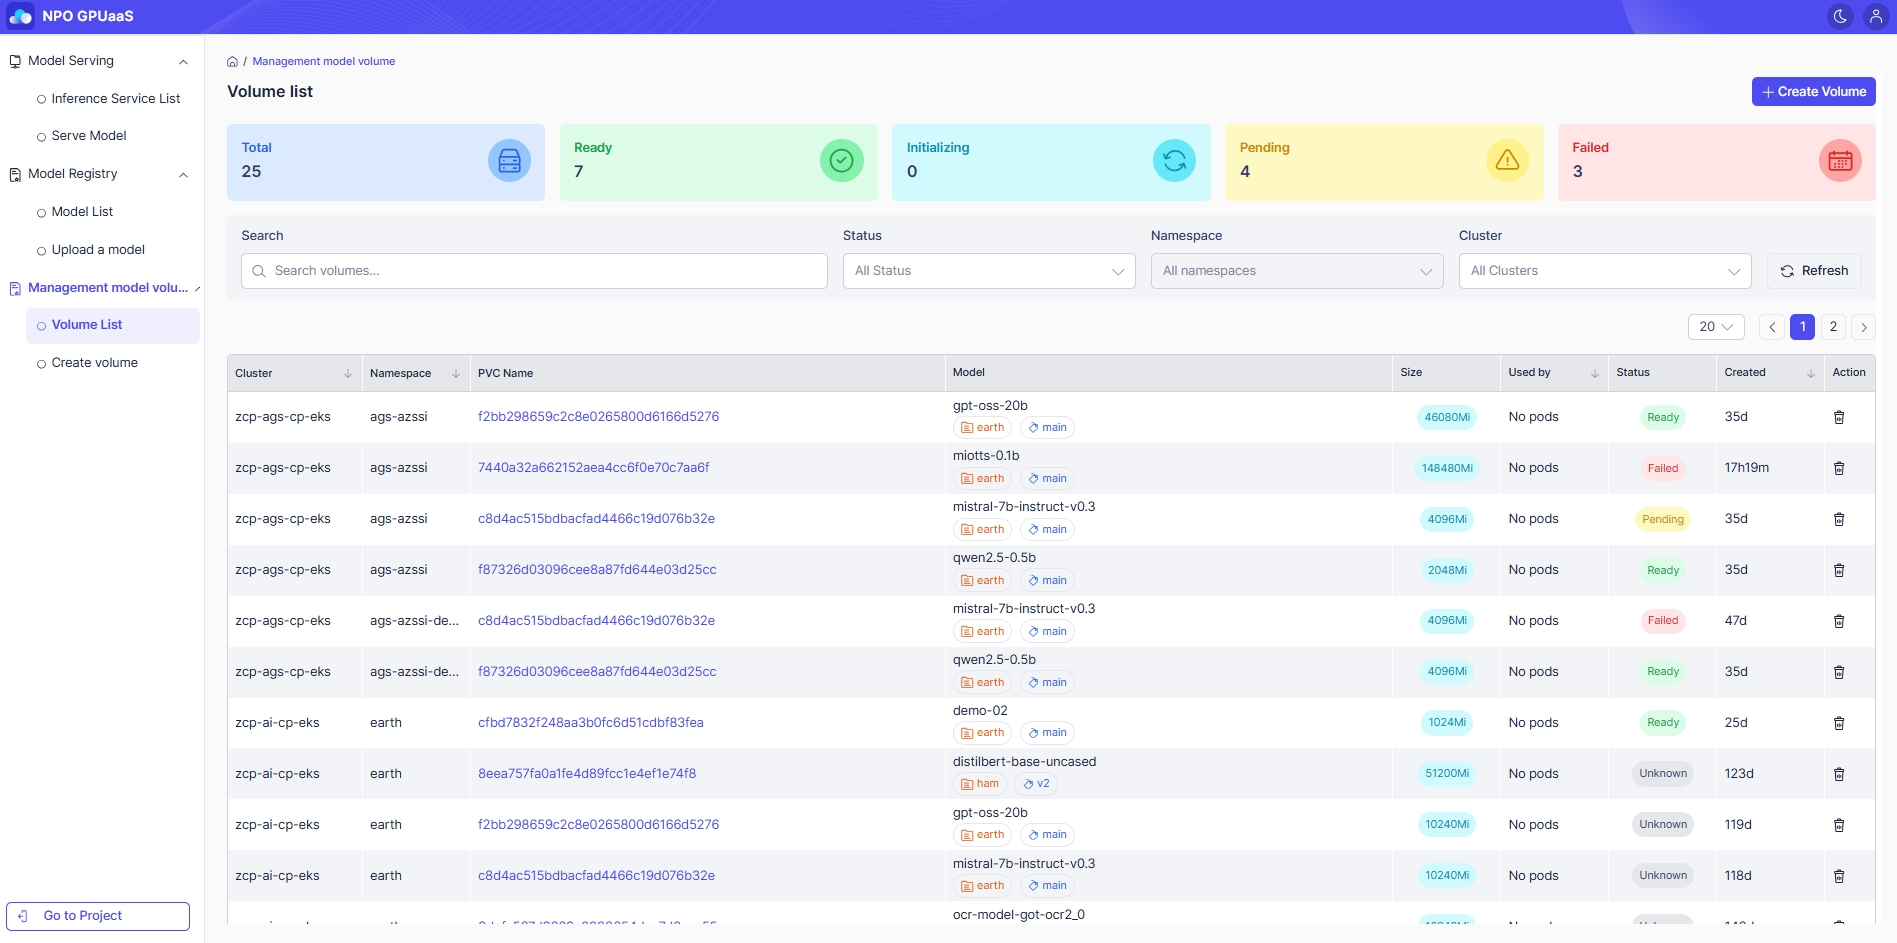
システム管理者コントロールパネルから、メインナビゲーションで Model をクリックします。次に、左側のナビゲーションで Volume Listを選択します:
-
ボリュームリスト画面で、画面の右上隅にある + Create Volumeボタンをクリックします。
共通ステップ(すべてのエントリポイントに適用)
- Create Volume フォームに記入します:
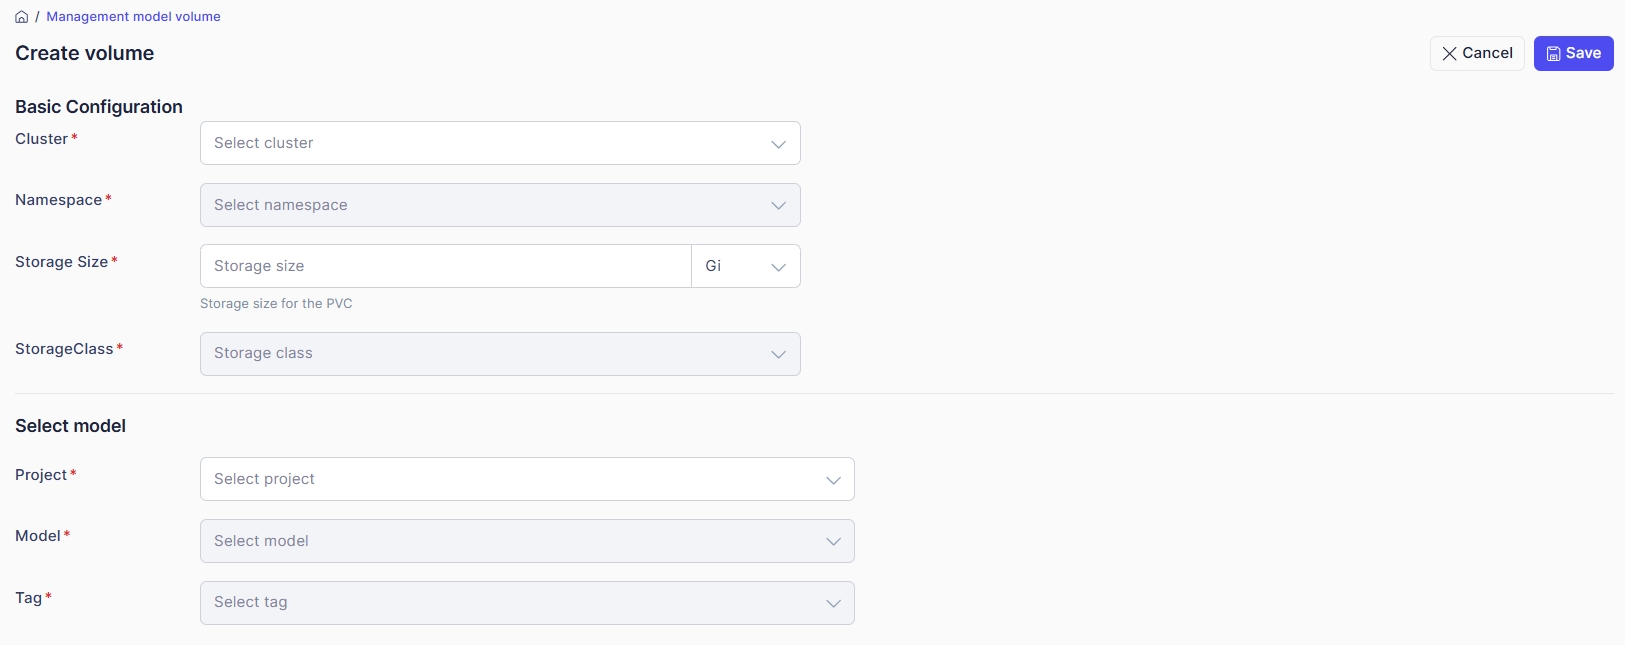
- Cluster: ボリュームを作成したいクラスターを選択します。
- Namespace:
- ボリュームリソースを管理および分離するために使用される名前空間を選択します。
- クラスターが選択された後にのみ名前空間が有効になります。選択されたクラスターに属する名前空間のみが表示されます。
- Storage Size:
- ストレージサイズを入力します。
- 単位: Gi, Mi
- StorageClass:
- クラスターがボリュームをプロビジョニングするために使用するストレージタイプまたはディスク構成を選択します。
- StorageClassはクラスターが選択された後にのみ有効になります。選択されたクラスターによってサポートされているStorageClassのみが表示されます。
Select Model:
- Project: ボリュームとモデルが属するプロジェクトを選択します。
- Model:
- このボリュームを使用するモデルを選択します。
- プロジェクトが選択された後にのみモデルが有効になります。選択されたプロジェクトの下にあるモデルのみが表示されます。
- Tag:
- モデルタグ(バージョン)を選択します。
- モデルが選択された後にのみタグが有効になります。選択されたモデルに対応するタグのみが表示されます。
モデルが選択されると、選択されたモデル情報が右側に表示されます:
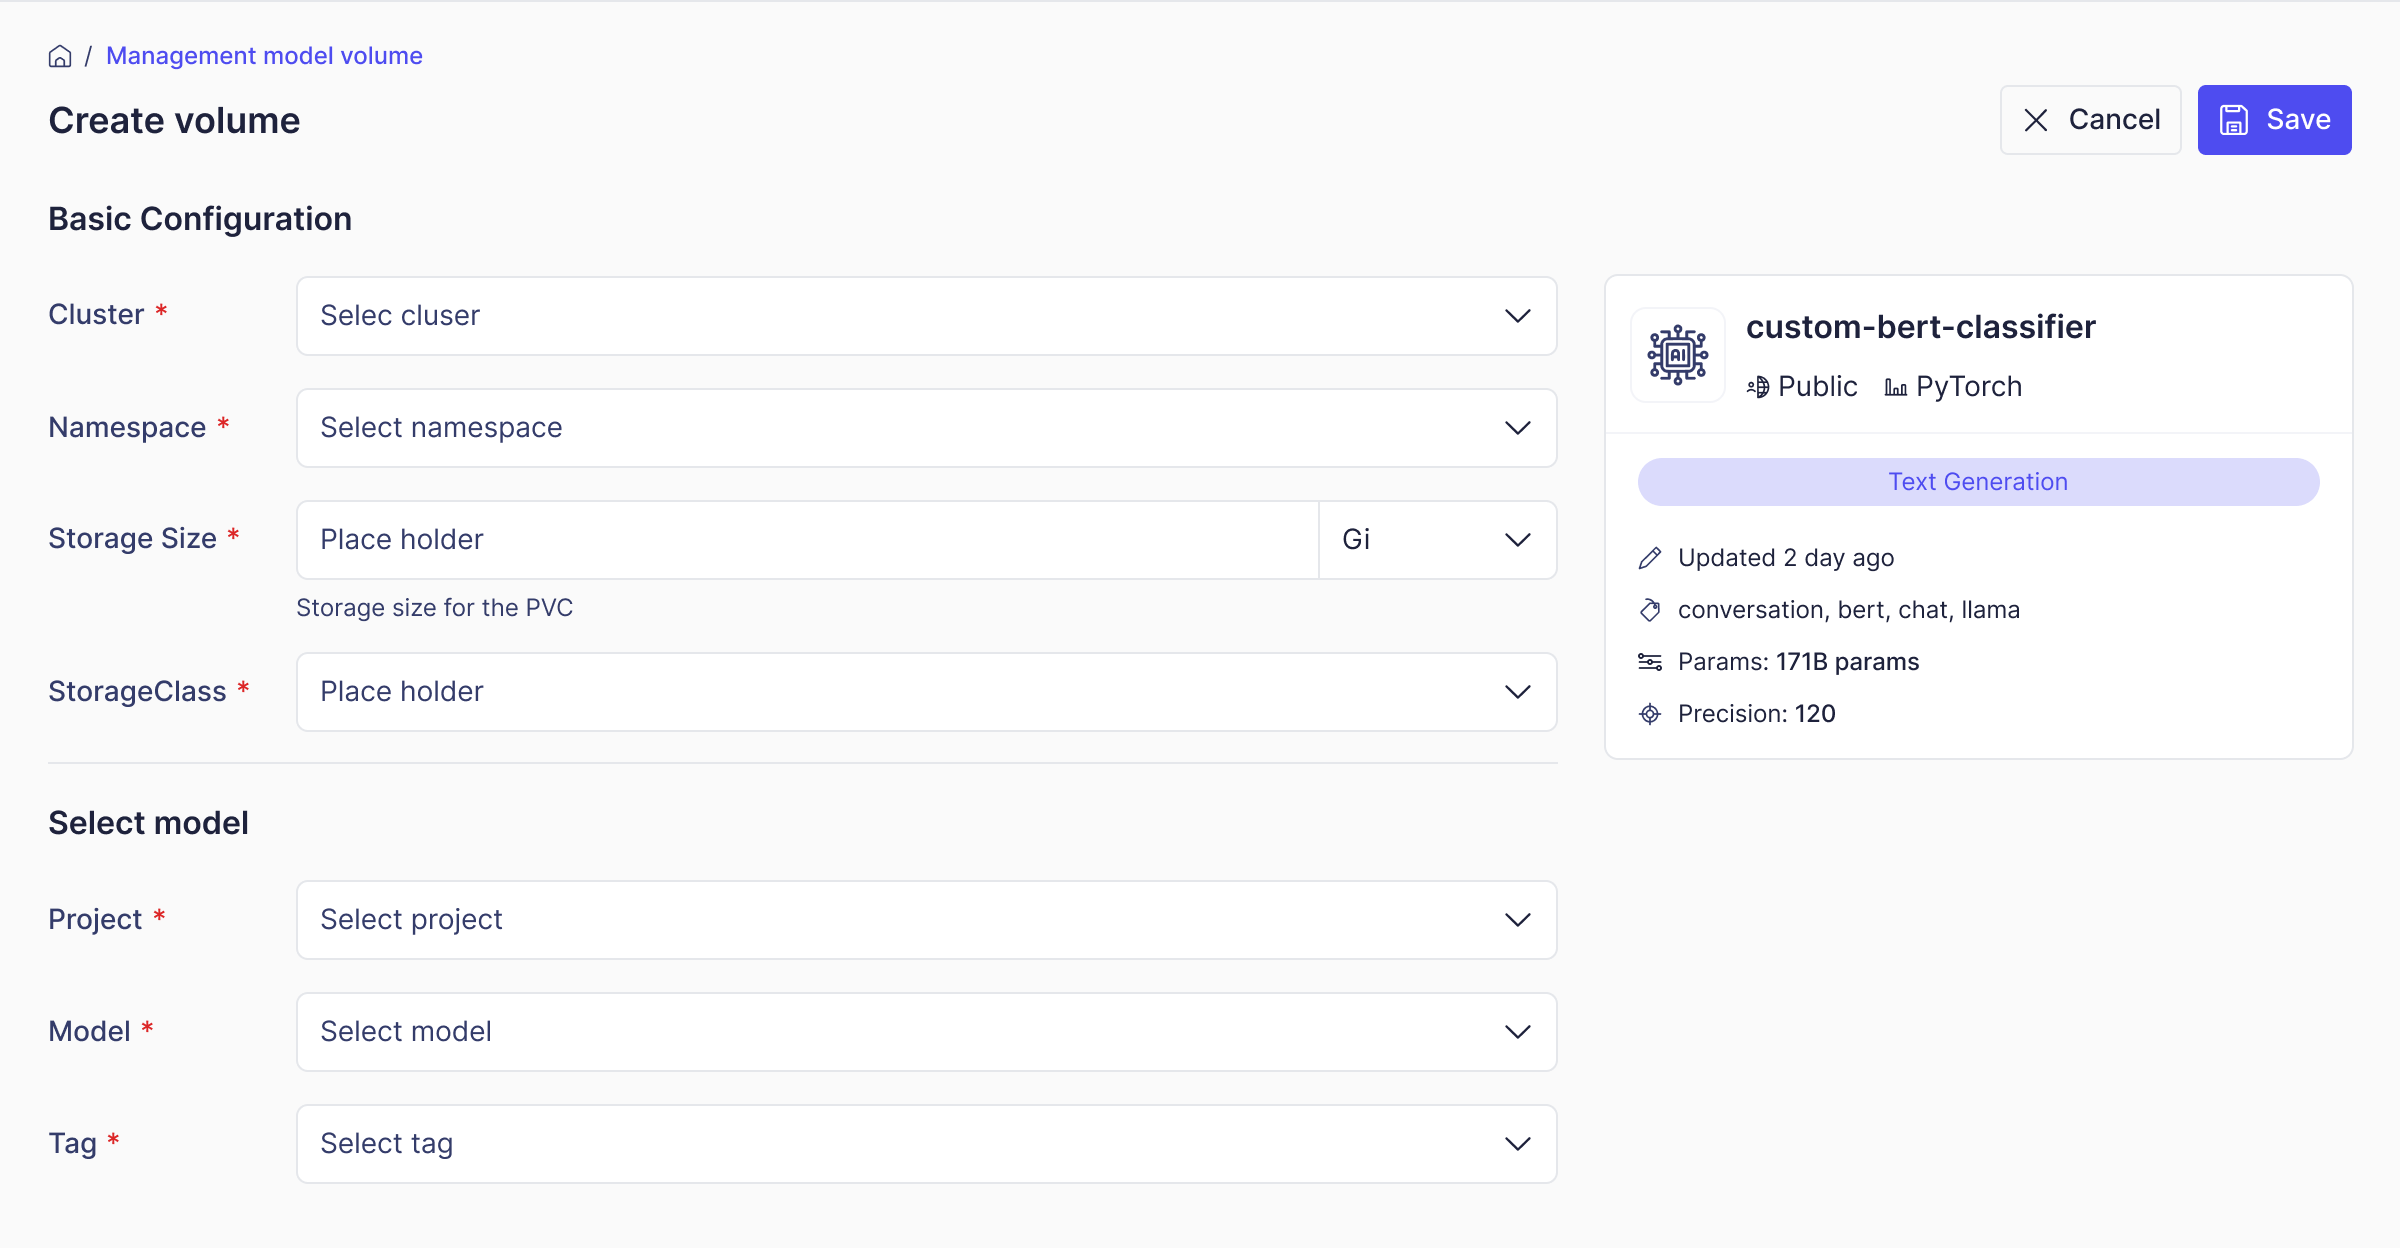
- フォームの入力が完了したら、Saveをクリックしてボリュームを作成します。変更を破棄したい場合は、Cancelをクリックします。