Create New Volume
A volume is a shared storage allocated to a model to persist its weights, allowing multiple pods using the same model to load the weights from storage instead of re-downloading them.
You must have the System Administrator role to access the System Admin Control Panel and perform these operations.
You can start creating new volume from different entry points in the system.
Entry Point A: Start from Create Volume Screen
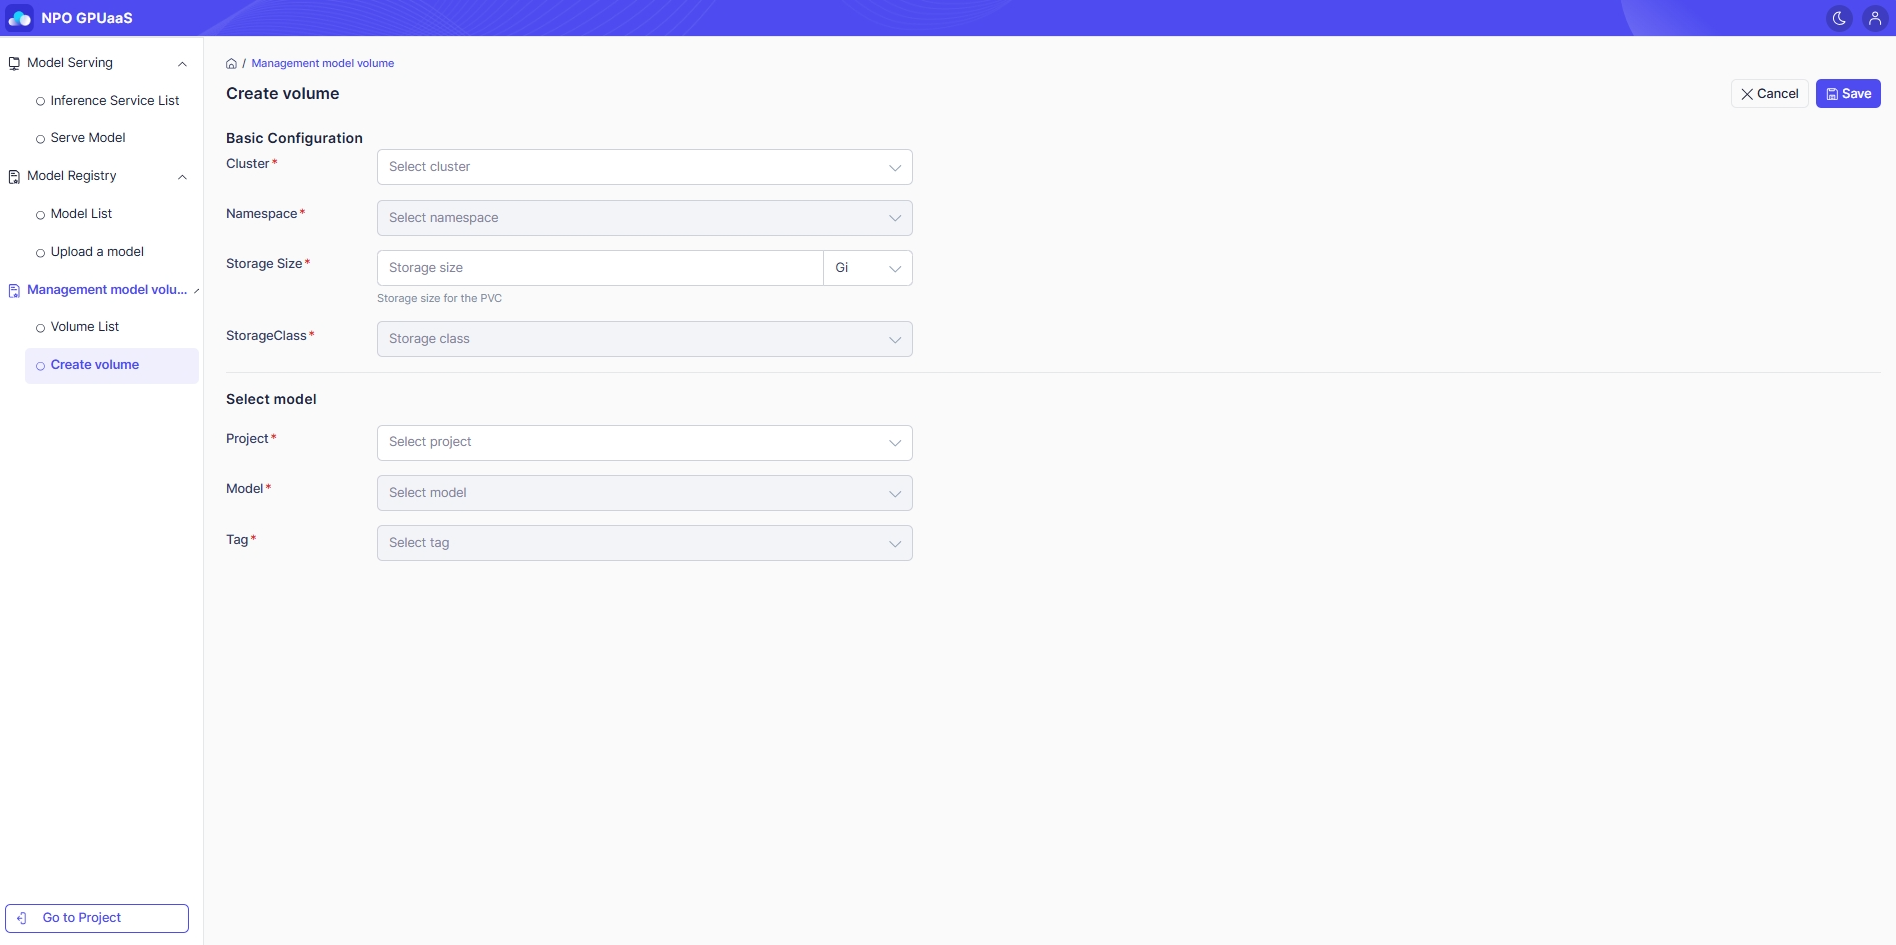
From the System Admin Control Panel, click Model in the main navigation. Then, in the left-side navigation, select Create Volume:
Entry Point B: Start from Volume List Screen
-
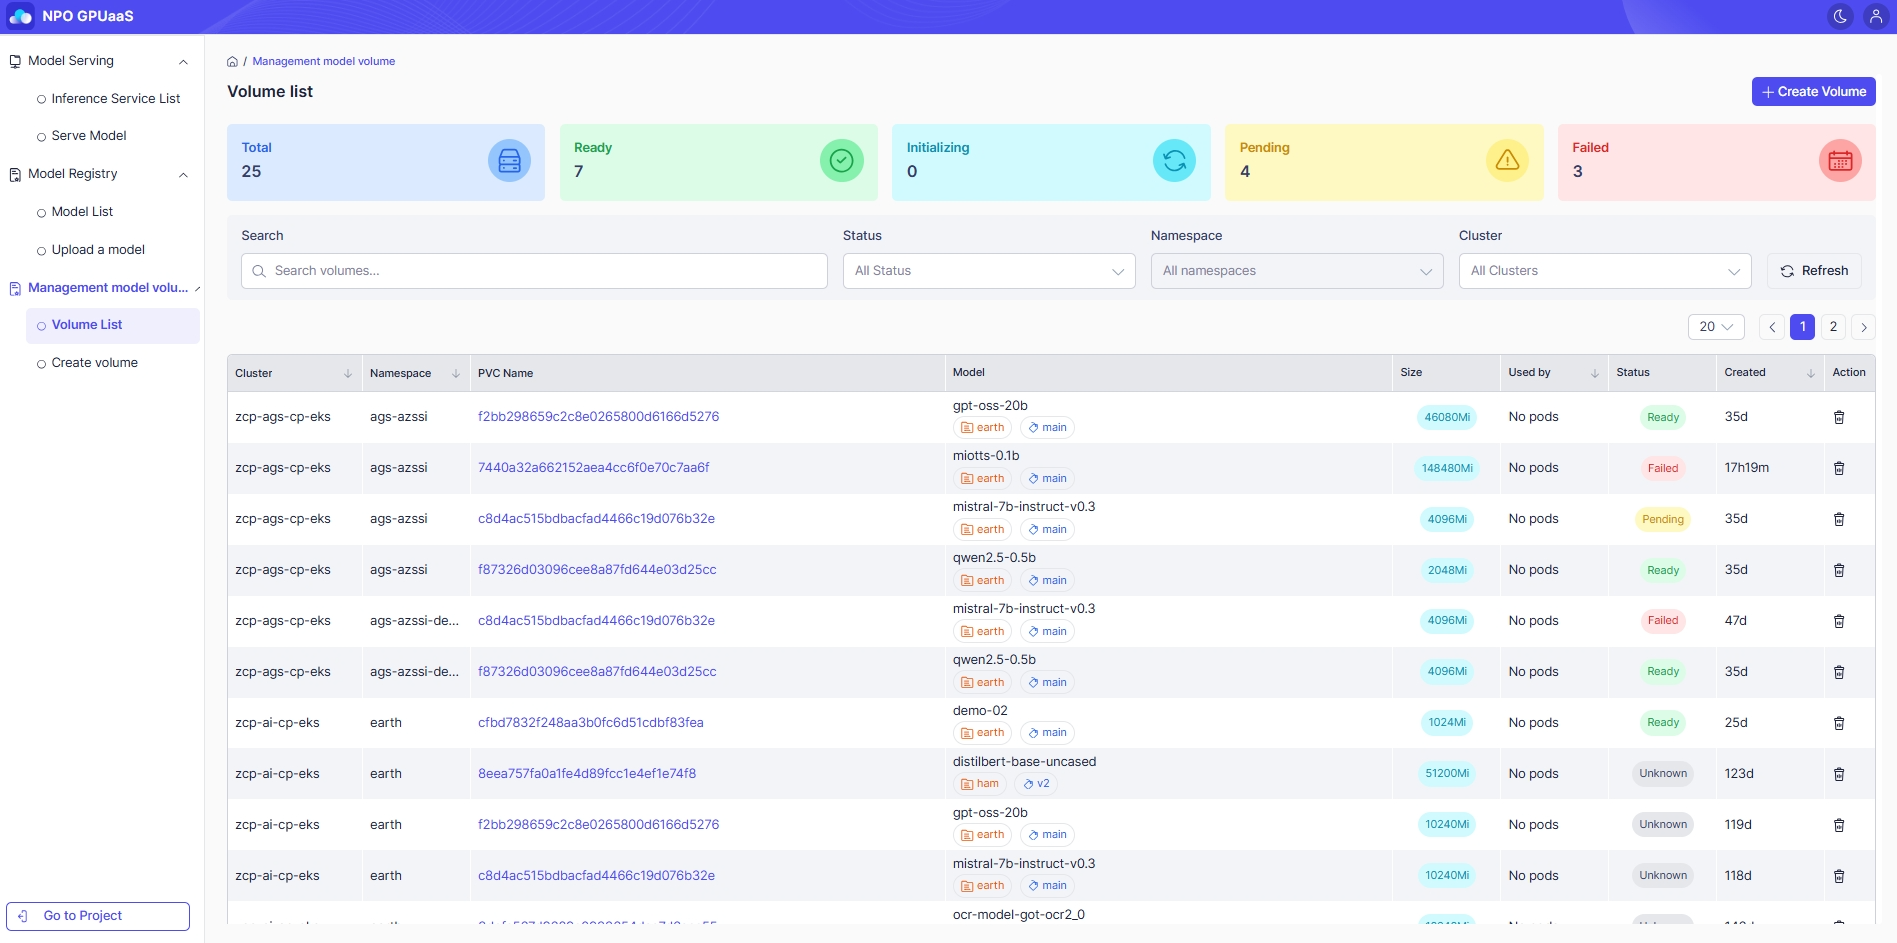
From the System Admin Control Panel, click Model in the main navigation. Then, in the left-side navigation, select Volume List:
-
On the Volume List screen, click the + Create Volume button at the top-right corner of the screen.
Common Steps (Applied to all entry points)
- Fill in the Create Volume form:
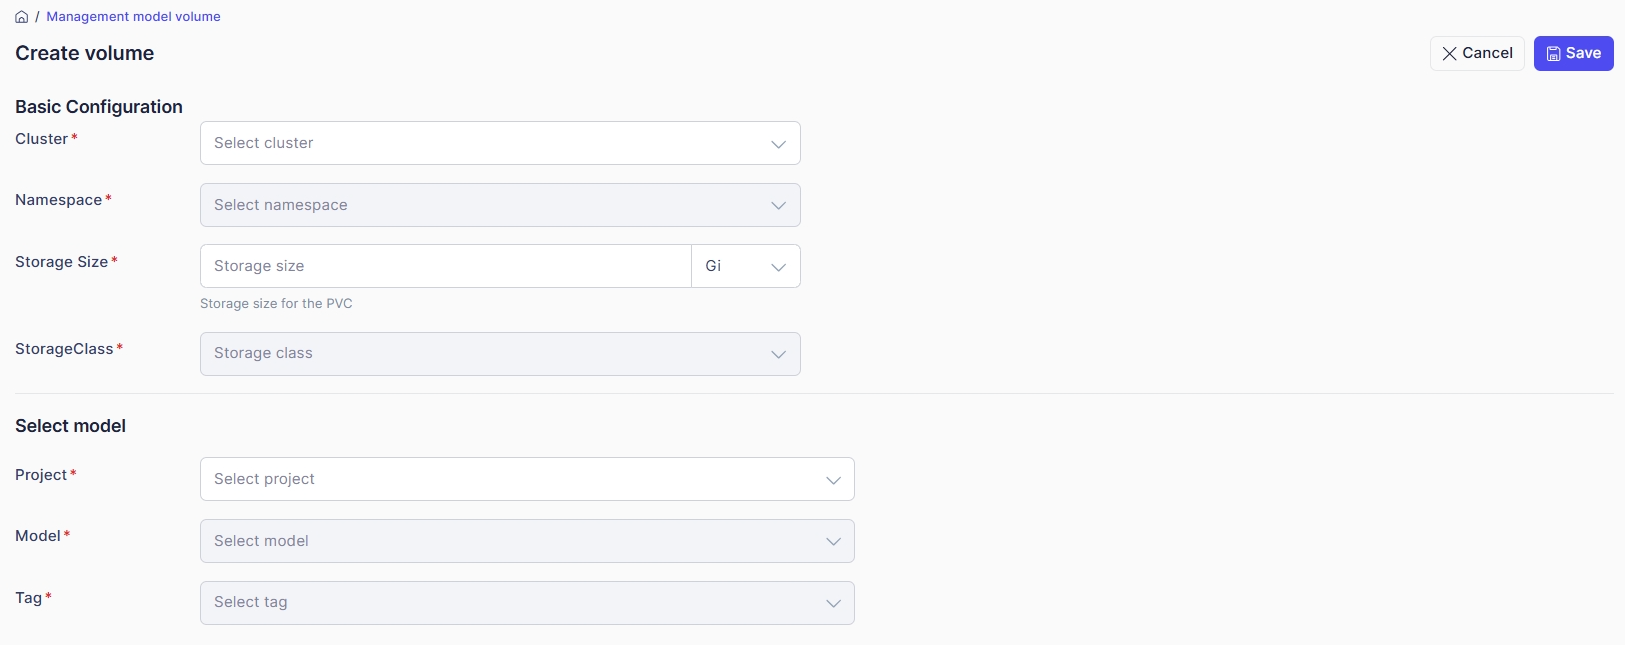
- Cluster: Choose the cluster where you want the volume to be created.
- Namespace:
- Choose the namespace used to manage and isolate the volume resources.
- Namespace is enabled only after a Cluster is selected; only namespaces belonging to the selected cluster are displayed.
- Storage Size:
- Enter the storage size.
- Units: Gi, Mi
- StorageClass:
- Choose the storage type or disk configuration that the cluster will use to provision the volume.
- StorageClass is enabled only after a Cluster is selected; only StorageClass supported by the selected cluster are displayed.
Select Model:
- Project: Choose the project to which the volume and model belong.
- Model:
- Choose the model that uses this volume.
- Model is enabled only after a Project is selected; only models under the selected project are displayed.
- Tag:
- Choose the model tag (version).
- Tag is enabled only after a Model is selected; only tags corresponding to the selected model are displayed.
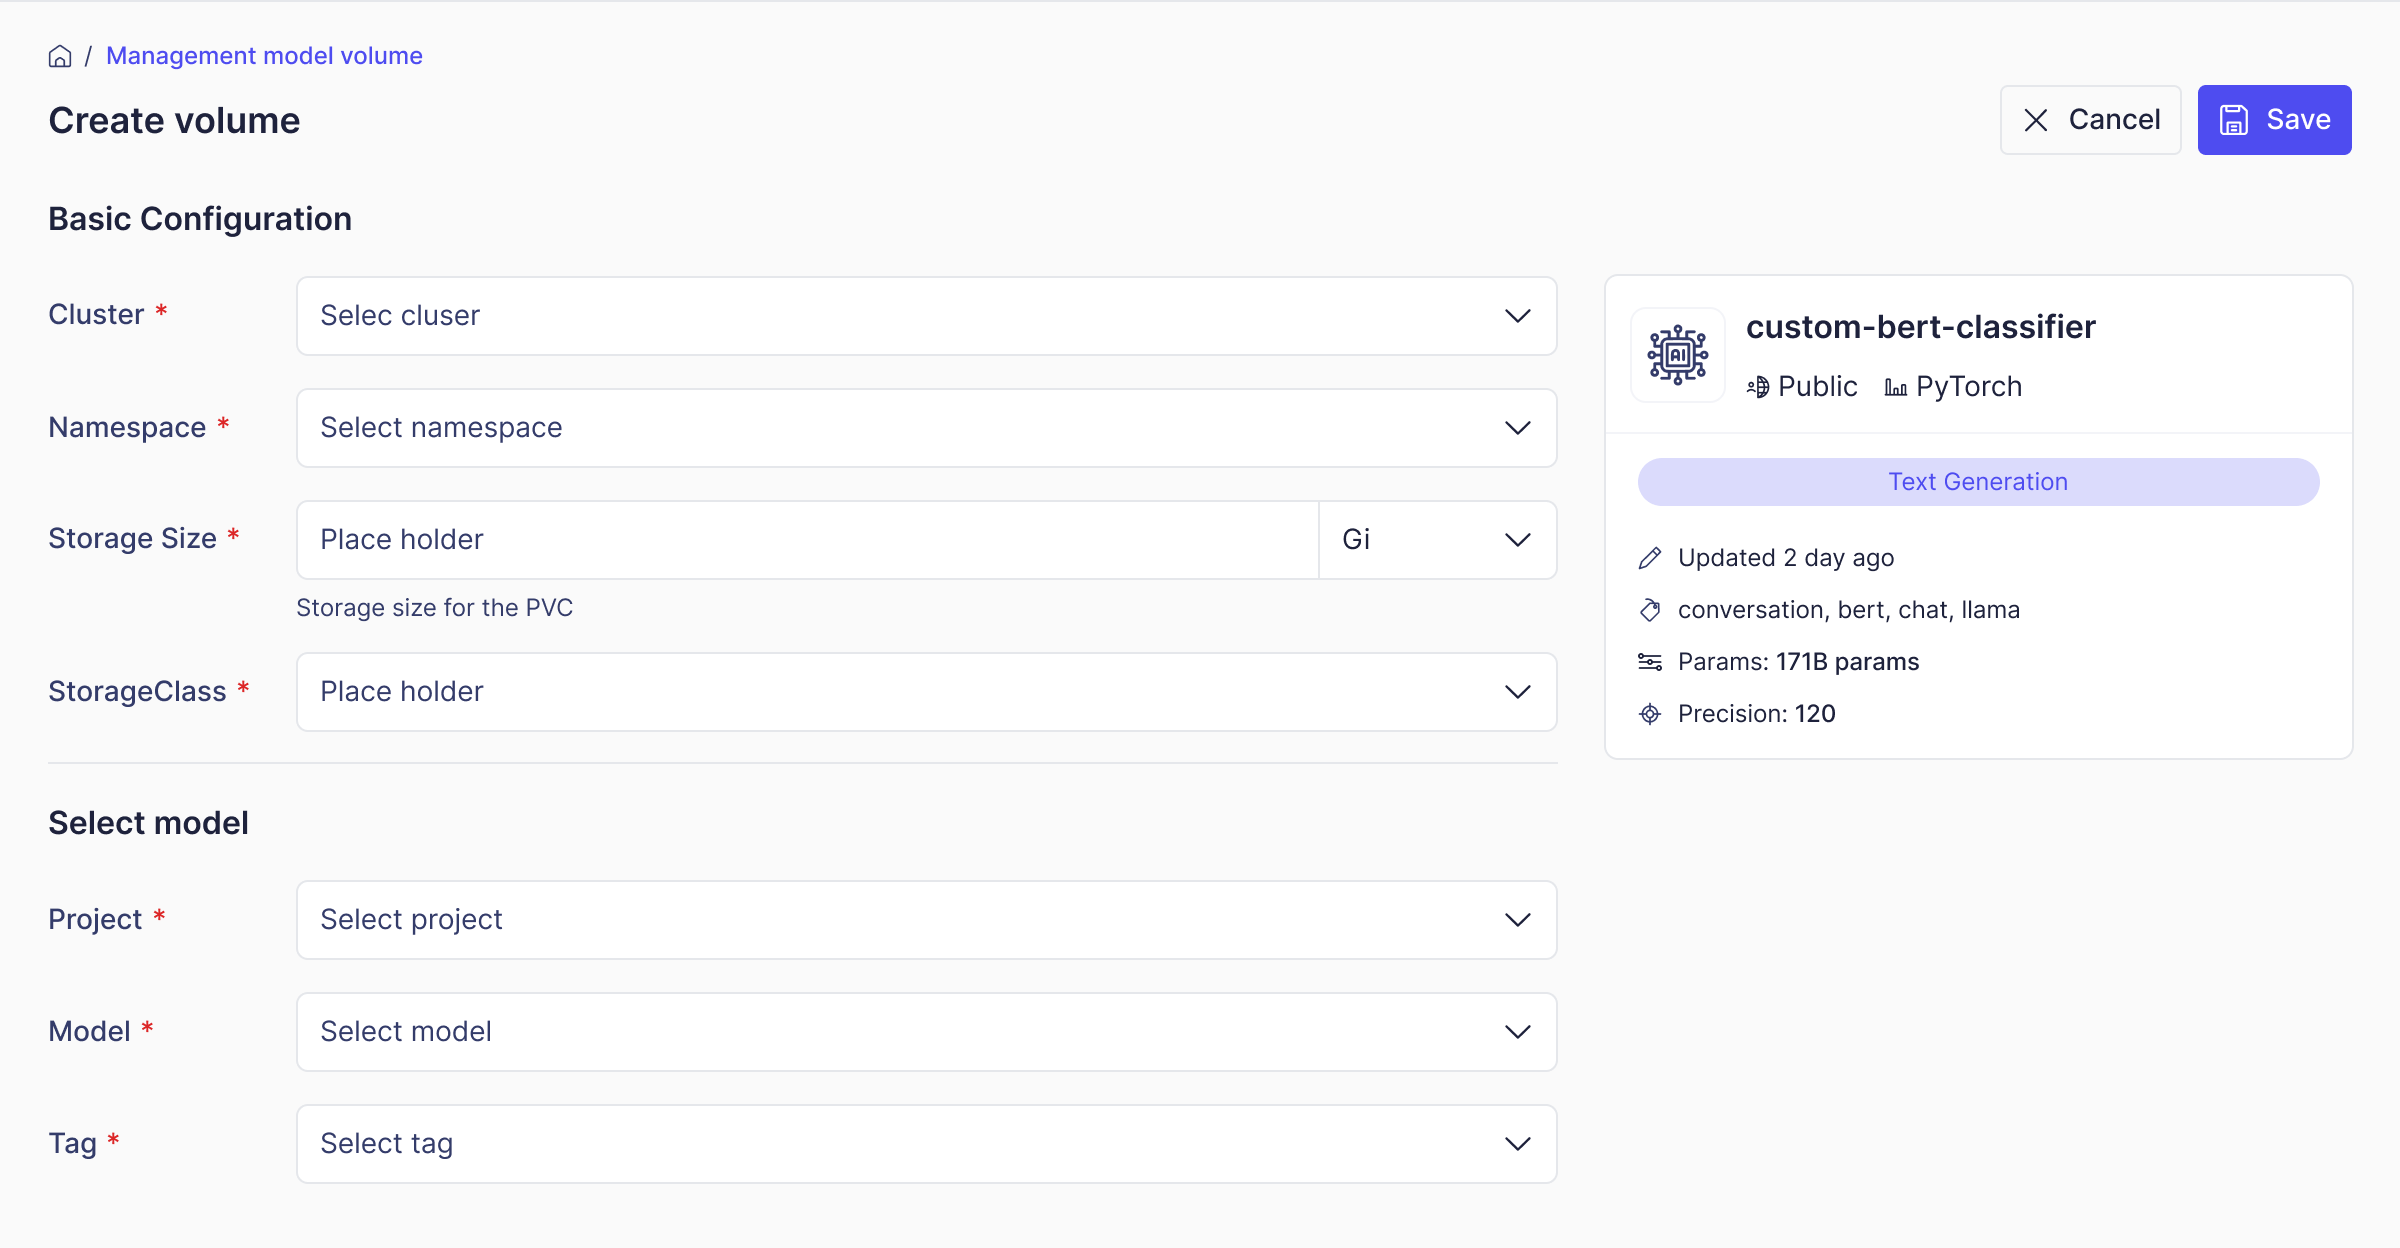
After a model is selected, the selected model information is displayed on the right side:
- After completing the form, click Save to create Volume. In case you want to discard the changes, click Cancel.