APIM Developer Portal User Guide
Introduction
In this guide, there are details about the tasks that user can perform within the APIM Developers Portal.
Creating a My Application
Firstly, user needs to know how to create an Application.
What is an Application?
An Application represents the user’s service or system for development or operation. Through it, users can issue API Keys, API URLs, request access to APIs, and test APIs via Swagger.

Steps to create an Application
- Go to Global Menu > Application > My Application
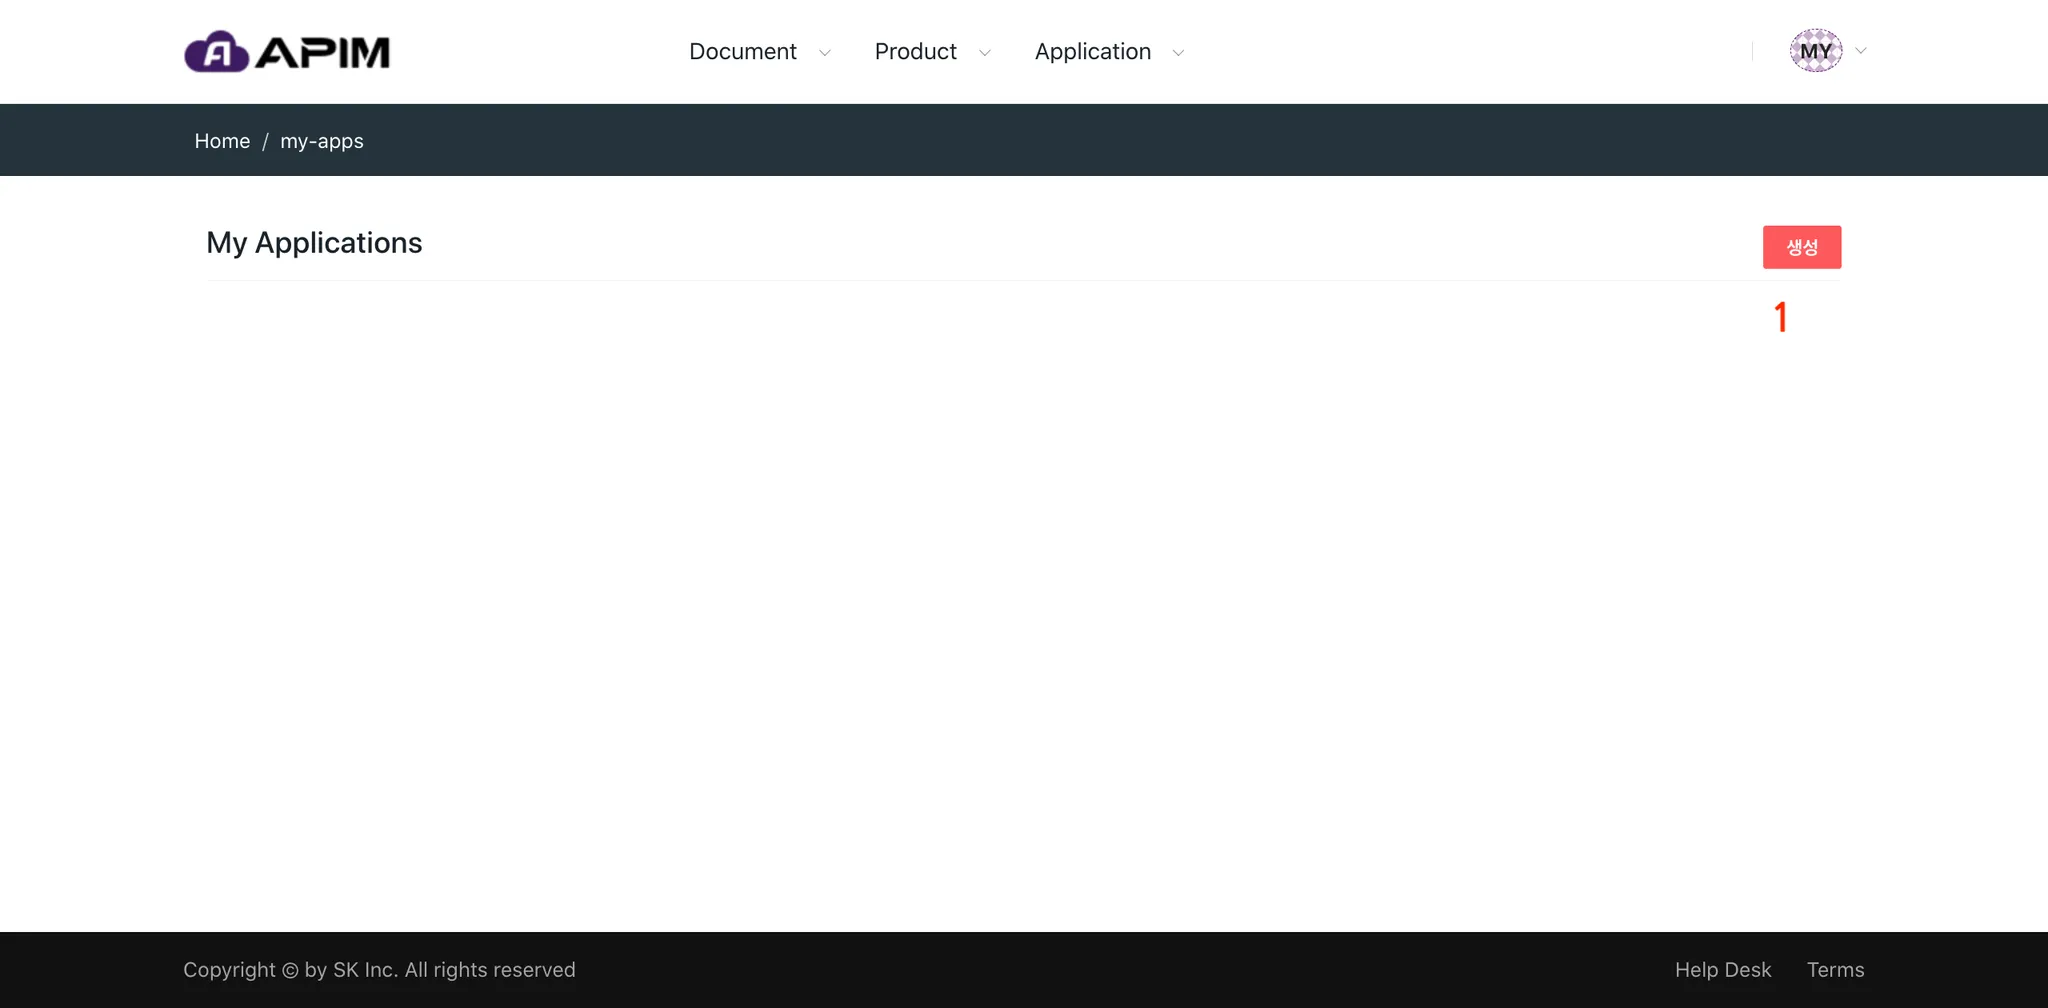
- Click the “Create” button on the My Applications screen.
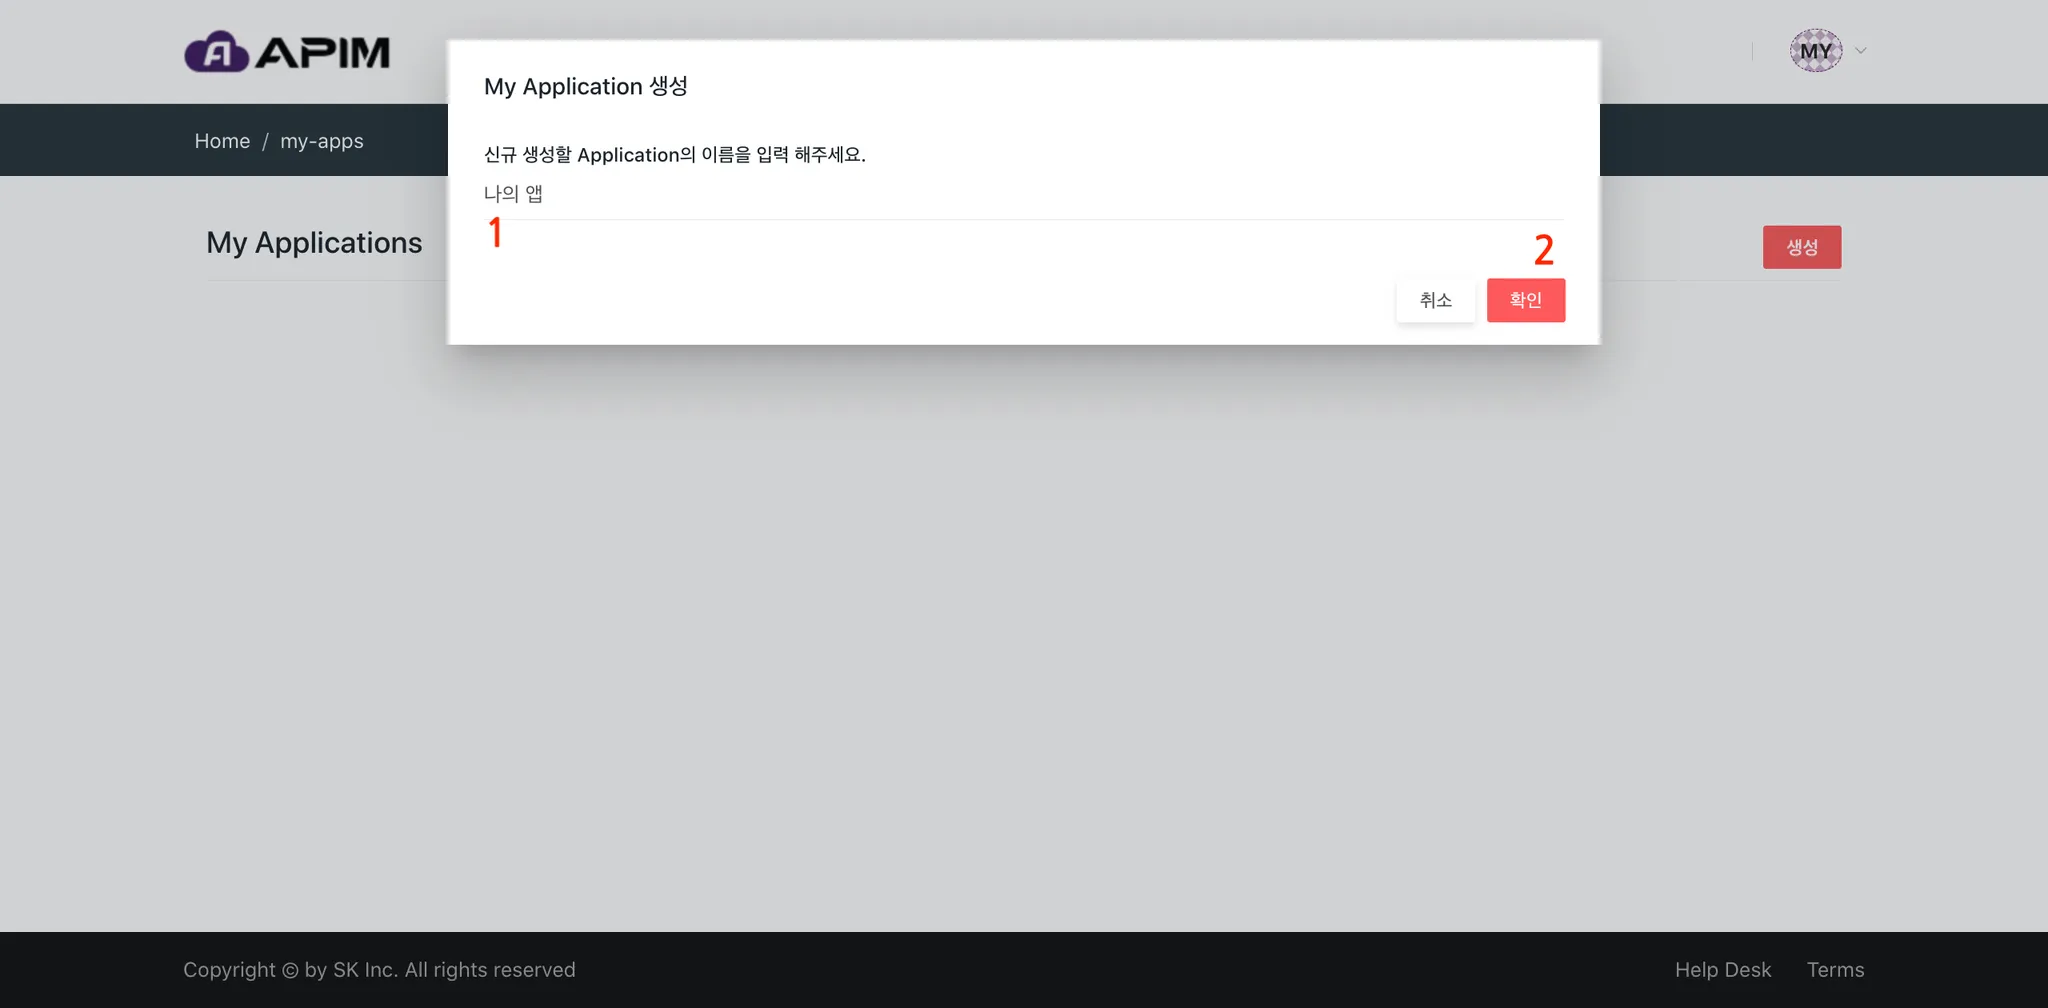
- Enter a name for the new Application (Korean, English, and spaces allowed).
- Click “Confirm” to create the Application.
My Application
This is the user’s workspace. You can add members, request API access, test via Swagger, and manage API Keys.
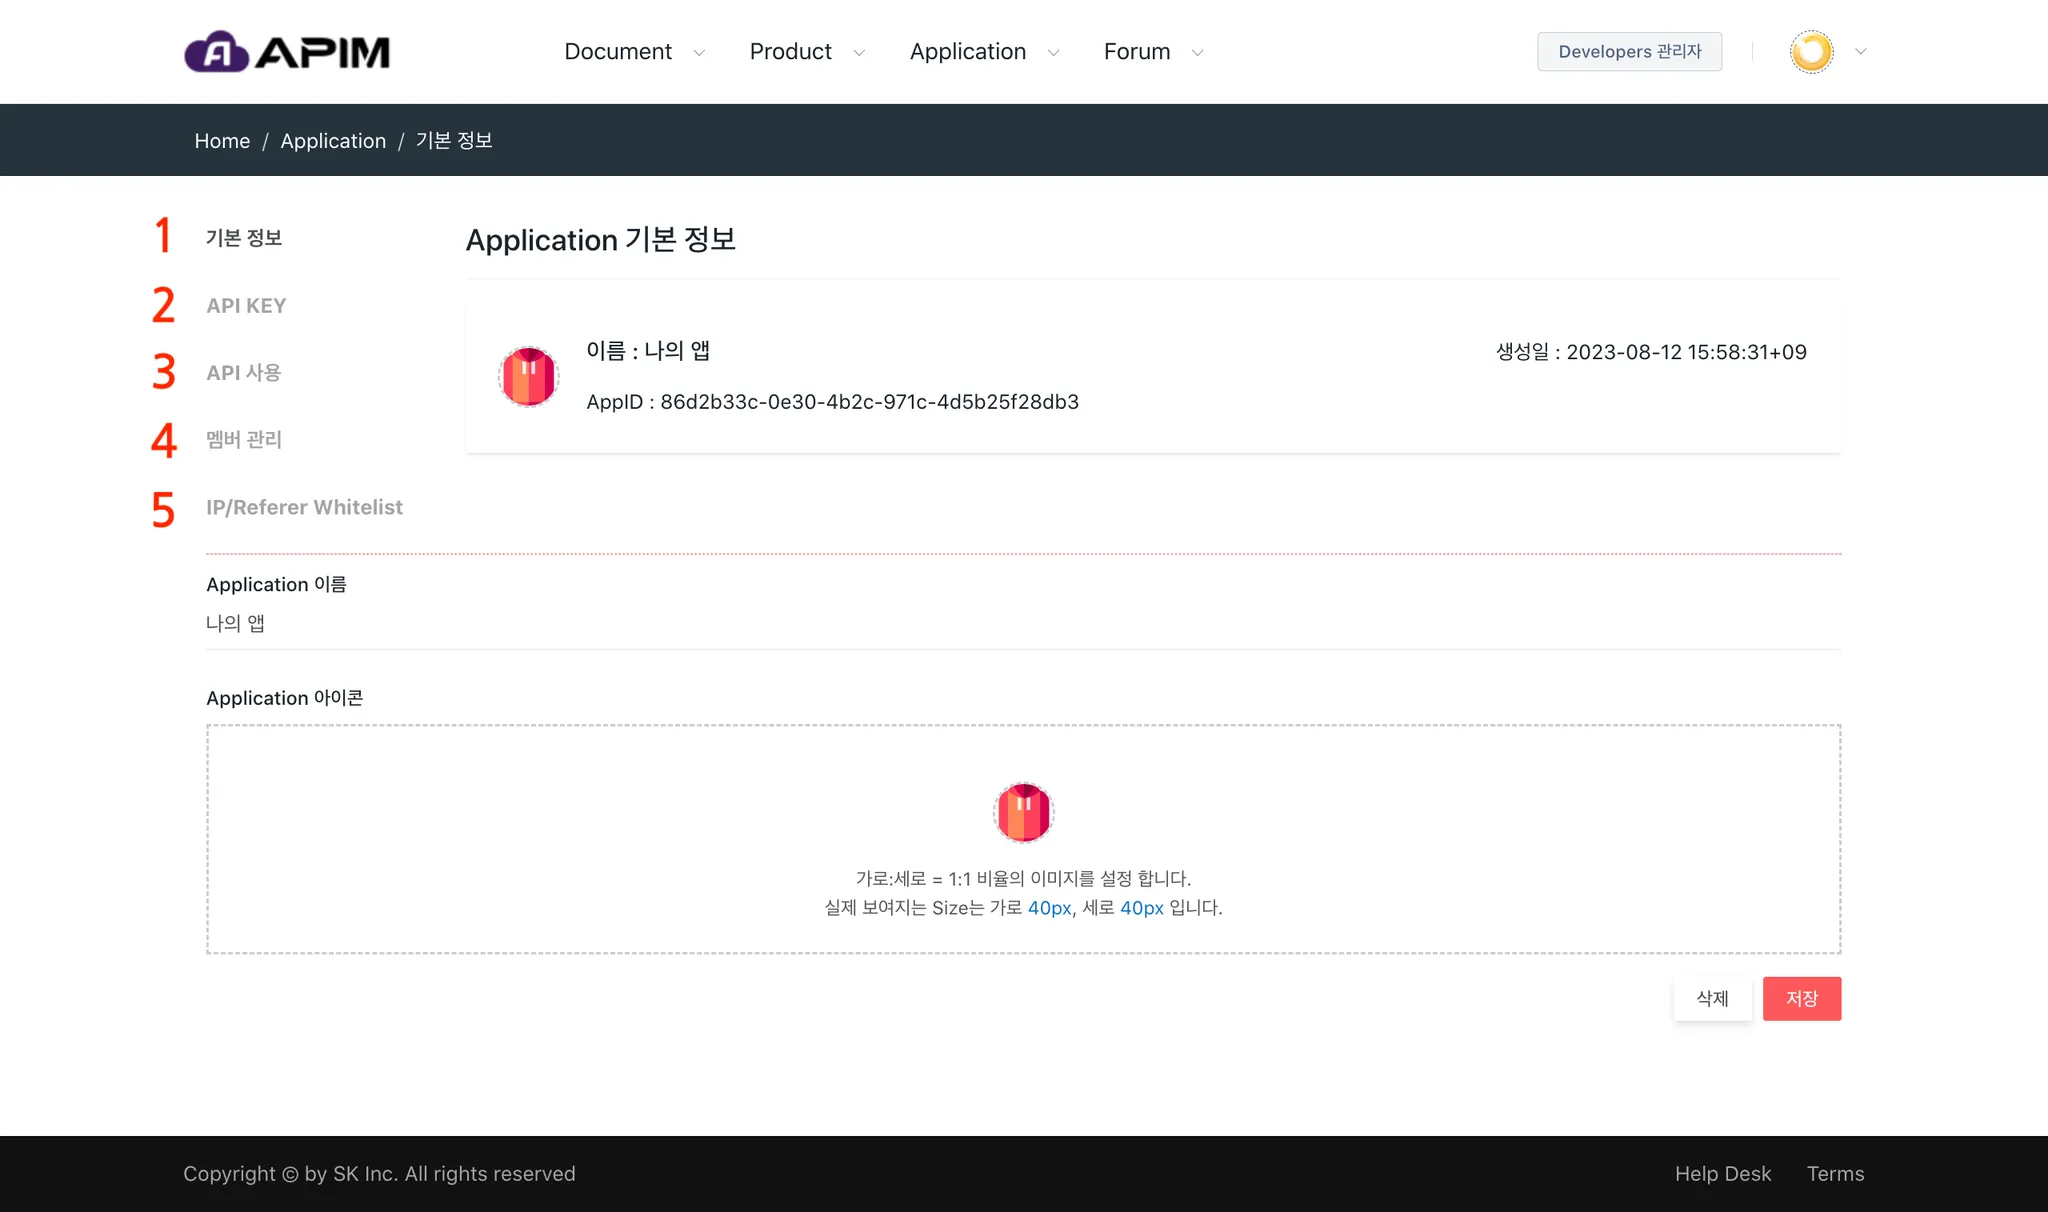
Screen components:
- Basic Information: Set application name and icon; delete unused applications.
- API KEY: Used for authentication during API calls. Automatically issued at creation; can be reissued by the App. Administrator.
- API Usage: Request access to APIs by selecting them and describing usage intent. Once approved, you receive the API URL.
- Member Management: Add members and assign App. Administrator permissions.
- IP/Referer Whitelist: Restrict API calls to specific IPs or referers whitelisted only, block the others.
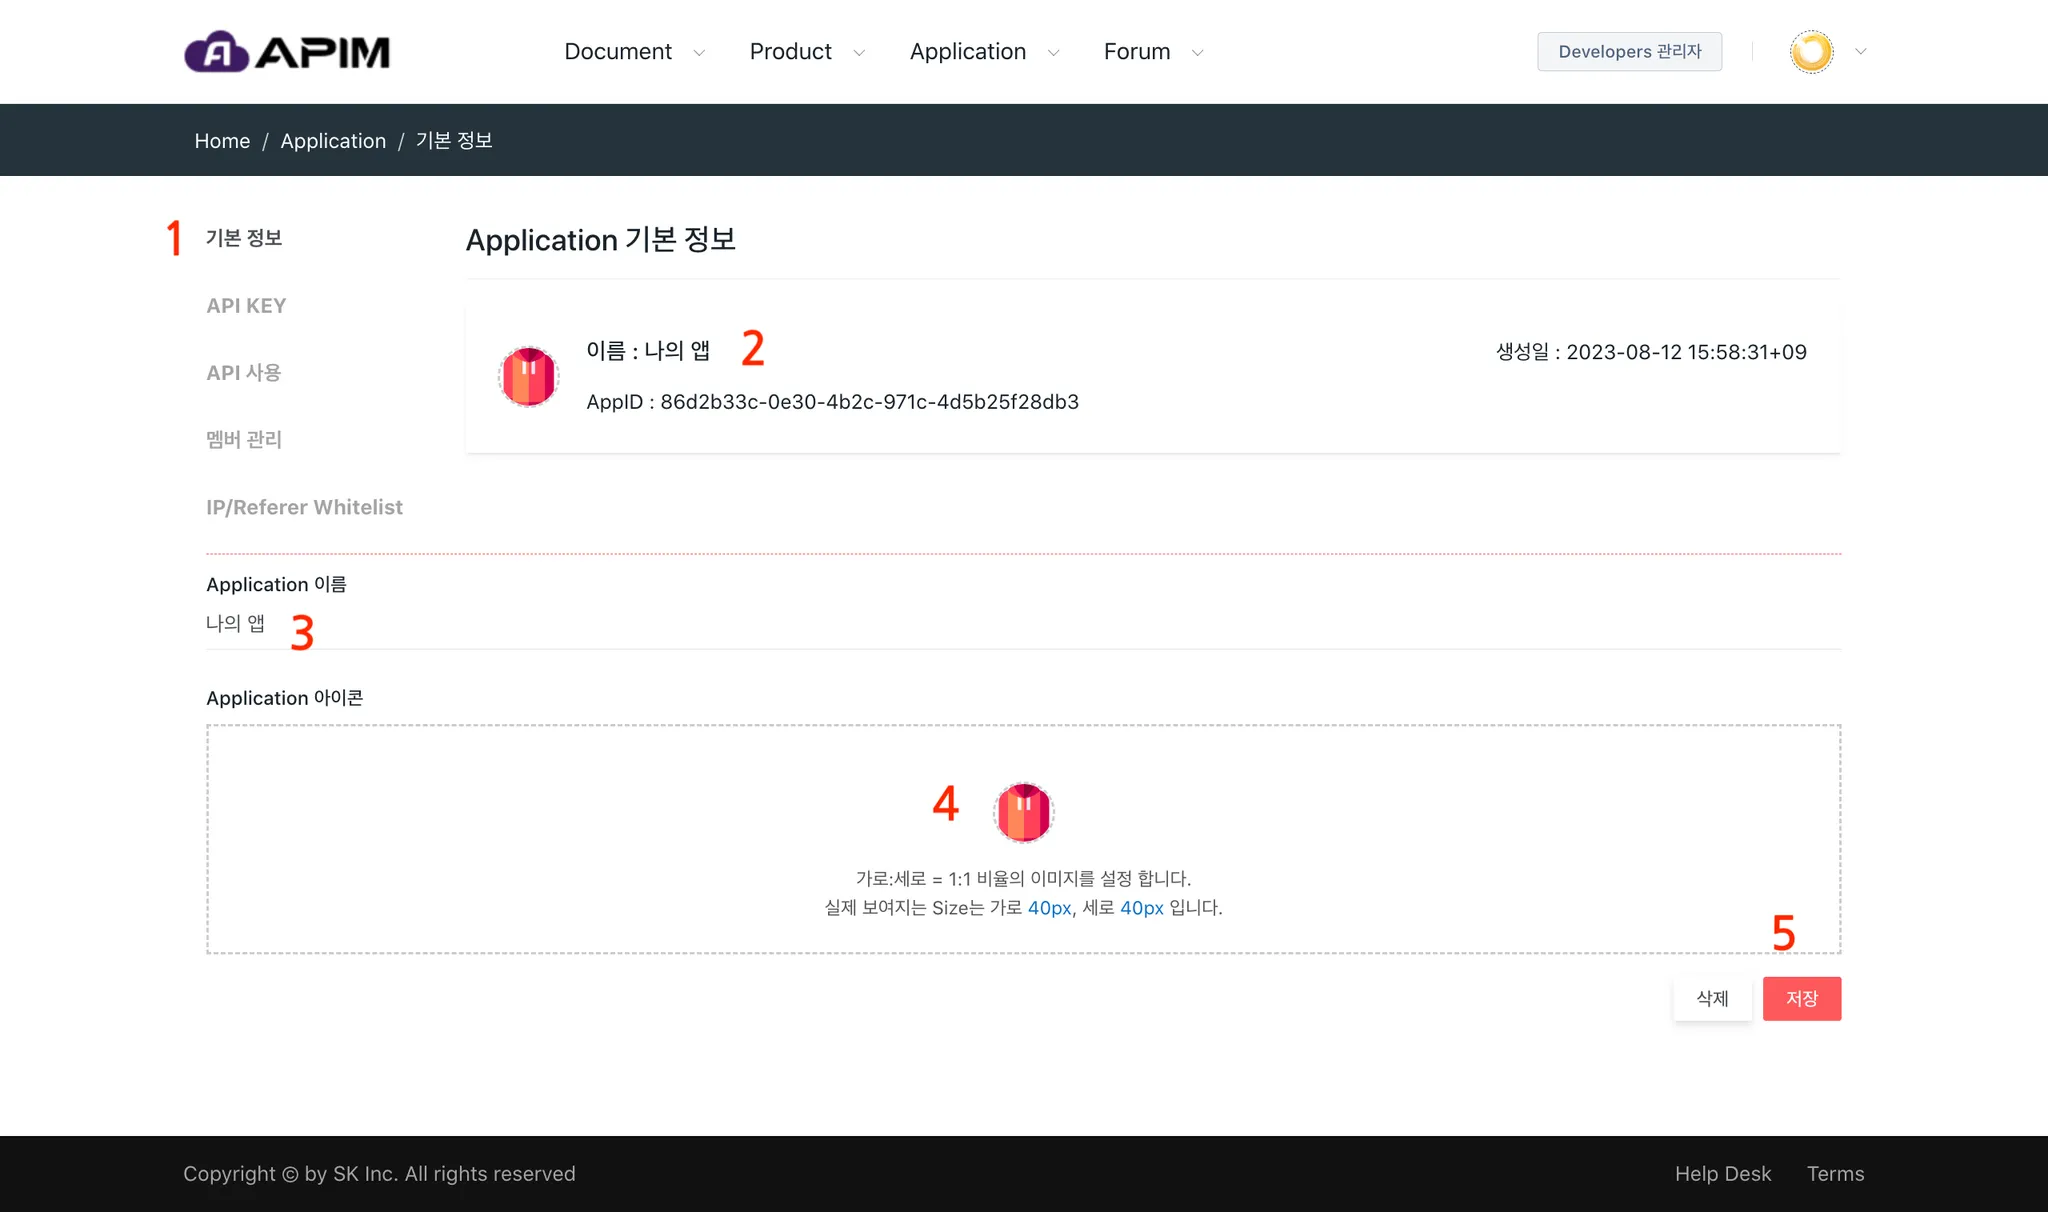
My Application - Basic Information
Manage application name and icon, and optionally delete the application.
Key points:
- Go to “Basic Information” to view details.
- Check Application name, AppID, and creation date.
- Edit Application name.
- Set or change the application icon.
- Save changes. App. Administrators can delete the application.
My Application - API KEY
This refers to the API KEY for authentication when calling the API. It is automatically issued when creating an application, and the App. Administrator can reissue it.
API KEY must be applied when calling the API. Otherwise, the API call will fail because there is no authentication.
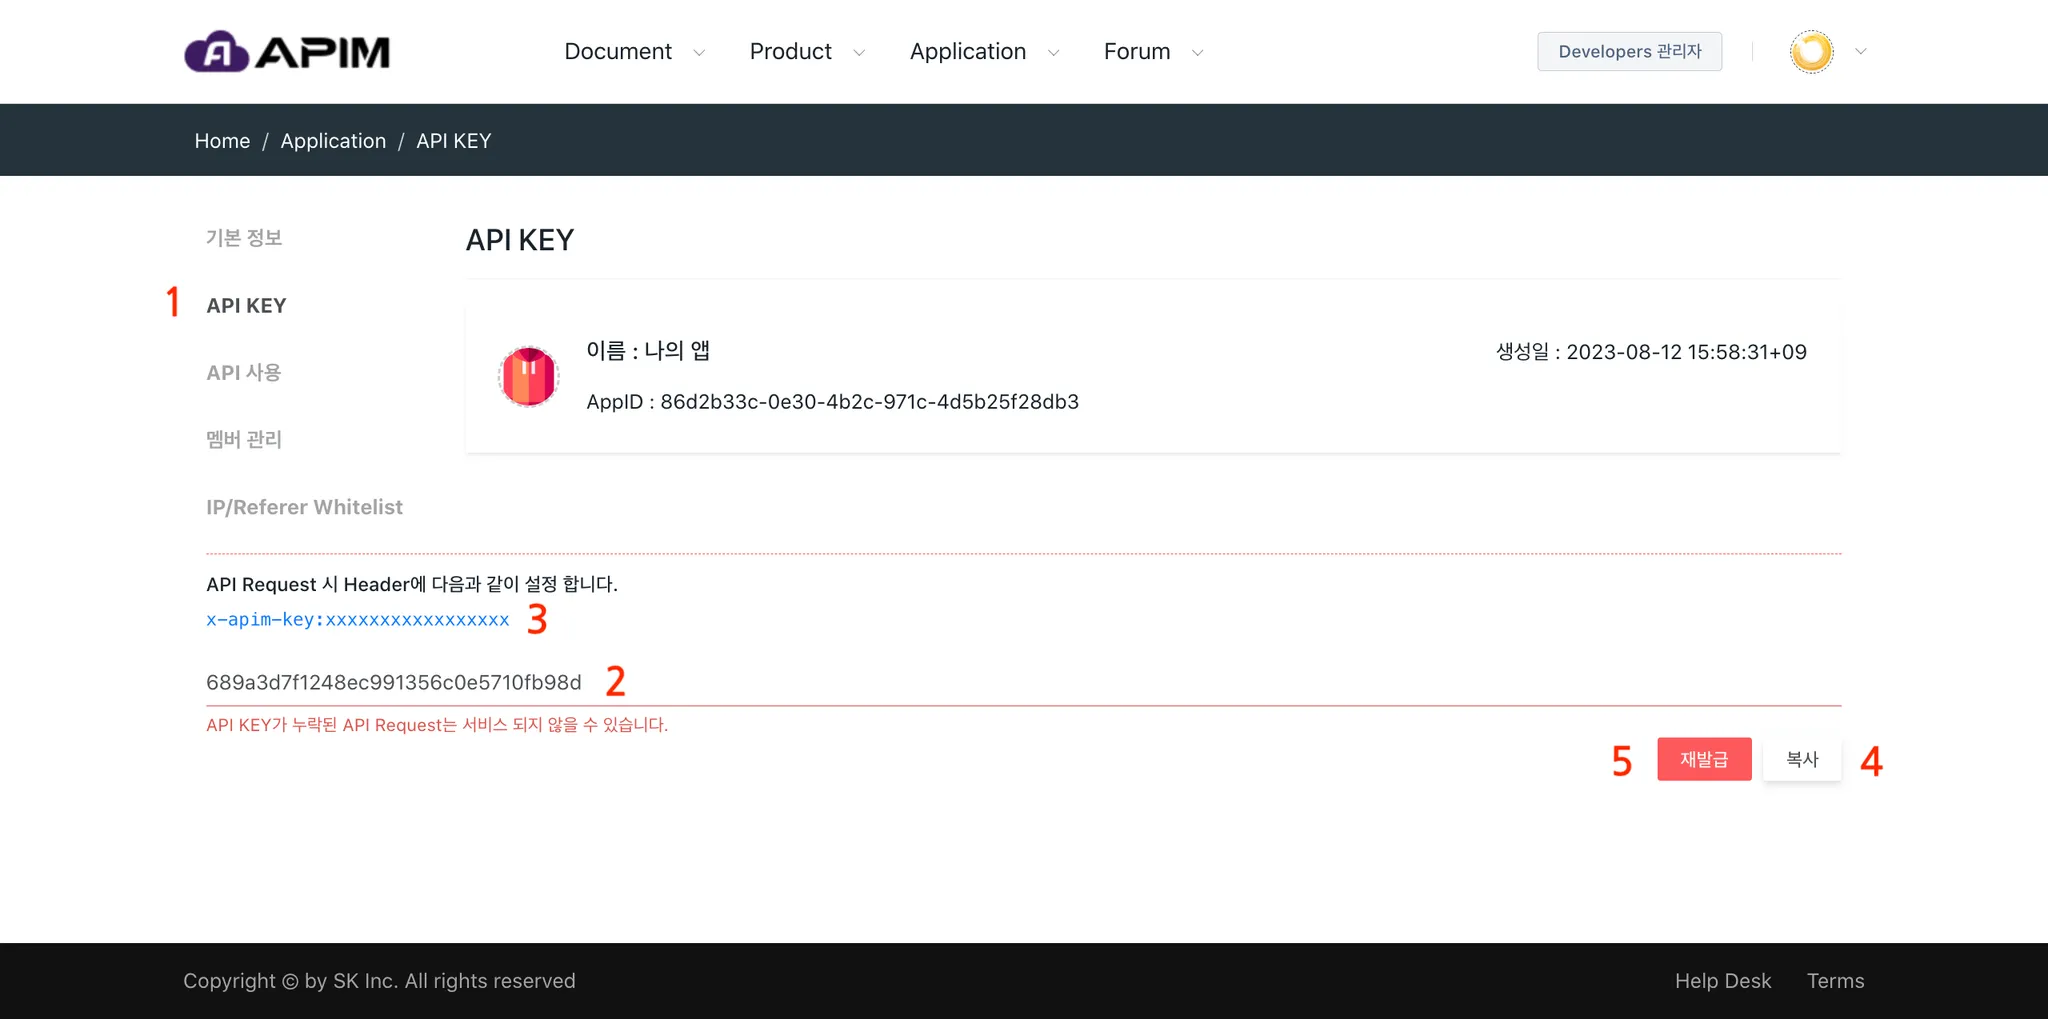
Key points:
- Access the API KEY menu.
- View the initial API Key issued at Application creation.
- When calling APIs, set it in the HTTP request header as:
x-apim-key: "xxxxxxxx"
My Application - API Usage
Select the API you want to use, enter the purpose of using the API, and request to use the API. If the request is approved, you will receive an API URL that allows you to call the API.

To use the API, follow the steps below:
- Go to the “API Usage” screen through the menu.
- Select which API you want to request to use by clicking the “Add” button.
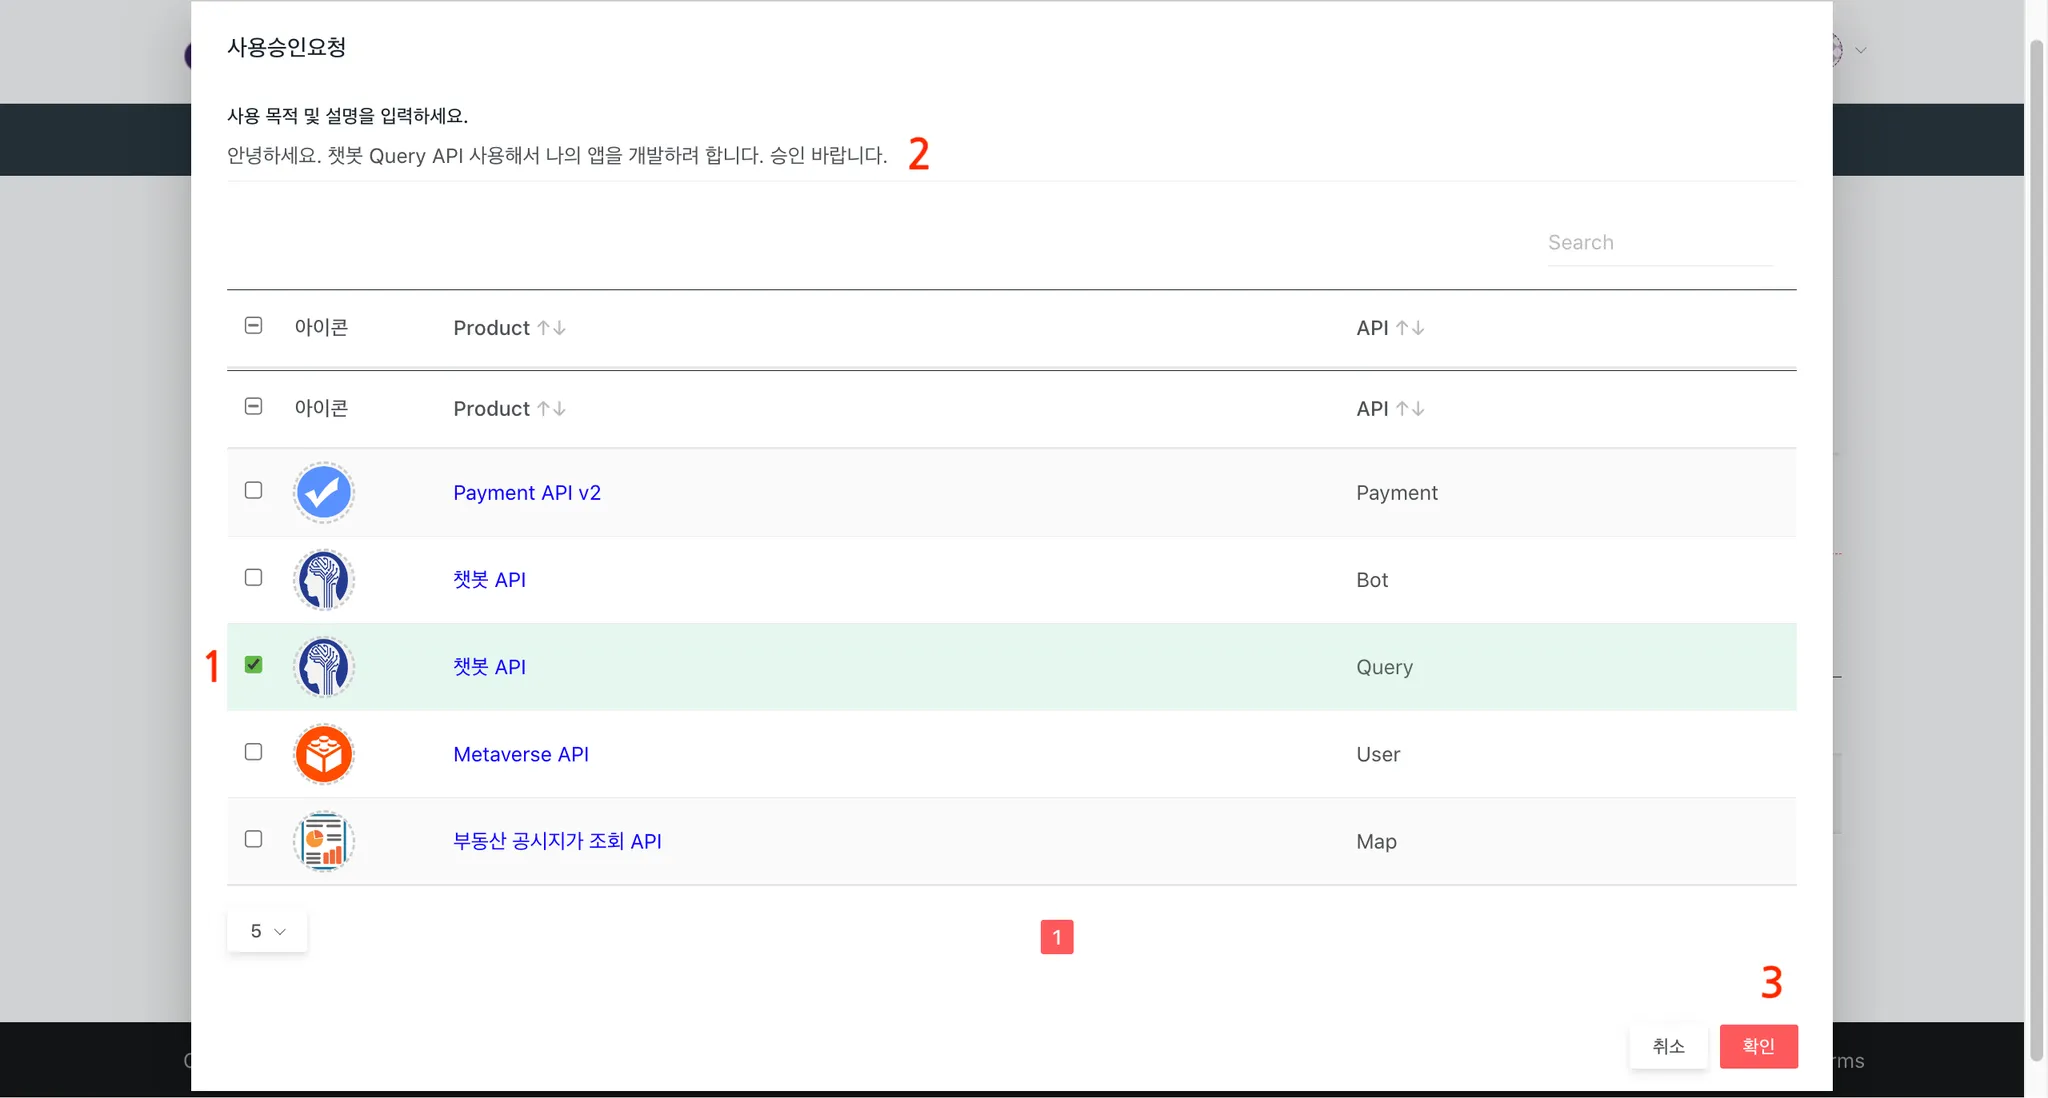
- In the “Usage Approval Request” pop-up, select the API to use by put a tick on the checkbox. Multiple selections are possible.
- Enter usage purpose/description.
- Click “Confirm” to submit the request (status will be set to “Pending”).
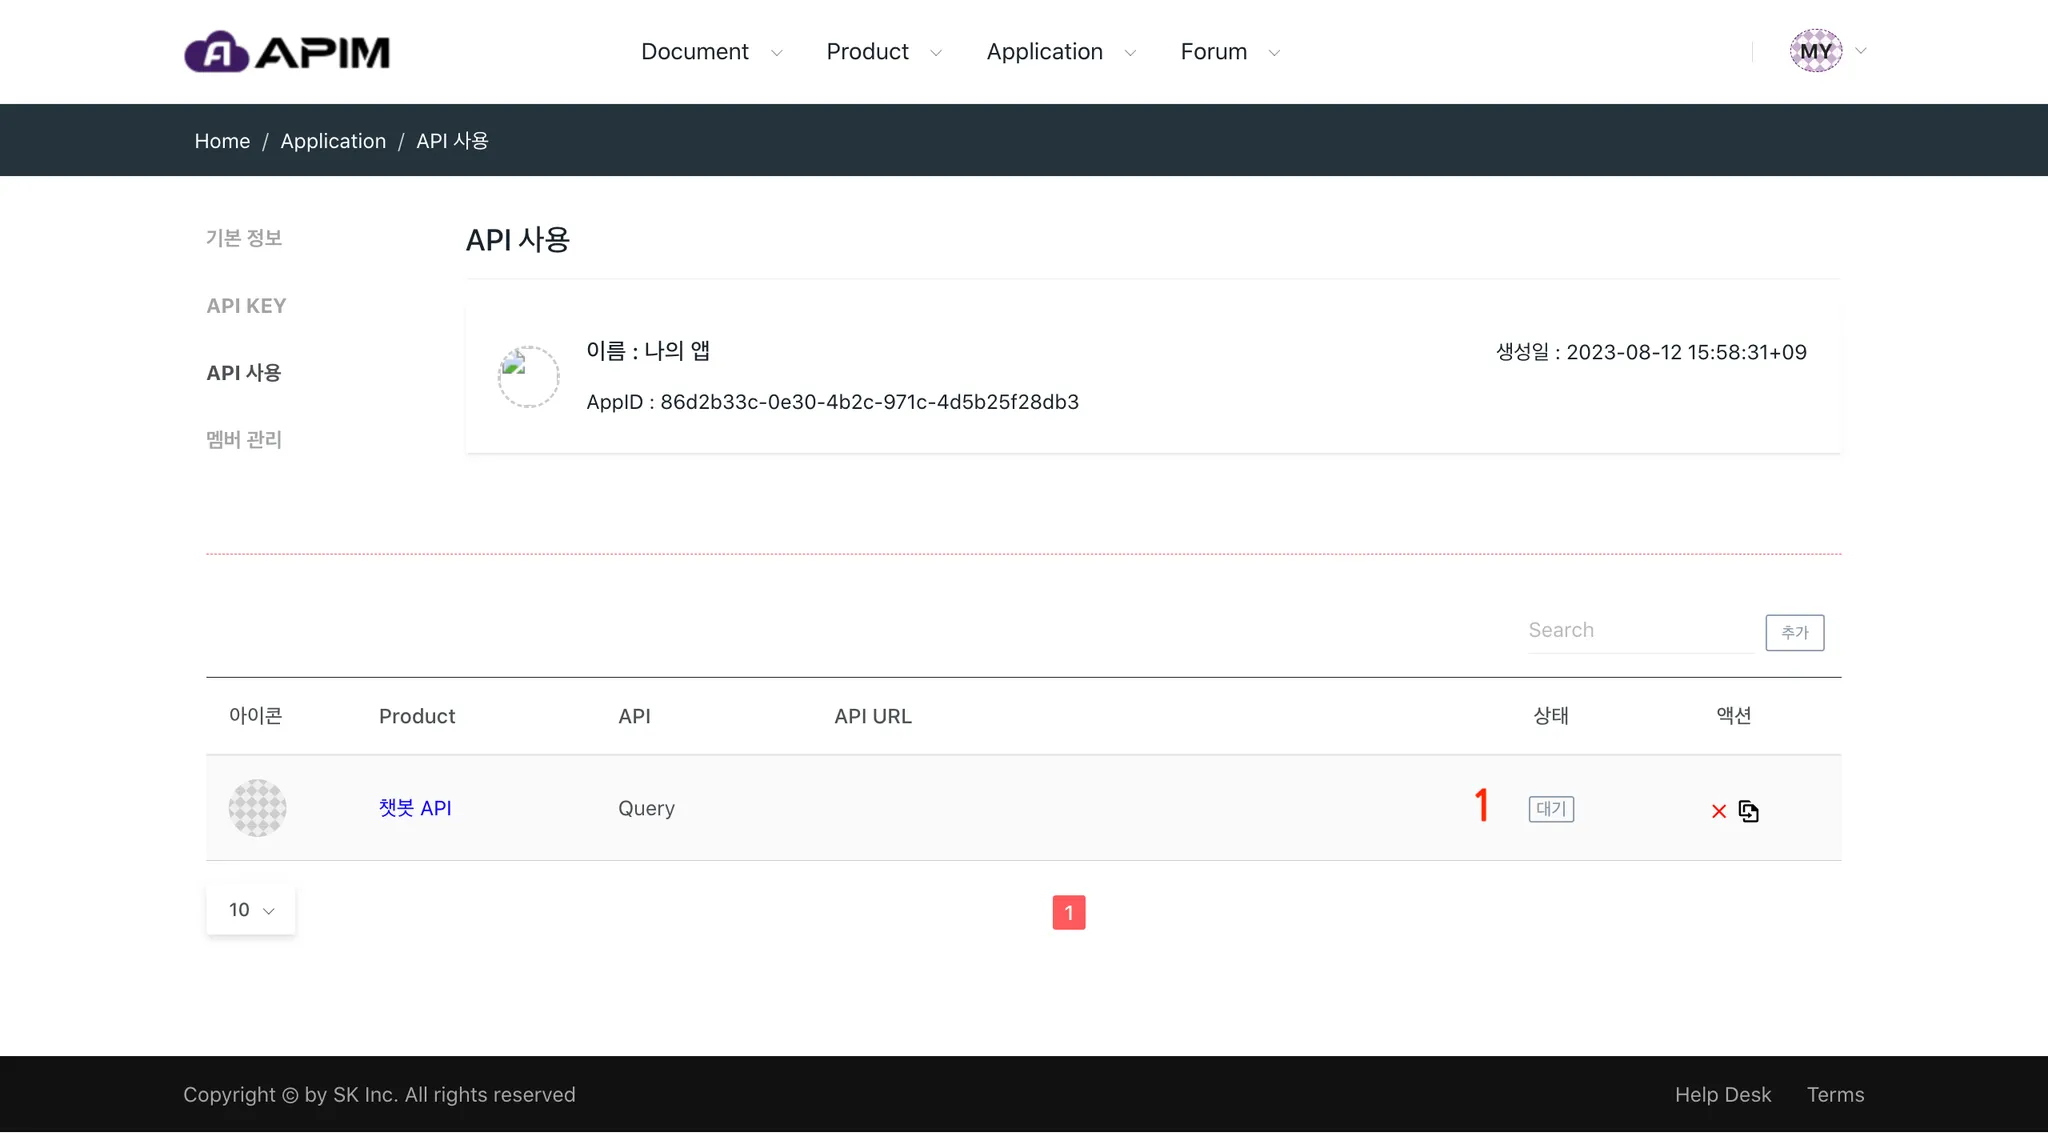
Above is the screen after requesting API usage, it shows the “Pending” status for the API usage request. Since the API usage request notification has been delivered to the API manager, it will wait for approval.
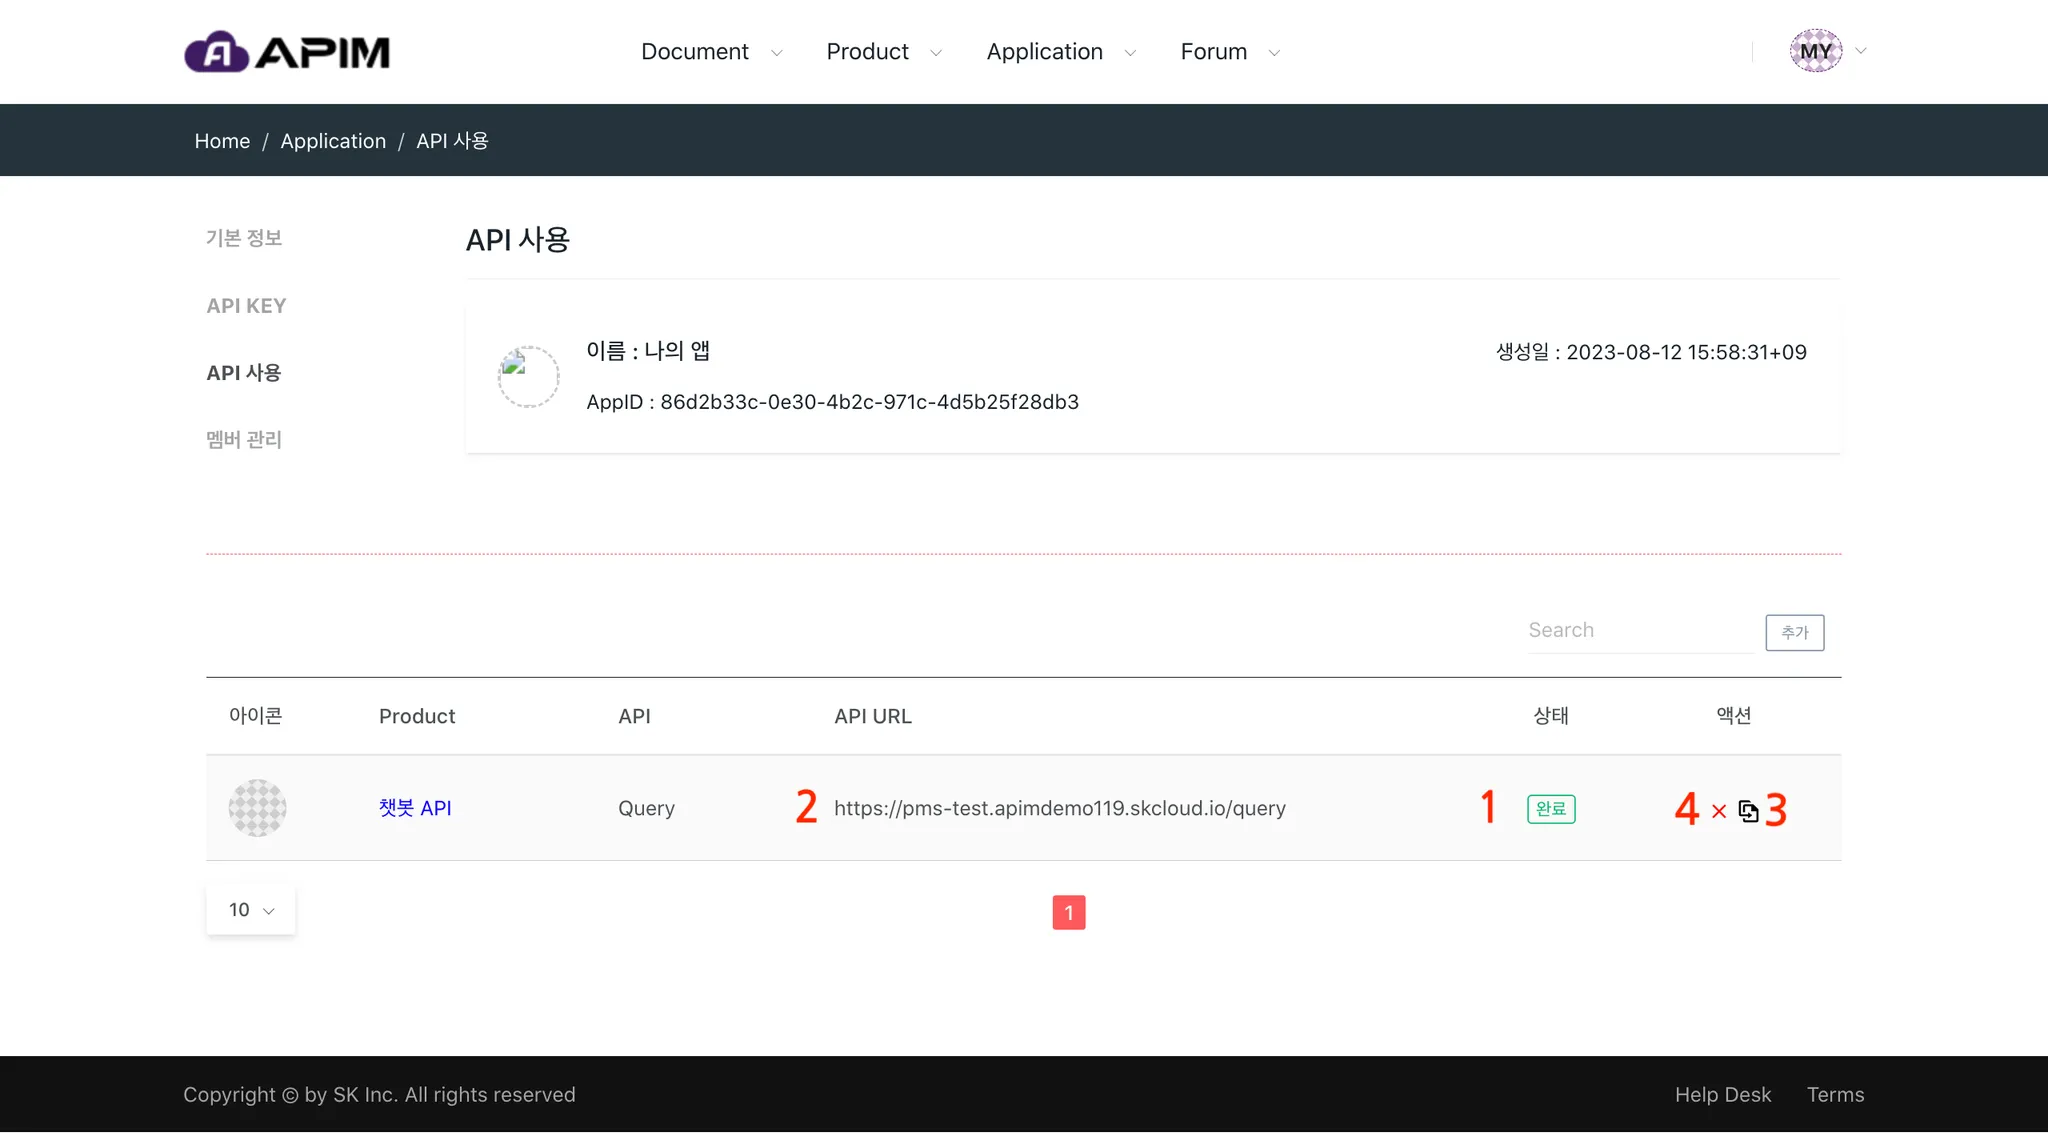
Once the API manager approves:
- Status changes to “Approved”.
- An API URL that can be used for API calls is issued.
- You can test the API using Swagger.
- You may cancel the request or delete “Approved” APIs.
If you delete an API, the issued API URL becomes invalid.
API Test - Swagger UI
API document is provided based on Swagger, and API call tests are performed through Swagger > Try it Out > Execute.

Follow the steps below to test APIs:
- Copy your API KEY from the API KEY screen.
- In Swagger UI, click “Authorize” and enter the API KEY.
- Select API method and path.
- Click on “Try it Out > Execute”.
API KEY must be applied when calling the API. Otherwise, the API call will fail due to authentication failure.
My Application - Member Management
This function is to add members to the Application and grant App. Administrator permission to the added members. The user who first created the Application is granted App. Administrator permission as default.

Follow the steps below:
- Go to the “Member Management” menu.
- The original creator is automatically granted App. Administrator privileges.
- Click “Add” to add members.
Only members who have registered on the APIM Developer Portal can be added. Please instruct the users who will be added as members to first register on the APIM Developer Portal.
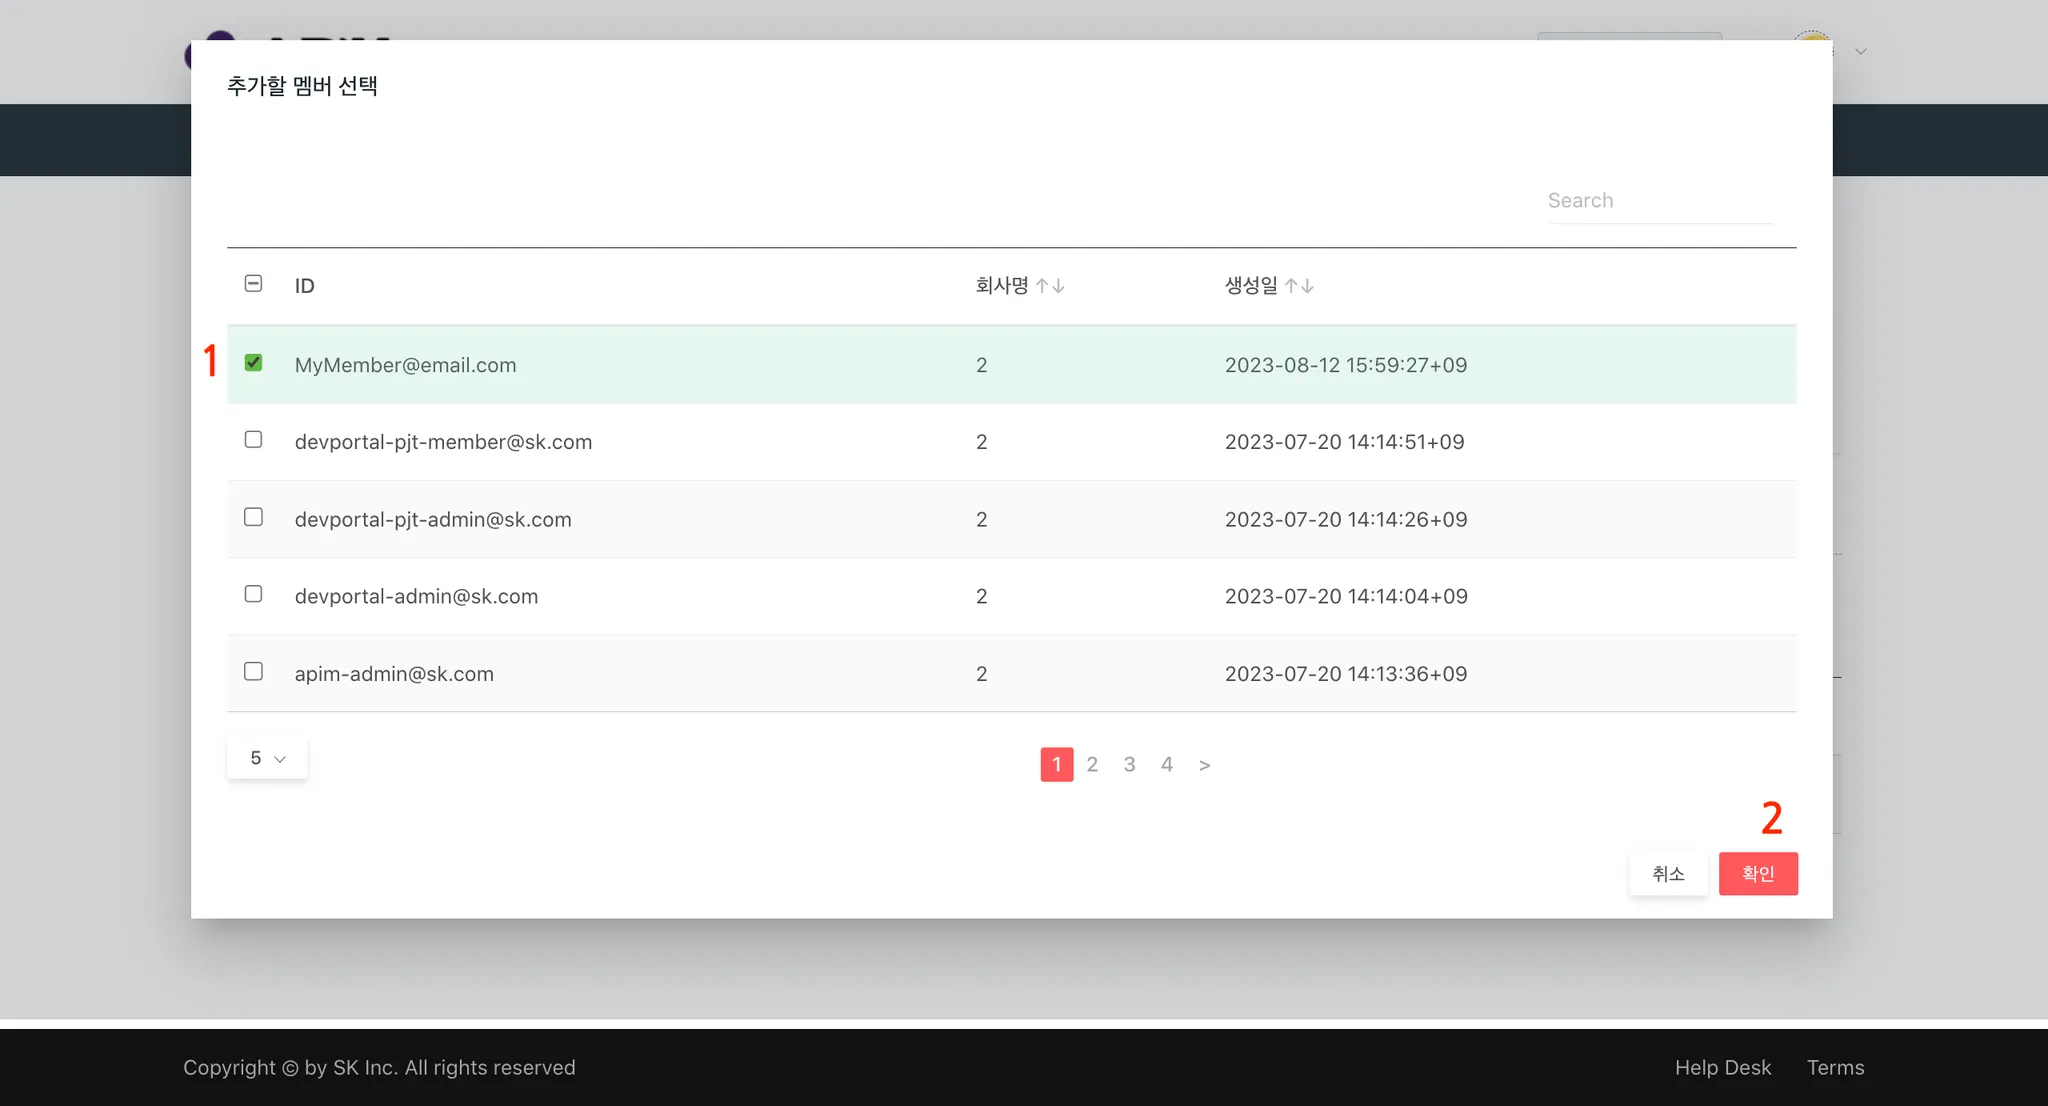
On “Add Member” pop-up, you can follow the steps below:
- Select one or more users to add.
- Click “Confirm” to complete the process.
Make sure to check the user ID of the member you want to add to avoid adding the wrong user.

After completing adding member, you can see the following components on the screens:
- You can check the added members.
- You can grant “App. Administrator” authority to the added members.
- You can also exclude the added members from “Member” again.
App. Administrator permissions include:
- Modifying app name/icon
- Deleting the application
- Reissuing API Keys
- Requesting or canceling API access
- Managing members and admin roles
My Application - IP/Referer Whitelist
API calls are only allowed for IP/Referer Whitelists from limited origins, and other calls are blocked.
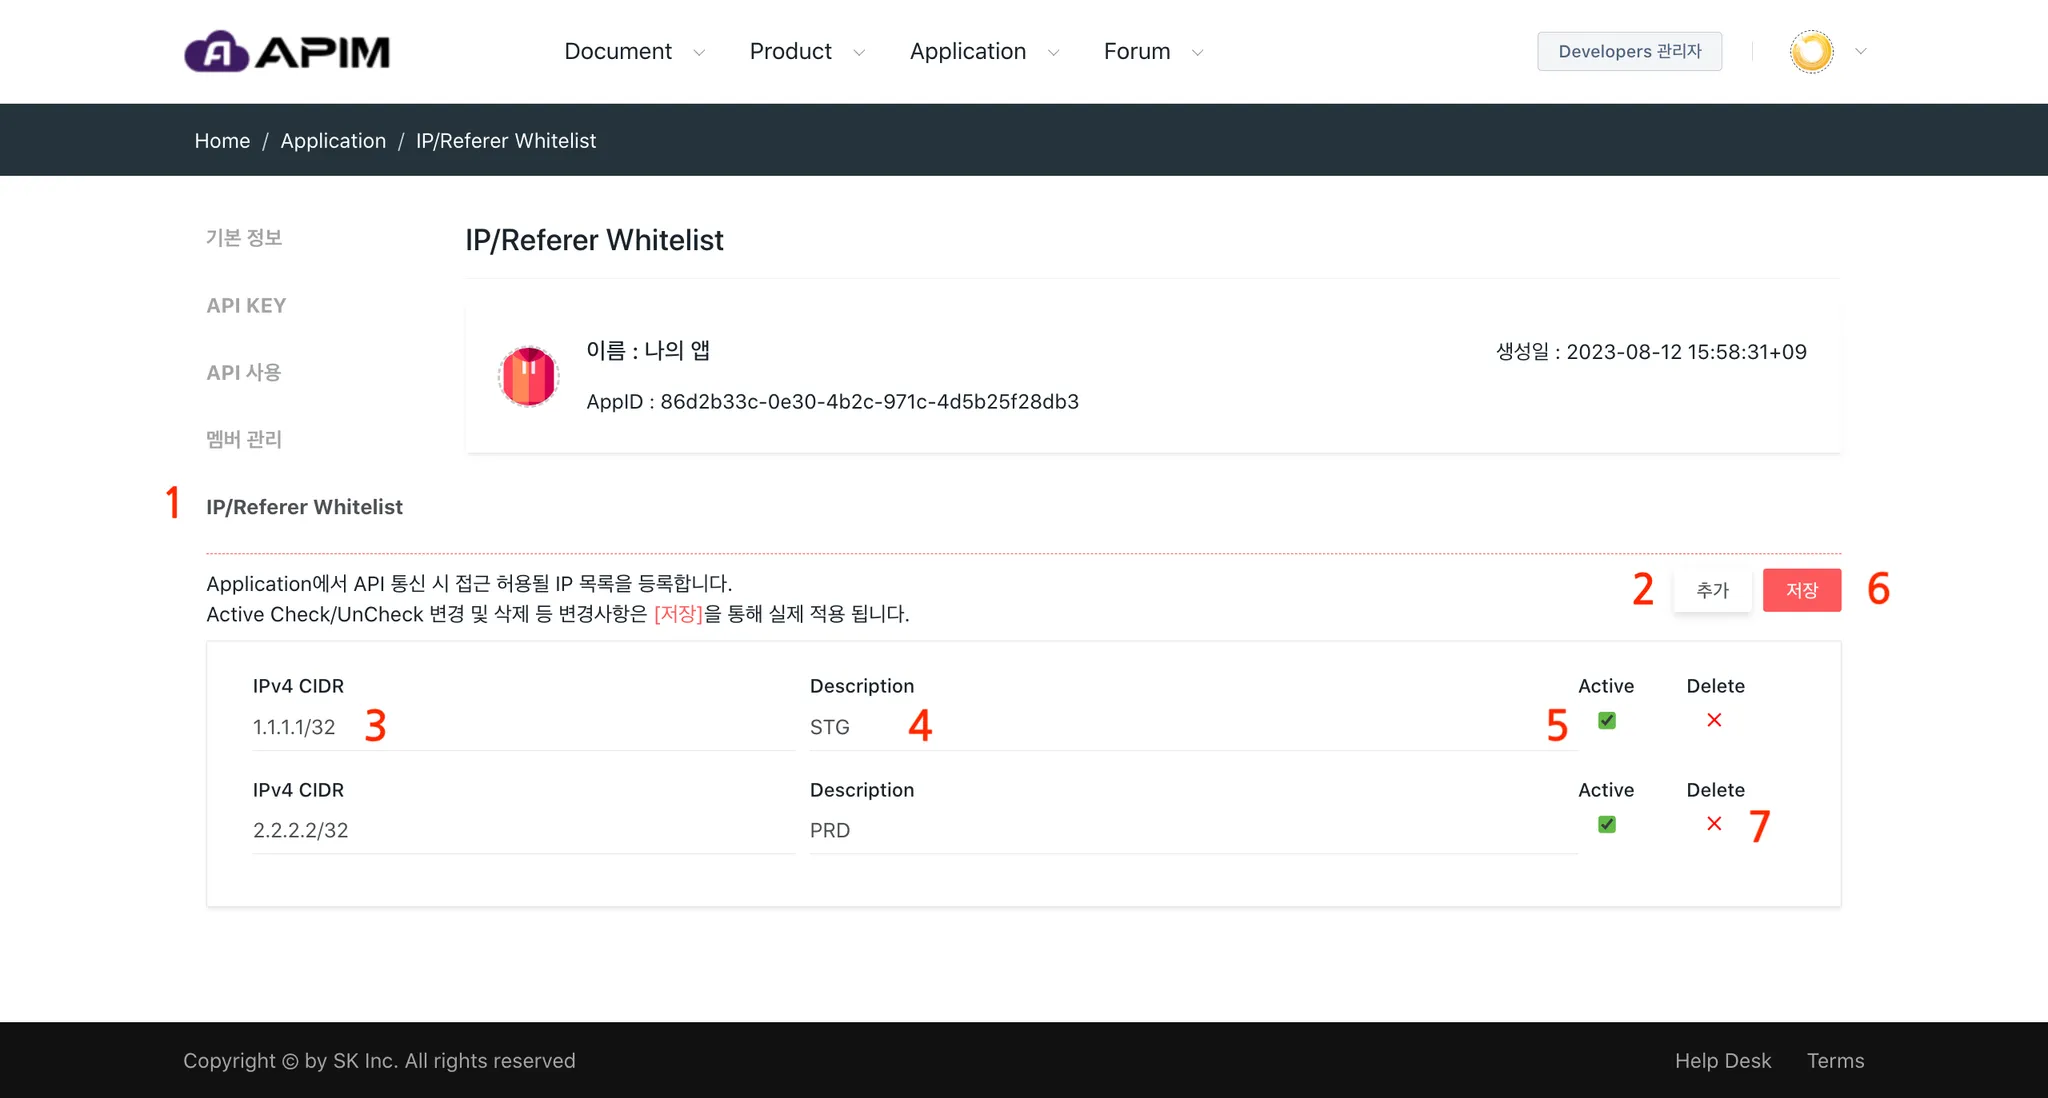
Follow the steps below to whitelist IP/Referer:
- Go to the “IP/Referer Whitelist” menu.
- Click “Add” to insert an entry.
- Enter the IPv4 CIDR format (e.g., 192.168.0.0/24).
- Add a description of the entry.
- Check “Active” to enable the rule. Be sure to save changes.
- Save the IPv4 CIDR entries. Oly items marked as “Active” will be applied.
- Delete entries as needed. Save after deleting.