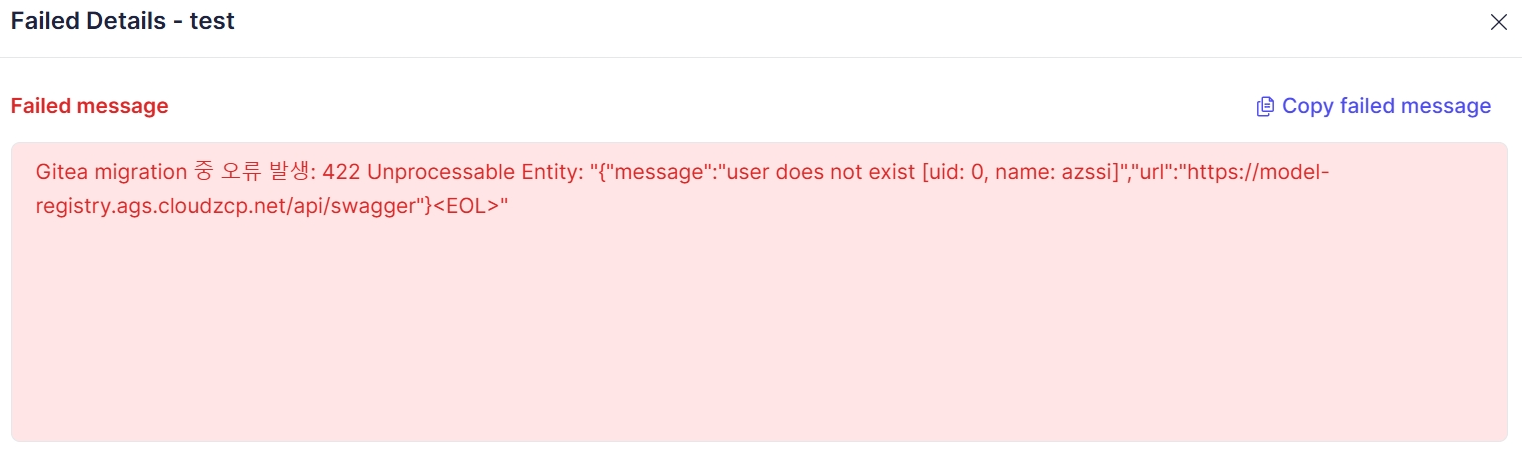
Màn hình Model List cho phép các quản trị viên hệ thống xem, lọc và quản lý tất cả các mô hình trong hệ thống. Người dùng có thể tạo mô hình mới, xem chi tiết mô hình và triển khai mô hình.
Truy cập Danh sách Mô hình
Từ Bảng điều khiển Quản trị Hệ thống, nhấp vào Model trong điều hướng chính. Sau đó, trong điều hướng bên trái, chọn Model List.
Màn hình hỗ trợ two view modes (Grid View and Table View), cho phép người dùng xem và quản lý dữ liệu theo nhiều cách khác nhau.
Chế độ xem Lưới
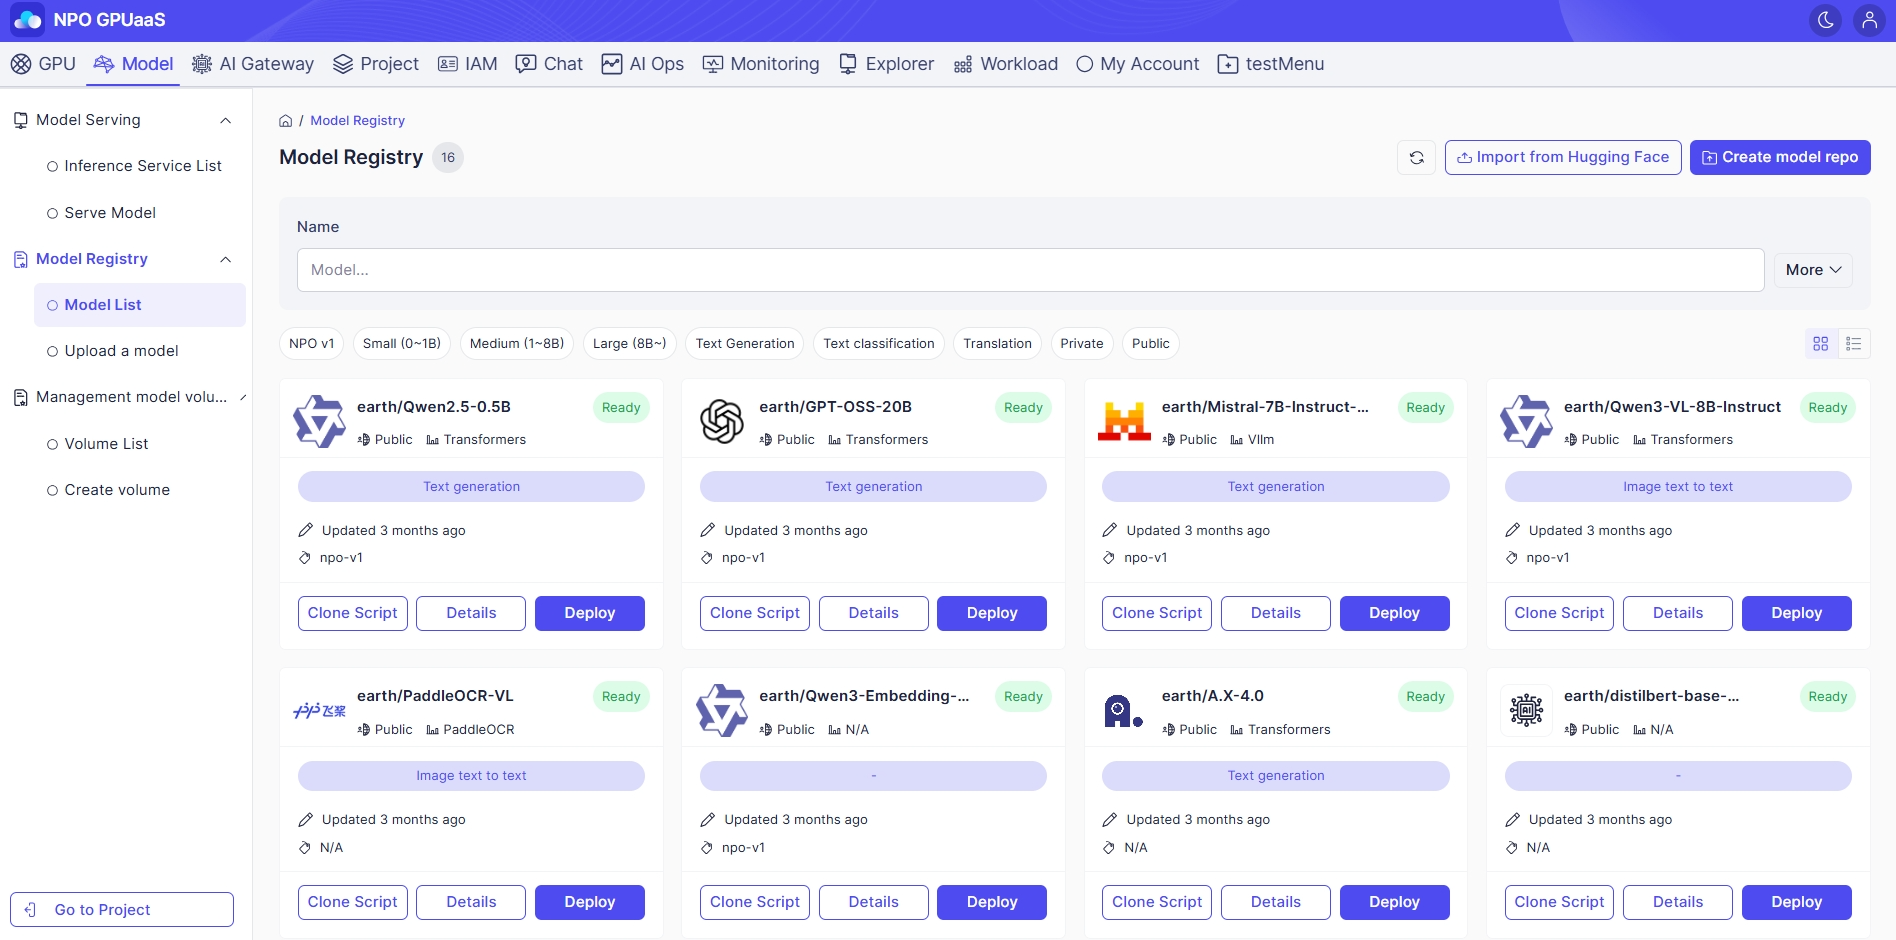
Tìm kiếm Mô hình
Người dùng có thể nhanh chóng tìm kiếm Mô hình theo tên:

Để có thêm tùy chọn tìm kiếm chi tiết, nhấp vào “Thêm” bên cạnh thanh tìm kiếm để mở bảng điều khiển tìm kiếm nâng cao:

- Name: Lọc theo tên Mô hình
- Library: Danh sách thả xuống để chọn một thư viện cụ thể hoặc tất cả các thư viện.
- Task: Danh sách thả xuống để chọn một nhiệm vụ cụ thể hoặc tất cả các nhiệm vụ.
- Model size: Sử dụng thanh trượt để lọc mô hình theo kích thước mô hình. (ví dụ: <1B, 6B).
Hệ thống tự động cập nhật danh sách mô hình theo thời gian thực khi người dùng chọn tiêu chí hoặc nhập giá trị.
Dưới phần lọc nâng cao, các bộ lọc nhanh này cho phép người dùng nhanh chóng lọc mô hình theo kích thước, khả năng và tính khả dụng:

Xem Danh sách Mô hình
Trên trang này, người dùng có thể xem nhiều thẻ, mỗi thẻ đại diện cho một mô hình trong hệ thống.
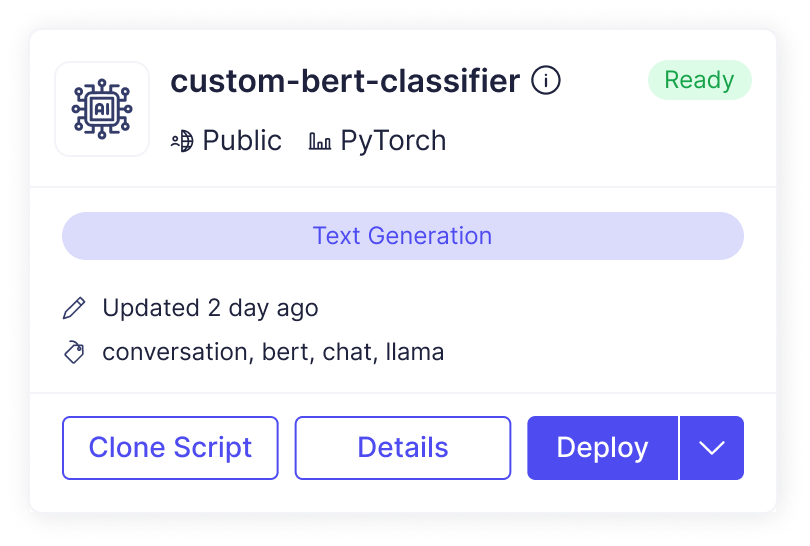
Mỗi thẻ hiển thị thông tin sau:
- Model name: Tên của mô hình
- Status: Trạng thái của mô hình (ví dụ: Sẵn sàng, Không sẵn sàng, Thất bại)
- Visibility: Hiển thị xem mô hình là Công khai hay Riêng tư.
- Library: Chỉ ra thư viện được sử dụng bởi mô hình.
- Task: Cung cấp thông tin để giúp người dùng xác định chức năng hoặc mục đích của mô hình.
- Updated At: Hiển thị thời gian cuối cùng mô hình được cập nhật.
- Card Tags: Hiển thị danh sách các thẻ liên quan đến mô hình.
Action Menu
Clone Script
- Chỉ hiển thị khi trạng thái của mô hình là “Sẵn sàng”.
- Khi nhấp vào, hệ thống sẽ sao chép kho Git chứa các tập lệnh và tệp nguồn của mô hình, cho phép chạy hoặc triển khai mô hình dựa trên mã đã sao chép.
Details
- Chỉ hiển thị khi trạng thái của mô hình là “Sẵn sàng”.
- Khi nhấp vào, hệ thống sẽ điều hướng đến màn hình Chi tiết.
Deploy
- Chỉ hiển thị khi trạng thái của mô hình là “Sẵn sàng”.
- Khi nhấp vào, hệ thống sẽ điều hướng đến màn hình Triển khai Mô hình.
Failed Details
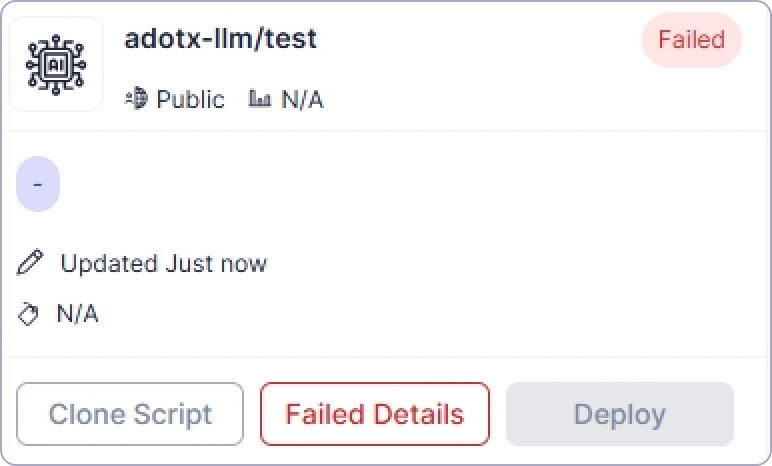
- Chỉ hiển thị khi trạng thái của mô hình là “Thất bại”.
- Khi nhấp vào, một popup sẽ hiển thị lý do tại sao việc nhập mô hình thất bại.
Table View
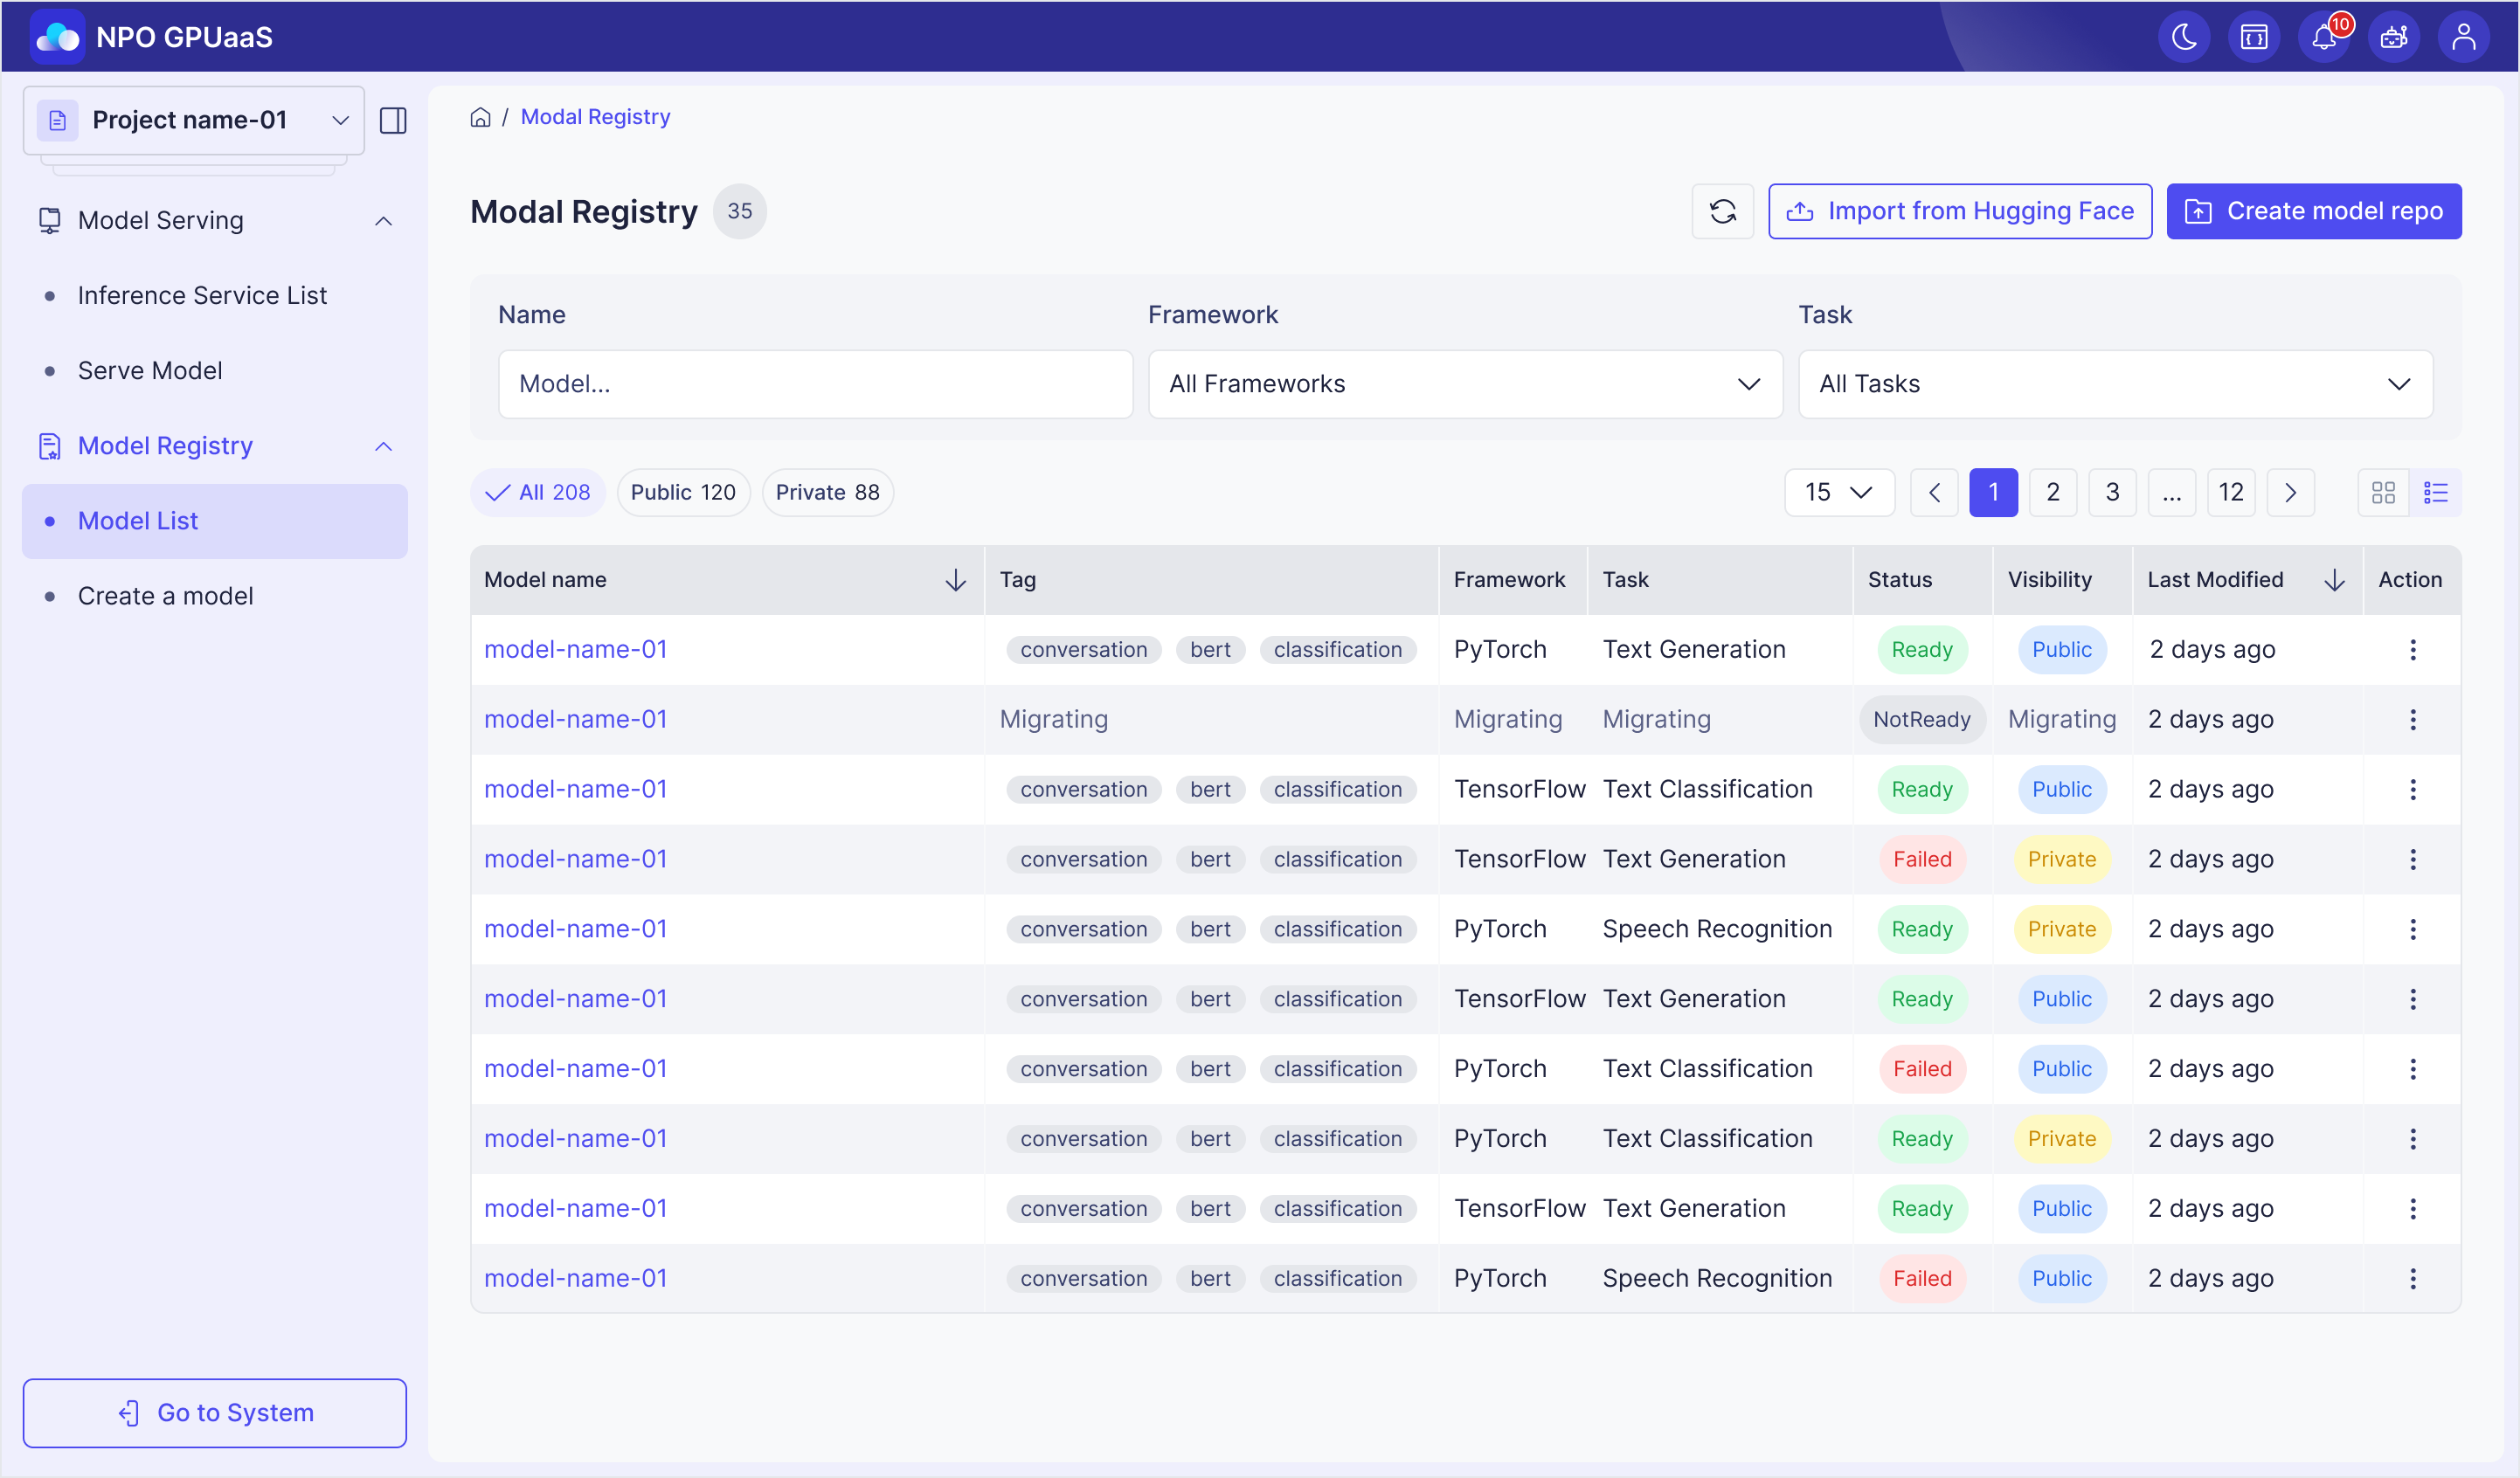
Search Model
Người dùng có thể nhanh chóng tìm kiếm Mô hình theo tên:
Để có thêm tùy chọn tìm kiếm chi tiết, nhấp vào “Thêm” bên cạnh thanh tìm kiếm để mở bảng điều khiển tìm kiếm nâng cao:
- Name: Lọc theo tên Mô hình
- Framework: Dropdown để chọn một framework hoặc tất cả các framework.
- Task: Dropdown để chọn một nhiệm vụ cụ thể hoặc tất cả các nhiệm vụ.
Hệ thống tự động cập nhật danh sách mô hình theo thời gian thực khi người dùng chọn tiêu chí hoặc nhập giá trị.
View Model List
Các tab cho phép người dùng lọc các mô hình theo khả năng hiển thị.
- All: Hiển thị tất cả các mô hình trong hệ thống.
- Public: Hiển thị chỉ các mô hình công khai.
- Private: Hiển thị chỉ các mô hình riêng tư.
Người dùng có thể xem Danh sách Mô hình với các thông tin sau:
- Model name: Tên của mô hình
- Tag: Hiển thị danh sách các thẻ liên quan đến mô hình.
- Framework: Hiển thị thông tin khung của mô hình.
- Task: Cung cấp thông tin để giúp người dùng xác định chức năng hoặc mục đích của mô hình.
- Status: Trạng thái của mô hình (ví dụ: Sẵn sàng, Không sẵn sàng, Thất bại)
- Visibility: Hiển thị xem mô hình là Công khai hay Riêng tư.
- Last Modified: Hiển thị thời gian cuối cùng mô hình được cập nhật.
Menu Hành Động
Triển Khai
- Chỉ hiển thị khi trạng thái của mô hình là “Sẵn sàng”.
- Khi nhấp vào, hệ thống sẽ điều hướng đến màn hình Triển Khai Mô hình.
Chỉnh Sửa
- Khi nhấp vào, người dùng sẽ được điều hướng đến màn hình Chi tiết Mô hình.
Sao Chép Kịch Bản
- Chỉ hiển thị khi trạng thái của mô hình là “Sẵn sàng”.
- Khi nhấp vào, kịch bản sẽ được sao chép vào clipboard.
Xem Chi Tiết Thất Bại
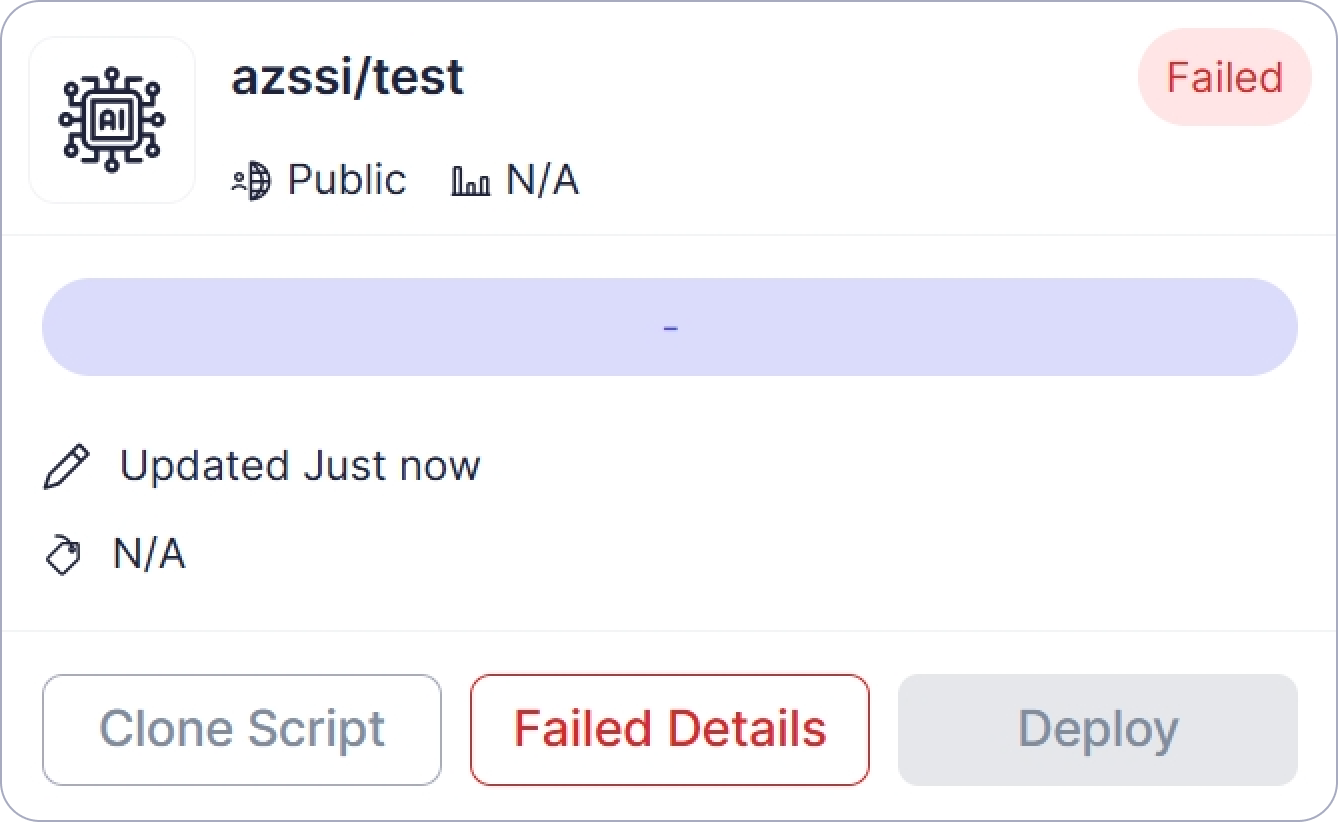
- Chỉ hiển thị khi trạng thái của mô hình là “Thất bại”.
- Khi nhấp vào, một popup sẽ hiển thị lý do tại sao việc nhập mô hình thất bại.