Manage Workloads
在 Cloud Z CP 控制台中,您可以查看和管理所有注册集群的 Kubernetes 资源。资源管理分为三个菜单:工作负载、网络和存储。
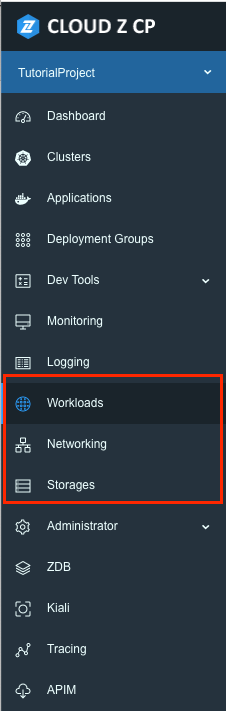
要管理 Kubernetes 工作负载,请从侧边菜单中选择 Workloads:
这将打开 Kubernetes 资源管理屏幕:
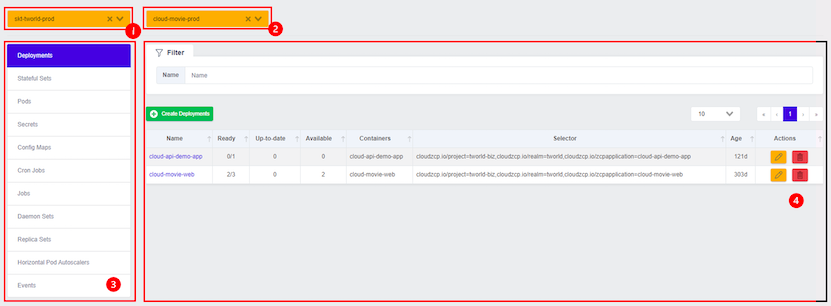
➀ Select a cluster: 这是项目中使用的集群列表,当您选择一个集群时,命名空间组合框中的列表会发生变化。
➁ Select Namespace: 选择您要搜索资源的命名空间。当您选择命名空间时,将显示当前选定类型的资源列表。
➂ Select a resource type: 这是现代化平台提供的资源类型列表。选择以显示资源列表。
➃ Resource list screen: 显示所选集群中存在的资源类型列表,命名空间。可以通过名称值进行搜索,并在资源较多时提供分页功能。资源表中的列是使用 kubectl cli 进行宽输出查询时出现的项目。
以工作负载中的部署资源为例,资源列表屏幕的详细信息如下所示:
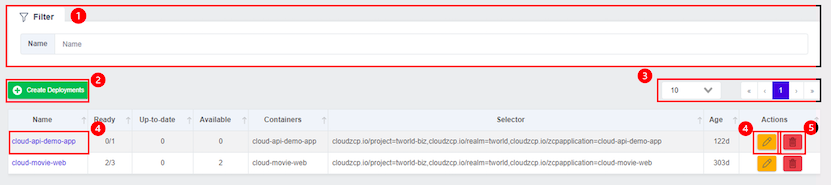
➀ Filtering feature: 您可以使用过滤功能按资源名称过滤部署资源列表。
➁ Create Deployments resource: 点击按钮进入创建部署资源屏幕。
➂ Paging function: 您可以更改每页的列表数量并移动页面。
➃ Deployments resource detail page: 点击资源名称或在操作中点击编辑按钮以进入详细信息和编辑屏幕。
➄ Delete Deployments resource: 此功能允许您删除所选资源。
Kubernetes 资源(事件)查找
事件类型资源查找屏幕提供了在所选集群和命名空间中发生的 Kubernetes 资源事件列表。

对于事件资源,检索以下项目:
- First Seen: 显示事件首次记录的时间。
- Last Seen: 显示事件发生的最新时间。
- Type: 显示事件的类型。('正常','警告',自定义类型)
- Reason: 显示对象状态变化的原因。
- Object: 显示事件发生的目标对象的名称。
- SubObject: 显示对象的可选子对象。
- Source: 显示事件发生的组件和节点的名称。
- Message: 显示发生事件的描述。
- Count: 显示事件发生的次数。
- Name: 显示事件发生的组件的名称和 ID。
管理 Kubernetes 资源信息
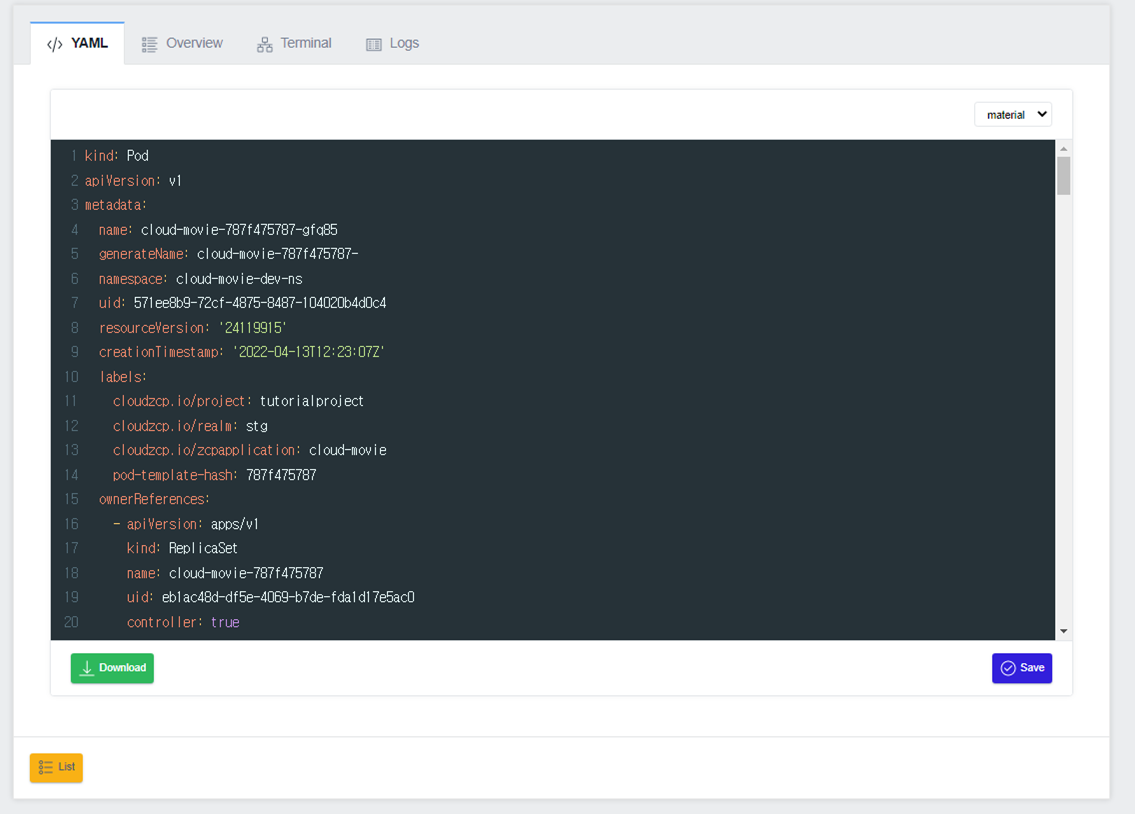
从资源列表中选择您想了解更多信息的资源,以进入资源详细信息屏幕。Pod 资源分为四个选项卡:YAML、概述、终端和日志,而其他资源仅有 YAML 和概述选项卡。
每个菜单的内部屏幕组织相似,因此我们将首先参考功能最丰富的 Pod 资源。
YAML
您可以以 YAML 格式查看资源的详细信息。您可以通过点击下载按钮将其下载为文件,进行编辑,并通过点击保存按钮对实际资源进行更改。
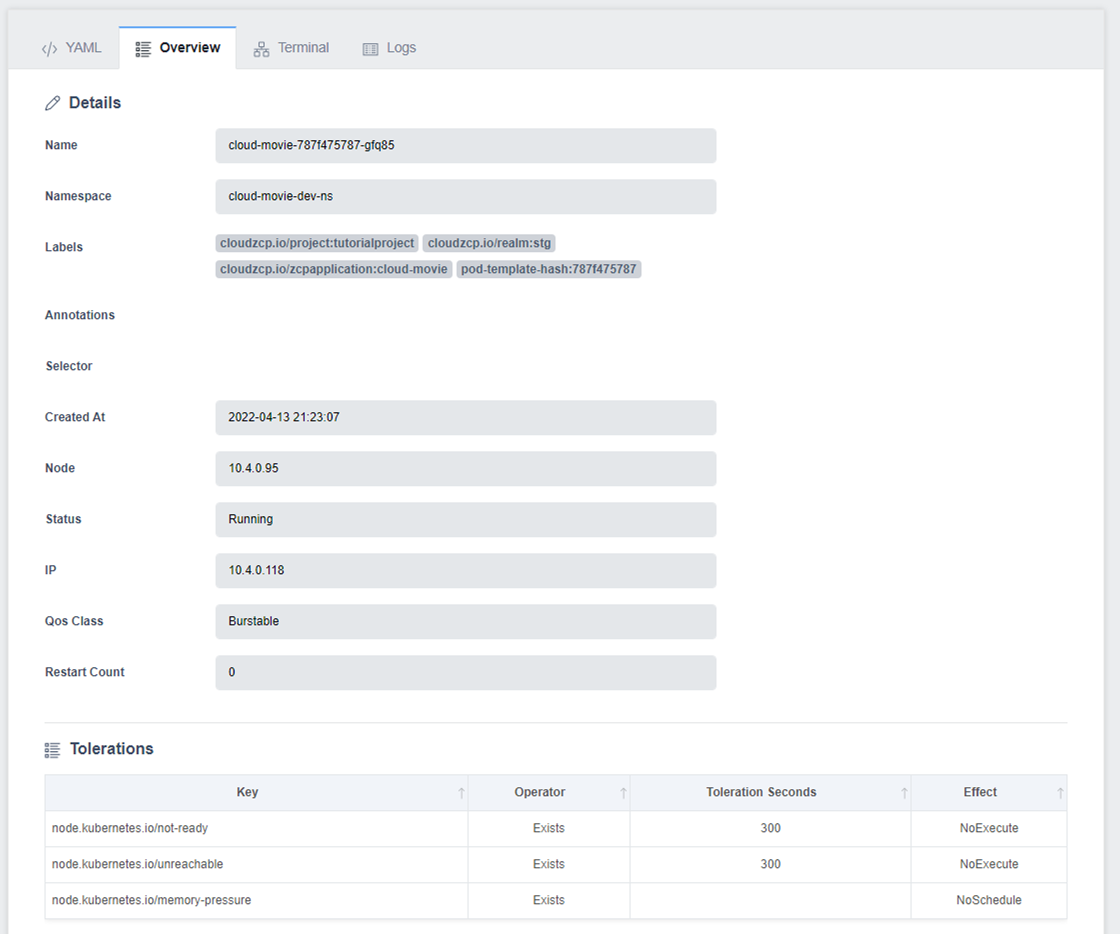
概述
终端
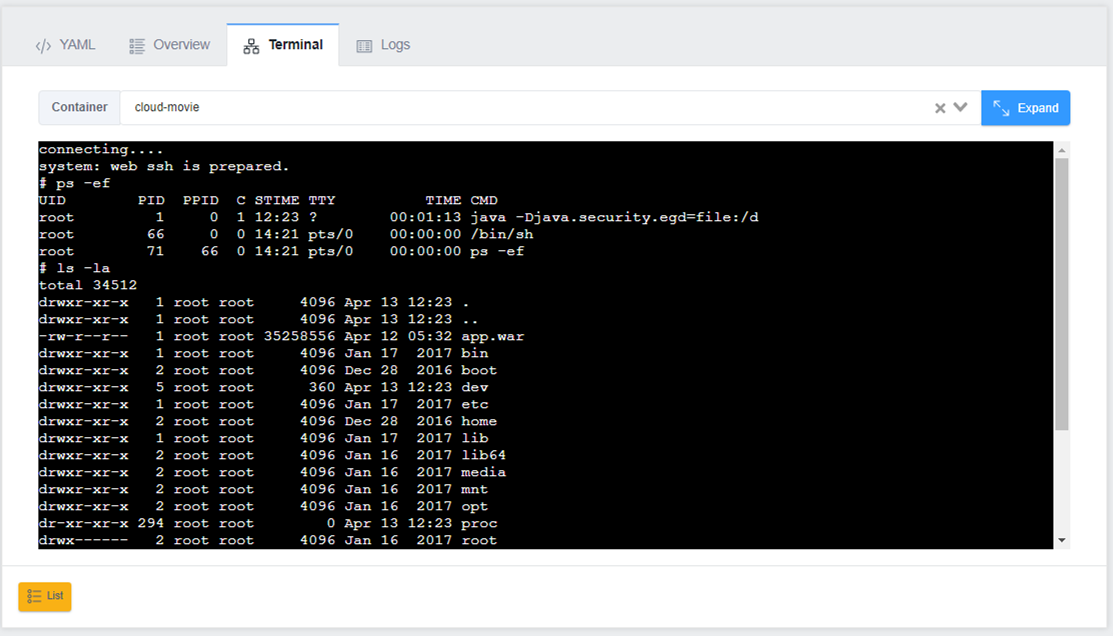
此选项卡仅适用于 Pods。连接到 Pod 内部容器的 SSH 会话。选择您要连接的容器,会话会立即连接。如果您在 Pod 内部没有 shell 或没有权限,则无法连接。
日志
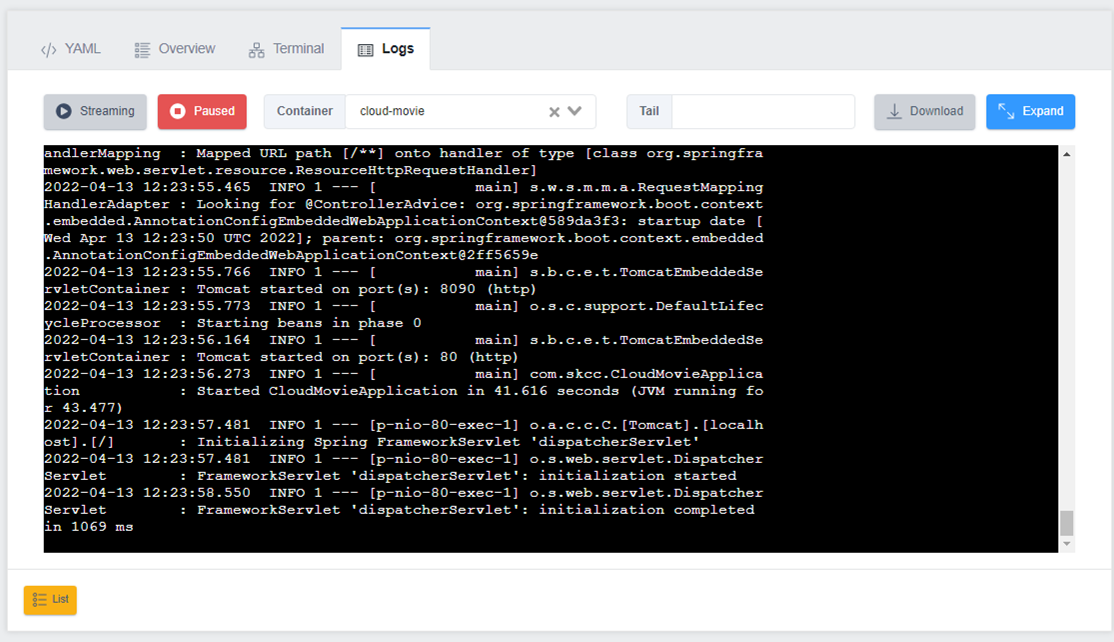
此选项卡仅适用于 Pods。查看 Pod 内部容器生成的日志。选择一个容器并点击流式按钮以查看实时日志。
删除 Kubernetes 资源
您可以删除 Kubernetes 资源:

在 Kubernetes 资源列表屏幕上。在右侧的操作列中,点击 Delete 操作按钮。之后,将显示确认资源删除的弹出窗口:

检查您要删除的资源的名称,然后点击 OK 按钮以删除该资源。