Create Policy
Access Create Traffic Policy Screen
From the Traffic Policy List page, click Create Policy button at the top-right corner of the screen.

Step 1: Fill in the Create Policy form
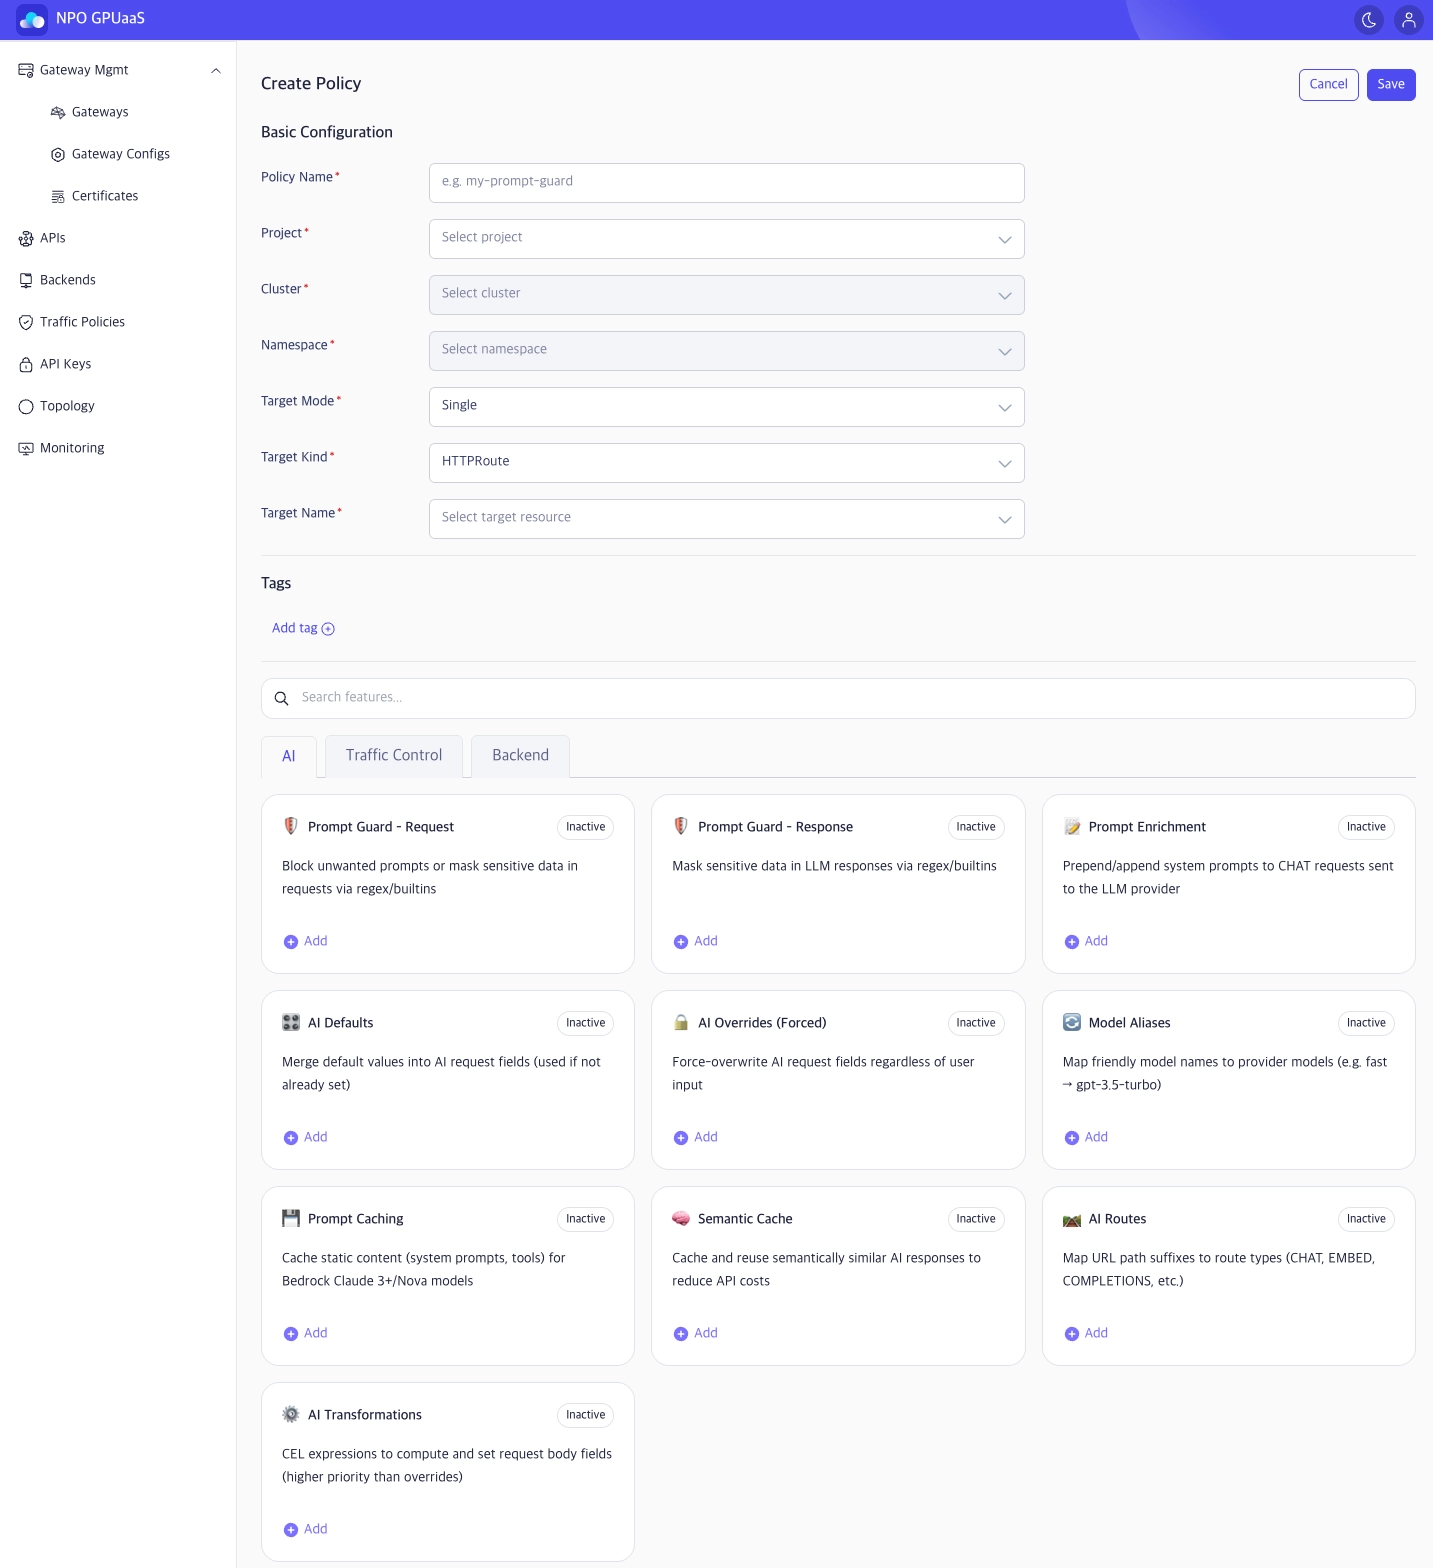
Basic Configuration
In the Basic Configuration section, fill in the required information to define the policy identity and where it will be applied. Displayed information:
- Policy Name (Required): Enter a unique policy name (e.g., my-prompt-guard).
- Project (Required): Select a project.
- Cluster (Required): Select a cluster under the chosen Project.
- Namespace (Required): Select a namespace under the chosen Cluster.
- Target Mode (Required): Select how targets are selected (default value: Single).
- Target Kind (Required): Select the type of resource (e.g., HTTPRoute, Gateway, Agentgateway).
- Target Name (Required): Select the target resource name based on the selected Target Kind.
Tags
In the Tags section, user can add tags to help organize and filter policies later.
-
Click Add tag and enter Key and Value:

-
Multiple tags are supported.
Feature
Search Features
If there are many features, use Search features to quickly find a feature card by keyword. The feature grid will be filtered based on your search input.
Feature Category Tab
User can use the category tabs to filter available features: AI/ Traffic Control/ Backend
Feature Card
In the Feature card grid, each feature is displayed as a card with:
- Feature title
- Status badge: Inactive / Active
- Short description (1–2 lines)
- When Add button is clicked, a detailed settings panel will be displayed, allowing you to config for each policy.
Step 2: Save or Cancel
- After completing the form, click Save to create Traffic Policy.
- In case you want to discard the changes, click Cancel and navigates back to the Traffic Policy List page.