Build and Deploy an Application
To build and deploy an application, complete the following steps:
- Set up the source repository
- Create a Harbor robot account
- Create the application
- Create build pipelines
- Create a deployment group
- Add a cluster to the deployment group
- Add the application to the deployment group
- Configure deployment specifications
- Deploy and verify the application
Set Up the Source Repository
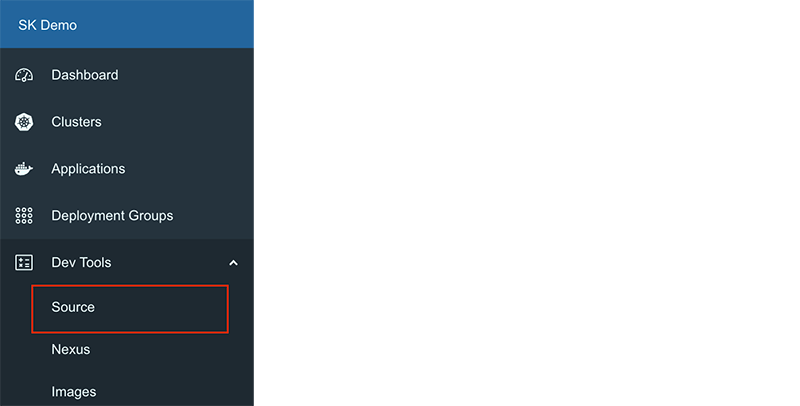
- In the console’s left-side menu, navigate to Dev Tools > Source to open GitHub’s Source Repository Dashboard:
-
Here, you create the source code repository of an application.
-
Copy the Git repository URL of the created application.
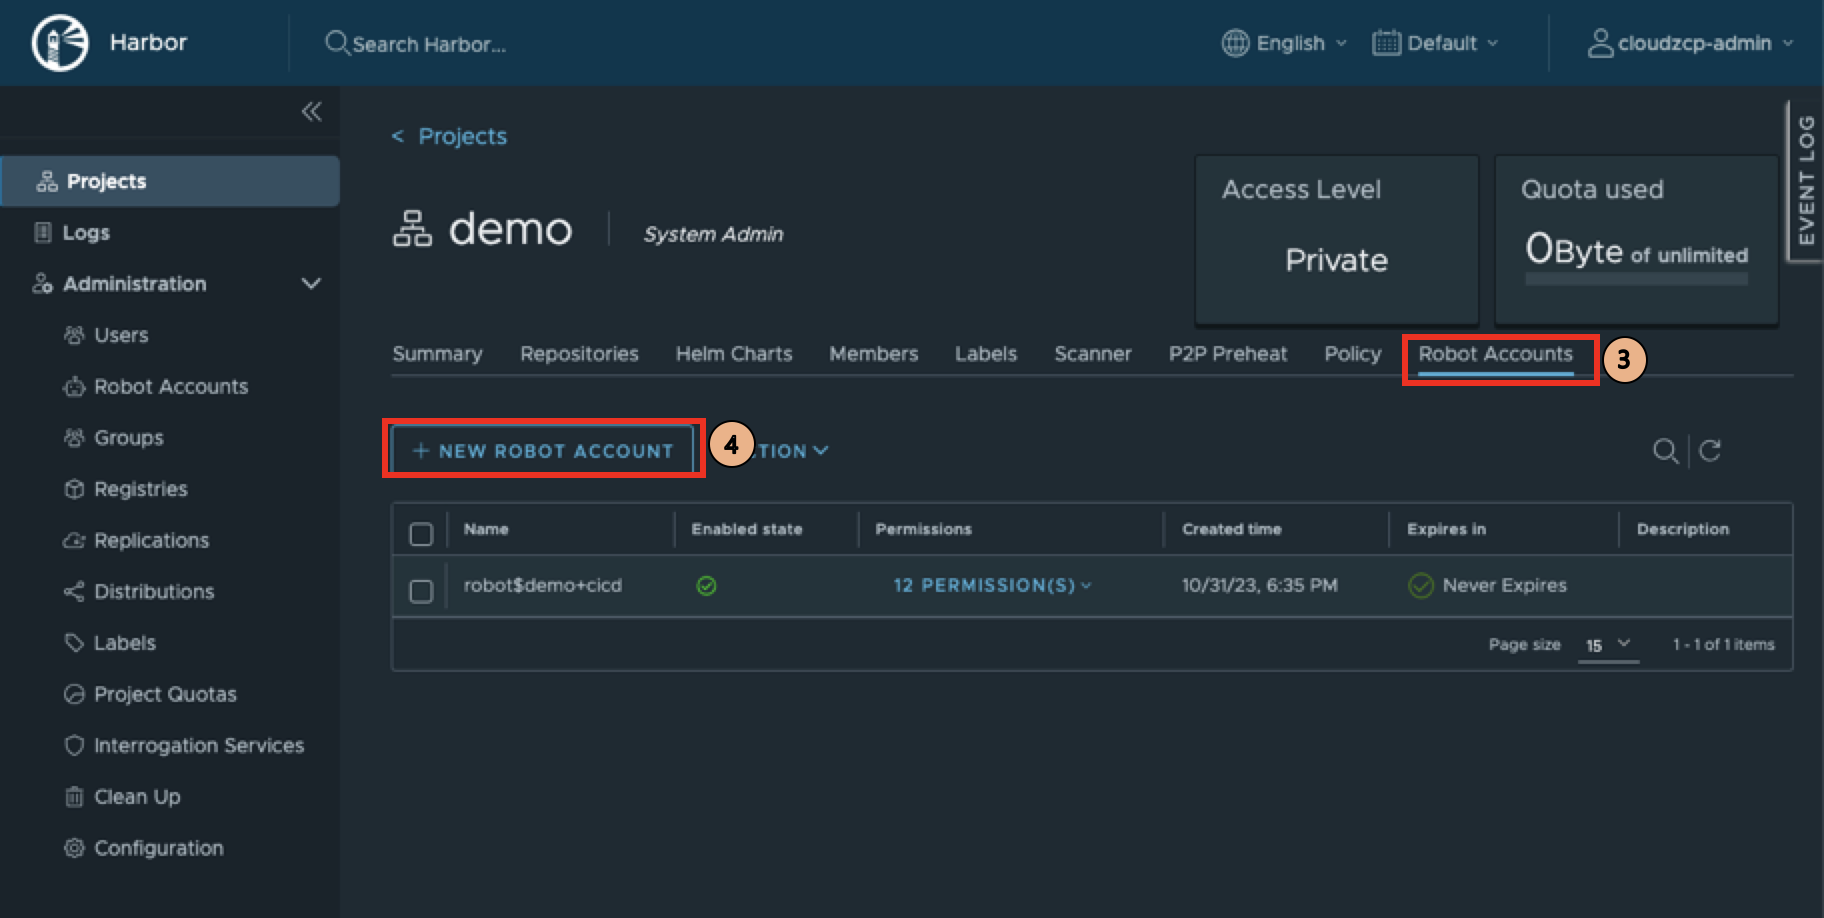
Create a Harbor Robot Account
To configure container images, create a robot account in the project’s container image registry.
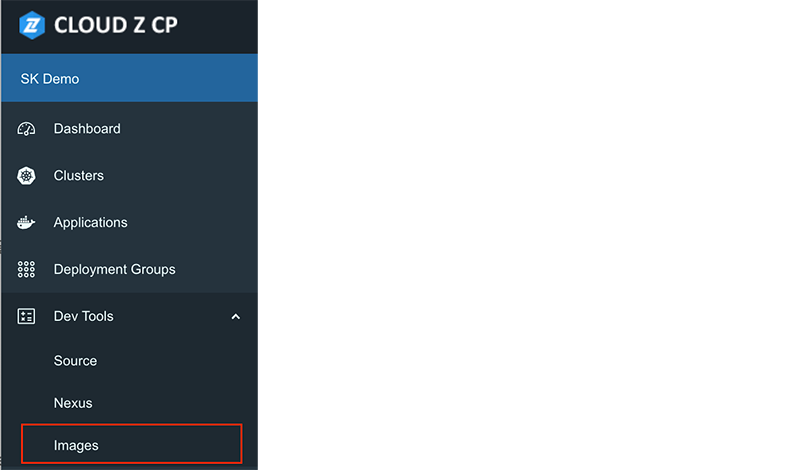
- In the console's left-side menu, go to Dev Tools > Images to open the Harbor registry:
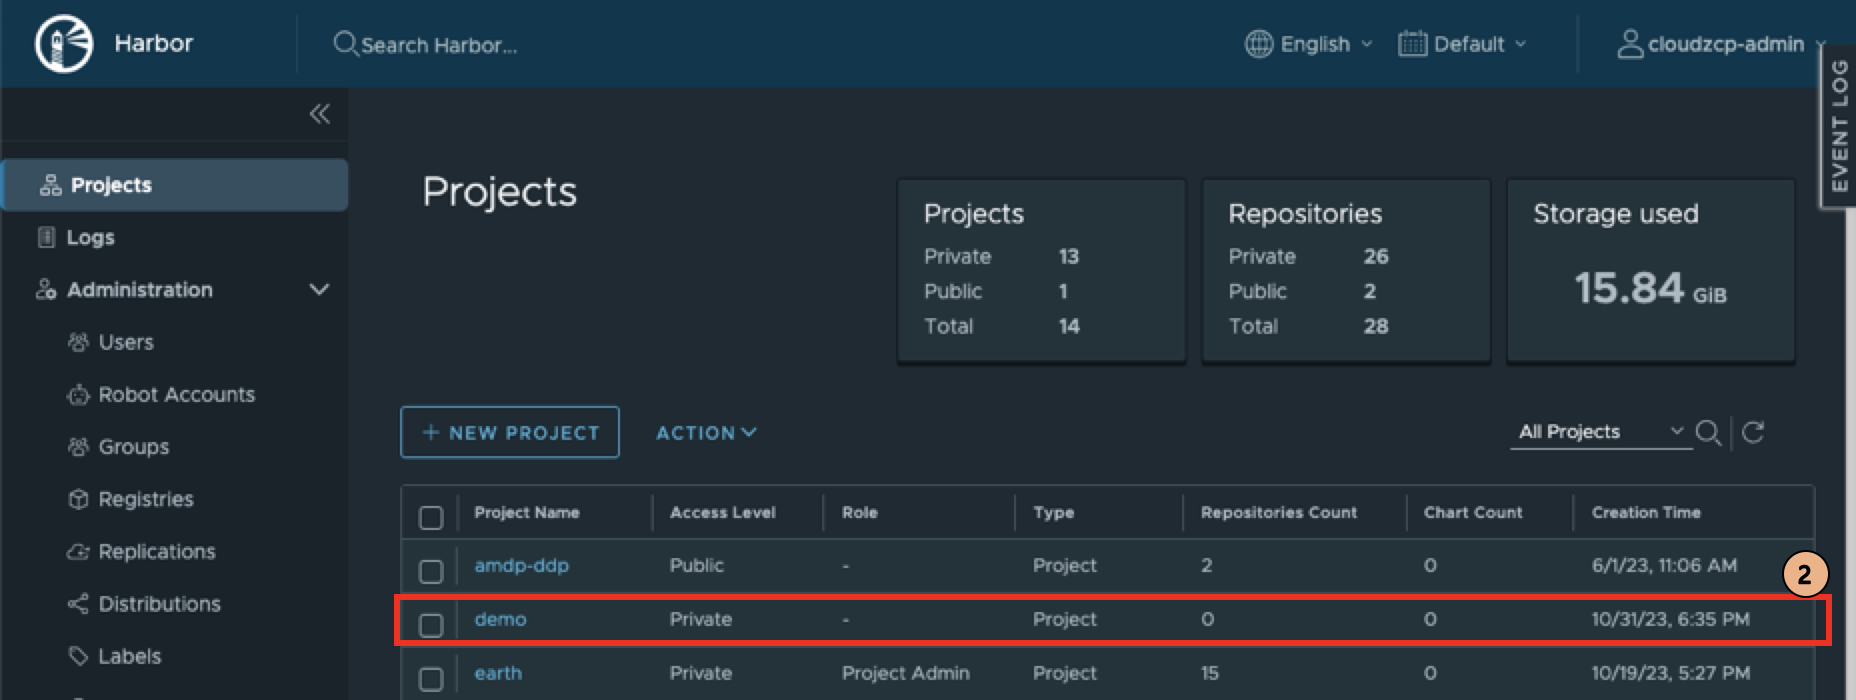
- In the Harbor window, select the appropriate project from the Projects list:
- Navigate to the Robot Accounts tab:

- Click the New Robot Account button:
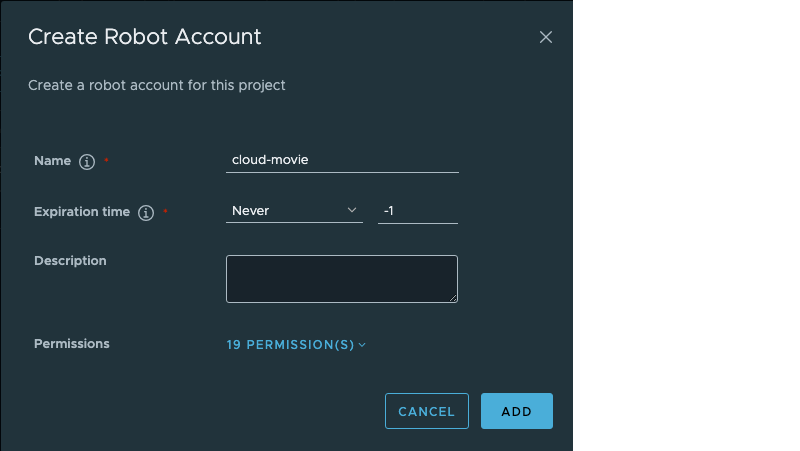
- Fill in the required details and click Add:
- After creation, the robot account’s name and token will be displayed:
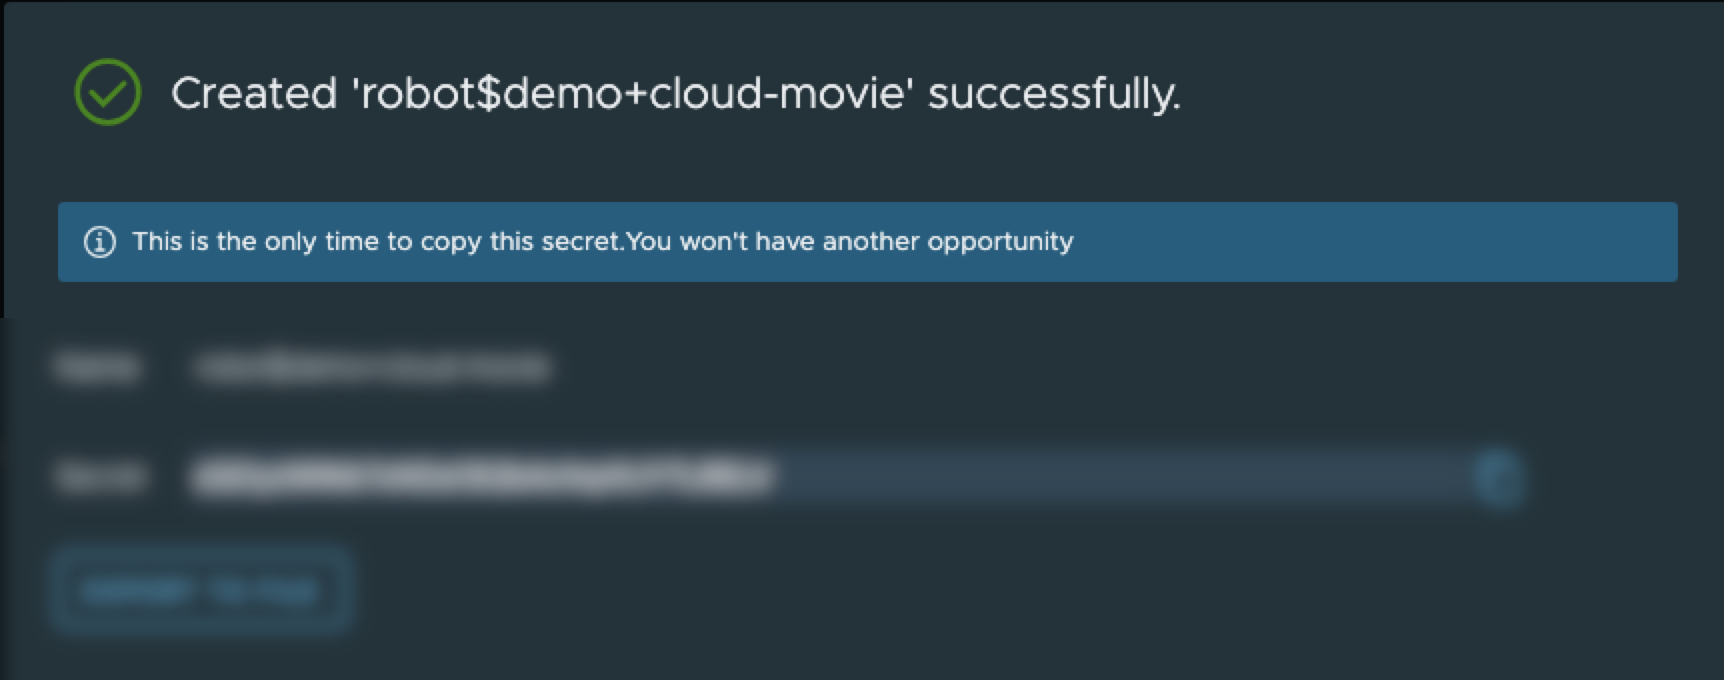
The token will not be shown again. Click the Export to File button to save it.
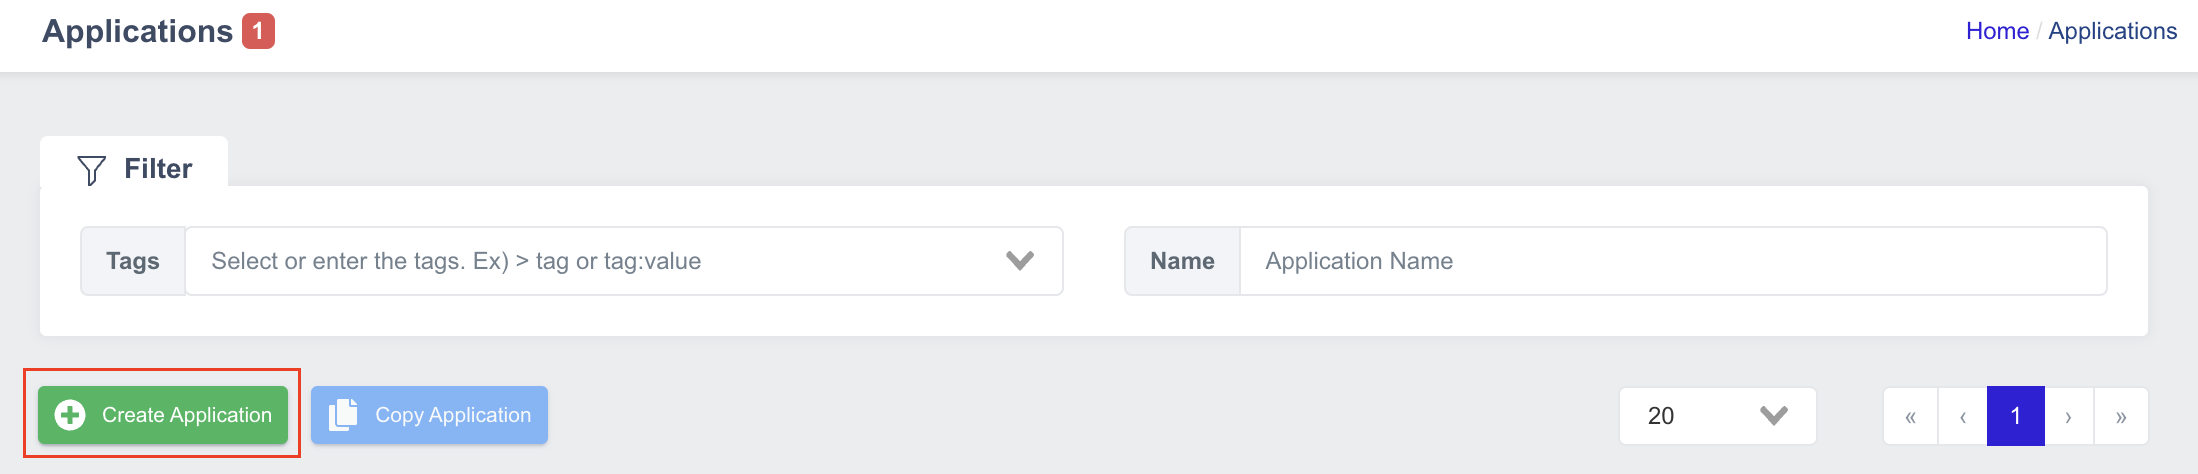
Create the application
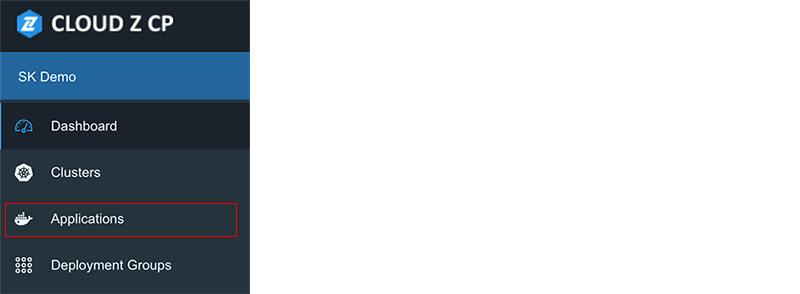
- In the project console, go to Applications from the left-side menu:
- Click the Create Application button:
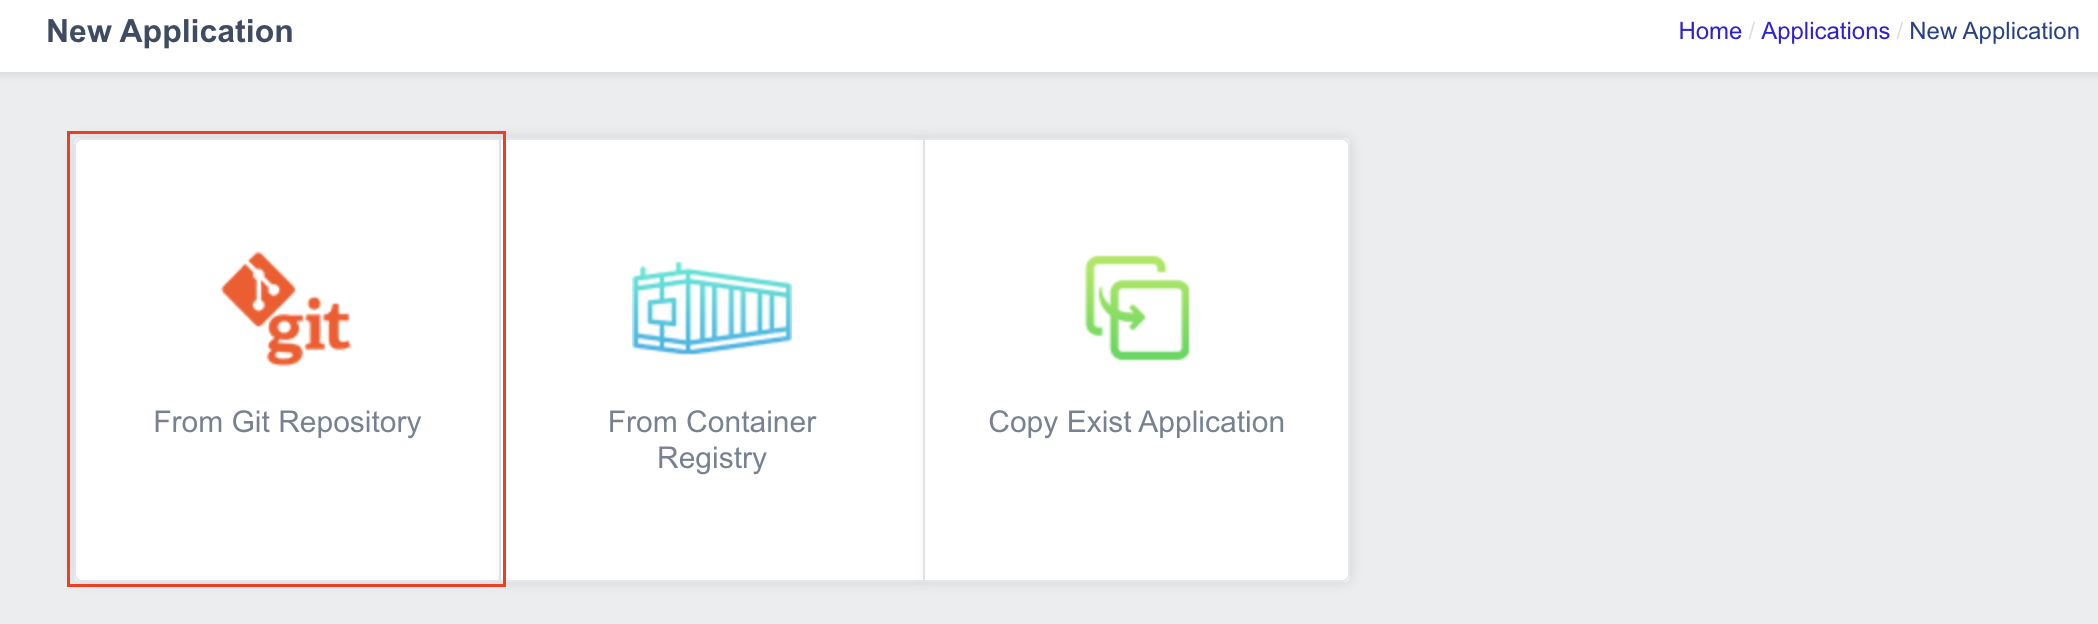
- Select the source (e.g., From Git Repository):
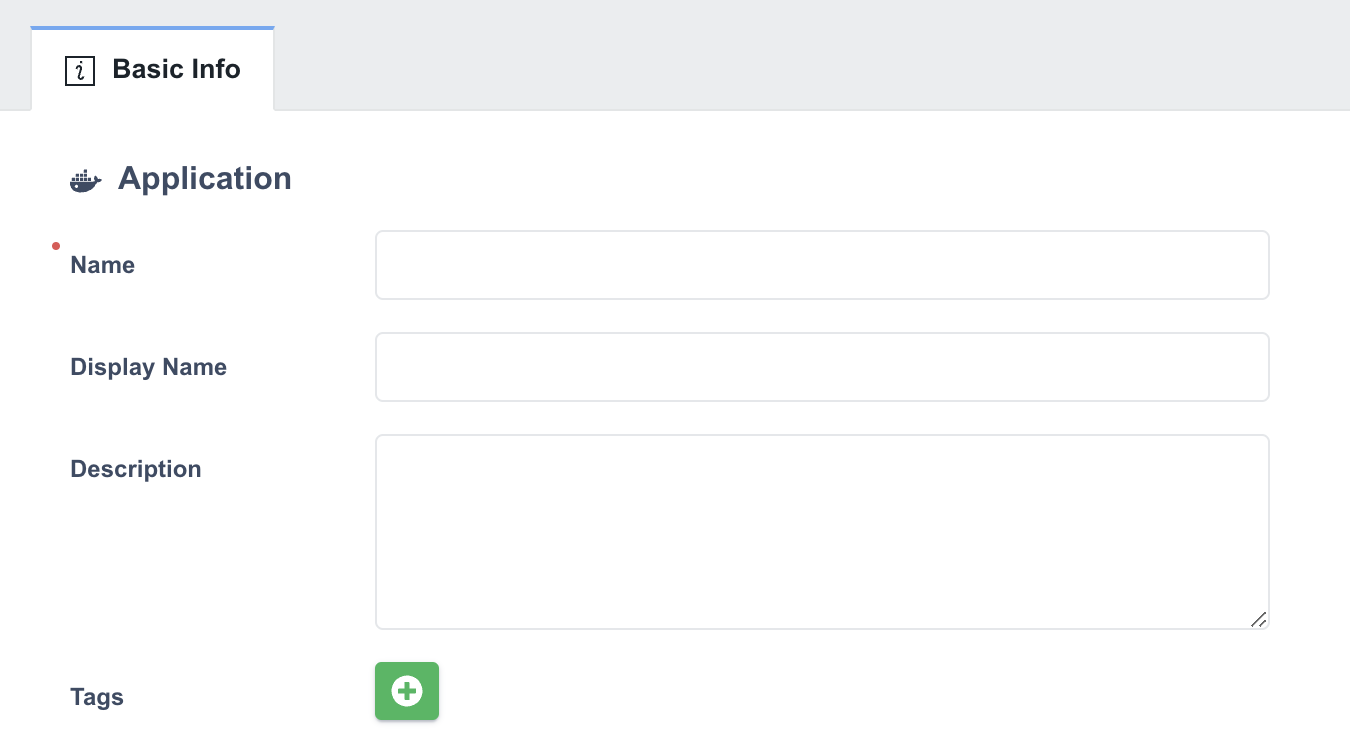
- Fill in the application information:
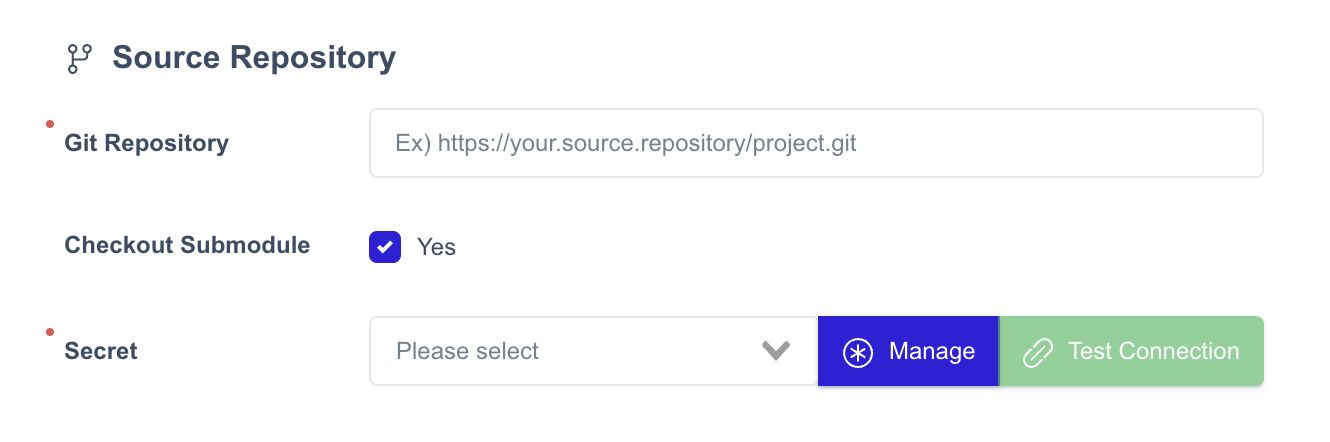
- Configure the Source Repository:
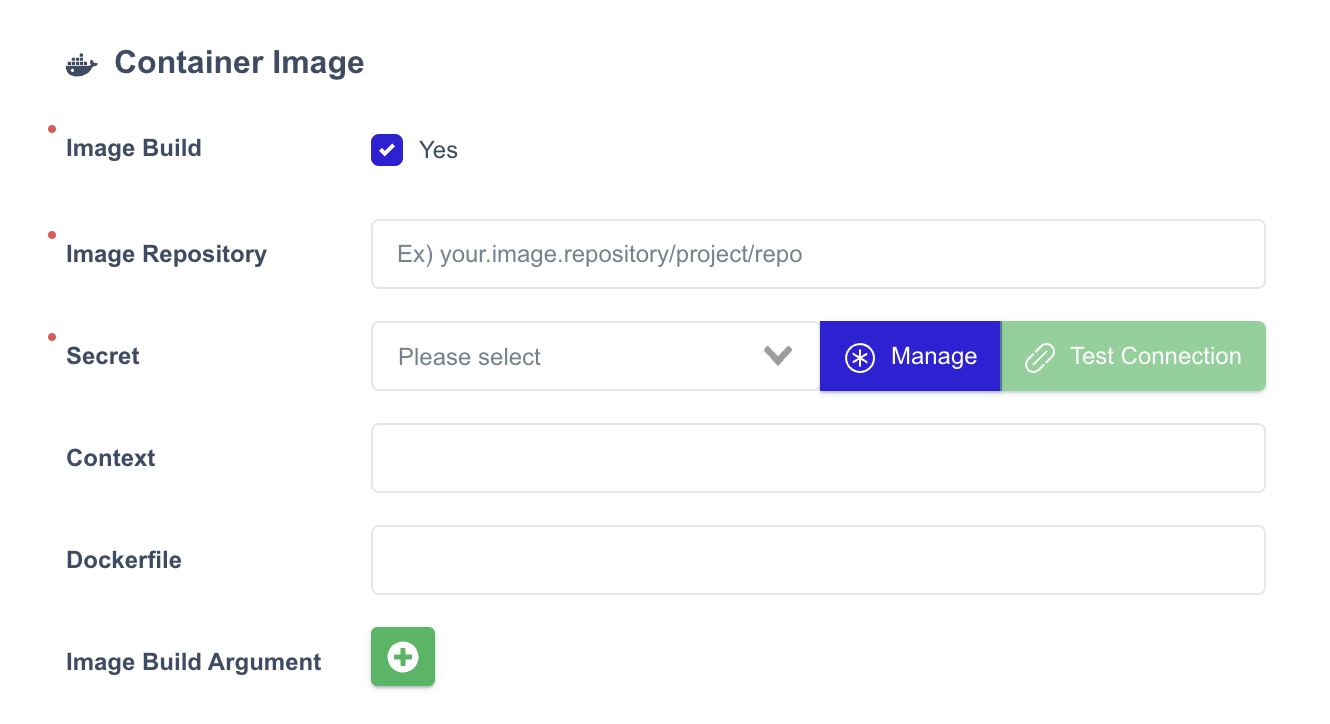
- Configure the Container Image:
- Review all settings and click Save.
Create Build pipelines
-
From the Applications list, select your application to open its settings.
-
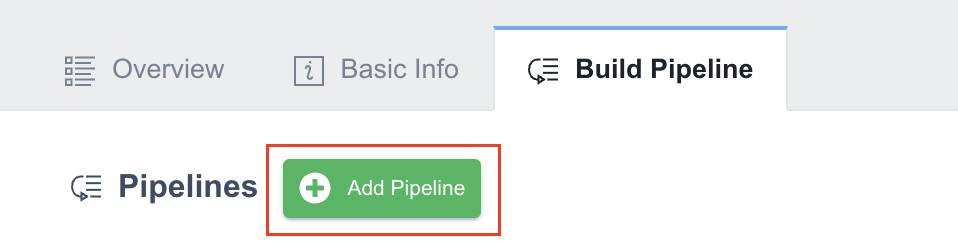
Navigate to the Build Pipeline tab.
-
Click the Add Pipeline button:
-
Repeat the step to add more pipelines as needed.
-
After entering all details, click Save.
Create a Deployment Group
A deployment group is required to run the application in a target cluster.
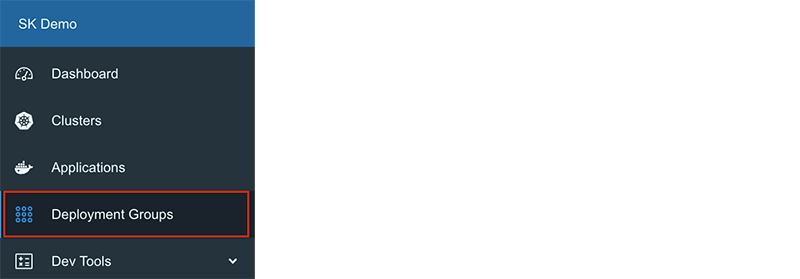
- In the left-side menu, click Deployment Groups:
- Click the Create Deployment Group button:

- Enter a name for the deployment group:

-
Select a Prevent Cascade Delete option:
- Enabled (Default): Resources and namespaces are retained when the deployment group or cluster is deleted.
- Disabled: Resources and namespaces are deleted along with the group or cluster.
-
Enter the Namespace:

You cannot create a duplicate namespace because a namespace cannot be reused by multiple deployment groups.
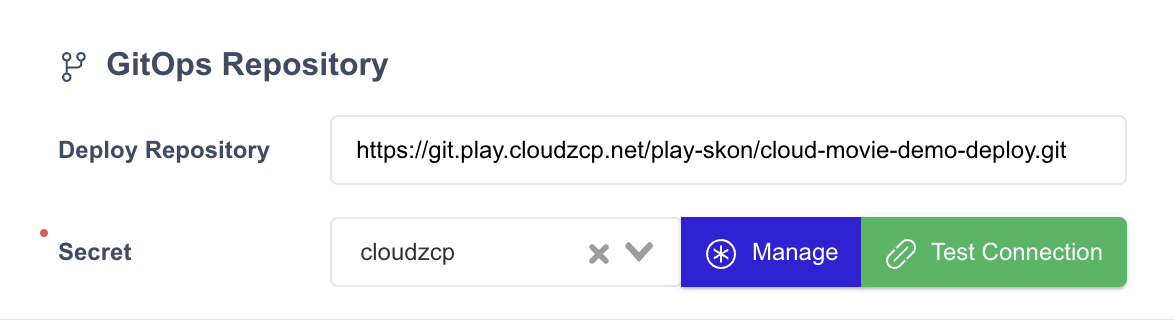
- In the GitOps Repository section, Enter the Git repository URL where the deployment-related YAML files will be stored:
- Click Save.
Add a Cluster to the Deployment Group
Once the Deployment Group is created, you need to add a Cluster to it.
-
Go to the Clusters tab.
-
Click the Add Cluster button:

- Select a cluster from the list (only assigned clusters will appear on the list):
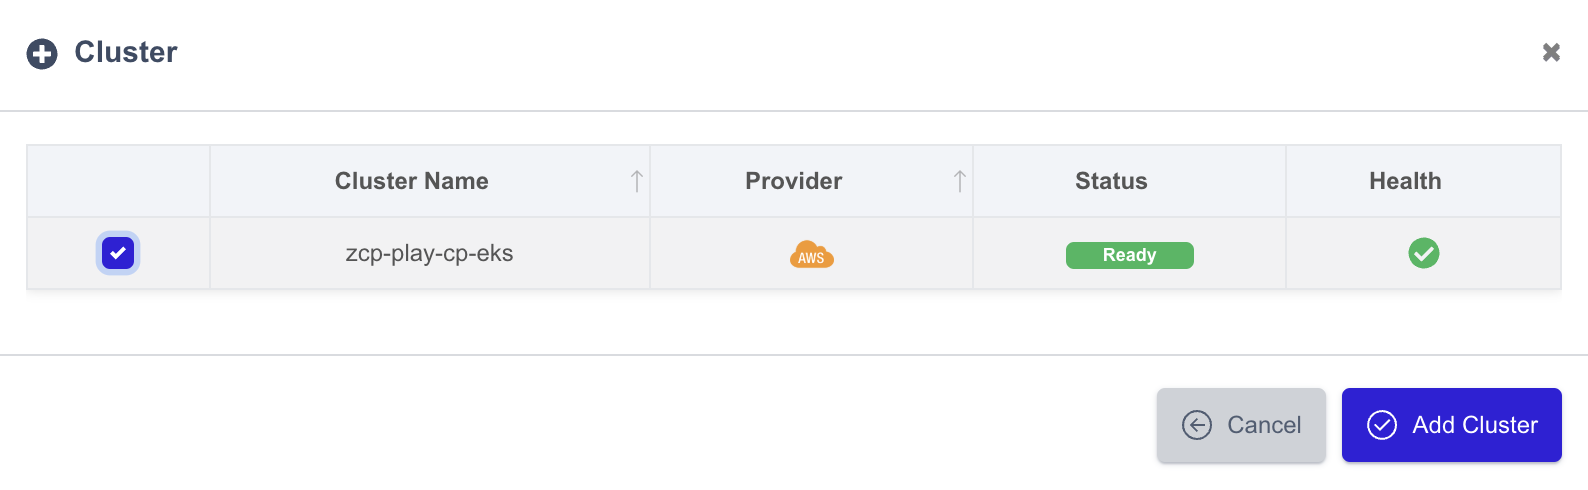
- Click Add Cluster to save.
The selected clusters will now appear in the Clusters tab:

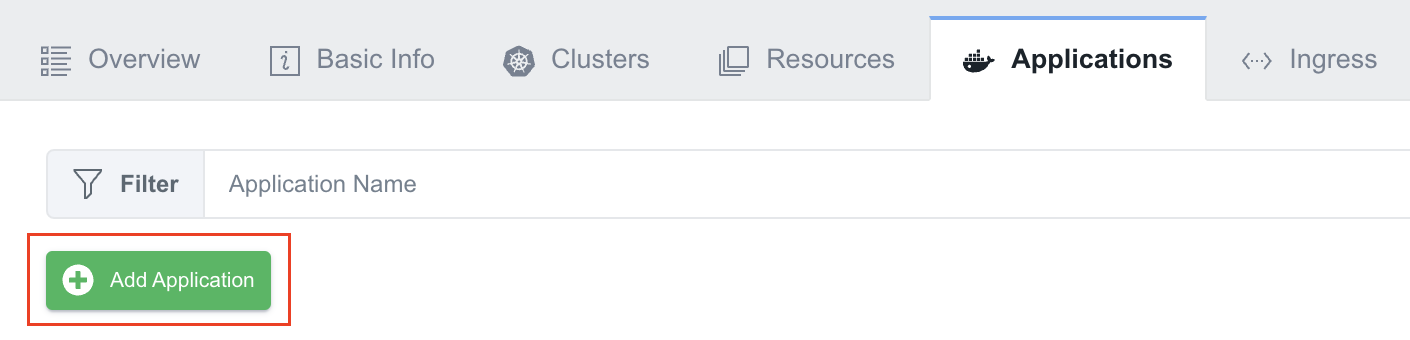
Add the Application to the Deployment Group
You add the applications you have created to the Deployment Group.
-
Open the Applications tab in the deployment group.
-
Click the Add Application button:
-
Select the application to be added.
-
Choose a YAML Generation Policy:
- Always: Changes are synced with the GitOps repository.
- Image Only: Changes are not synced (only the first deployment is saved).
-
Select a pipeline to deploy:
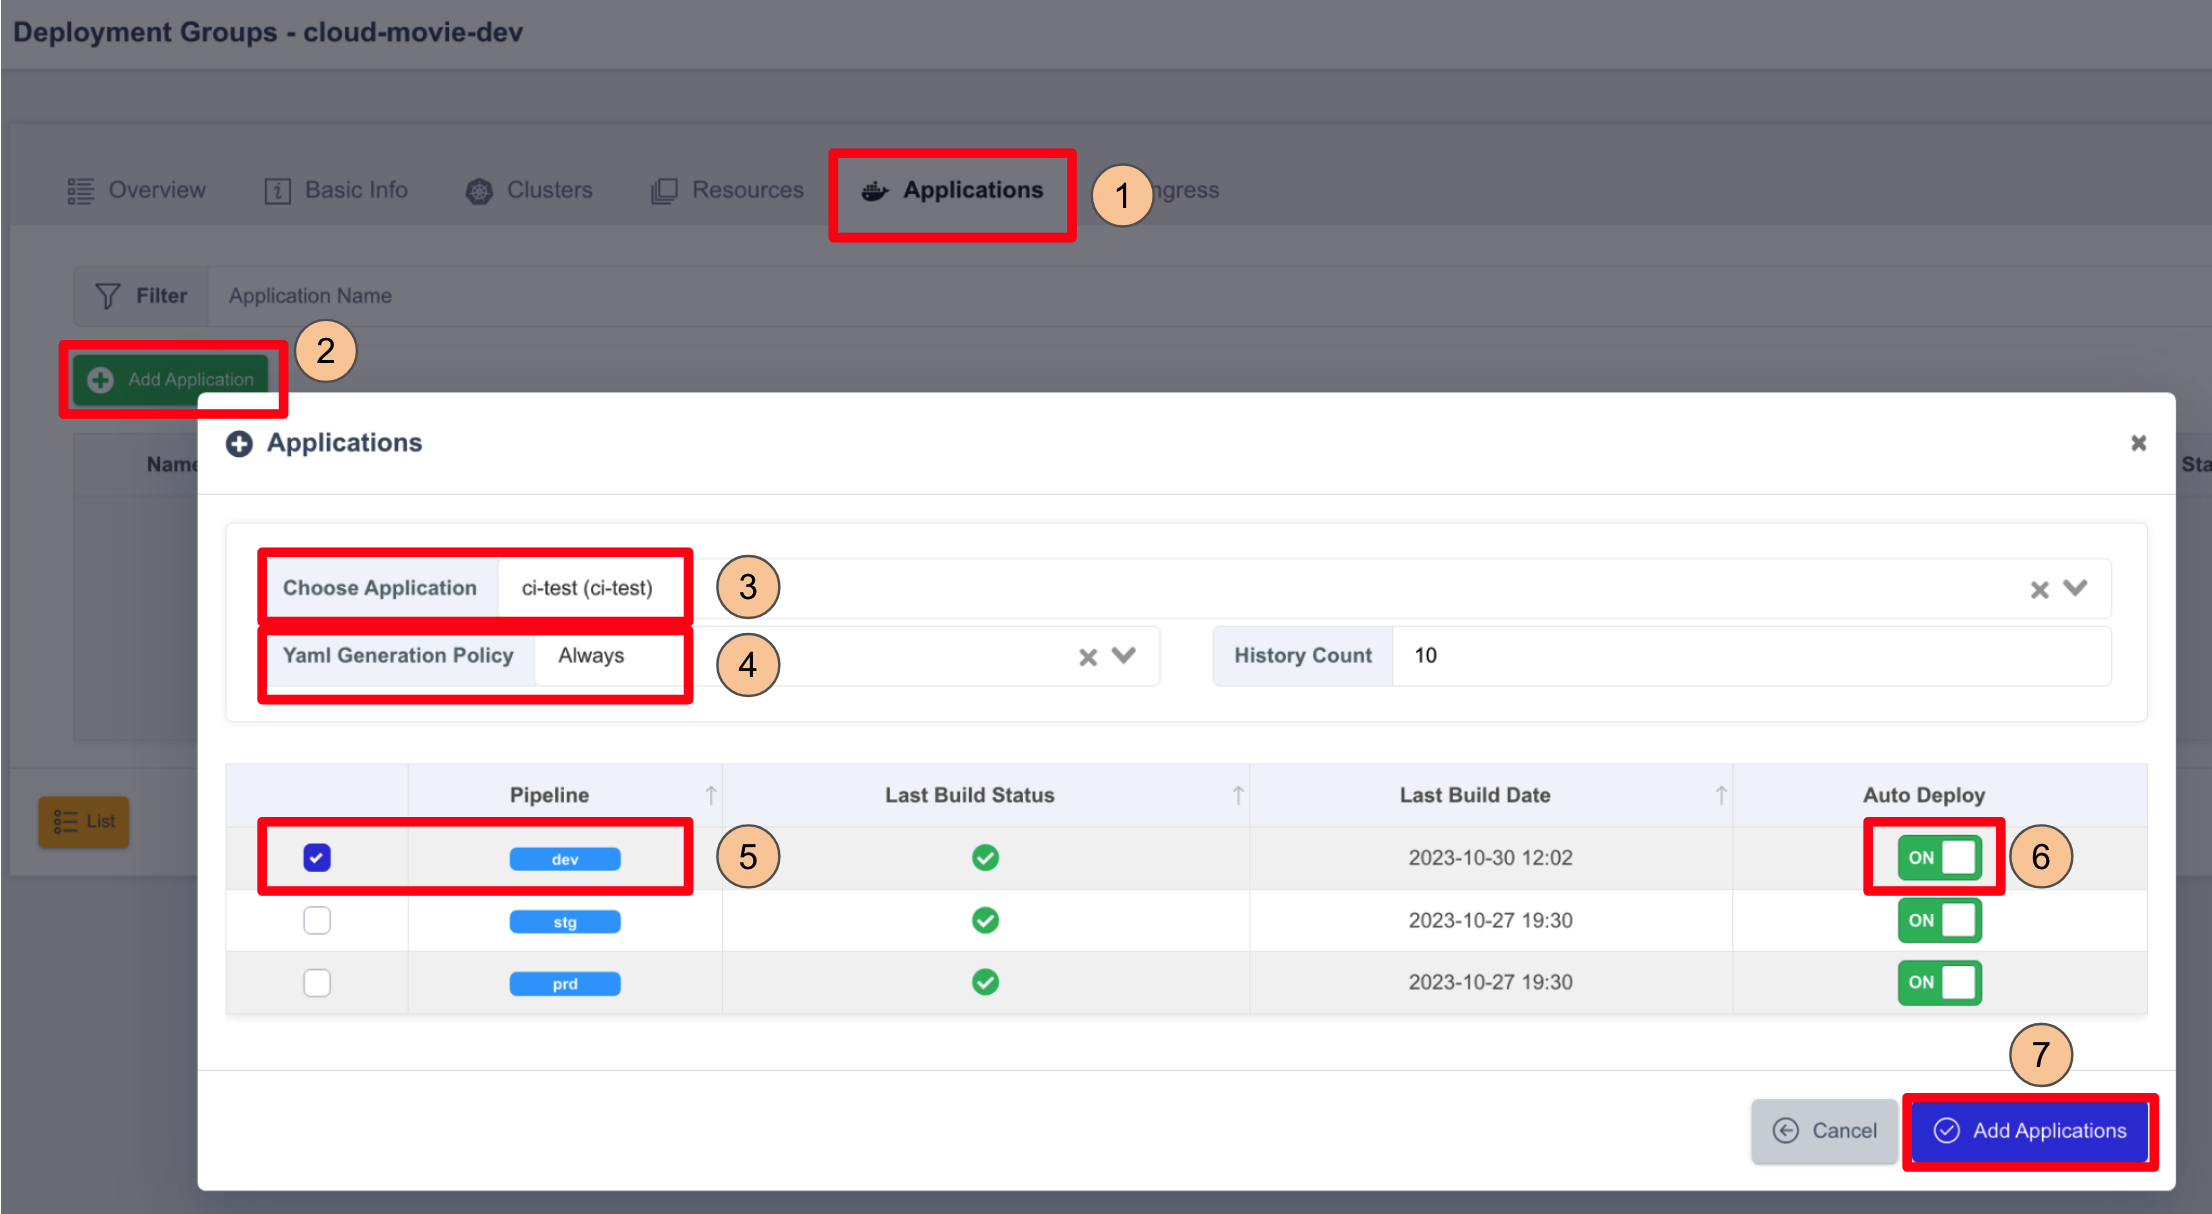
-
Turn Auto Deploy ON.
-
Click Add Applications to save the settings.
The application will now appear in the application list.
Configure the deployment specifications
-
Click the configuration icon in the Actions column.
-
Enter the configuration details and click Save.
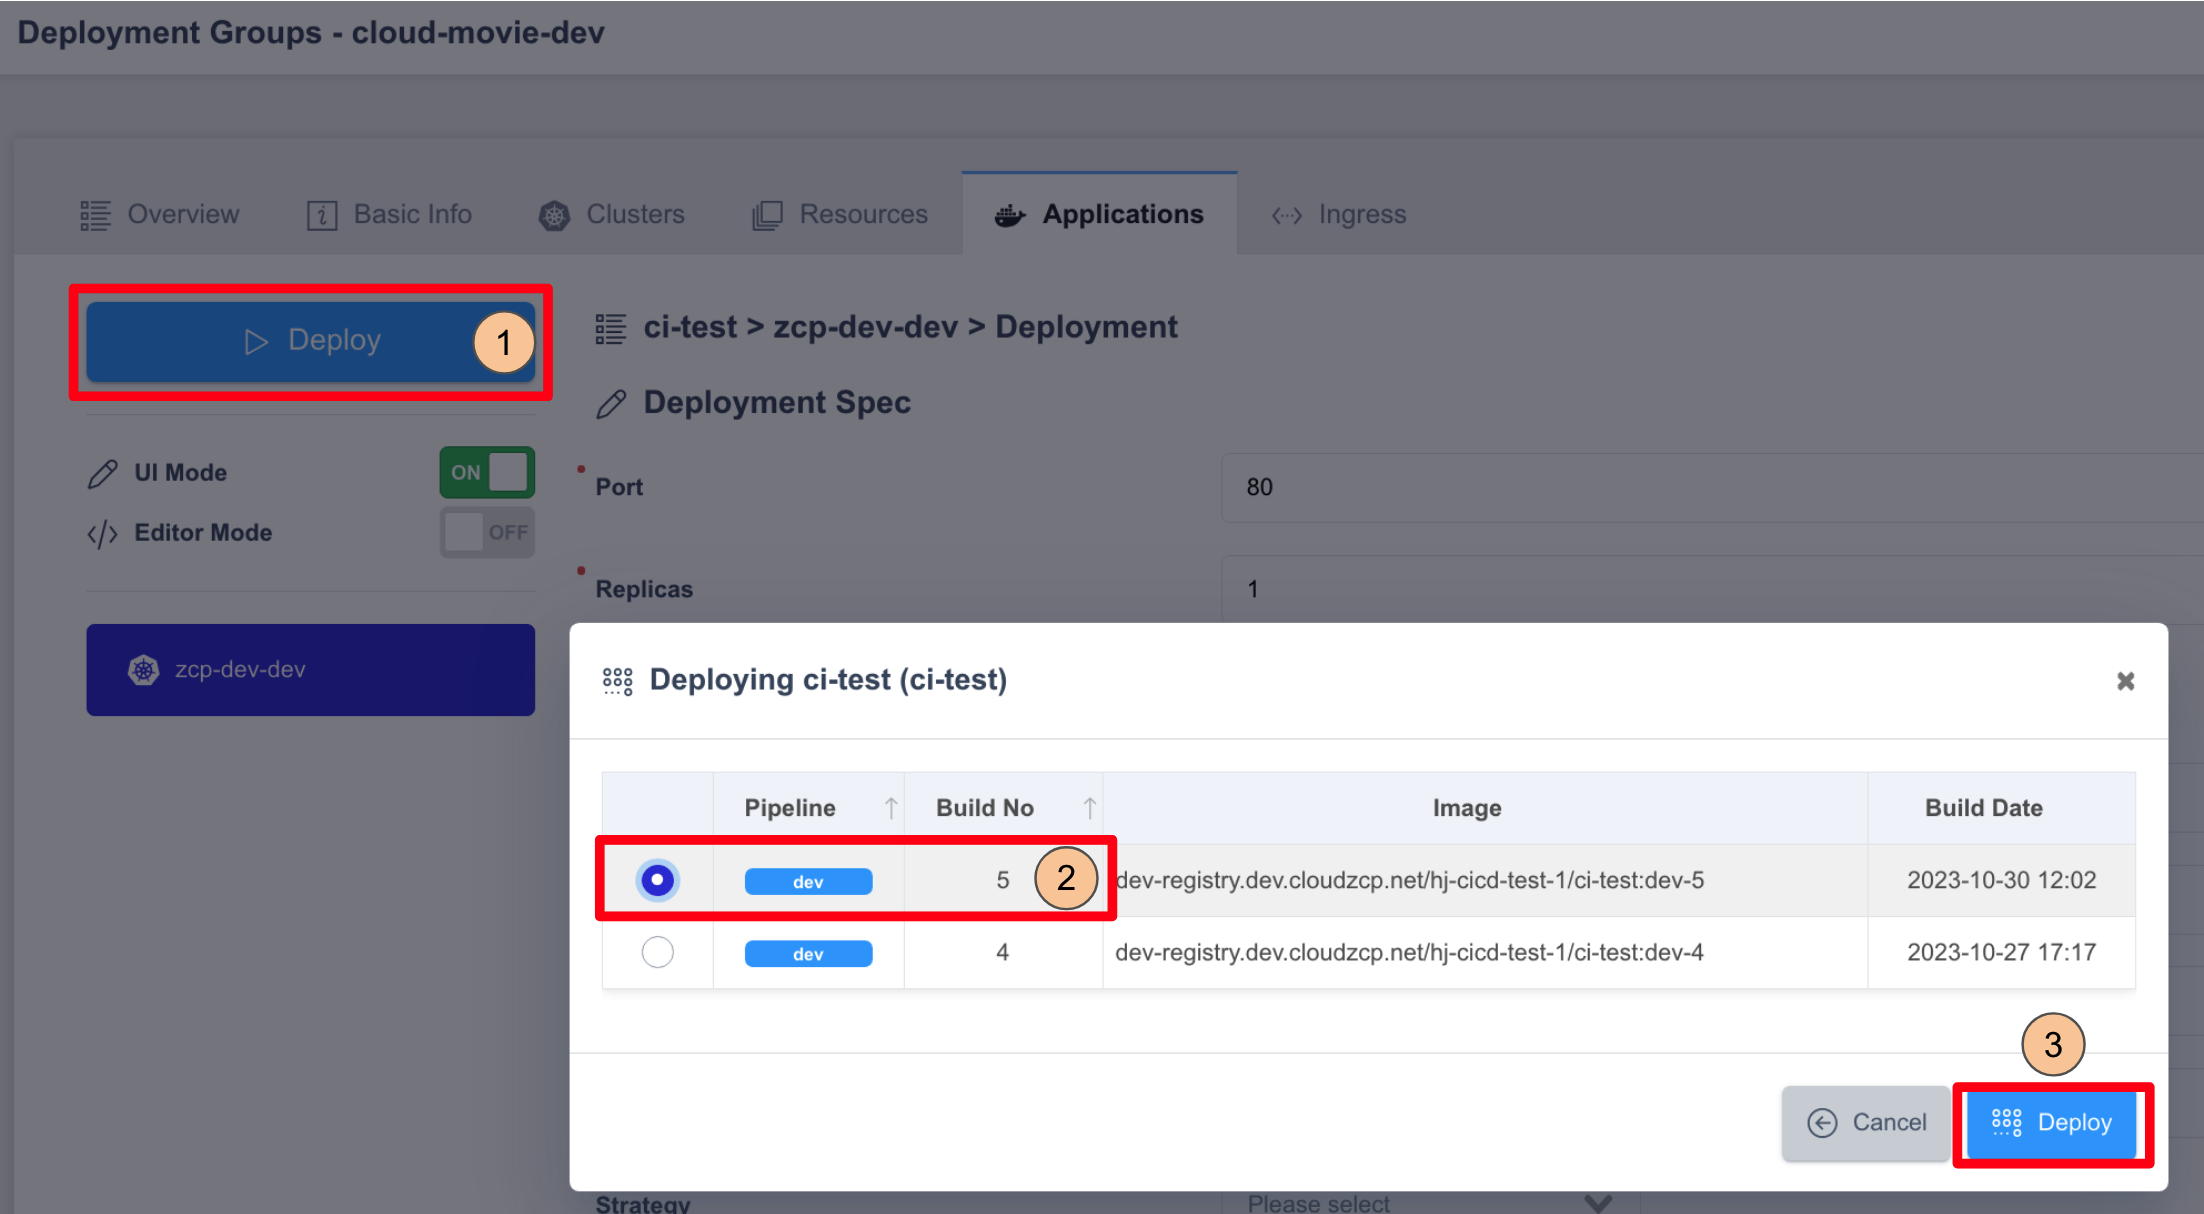
Deploy application
-
In the Applications tab, click Deploy.
-
Select a Build Number from the history.
-
Click Deploy.
-
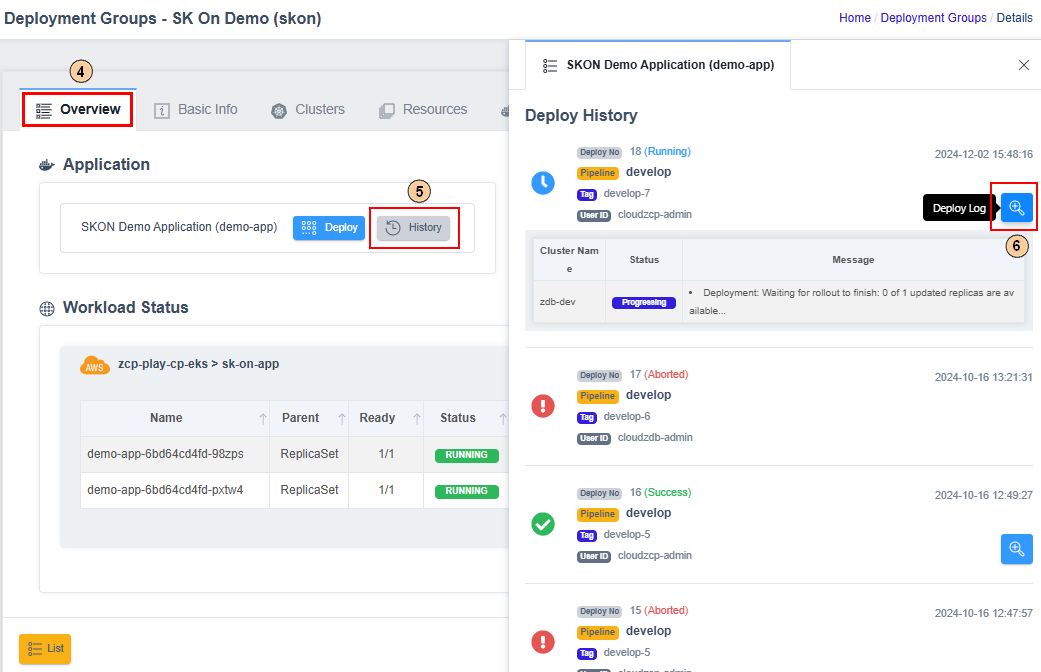
Go to the Overviews tab.
-
Click History to view past deployments.
-
Click the magnifying glass icon to view logs. A Running status indicates a successful deployment.