Access Create Backend Screen
From the Backend List page, click Register Backend button at the top-right corner of the screen.

Step 1: Fill in the Register Backend form
REST Tab
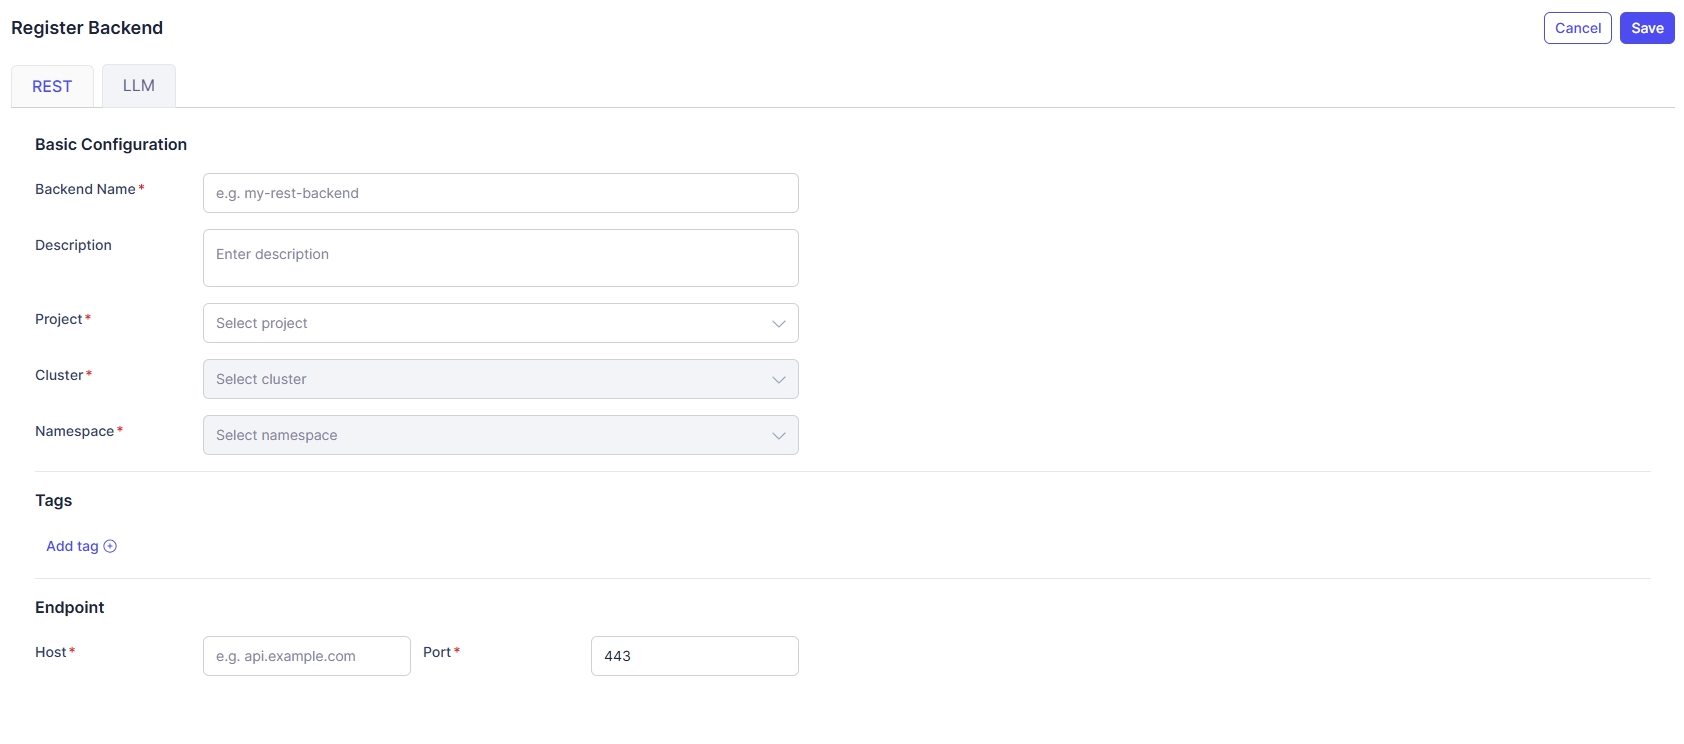
Basic Configuration
- Backend Name (Required): Backend identifier.
- Description: Short description about corresponding backend.
- Project (Required): Select a project.
- Cluster (Required): Select a cluster under the chosen Project.
- Namespace (Required): Select a namespace under the chosen Cluster.
Tags
User can add multiple tags for filtering on the Backend list.
-
Click Add tag and enter Key and Value:

-
Multiple tags are supported.
Endpoint
- Host (Required): The backend server hostname or IP address that the gateway will forward requests to.
- Port (Required): The TCP port on the host to connect to. (Default value: 443)
LLM Tab
Basic Configuration
- Backend Name (Required): Backend identifier.
- Description: Short description about corresponding backend.
- Project (Required): Select a project.
- Cluster (Required): Select a cluster under the chosen Project.
- Namespace (Required): Select a namespace under the chosen Cluster.
Tags
User can add multiple tags for filtering on the Backend list.
-
Click Add tag and enter Key and Value:

-
Multiple tags are supported.
Model Source
- Self-Hosted Model (CLUSTER): A model running inside the Kubernetes cluster.
- Public Model (CLOUD): External AI providers such as OpenAI / Anthropic.
After selecting Model Source, additional fields are shown dynamically (provider selection, API key secret, etc.).
Step 2: Save or Cancel
- After completing the form, click Save to create Backend.
- In case you want to discard the changes, click Cancel and navigates back to the Backend List page.