GPU Pool Detail
This screen allows the System Administrator to view detailed information of GPU Pools that already exist in the system.
- From the System Admin Control Panel, click GPU in the main navigation. Then, in the left-side navigation, select GPU Pools:
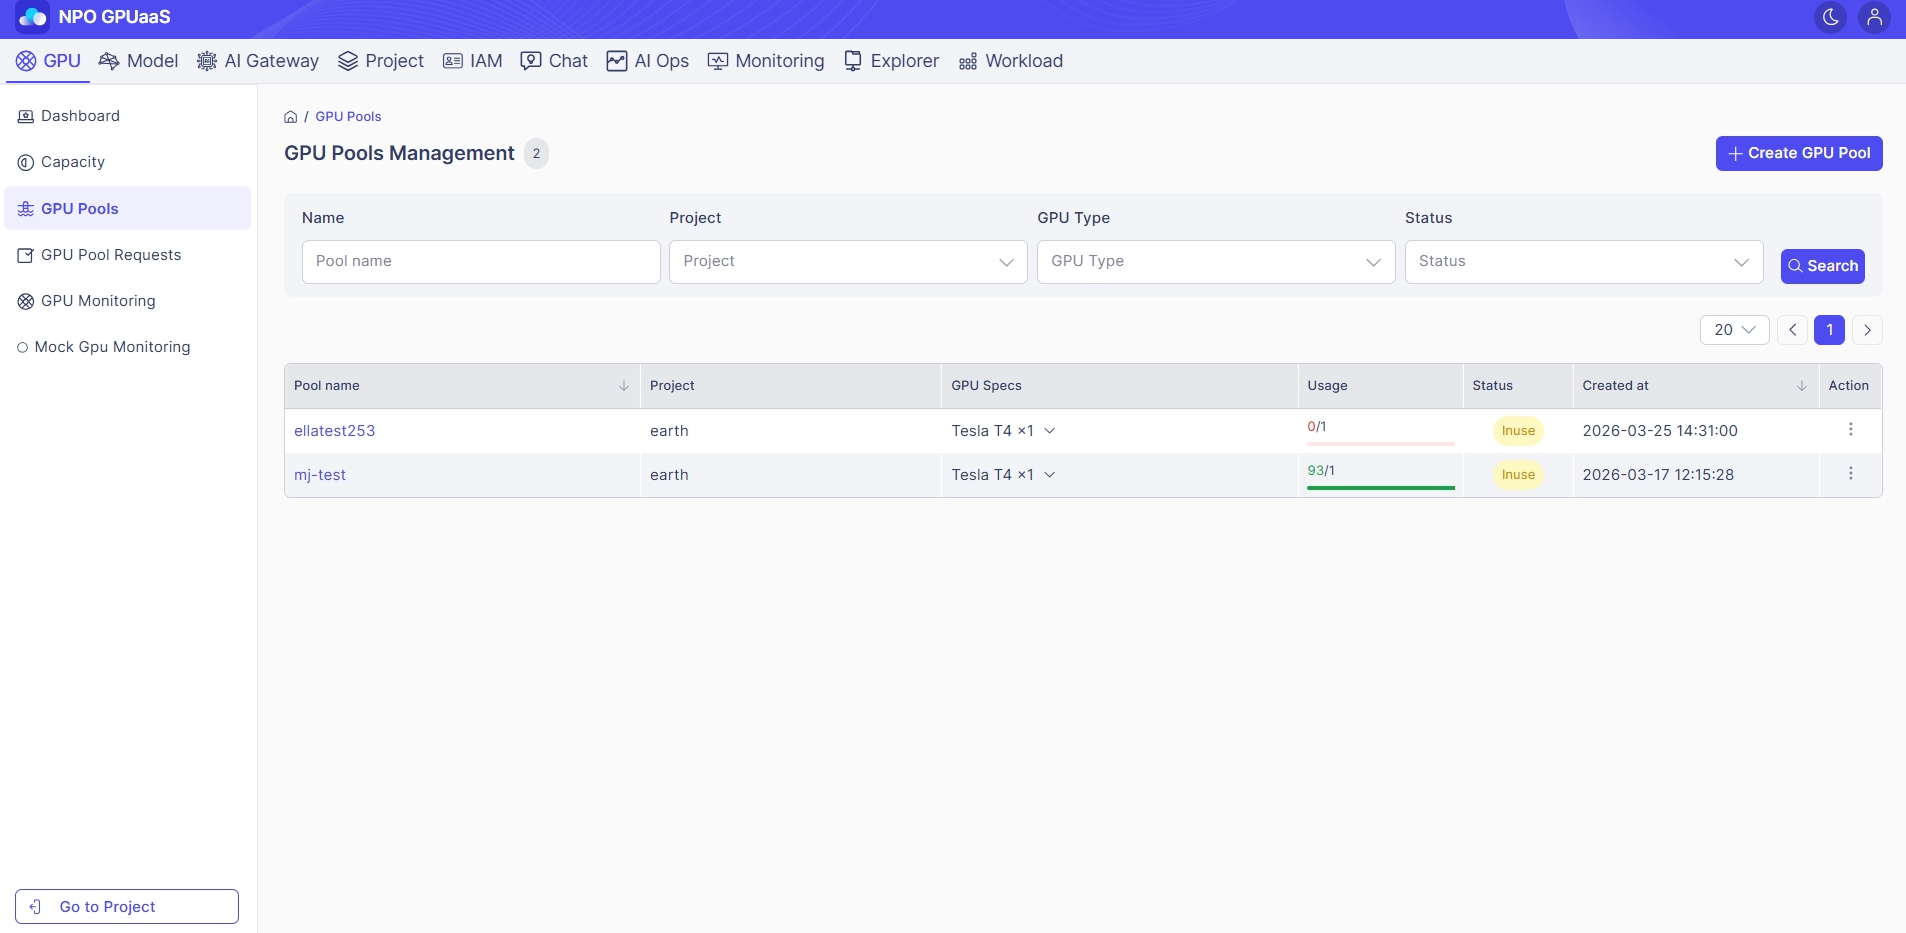
2. Click the three-dot icon and select Manage profiles:

- System navigates to the corresponding GPU Pool Detail screen with the following information.
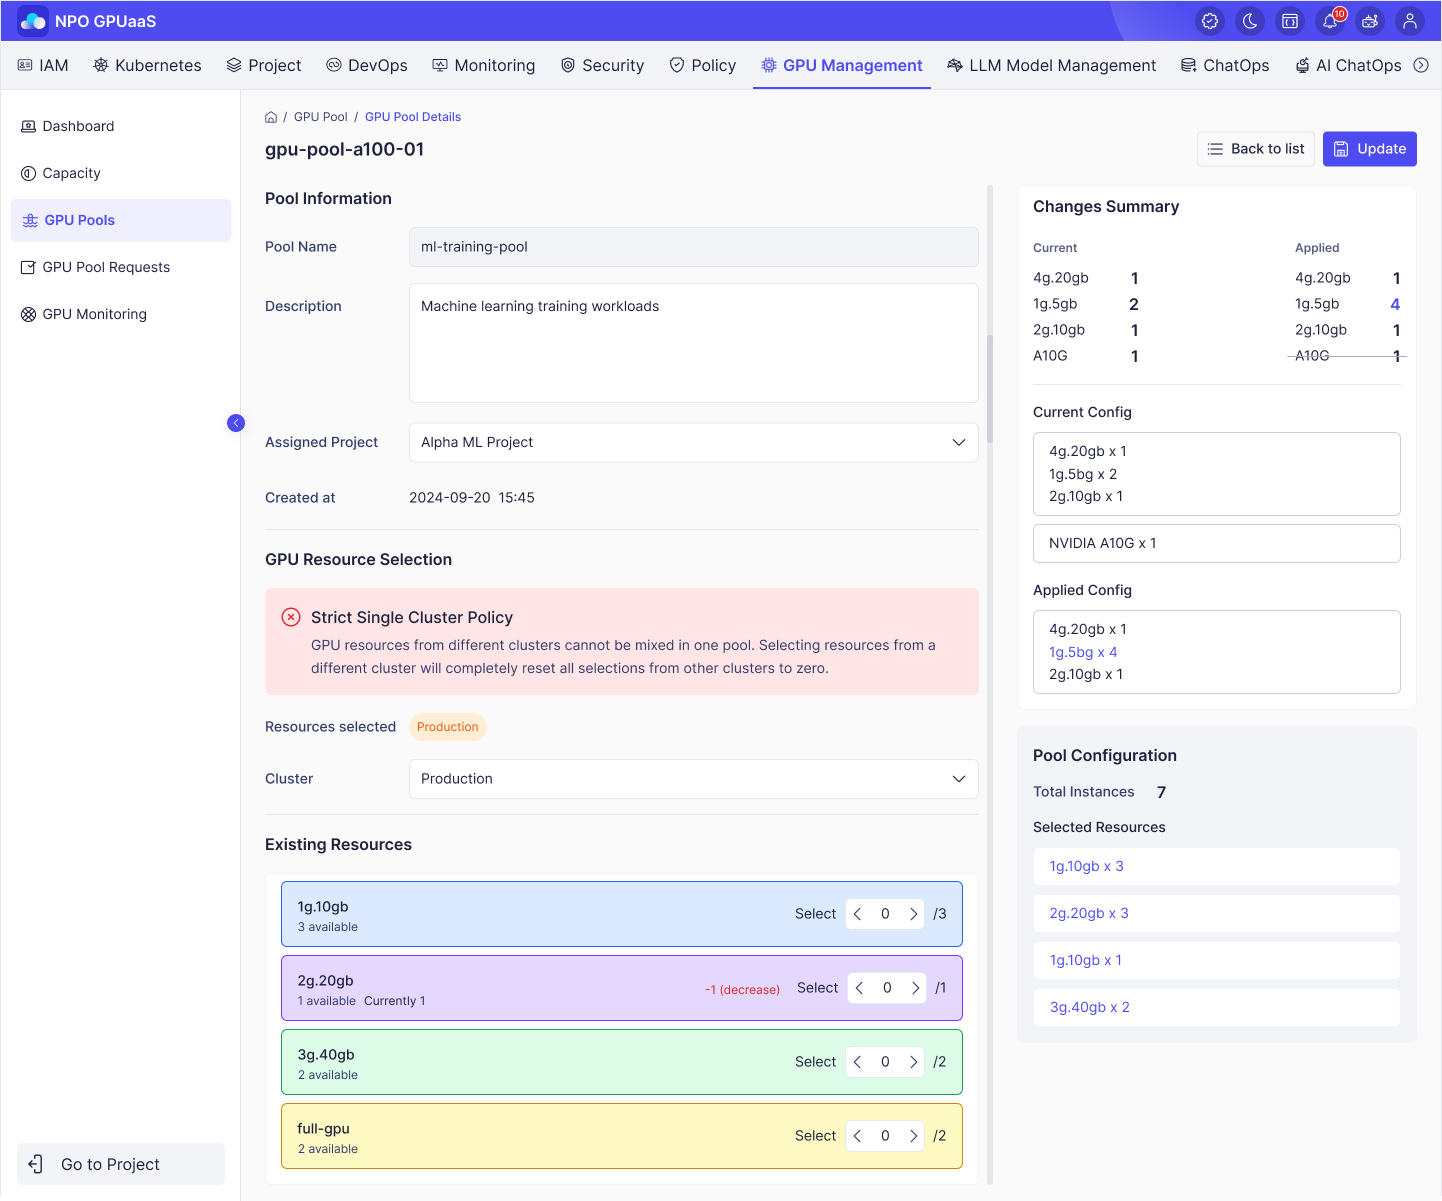
- Pool Name: Name of GPU pool.
- Description: Display the purpose of this pool.
- Assigned Project: Shows the project that the pool has been assigned to.
- Created at: Date and time the pool was created.
- GPU Resource Selection:
- Cluster: Display the cluster where the GPU Pool was created.
- Existing Resources:
- For each GPU type, display the number of units included in the pool.
- Use the selector next to each resource to change the allocated amount as required.
4. On the right panel, review your changes summary (if any):
- Changes summary: Displays a summary of selected resources with their current and newly applied quantities and displays a comparison between the current configuration and the newly applied configuration.
- Pool Configuration: Shows a summary of selected GPU instances, types, and quantities.
5. After confirming all changes, click Update to update the GPU Pool.