Timetable
Accessing the GPU Inventory Page
Project mode: Scheduler > Time Table
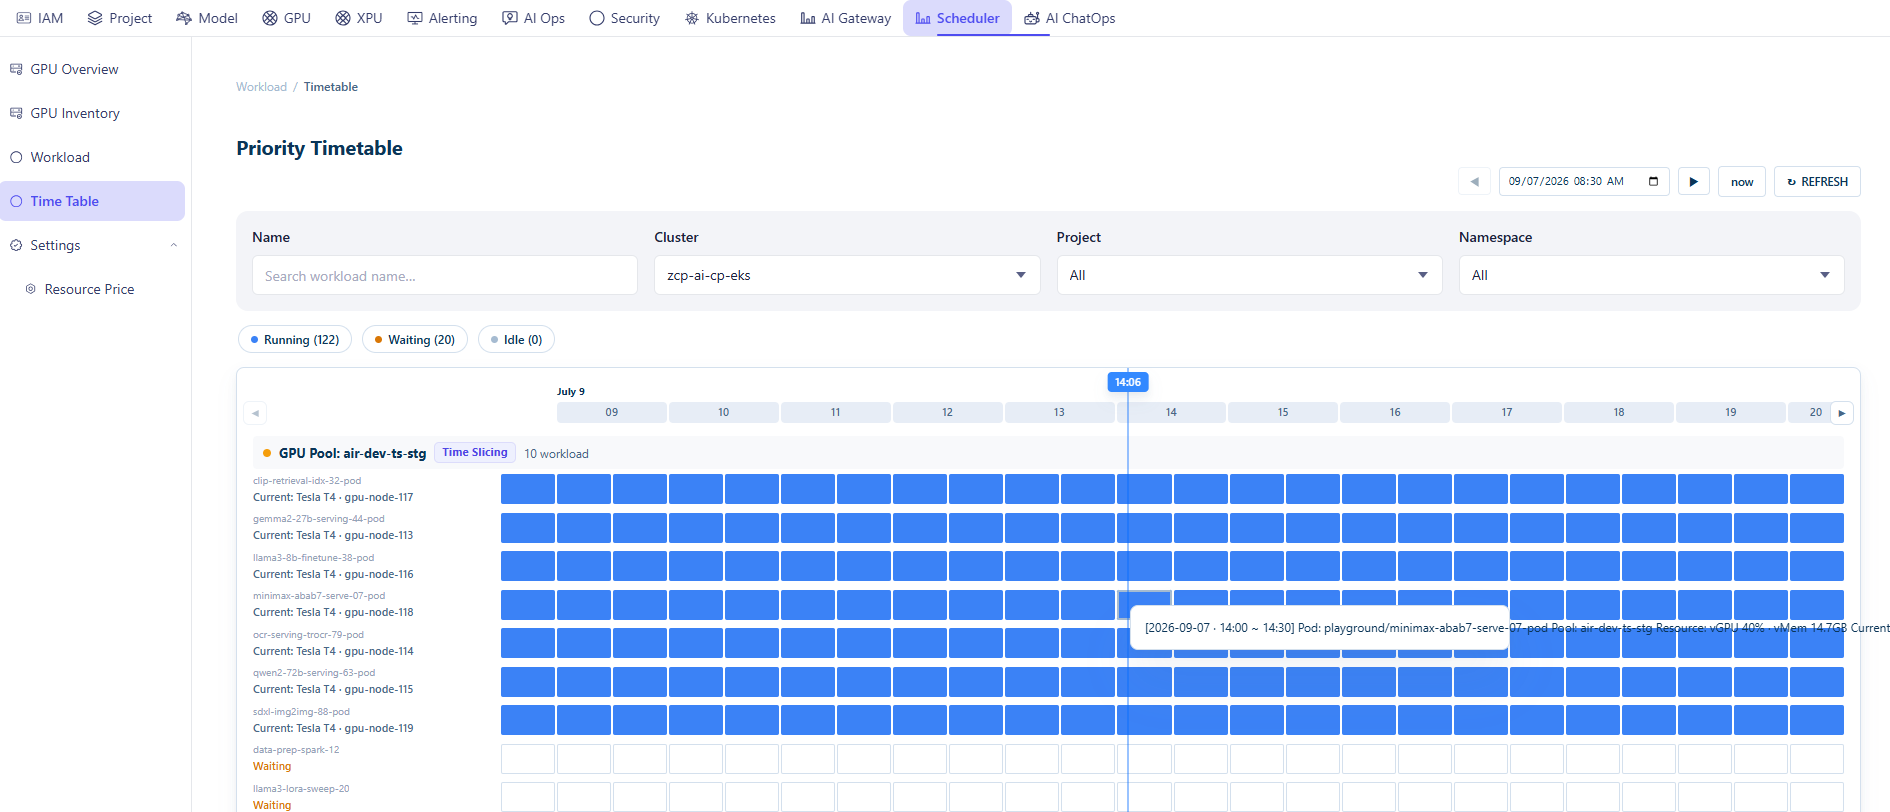
1. Time navigation header
- ◄ / ► buttons: move the timeline back/forward by 12 hours. The "previous" button is disabled when it would move earlier than the current time.
- now button: jumps the view back to the current time.
- REFRESH button: reloads the data.
- A date/time can also be picked directly (e.g. 09/07/2026 08:30 AM).
2. Filter bar & status legend
| Filter | Options (from code) |
|---|---|
| Name | search by workload name |
| Cluster | list of clusters, defaults to "All" |
| Project | list of projects, defaults to "All" |
| Namespace | list of namespace , defaults to "All" |
Three togglable counters, matching the screenshot exactly:
- Running (n)
- Waiting (n)
- Idle (n)
3. Table structure
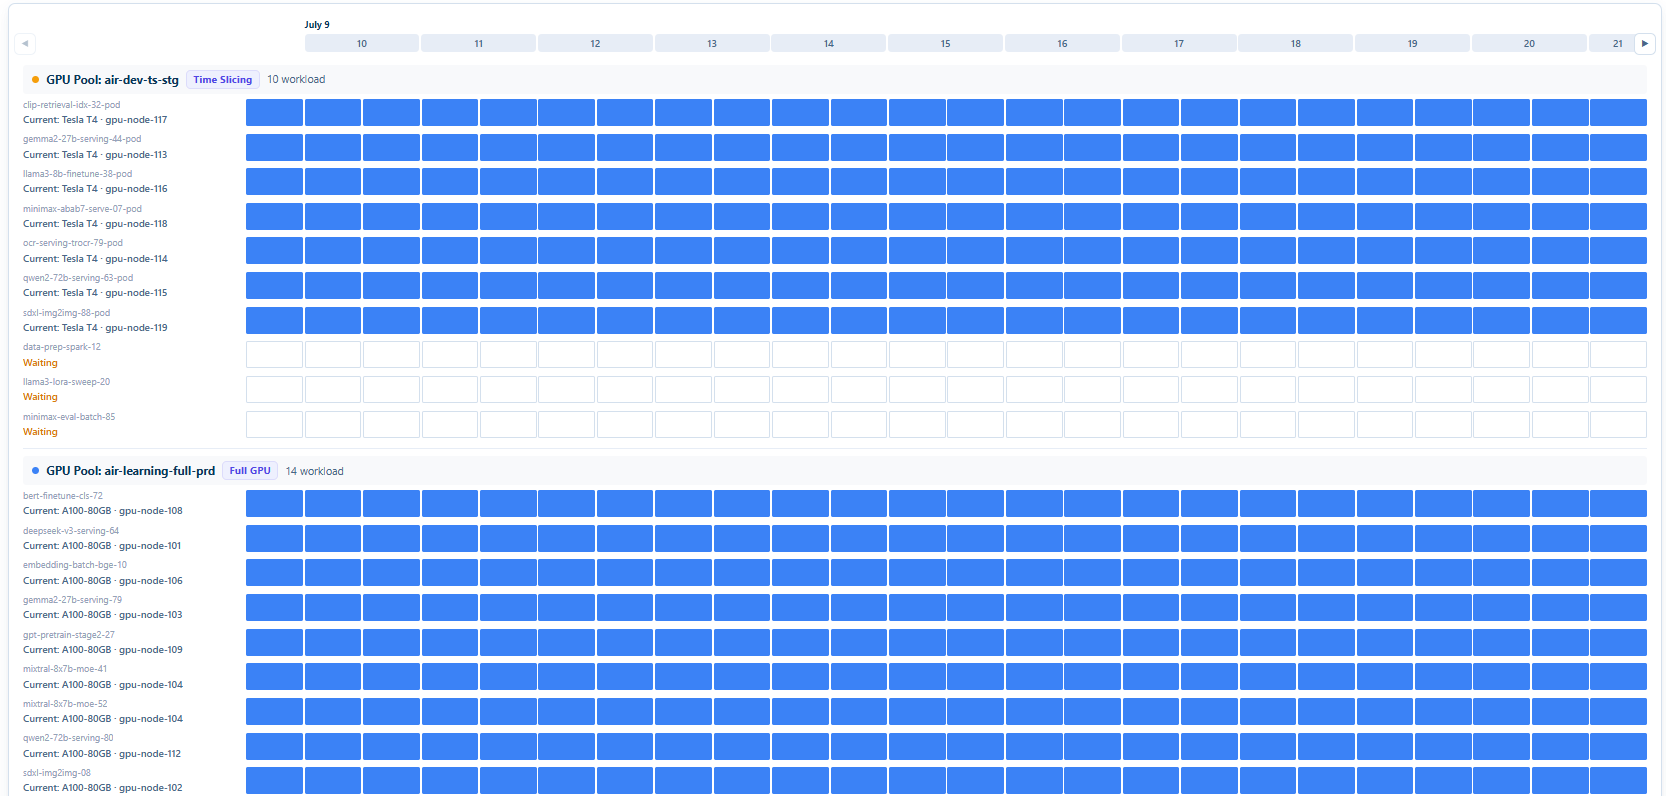
- Each group header row represents one GPU Pool: "GPU Pool: {name}" (e.g. air-dev-ts-stg), with a sharing-mode tag (e.g. "Time Slicing") and a total workload count for that pool (e.g. "10 workload").
- Each row below a group is one workload, showing its pod name and current node (e.g. clip-retrieval-idx-32-pod · Current: Tesla T4 · gpu-node-117).
- Each column is a time slot along the horizontal axis (hourly, with a date label above, e.g. "July 9", hours 09–20). A blue vertical line marks the current time.
- A blue cell = the workload is running during that time slot; a white/outlined cell = waiting or not yet scheduled.
. Hovering a cell — viewing details
The tooltip shows the following (matching the screenshot's content exactly):
- Pod: {namespace}/{pod} — e.g. playground/minimax-abab7-serve-07-pod
- Pool: {pool} — e.g. air-dev-ts-stg
- Resource: {resource} — e.g. vGPU 40% · vMem 14.7GB
- Current priority: {label} — the current priority level
- If a schedule already exists: the direction (↑ Raise / ↓ Lower) → the target priority (Scheduled: {dir} → P{priority}), and either the revert time (End time: reverts in {n} min) or the exact execution time.
- If no schedule exists: Schedule: none — running as usual.
- If the cell has no GPU allocated at all: Idle (no GPU allocated).
7. Creating a new priority schedule
Clicking a future time slot opens the "Schedule Priority Bump" dialog, allowing the user to configure a priority change for the selected workload. In the dialog, the user can:
- Select the execution type: One-time or Repeat.
7.1. For One-time:
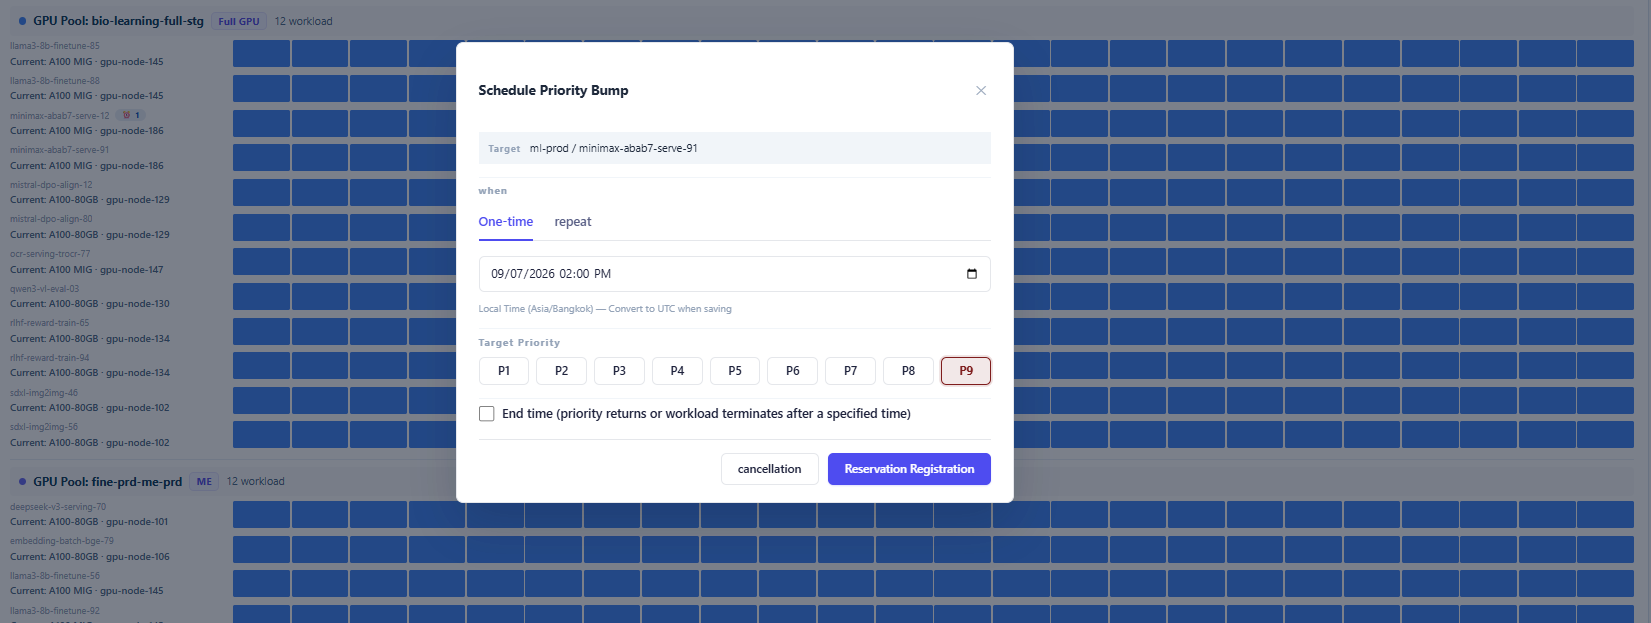
- Choose the execution date and time.
- Select the target priority level (P1–P9).
- Optionally enable End Time to automatically revert the workload to its previous priority (or terminate it) after a specified time.
- Submit the schedule by clicking Reservation Registration.
7.1. For Repeat:
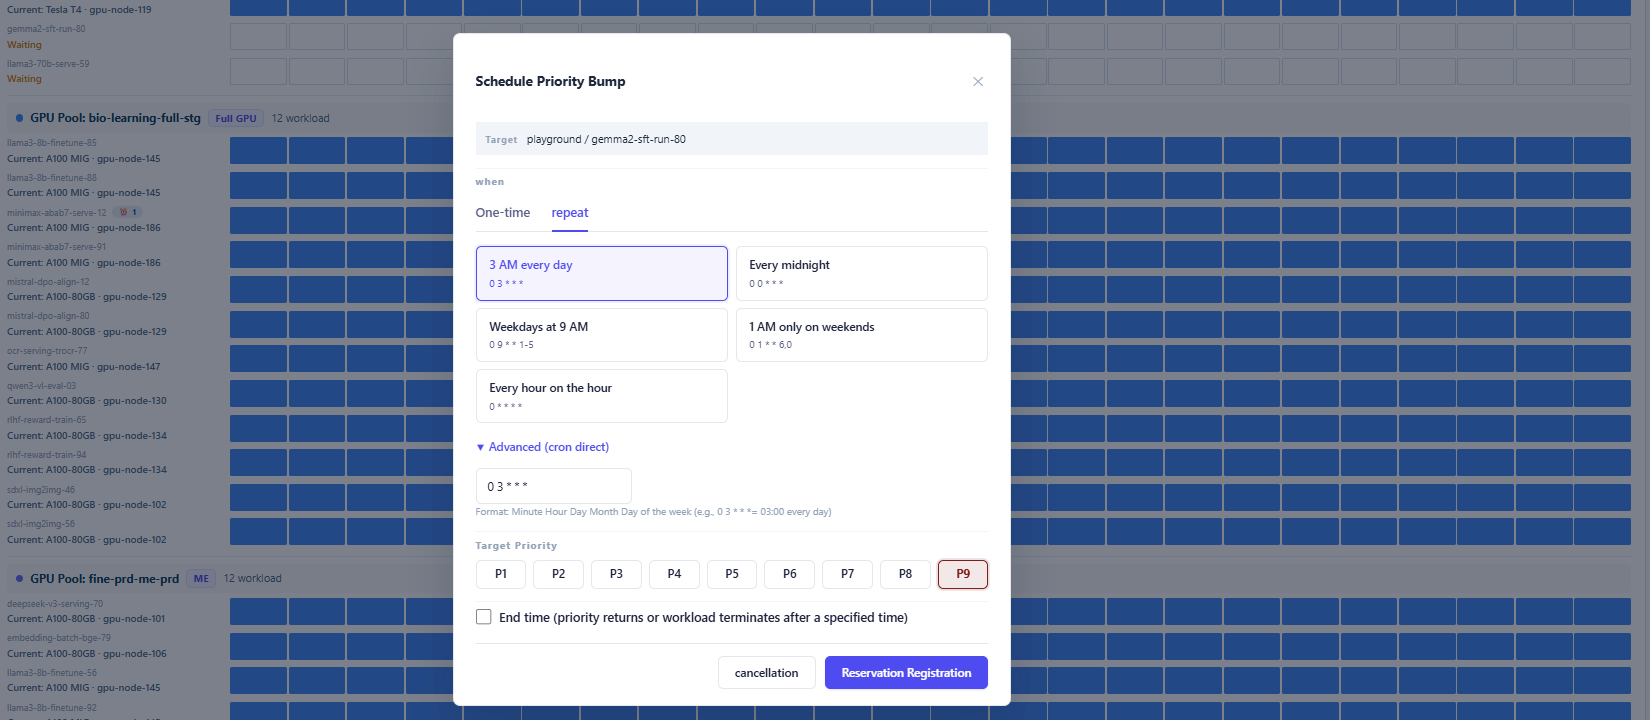
- Choose a predefined recurring schedule (for example: 3 AM every day, Every midnight, Weekdays at 9 AM) or define a custom schedule using Advanced (cron direct).Select the target priority level (P1–P9).Optionally enable End time to automatically revert the priority (or terminate the workload) after a specified time.Click Reservation Registration to save the schedule.
- Choose a predefined recurring schedule (for example: 3 AM every day, Every midnight, Weekdays at 9 AM) or define a custom schedule using Advanced (cron direct).
- Select the target priority level (P1–P9).
- Optionally enable End time to automatically revert the priority (or terminate the workload) after a specified time.
- Click Reservation Registration to save the schedule.