Provisioning Agent Profile
Provisioning allocates compute resources and configures networking for your agent to run in production. For agents with Standalone Runtime mode, you must complete provisioning before publishing to make the agent available for use in Workspace. For agents with Workspace Runtime mode, publishing alone is sufficient, provisioning is not required.
Quick Steps
- Go to AI Agent > Agent Profiles and select your agent profile. Click pencil icon on the top right conner to open screen Edit Agent.
- Click Provision to open the provisioning dialog.
- Select your Cluster and Namespace.
- Configure the Deployment Spec tab (compute resources).
- Configure the Network tab (connectivity and access).
- Click Start Deployment to complete provisioning.
After successful provisioning, your agent shall appear on the Agent Instance list screen.
Tab Deployment Spec
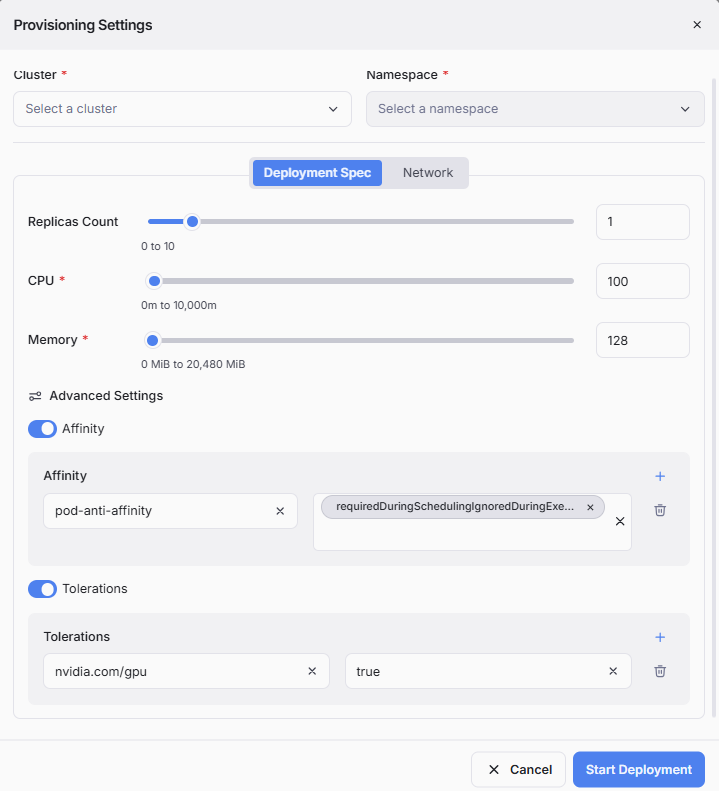
| Field | Description | Range | Default |
|---|---|---|---|
| Replicas Count | Number of pod replicas to run (for high availability and load distribution). | 0 to 10 | 1 |
| CPU * (required) | CPU request/limit for each pod (in millicores). | 0 to 10,000m | 100 |
| Memory * (required) | Memory request/limit for each pod (in MiB). | 0 to 20,480 MiB | 128 |
| Advanced Settings | Toggle to expand optional configurations: • Affinity: Pod affinity/anti-affinity rules for scheduling. Add rules using + button. Format: Role: Management. • Tolerations: Tolerations for pod scheduling on tainted nodes. Add tolerations using + button. Format: Key: True. |
Tab Network
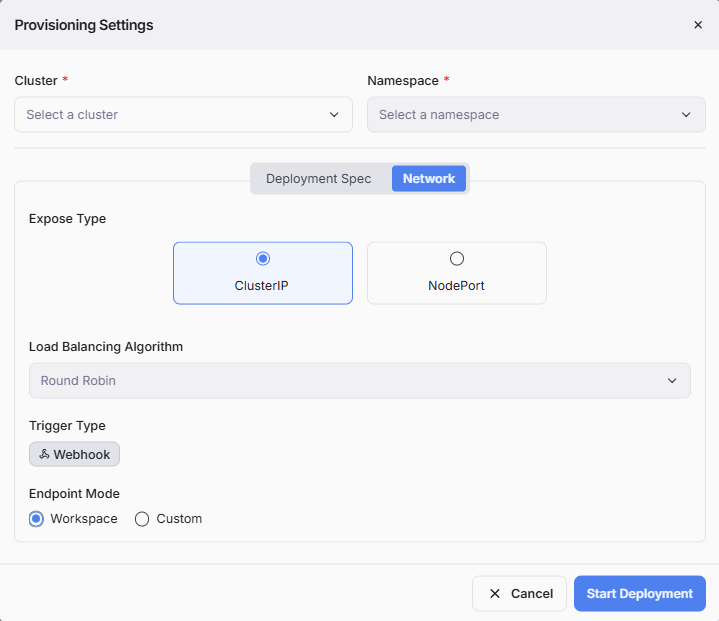
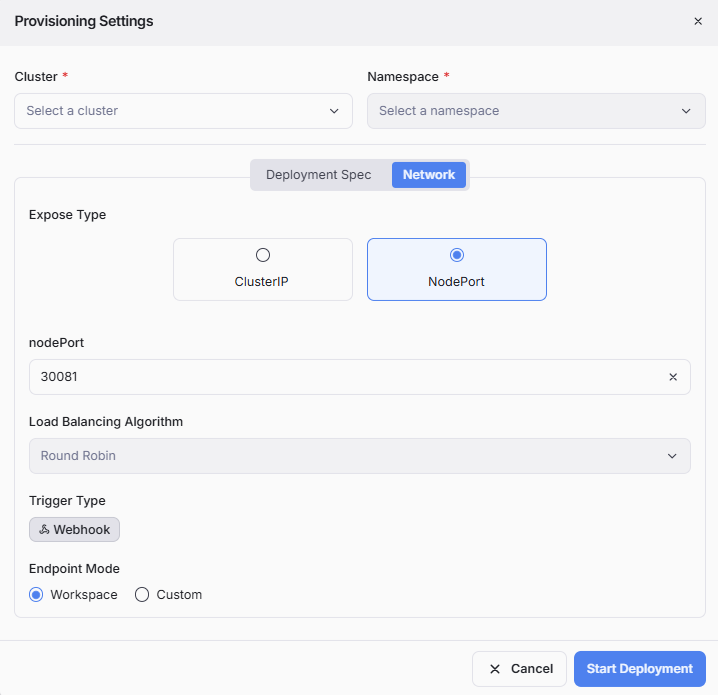
| Option | Description |
|---|---|
| ClusterIP (default) | Agent is exposed only within the cluster. No external access. Use for internal agents. |
| NodePort | Agent is exposed on a specific port on each node. External systems can call node-ip:nodeport. |
| nodePort | Display if NodePort is selected. Port number on the node. |
| Round Robin (default) | Requests are distributed equally across all pod replicas. |
| Trigger Type | The trigger configured for this agent (e.g., Webhook, Chatbot, Scheduler). Read-only; determined by the agent configuration. |
| Endpoint Mode: Workspace | The agent is accessible within the workspace infrastructure. Workspace handles routing and authentication. |
| Endpoint Mode: Custom | Expose the agent with a custom domain and advanced routing |
When select Endpoint Mode is Custom:
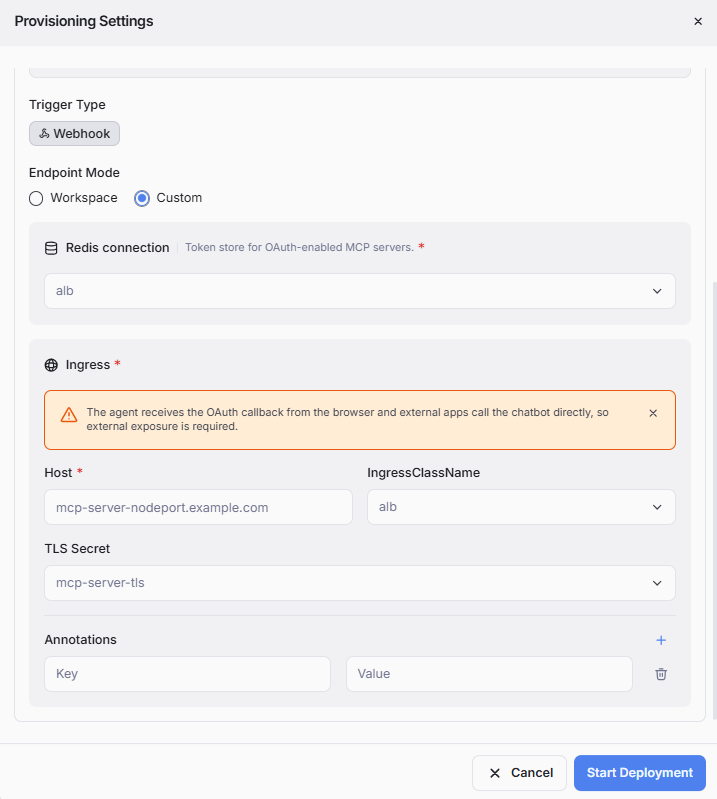
| Field | Description |
|---|---|
| Redis connection * (required) | Token store for OAuth-enabled MCP servers. Select from the dropdown. |
| Ingress * (required) | Configure external HTTP(S) exposure. |
| • Host * (required) | Fully qualified domain name for the agent. |
| • IngressClassName * (required) | Kubernetes Ingress class for routing. Select from dropdown. |
| TLS Secret | Kubernetes secret containing TLS certificate and key for HTTPS. Select from dropdown. |
| Annotations | Custom Kubernetes annotations to attach to the Ingress resource. Add key-value pairs using + button. Useful for routing rules, SSL certificates, etc. |
Note: When using Custom mode, the system displays: "The agent receives the OAuth callback from the browser and external apps call the chatbot directly, so external exposure is required."