Create GPU Pool
Một GPU Pool là một nhóm hợp lý của các tài nguyên GPU có thể được quản lý và phân bổ hiệu quả cho các dự án hoặc nhóm. Tổ chức các GPU thành các pool cho phép sử dụng tối ưu, quản lý đơn giản và khả năng mở rộng khi các yêu cầu phát triển.
ghi chú
Bạn phải có vai trò Quản trị viên Hệ thống để truy cập Bảng điều khiển Quản trị Hệ thống và thực hiện các thao tác này.
-
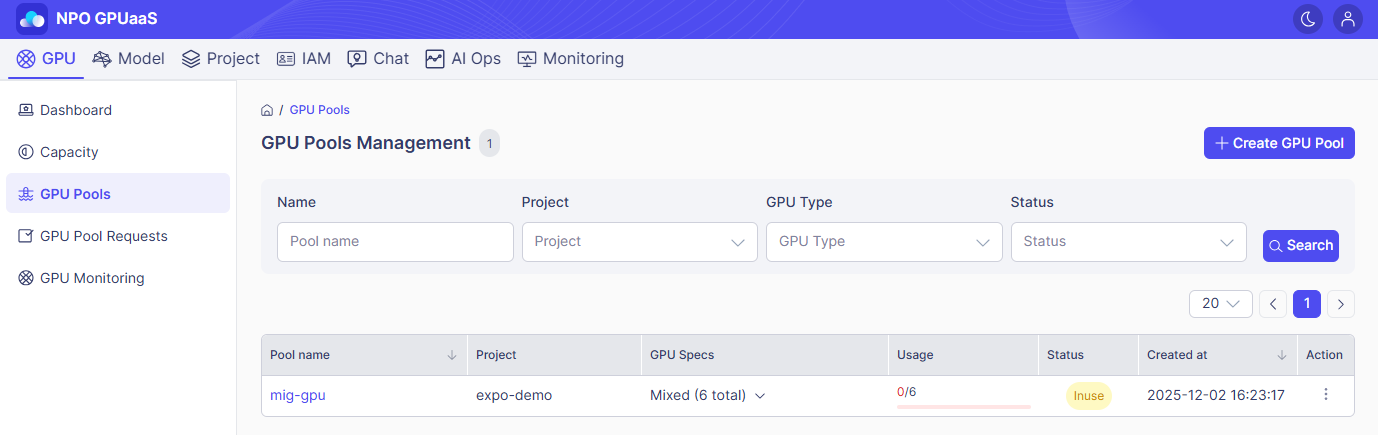
Từ Bảng điều khiển Quản trị Hệ thống, nhấp vào GPU trong điều hướng chính. Sau đó, trong điều hướng bên trái, chọn GPU Pools:
-
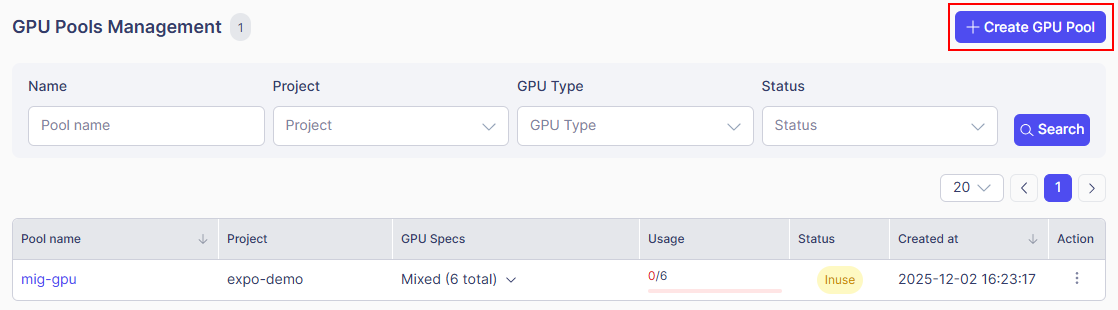
Trên màn hình GPU Pools Management, nhấp vào nút + Create GPU Pool ở góc trên bên phải của màn hình.
-
Điền vào mẫu Create Pool:
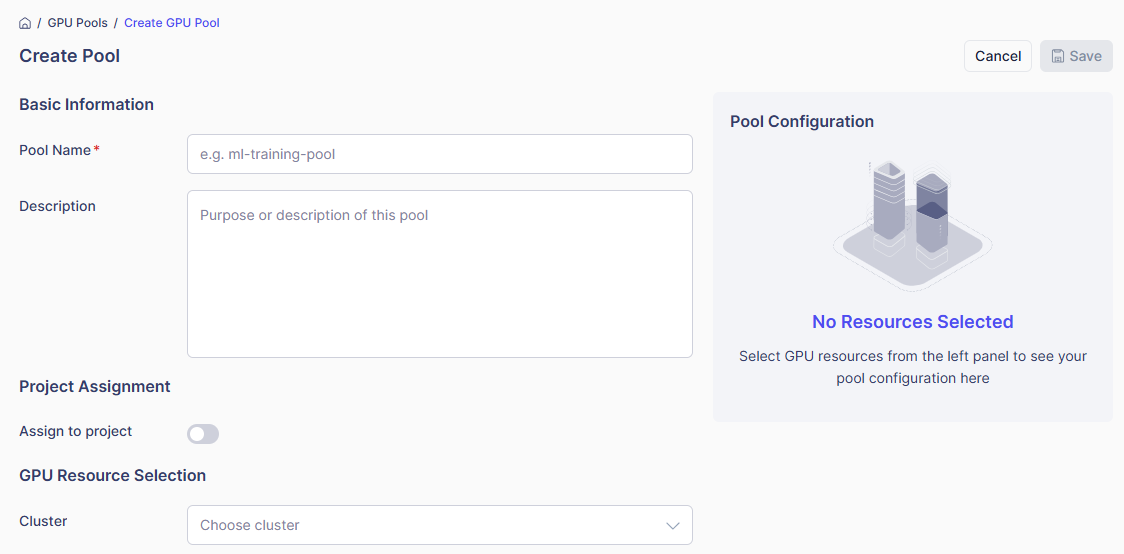
- Basic information:
- Pool Name (bắt buộc): Nhập một tên duy nhất, mô tả cho GPU pool của bạn.
- Description (tùy chọn): Mô tả ngắn gọn mục đích của pool này. Giúp các thành viên trong nhóm hiểu được mục đích sử dụng của nó.
- Project Assignment (tùy chọn): Chọn xem có muốn kết nối GPU Pool trực tiếp với một dự án cụ thể hay không:
- Assign to project:
- Bật ON nếu bạn muốn ngay lập tức gán pool cho một dự án cụ thể.
- Bật OFF để để pool chưa được gán cho đến bây giờ; nó có thể được gán sau.
- Assign to project:
-
GPU Resource Selection:
- Cluster: Chọn cụm mà bạn muốn tạo GPU pool. Chỉ có các cụm có sẵn được liệt kê.
- Select GPU Resources:
- Đối với mỗi loại GPU, chỉ định số lượng đơn vị để bao gồm trong pool.
- Giao diện người dùng hiển thị số lượng có sẵn cho từng loại GPU.
- Sử dụng bộ chọn bên cạnh mỗi tài nguyên để phân bổ số lượng cần thiết.
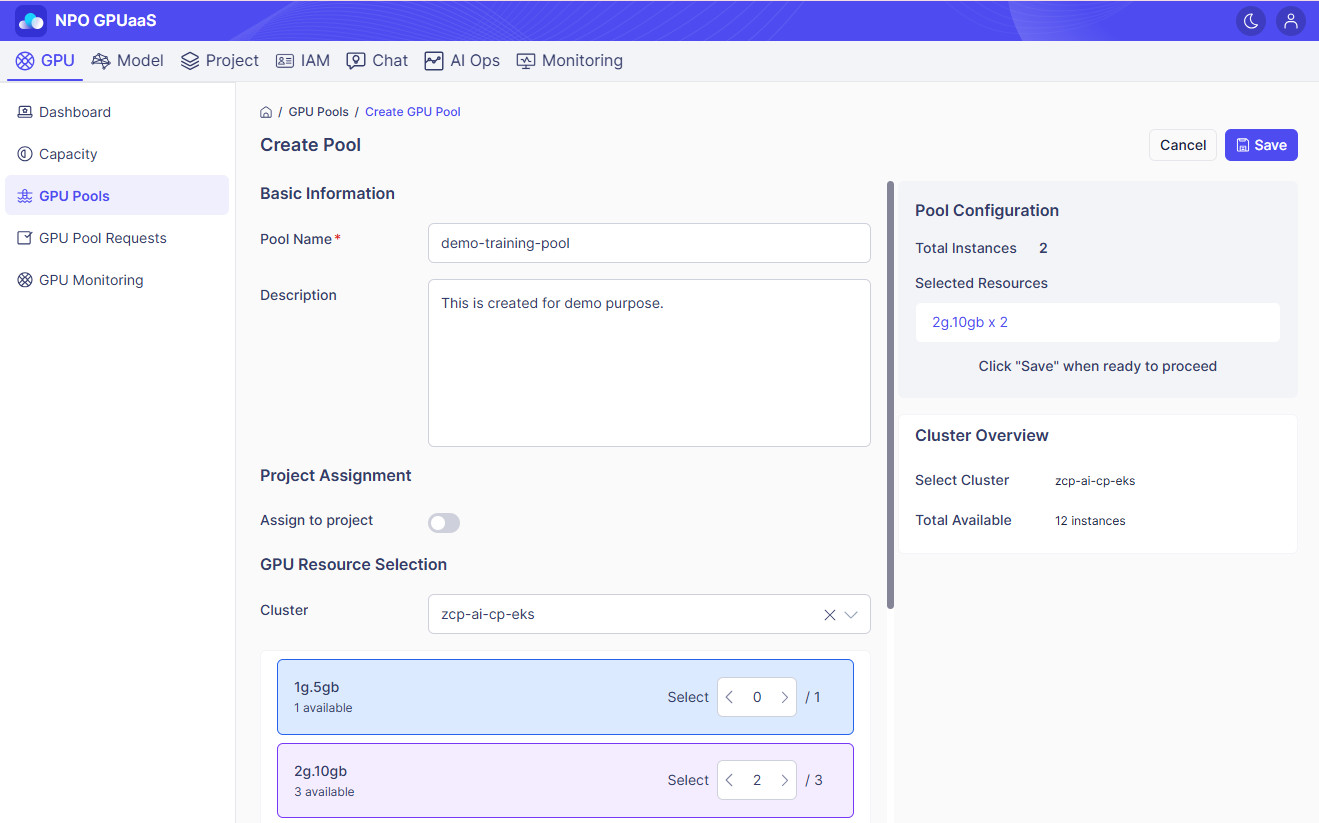
- Sử dụng bộ chọn bên cạnh mỗi tài nguyên để phân bổ số lượng cần thiết.
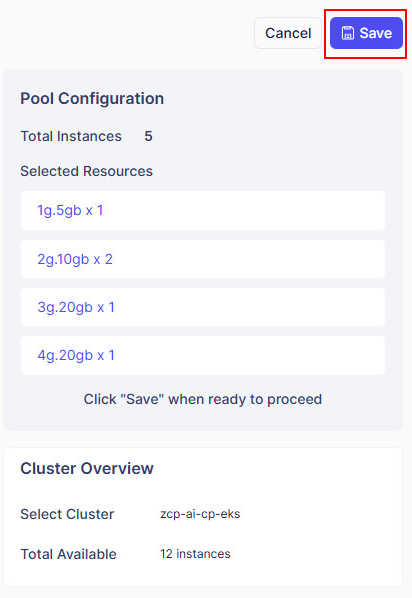
- Ở panel bên phải, xem lại cấu hình của bạn:
- Pool Configuration: Hiển thị tóm tắt các phiên bản GPU đã chọn, loại và số lượng.
- Cluster Overview: Hiển thị cụm đã chọn và tổng số phiên bản GPU có sẵn.
- Sau khi xác nhận tất cả các chi tiết, nhấp vào Save để tạo nhóm GPU. Trong trường hợp bạn muốn bỏ qua các thay đổi, nhấp vào Cancel.