General settings
Theme, Color, and API Key Settings
NPO Studio provides personalization options that let each user adjust the visual appearance of the interface, as well as a centralized Settings area for administrators to manage API credentials used by agents and backend services.
Theme and Color Customization
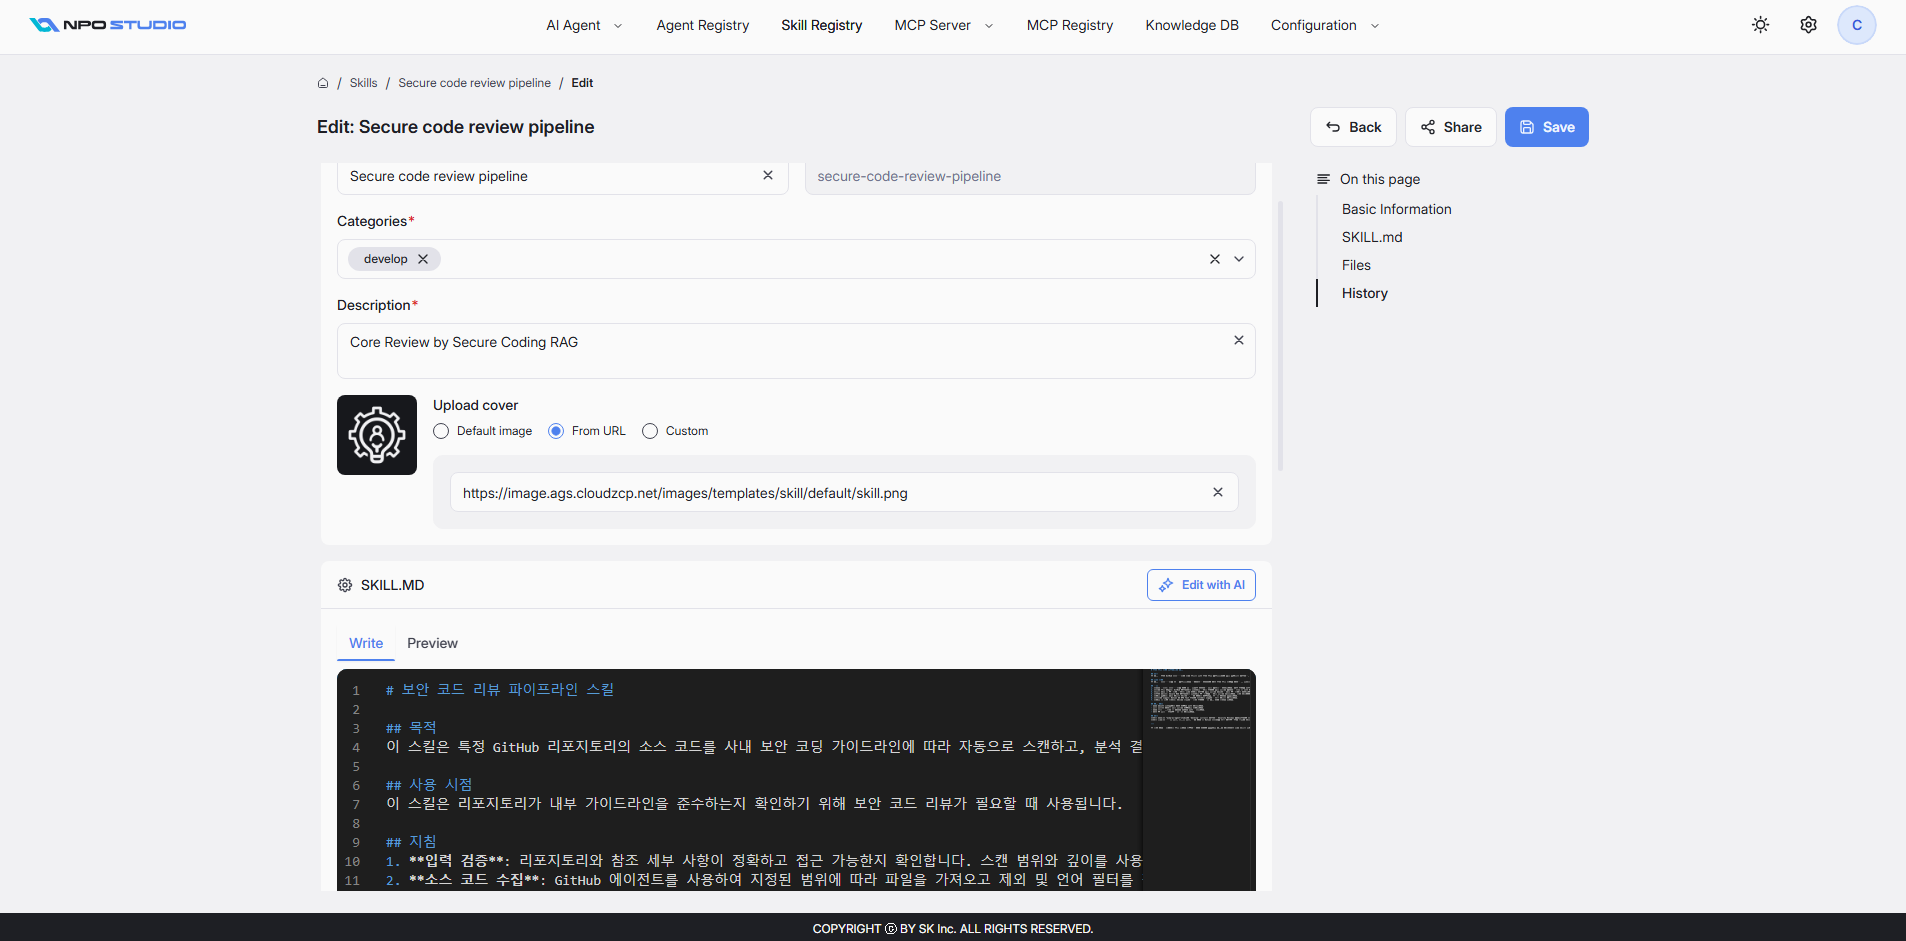
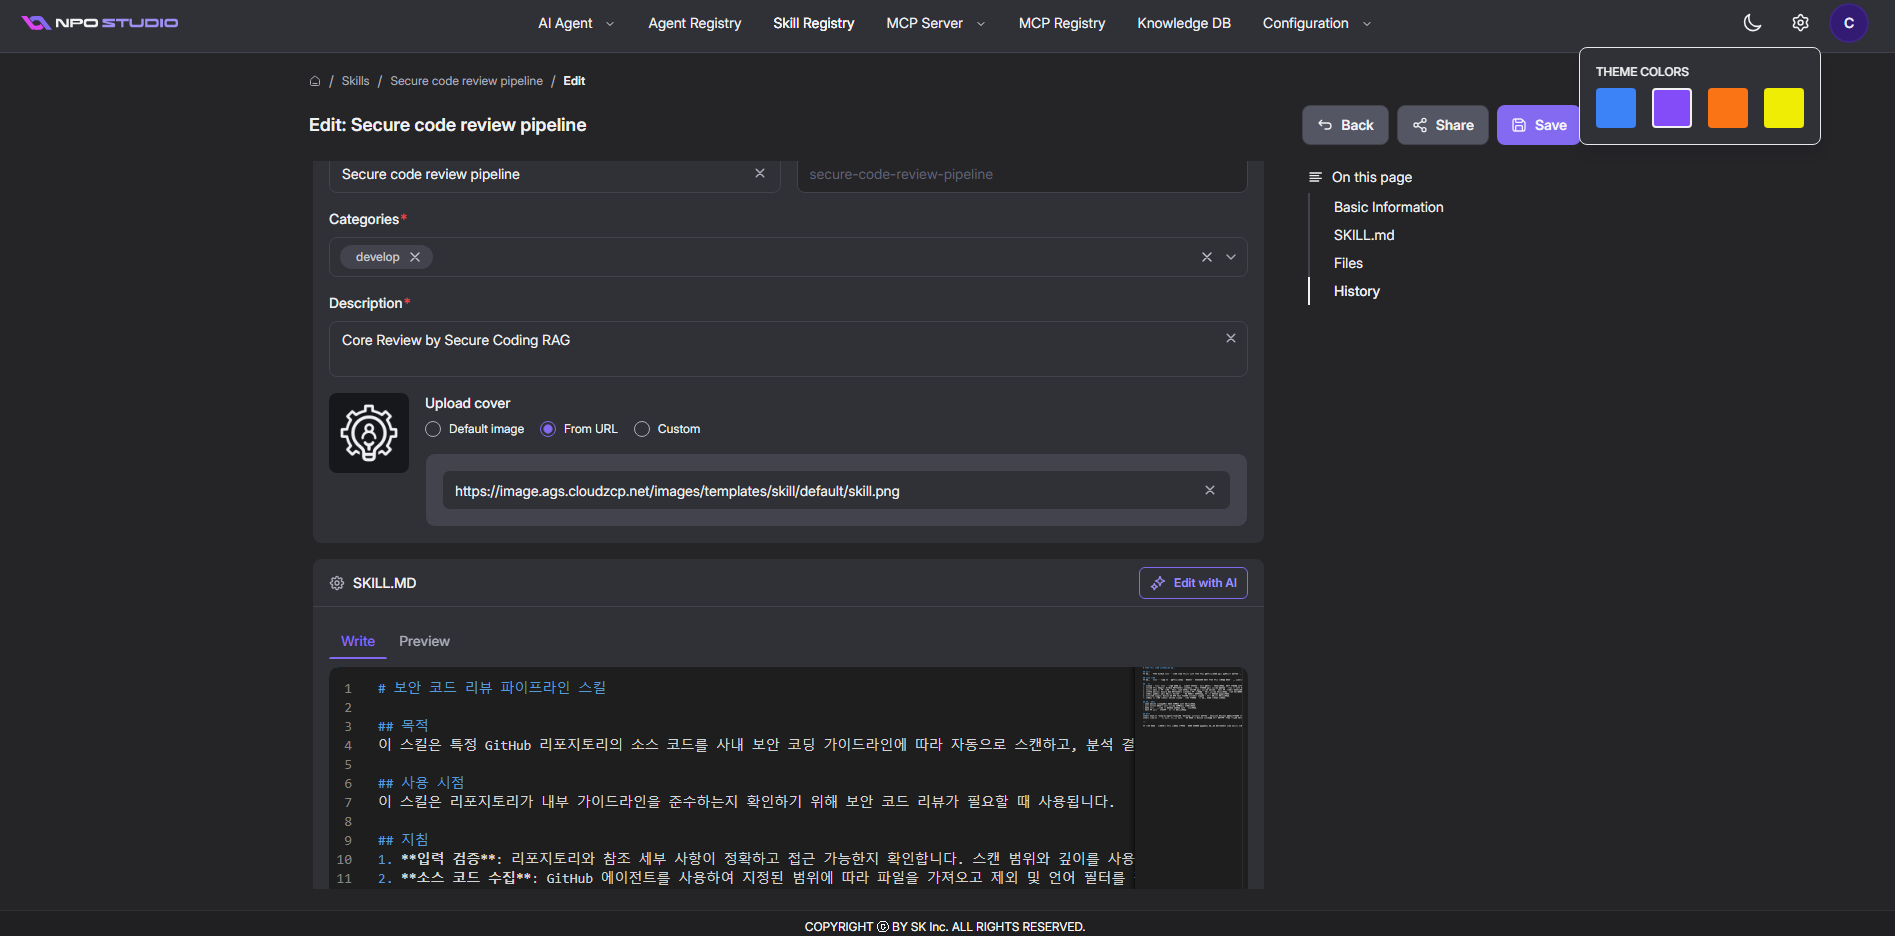
NPO Studio supports light and dark display modes along with selectable accent colors. These preferences are applied globally across the interface and are accessible from the top-right toolbar on any page.
Switch Between Light and Dark Mode
Click the sun icon (☀) in the top-right toolbar to toggle between light mode and dark mode. The interface immediately updates to the selected theme without requiring a page reload.
- Light mode: Bright background, optimized for well-lit environments.
- Dark mode: Dark background, ideal for low-light or extended sessions.
API Key Settings
The Settings page manages API credentials used by LLM providers, and backend servers. Credentials are stored securely and referenced by name across the platform.
View Existing Credentials
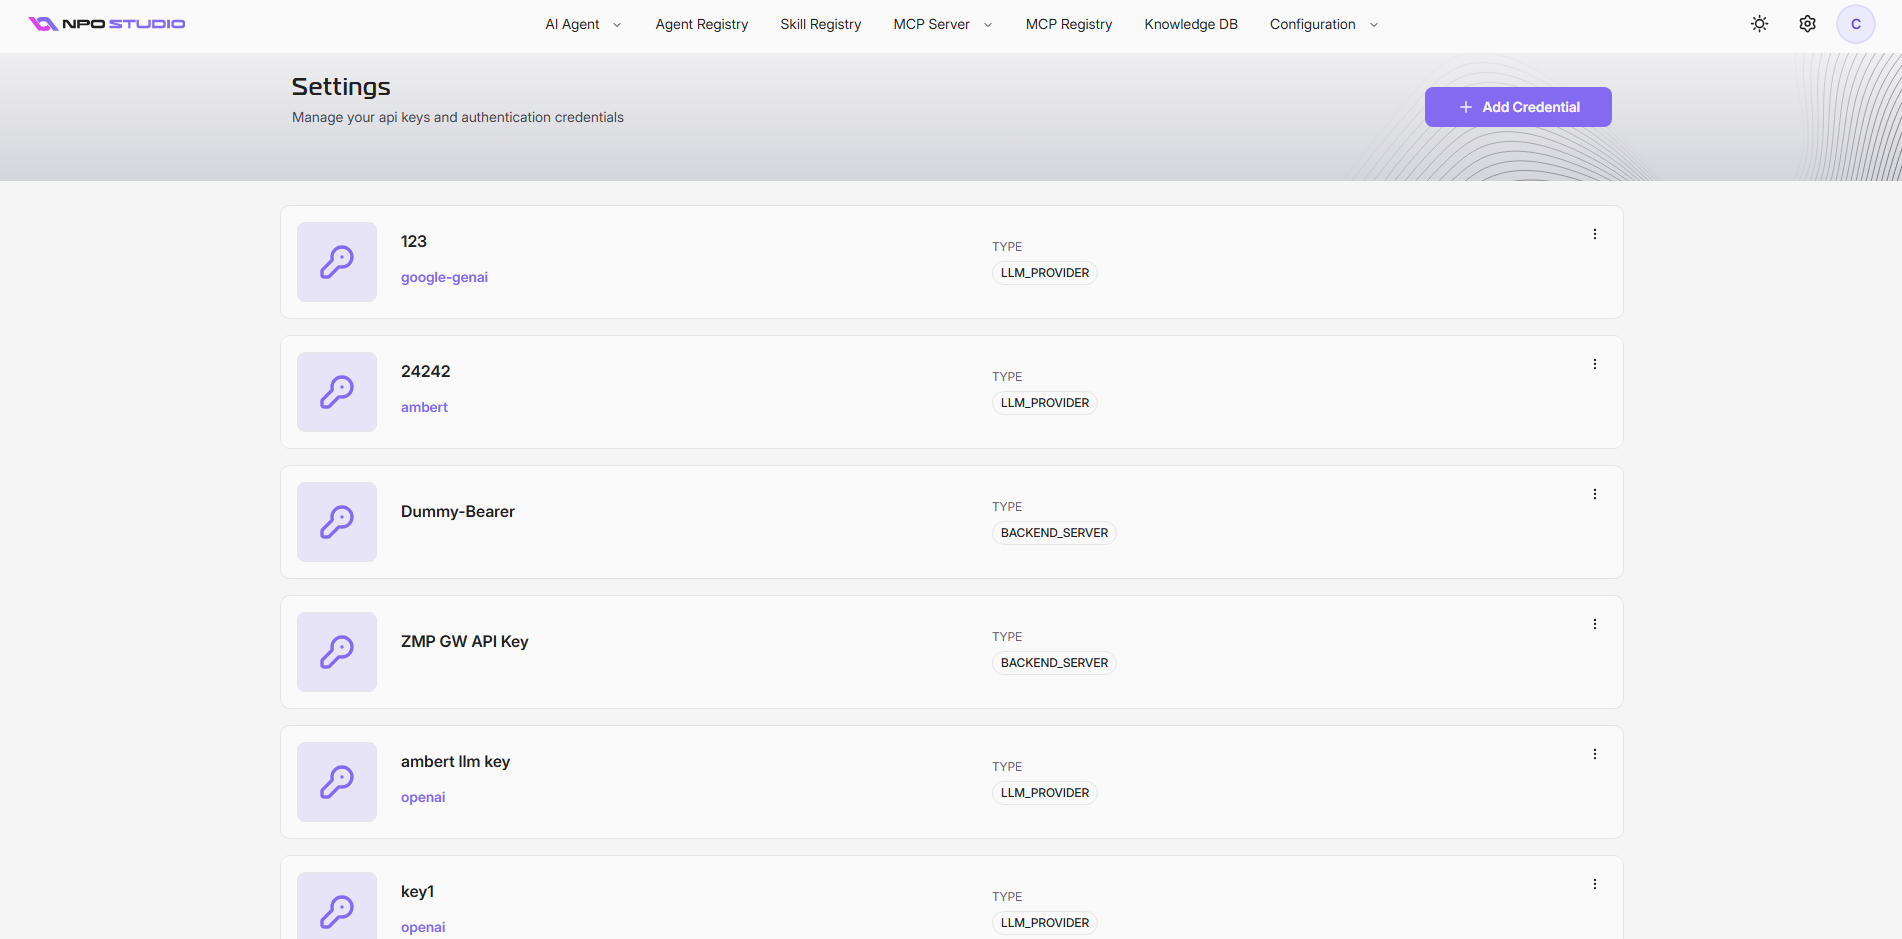
The Settings dashboard lists all configured credentials, each showing:
- Name: Display name identifying the credential.
- Provider: The associated provider or service (e.g., openai, google-genai).
- Type: The credential category:
- LLM_PROVIDER — Used to authenticate requests to AI language model providers.
- BACKEND_SERVER — Used to authenticate requests to backend services.
Each credential card includes an overflow menu (â‹®) for editing or deleting the entry.
Add/Edit a Credential
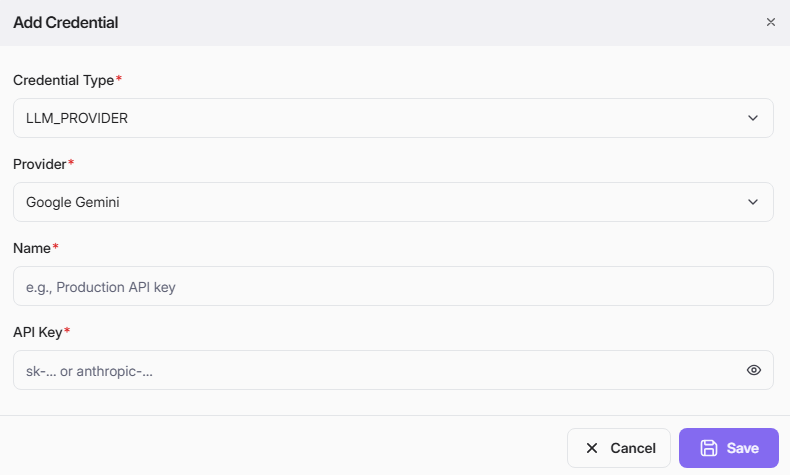
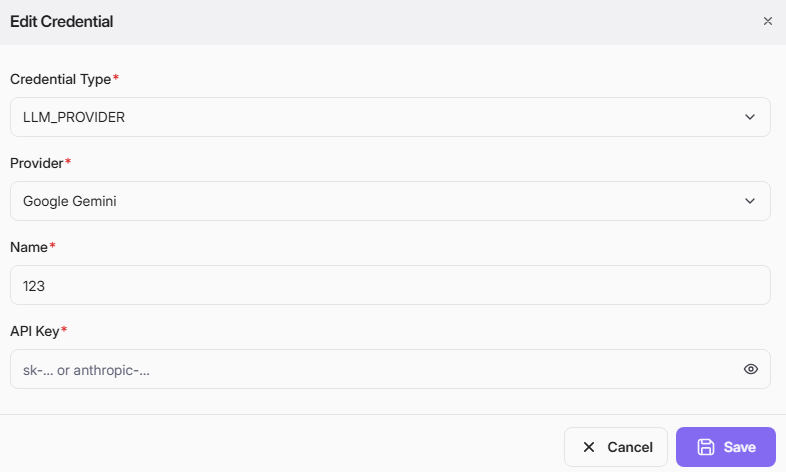
To add a credential, click Add Credential and complete the form:
- Credential Type (required): Select the type of service this key authenticates:
- LLM_PROVIDER
- BACKEND_SERVER
- Provider (required): Select the target provider (e.g., Google Gemini, OpenAI, Anthropic).
- Name (required): Enter a descriptive label (e.g., "Production API key").
- API Key (required): Paste the secret key value. Use the eye icon (ðŸ‘) to reveal or hide the key while typing.
After completing all required fields, click Save to store the credential, or Cancel to close without saving. The new credential will appear immediately in the Settings list.
Edit an Existing Credential
To update a credential, click the overflow menu (⋮) on its card and select Edit. The Edit Credential dialog opens with all current values pre-filled and masked.
Share a Credential
To share a credential, click the overflow menu (⋮) on its card and select Share. The Share dialog opens
The API Key sharing feature makes it easy to collaborate securely. You can adjust access at any time by revisiting the sharing dialog, updating users, groups, or permissions as needed.
Select Sharing Mode
In the sharing dialog, you’ll see three sharing modes:
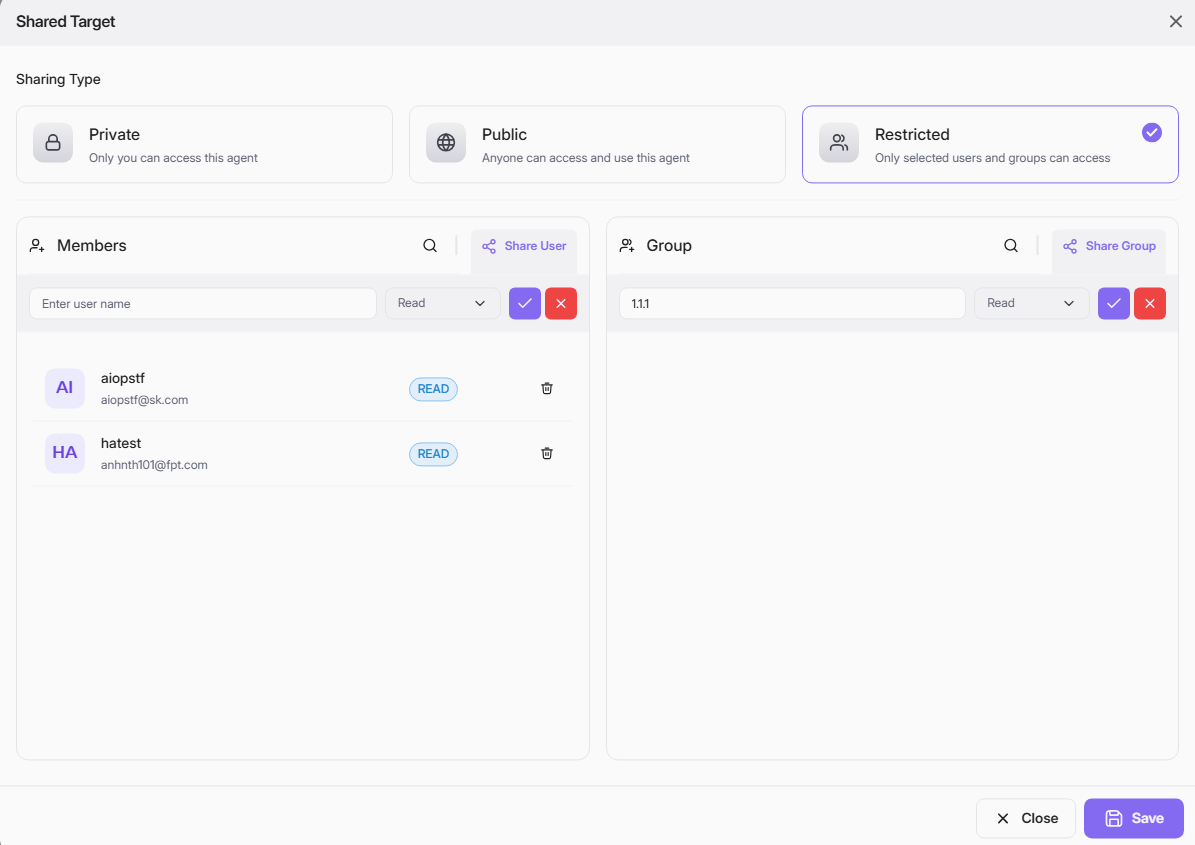
- Private:
- Only you can access and use this API Key.
- Public:
- Anyone can access and use this API Key.
- Choose this for API Key intended for broad visibility or open collaboration.
- Restricted:
- Only selected users or user groups can access and use this API Key.
Please select the appropriate sharing mode and click Save to apply your changes.
Share with specific User
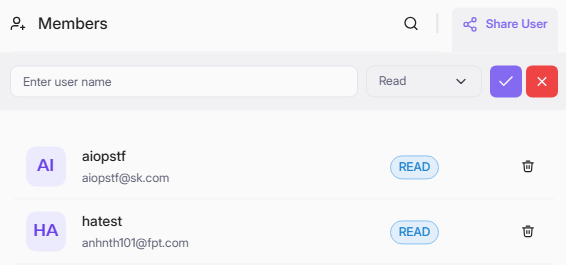
When you select Restricted mode, you can share the API Key with specific users:
Follow the steps below to share the agent profile with other users:
- Click Share User at the top right of the Members section.
- In the search bar, begin typing the username or email. Matching users will appear in the dropdown.
- Select the desired user.
- Choose the permission level: For API key, target users are only allow to view the key and apply for authentication without editability.
- Click the checkmark to confirm, or the red X to cancel.
- The user will appear in the list below with their permission badge (
READ). - Click Save at the bottom right to apply your changes.
You can delete shared user with the trash icon.
Share with a User Group
When you select Restricted sharing mode, you can also share your API Key with groups:
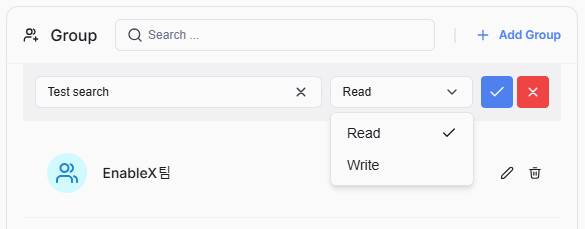
Follow the steps below to share the agent profile with user groups:
- Click + Share Group at the top right of the Group section.
- Type the group name in the search bar. Matching groups will appear in the dropdown.
- Select the appropriate group from the results.
- Choose the permission for the group: For API key, target groups are only allow to view the key and apply for authentication without editability.
- Click the checkmark to confirm, or the red X to cancel.
- The group will appear in the list below with their permission badge.
- Click Save to apply changes.