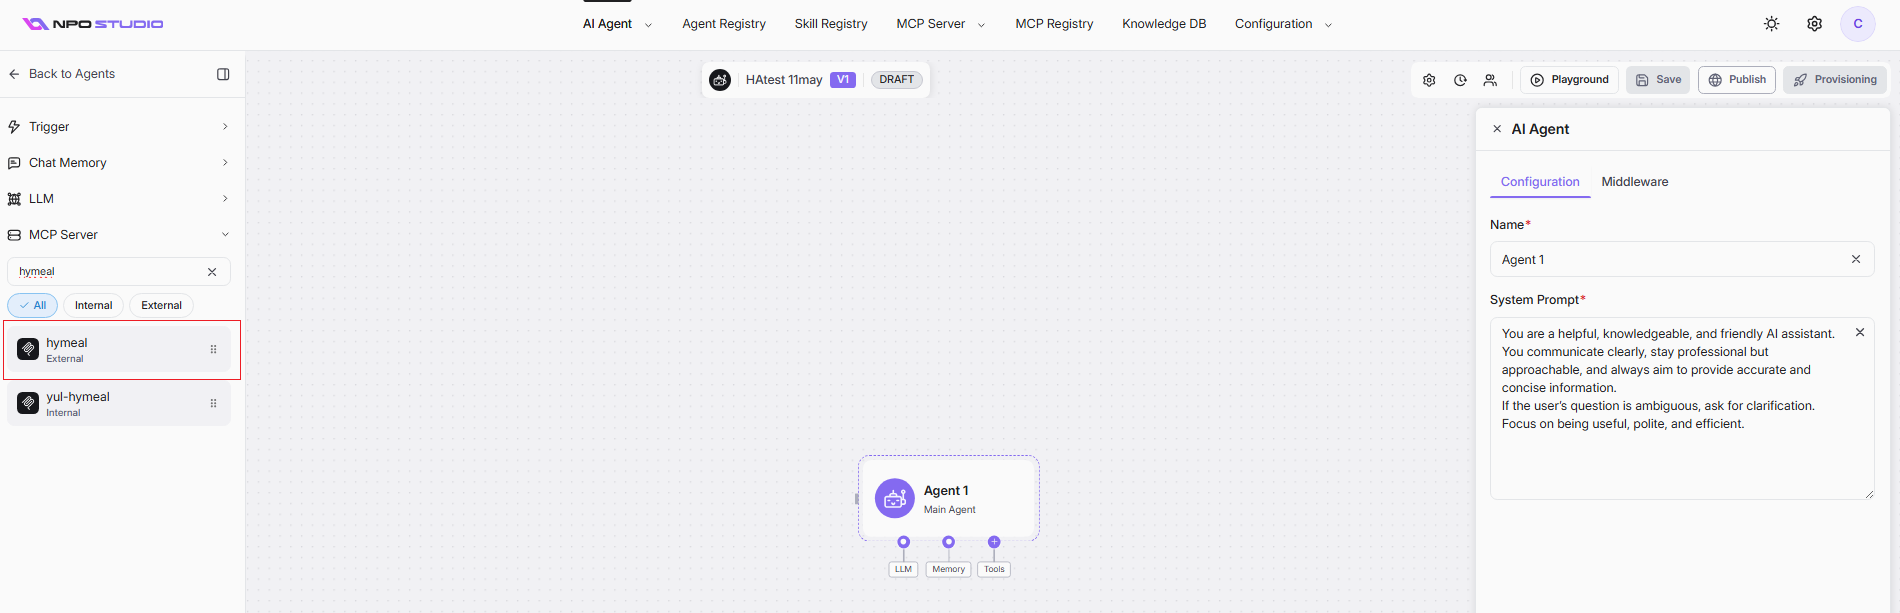
Publish an External MCP
Publishing a server to the MCP Registry makes it discoverable, manageable, and available for use within your organization's ecosystem.
Navigate to the MCP Registry page from the main menu.
- Click the Publish External MCP button in the top-right corner.

- The Publish External MCP Server dialog appears. Provide the server's configuration by filling in the server details in JSON format:
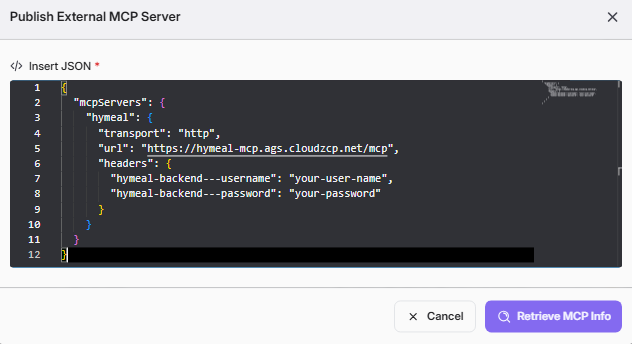
Paste the configuration in the Insert JSON area, then click Retrieve MCP Info. The system will auto-fill details for review.
- On the Publishing Confirmation screen, review technical details (right) and fill in metadata (left) for registry display.
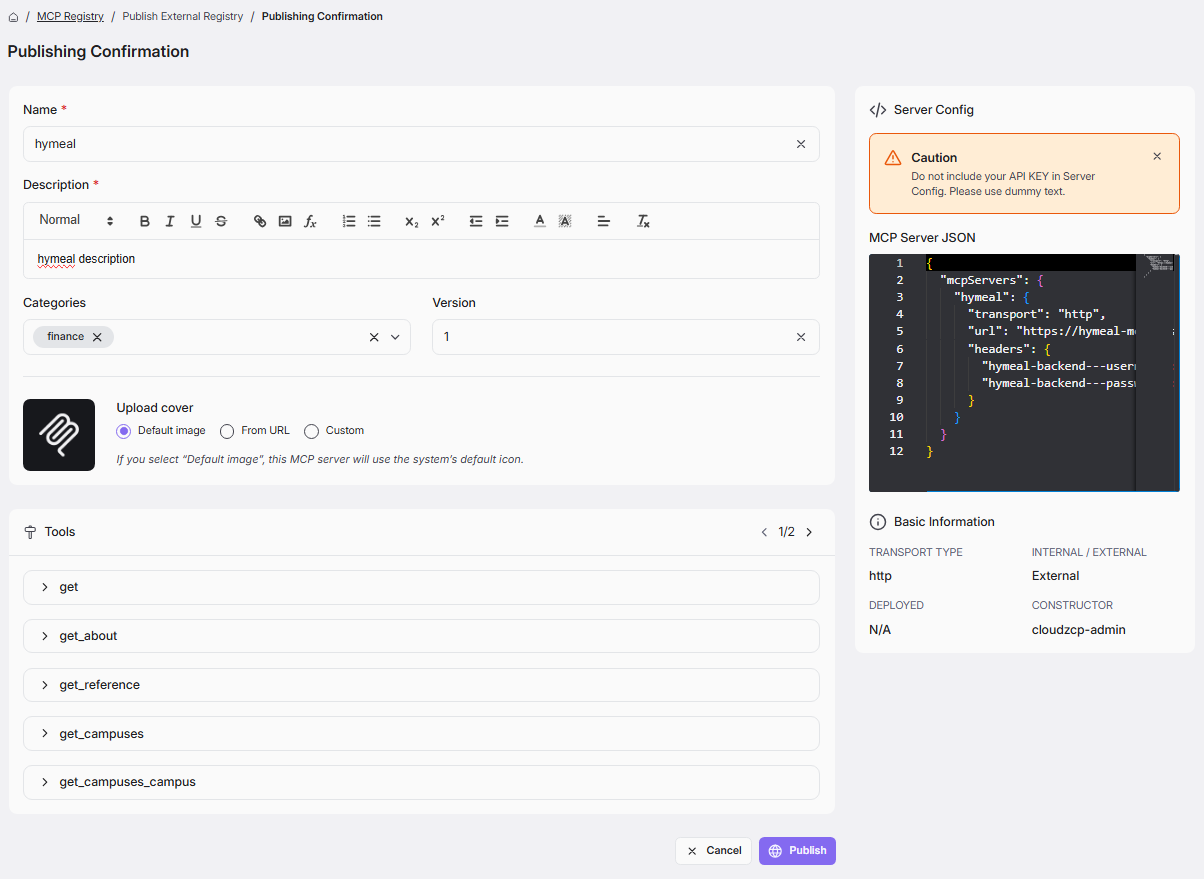
Complete the following fields:
- Name: Enter a clear, user-friendly server name. This is a required field.
- Description : Write a detailed summary of the server's purpose. This is a required field.
- Categories : Add one or more tags to help organize and filter the server.
- Version : Specify the version number for this registration.
- Upload cover: Choose a representative icon for the server. You can select the Default image, provide a URL From URL, or Custom upload a file.
Review Tools, Server Config, and Basic Information to confirm accuracy. If all are correct, click Publish.
- Upon successful publication, you will be stayed at MCP Registry detail page with toggle Published ON to reflect successful publication.
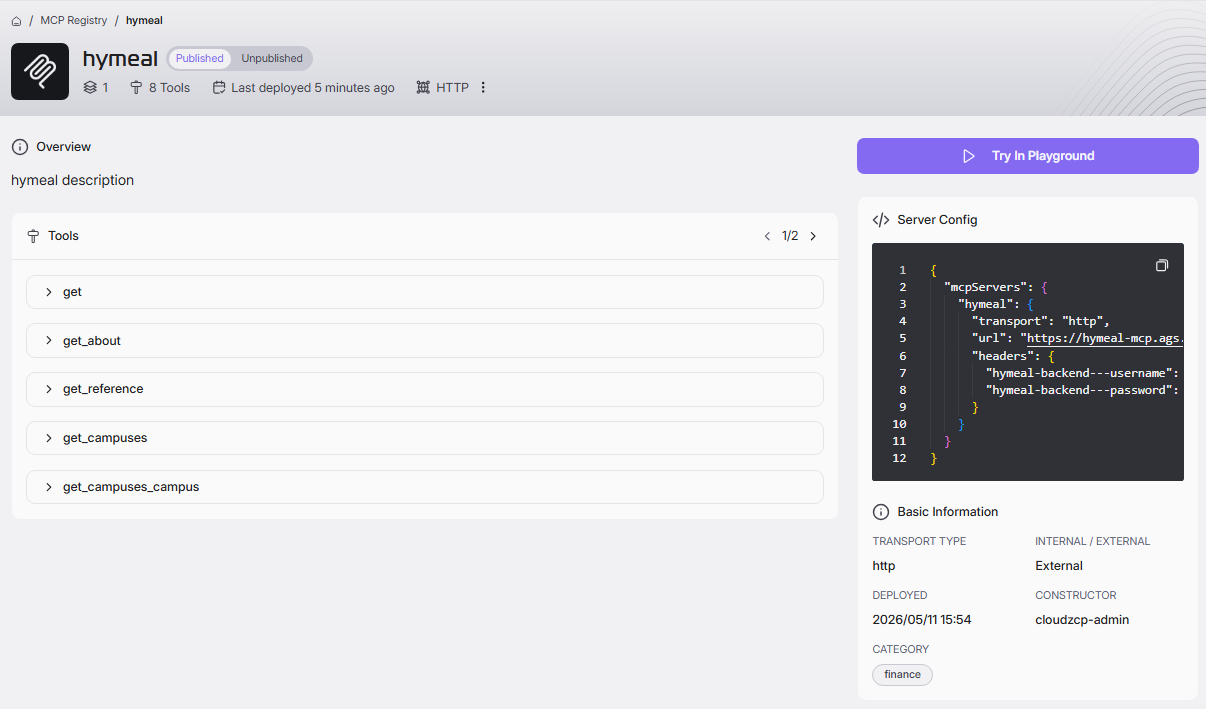
Your newly registered server will appear as a card in the grid, now discoverable and manageable alongside other MCP servers when create agent.