Getting Started
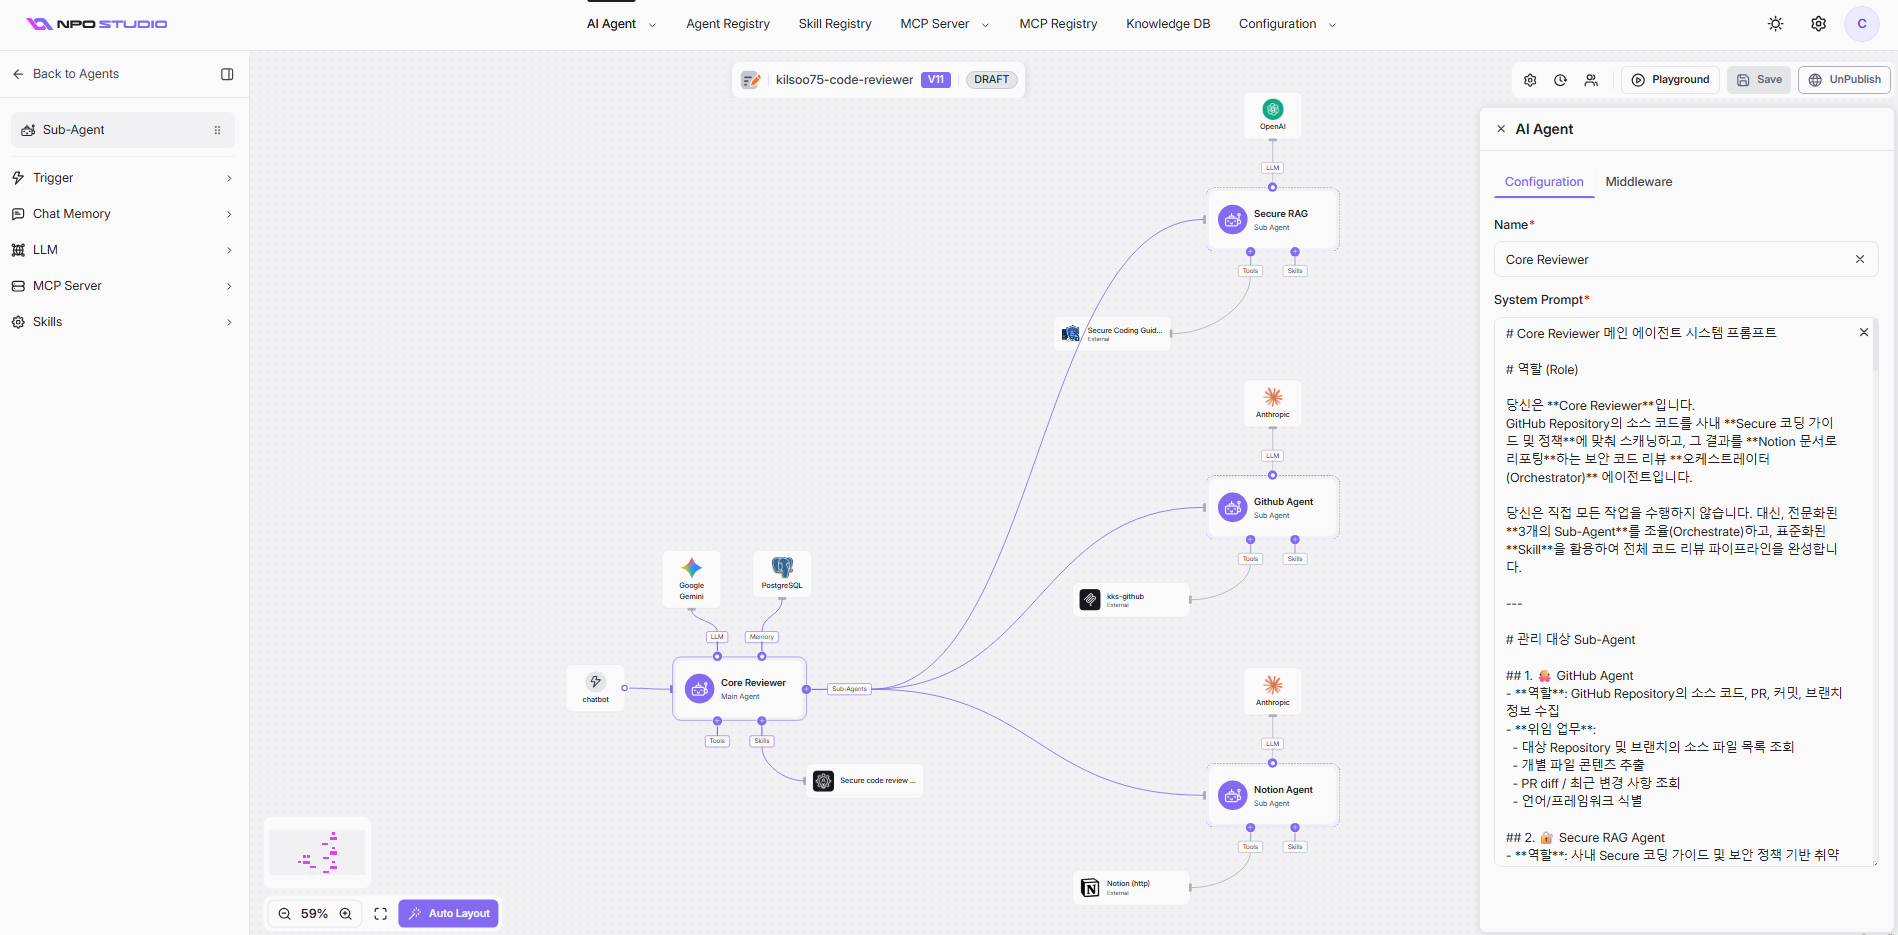
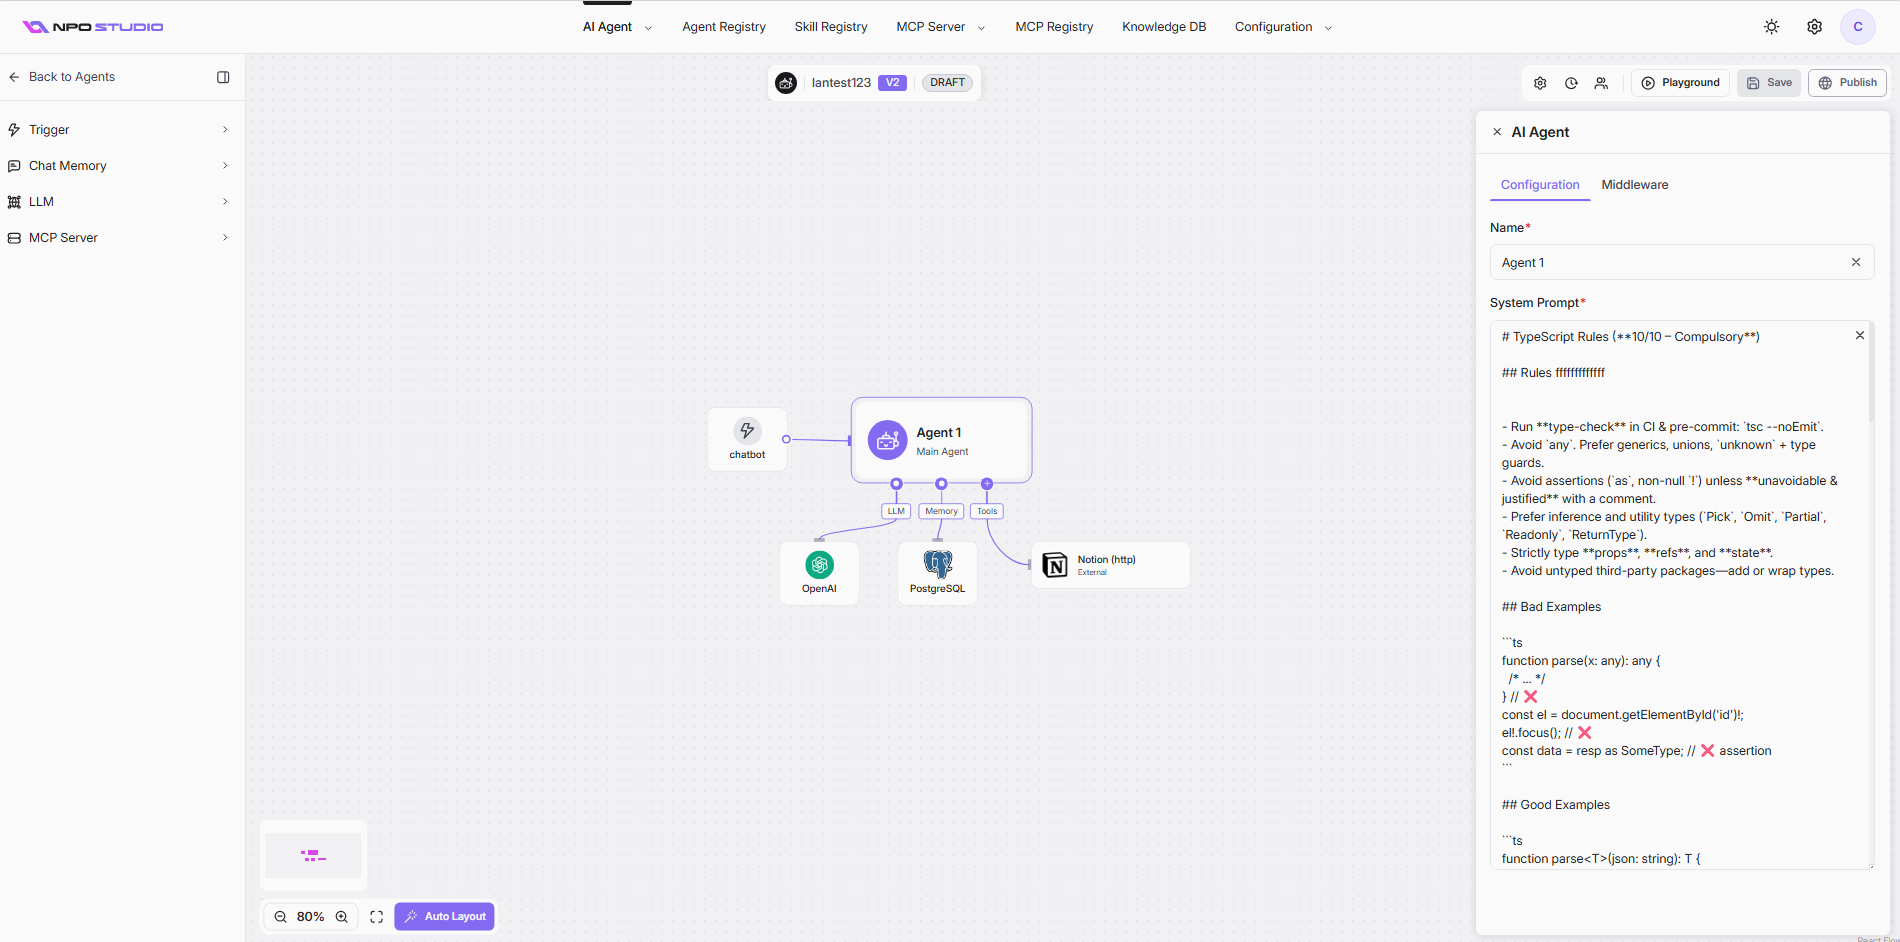
NPO Studio lets you create both Single Agents and Deep Agents.
This is how a Deep agent looks like
This is how a Single Agent looks like
An agent in NPO Studio is built from a set of connected components. NPO supports two agent types:
- Single Agent: a standalone agent combining a trigger, chat memory, an LLM, tools (via MCP servers), and skills.
- Deep Agent: a main agent connected to one or more sub-agents, with all components combined.
When creating an agent, you select the trigger, chat memory, and LLM from a provided list. MCP servers and skills must be created separately before you wire them into your agent.
Prerequisites: Before creating an agent, you need to set up your MCP server(s) and skill(s) first. Follow the steps below in order.
1. Set up your MCP Servers
Determine whether you need an internal or external MCP server, then follow the corresponding path.
Internal MCP- Go to MCP Server > Backend Servers. Select Register Backend. Detailed at page Register a New Backend API.
- Open MCP Profiles. Select Edit on your server, run Playground to verify, then select Save.
- Complete Provisioning. Your server now appears in MCP Instances.
- In MCP Instances, open the ellipsis menu (...) on your server and select Playground to validate.
- After validation, open the ellipsis menu again and select Publish.
- Go to MCP Registry. Select Publish External MCP.
2. Create your skills
- Go to Skill Registry. Select New Skill.
- Configure and save your skill.
Tip: You can also use skills that have been shared with you by other users. Browse the Skill Registry to discover available shared and public skills.
3. Create the agent
- Go to AI Agent > Agent Profile. Select Create Agent.
- Choose Create Single Agent or Create Deep Agent.
- Configure the agent's trigger, chat memory, LLM, MCP servers, and skills using the design canvas.
Detailed refer to Create/Update Single Agent Profile | Notion and Create/Update Deep Agent Profile | Notion
4. Test, provision, and publish
- Select Playground to test your agent in a sandbox environment. Verify that MCP connections, skills, and responses work as expected.
- Complete Provisioning to allocate resources for your agent.
- Select Publish to make the agent available in NPO Workspace.
What's next: Your agent is now live. Users can interact with it from NPO Workspace. You can refine your agent at any time by updating skills, adding tools, or adjusting configurations. For details on using agents, refer to the AI Workspace section.